

Crochet balaclavas can range from close-fitting ski masks to relaxed hoods that behave more like a scarf or cowl. The biggest differences are not simply color or stitch choice. Face-opening shape, crown construction, neck coverage, ribbing, drawstrings, motif joins, and overall ease can completely change how the finished piece looks and feels.
These 13 crochet balaclava ideas cover fitted and loose shapes, open-top masks, granny-square constructions, animal ears, turtleneck hoods, and a scarf hybrid. The goal is to help you compare the finished forms before committing your yarn. Pay particular attention to how much coverage you want, whether the hood should sit close or loosely, and which parts of the fit can be adjusted while you work.
Quick List
- Crochet Made-to-Measure Drawstring Balaclava
- Crochet Top-Down Ribbed Balaclava with Rolled Edge
- Crochet Collar Hood Balaclava
- Crochet Full-Coverage Ski Mask Balaclava
- Crochet Open-Top Ski Mask Balaclava
- Crochet Turtleneck Hoodie Balaclava
- Crochet Cat-Ear Balaclava
- Crochet Convertible Hat-and-Cowl Balaclava
- Crochet Textured Hooded Balaclava with Drawstring
- Crochet Customizable Granny Square Balaclava
- Crochet Side-to-Side Adult Ski Mask Balaclava
- Crochet Loose-Fit Baggy Balaclava
- Crochet Granny-Square Balaclava Scarf
Choose the Amount of Face and Neck Coverage First
A balaclava that covers most of the lower face behaves differently from a loose hood with an open neckline. Before choosing a tutorial, decide where you actually want coverage. A traditional ski-mask shape keeps more crochet close to the cheeks and forehead, while hood-and-cowl versions leave the face more exposed and put additional fabric around the neck.
Also look carefully at the face opening. A fixed opening depends heavily on accurate sizing, while ribbed borders and drawstrings may offer more adjustment. Open-top designs introduce another option: they can give the ski-mask look without closing over the crown.
For everyday layering, a roomy hood may be easier to wear over hair. For a closer fit under another hood, a streamlined balaclava generally creates less bulk.
Yarn, Texture, and Drape Change the Fit
The same general balaclava shape can feel very different when worked into a dense textured fabric instead of a softer, more flexible one. Crochet fabric with pronounced ribbing often has useful stretch, but the direction of that stretch matters. A fabric that expands comfortably around the head may behave differently around the face opening.
Bulkier yarn can create dramatic structure and faster visual impact, yet it also adds thickness around seams, the chin, and the neck. Finer or softer fabric generally creates a less bulky hood but may not hold decorative features as firmly.
For anything worn directly around the face, also consider how the fiber feels against your forehead, cheeks, and neck. Check the yarn’s care instructions before choosing it, particularly when making a balaclava that will be worn frequently outdoors.
Fit Checkpoints That Matter More Than the Finished Size
Head circumference is only part of balaclava fit. You also need enough depth from the crown toward the chin, comfortable room around the jaw, and a face opening that does not pull uncomfortably toward the eyes or mouth.
Made-to-measure tutorials are especially useful when your yarn differs from the creator’s example, but they require more active checking. Try the developing piece on when the tutorial allows it instead of relying only on another maker’s finished dimensions.
For modular granny-square versions, compare blocked motif dimensions before joining. For ribbed designs, remember that the fabric may stretch differently after wear. For loose hoods, focus less on negative ease and more on whether the neckline, crown depth, and face opening create the silhouette you actually want.
1. Crochet Made to Measure Drawstring Balaclava

This crochet balaclava is a good direction when customized fit matters more than following one fixed finished measurement. Natalie’s tutorial describes the design as made to measure and uses minimal sewing, with separate attention given to bottom ribbing, face ribbing, and a drawstring. The finished form sits closer to the head than a baggy hood while retaining an adjustable detail around the opening.
It is especially worth considering if standard one-size balaclavas tend to feel too short, too roomy, or awkward around your face. Because measurements are part of the process, changing yarn should be approached through fresh fit checks rather than automatically copying another maker’s dimensions.
The Drawstring Changes More Than the Look
A cord around the opening gives you another way to control how the hood frames the face. Before adding one to any balaclava, decide whether you want it mainly for adjustment or as a visible styling detail.
Check the finished cord placement against your intended use. Long loose cords may be inconvenient for some activities, so their length and finishing deserve the same attention as the crochet itself.
Ribbing Needs to Feel Comfortable at Two Different Edges
This design incorporates ribbing around both the lower section and face area. Those edges do different jobs: the bottom influences how the balaclava meets clothing, while the face ribbing directly affects comfort near the skin.
When adapting the idea, avoid assuming that the same amount of firmness feels equally good in both places. A face edge should frame the opening without creating irritating pressure.
2. Crochet Top Down Ribbed Balaclava with Rolled Edge

For a more continuous, helmet-like shape, this top-down crochet balaclava uses pronounced ribbing throughout the main fabric. Serafima Crochet & Knitting demonstrates working from the crown downward, allowing fit checks as the piece grows, and includes an optional rolled edging. The tutorial uses front-post and back-post double crochet to create the ribbed surface.
This construction stands apart from flat-panel and granny-square versions because the crown establishes the shape first. It can be a practical choice when you prefer seeing the head fit develop before committing to the face and lower sections.
Top-Down Construction Makes Crown Fit the First Decision
With this approach, the upper head shape is established before the lower opening is completed. That makes crown depth an early checkpoint rather than something corrected during final assembly.
Try-on opportunities can be valuable when substituting yarn because a different fabric may grow at a different rate even when the visual texture looks similar.
A Rolled Edge Creates a Softer Visual Finish
An optional rolled edge changes the appearance of an otherwise strongly ribbed piece. It can make the lower or face border look thicker and more deliberate rather than simply ending with the main stitch texture.
If you use the idea with a different yarn, check whether the rolled section becomes too bulky. A fiber that already produces substantial fabric may not need additional visual weight.
Original Tutorial and Creator Credit
Creator: Serafima Crochet & Knitting
3. Crochet Collar Hood Balaclava
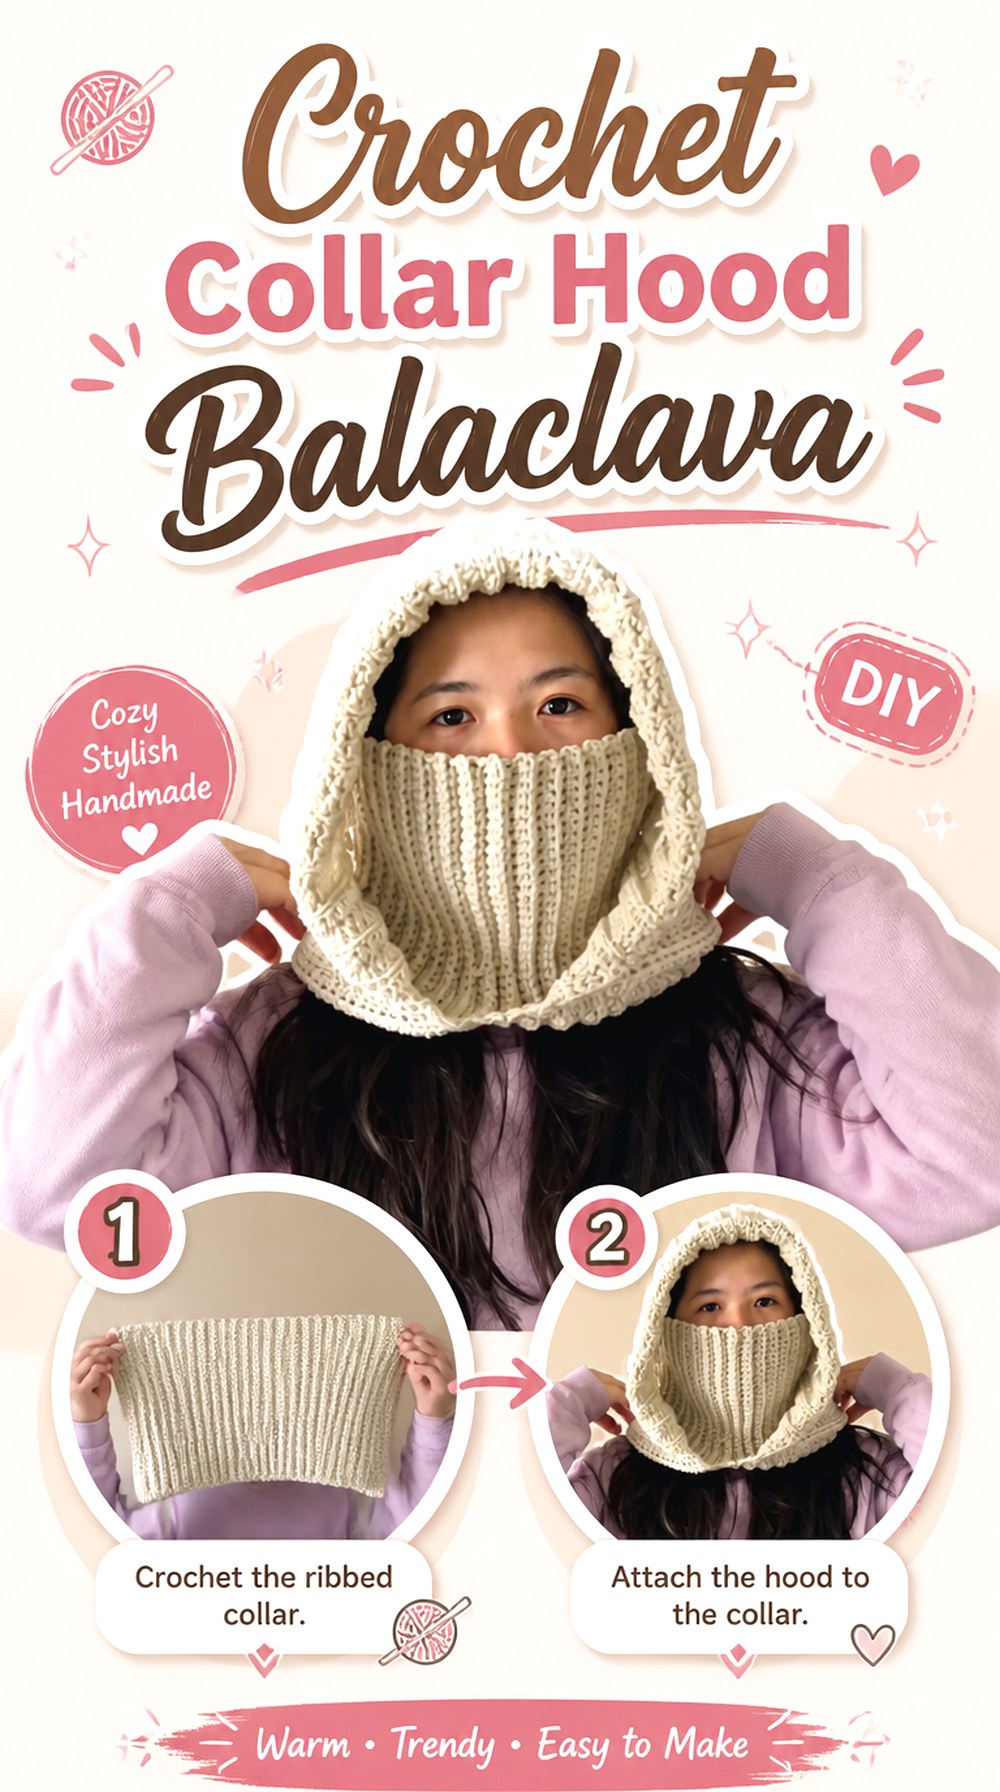
This version moves away from the classic ski-mask silhouette and toward a hood with an integrated collar. Life by Susan | Crochet begins the tutorial with the collar before developing the hood above it, creating continuous head-and-neck coverage without turning the project into a separate hat and scarf combination.
The larger face opening makes the style useful for readers who like the warmth of a balaclava but do not want fabric sitting as close to the mouth or cheeks. It also layers differently under coats because the lower portion behaves more like a collar.
Collar Depth Affects How It Sits Under Outerwear
A deeper crochet collar adds useful neck coverage, but it also creates more fabric inside a jacket. If you normally wear coats with high collars, compare the two layers before deciding how substantial you want the crochet section to be.
A lower-profile jacket neckline gives a taller crochet collar more room to sit naturally.
A Hood Opening Is More Forgiving Than a Tight Mask Opening
This style does not rely on the sharply defined eye or face openings seen in ski-mask constructions. That makes the finished look softer and can give more flexibility around hairstyles, glasses, or face shape.
The trade-off is less close coverage across the front of the face, so choose it for hood-like comfort rather than maximum mask-style coverage.
Original Tutorial and Creator Credit
Creator: Life by Susan | Crochet
4. Crochet Full Coverage Ski Mask Balaclava

Brunaticality’s crochet ski-mask tutorial takes the balaclava in a more face-covering direction. The video separates the construction into areas for the neck and lower face, eye opening, forehead, crown, and finishing details around the opening. That creates a substantially different result from the wide-faced hood styles elsewhere in this list.
Choose this route when the distinctive ski-mask silhouette is the main goal. Because more of the face is enclosed, placement and comfort around the opening become particularly important.
Eye Placement Is the Critical Fit Check
A small opening gives this style its recognizable appearance, but it leaves less room for inaccurate positioning. Before committing to surrounding sections, confirm that the opening sits where intended without pulling upward or downward.
Someone adapting the concept should also consider glasses and peripheral visibility rather than focusing only on head circumference.
Decorative Details Work Better Away From Sensitive Areas
The tutorial includes finishing details around the eye and upper sections. If you personalize a similar mask, think about where added yarn texture will actually touch the wearer.
Fuzzy fibers, raised embellishments, or thick joins positioned too close to the eyes may look striking on a flat surface but feel distracting once worn.
Original Tutorial and Creator Credit
Creator: Brunaticality
5. Crochet Open Top Ski Mask Balaclava
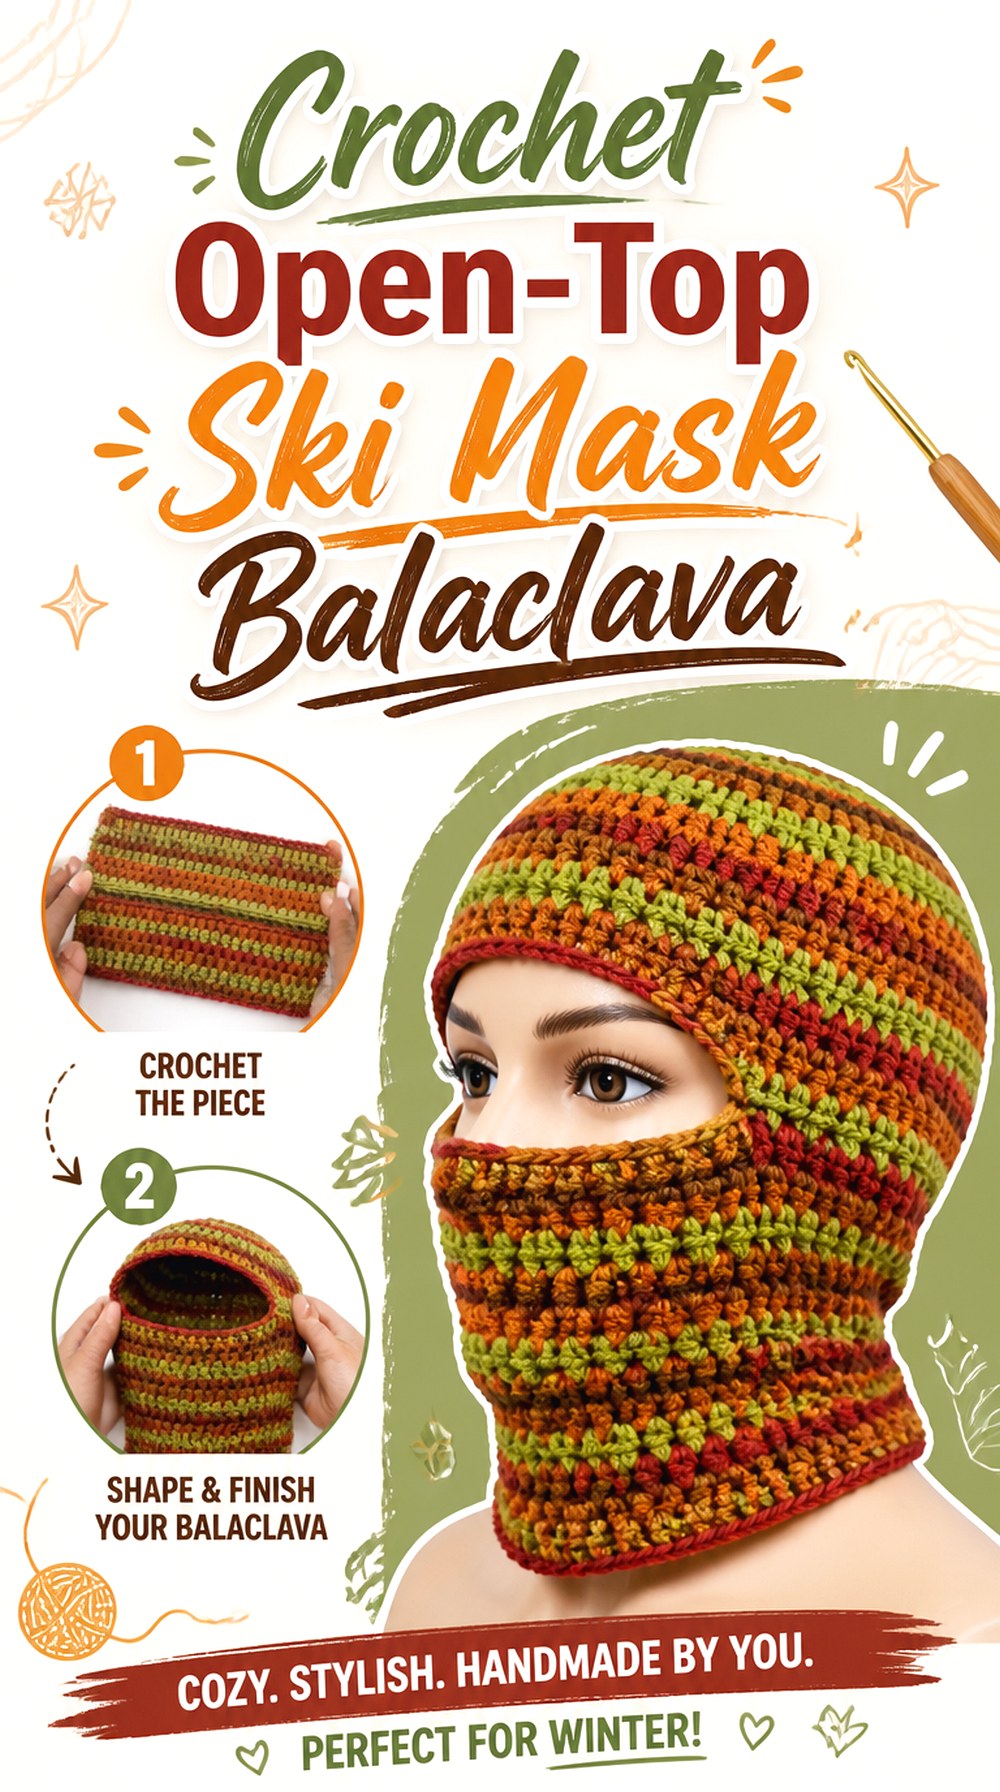
An open crown immediately separates this crochet ski mask from a conventional balaclava. LadyVKreations demonstrates a mask-style project with the top intentionally left open, while the lower fabric still frames and covers much of the face. The tutorial also incorporates front-post and back-post crochet in part of the design.
The open top makes the shape more visually distinctive and changes how it can interact with hair. It is better treated as its own style choice than as an unfinished version of a closed balaclava.
The Crown Opening Needs Deliberate Placement
Because the opening is a permanent design feature, think about how much of the upper head you want exposed and what will pass through it. Hair volume and hairstyle can change how the finished piece sits.
If your goal is complete cold-weather coverage, a closed crown is the more logical option. Pick this construction because you specifically want the open-top silhouette.
Ribbing Adds Structure to a Bold Shape
A defined ribbed section can help visually organize an unusual open-top mask. It introduces texture while keeping the overall shape recognizable.
When changing yarn, make a small fabric sample first if the ribbing is important to the look. A highly variegated or fuzzy yarn can hide the raised structure that makes this section interesting.
Original Tutorial and Creator Credit
Creator: LadyVKreations
6. Crochet Turtleneck Hoodie Balaclava

This crochet balaclava leans heavily into the hood-and-cowl side of the category. Diving Ducks Crochet presents a turtleneck hoodie that can function within the balaclava/cowl family, giving the design a substantial neck section and a relaxed hooded appearance rather than a tight mask profile.
The silhouette works particularly well when you want one accessory to visually fill the gap between a sweater neckline and a hood. It is also a strong contrast to small face-opening projects because most of the styling emphasis falls on the neck and hood volume.
Turtleneck Height Controls the Layered Look
A tall neck gives the project its defining shape, so compare that height with your usual winter clothing. Under a crew-neck sweater it can become a visible feature; underneath a high zippered coat it may create considerably more fabric around the neck.
That trade-off matters more here than in a slim ski mask.
Bulkier Fabric Creates a Stronger Hood Silhouette
The source tutorial uses a substantial yarn choice, which helps explain the visibly plush turtleneck-and-hood result.
If you substitute a lighter yarn, do not assume the hood will keep the same volume. A softer or thinner fabric may collapse closer to the head, producing a different style even when the construction remains compatible.
Original Tutorial and Creator Credit
Creator: Diving Ducks Crochet
7. Crochet Cat Ear Balaclava

The attached ears give this crochet balaclava an unmistakably playful profile. Cherilyn Q’s tutorial treats the ears and the balaclava body as separate stages before showing their attachment, making decorative placement part of the finishing rather than simply a color change in the main hood.
This is a good project direction when the balaclava needs to function as a statement accessory rather than disappearing beneath other winter layers. The ears draw attention toward the crown, so symmetry and firmness matter more than they do on a plain hood.
Ear Placement Determines the Expression
Moving ears slightly inward, outward, forward, or backward can change the entire character of an animal-style balaclava. Before permanently attaching pieces on a similar project, pin or temporarily position them while the hood is on a head form.
That small preview is more informative than arranging them only while the balaclava lies flat.
Choose Yarn That Supports the Decorative Shape
Softness is important around the face, but extremely limp fabric can make decorative ears fall differently than expected. Conversely, very stiff fabric may feel heavy or rigid on the head.
If substituting yarn, compare how your finished ear piece holds itself before attaching both. Matching the two finished shapes is more important than relying only on nominal yarn weight.
Original Tutorial and Creator Credit
Creator: Cherilyn Q
8. Crochet Convertible Hat and Cowl Balaclava

Light and Joy Designs approaches the category as a convertible hat-and-cowl combination. The finished accessory can be worn as a balaclava, while the creator also shows the cowl portion folded into the hat for another wearing option. Decorative pom-pom and hanging details can also be added.
That versatility makes this project fundamentally different from a fixed ski mask. It suits someone who wants a crochet accessory that can change roles instead of serving only as face-covering winter headwear.
Convertible Designs Need Comfortable Extra Fabric
Fabric that makes a substantial cowl has to go somewhere when the accessory is converted. Before adapting the idea, consider whether the extra thickness feels comfortable once folded inside the hat.
A dense yarn may create a very different conversion experience from a more flexible fabric, even when both look attractive in the extended version.
Corner Details Can Shift the Style Dramatically
Pom-poms, hanging cords, or spirals move the design toward a playful statement hat. Leaving those elements off produces a simpler silhouette.
Decide on those features before final finishing so yarn weight, attachment points, and overall balance can be considered together rather than treating decoration as an afterthought.
Original Tutorial and Creator Credit
Creator: Light and Joy Designs
9. Crochet Textured Hooded Balaclava with Drawstring

TCDDIY’s hooded balaclava combines a fitted neck tube, hood, defined face brim, and drawstring. The tutorial also demonstrates a textured main fabric and a cord detail, giving the finished piece more structural definition than a simple open hood.
This is a useful middle ground between a relaxed cowl hood and a close ski mask. The drawstring allows the face opening to become part of the styling while the extended neck creates clear separation from shorter helmet-shaped balaclavas.
The Brim Frames the Face Before the Cord Does
When a balaclava has both a defined brim and an adjustable cord, the two features need to work together. The brim determines the basic face shape, while the drawstring modifies how closely that edge sits.
When adapting a similar design, judge the opening without pulling the cord tight first. Good underlying proportions make the adjustment feature more useful.
Texture Adds Thickness Where the Hood Folds
Raised stitch texture can create a visually rich hood, but it also affects bulk where the crochet bends around the crown, jaw, and neck.
If you plan to wear the balaclava under a narrow coat hood, compare that thickness with a flatter-stitch alternative. For wearing as the outermost hood, the stronger texture may be an advantage visually.
Original Tutorial and Creator Credit
Creator: TCDDIY
10. Crochet Customizable Granny Square Balaclava

Granny squares turn a balaclava into a modular project rather than a continuously shaped hood. HayHay Crochet’s version uses four squares and emphasizes customization, including adjusting motif size before assembly and finishing the face and lower edges with ribbing.
The appeal is not limited to color. Swapping the motif itself can change visual density, openness, and surface texture, provided the finished squares remain compatible with the required layout.
Blocked Square Size Controls the Whole Hood
With modular headwear, a small difference in each square becomes a much larger difference after multiple edges are joined. Measure motifs after they have settled into their finished shape rather than assuming all squares with the same round count are identical.
If you mix motifs, compare dimensions and edge structure before making the full set.
Motif Choice Can Change Warmth and Coverage
A traditional granny motif naturally contains openings. A denser square creates more continuous fabric, while an open motif can produce more ventilation.
That means motif substitution is not purely decorative. Think about the intended weather and whether the finished hood will be worn alone or mainly as a fashion layer.
Ribbing Helps Visually Finish the Modular Shape
Squares create geometric edges, while ribbing can soften and define the face and neck openings. This contrast is part of what makes a granny-square balaclava look deliberately finished rather than like several motifs simply sewn together.
Check ribbing tension carefully so it does not pull the joined squares into unwanted puckers.
Original Tutorial and Creator Credit
Creator: HayHay Crochet
11. Crochet Side to Side Adult Ski Mask Balaclava

The Crochet Crowd’s adult balaclava provides a different route to a traditional ski-mask result: the piece is worked from side to side and shaped around an eye opening. The associated pattern includes adult options for women and men, making this a useful tutorial to examine when you prefer defined sizing over a purely one-size approach.
Its construction is particularly valuable to compare with top-down balaclavas. Instead of judging crown growth first, you are working with horizontal development and later finishing.
Side-to-Side Fabric Stretches in a Different Direction
Crochet fabric does not necessarily stretch equally in every direction. When a balaclava is built sideways, the orientation of the rows can influence how it expands around the head.
If you substitute yarn or alter stitch texture, make a swatch and stretch it in the same direction it will sit on the finished headwear.
A Defined Eye Opening Leaves Less Room for Guessing
A traditional ski-mask opening must align comfortably once the remaining sections are joined. Check placement against the intended wearer instead of assuming that an opening which looks centered on a flat piece will automatically sit perfectly once shaped.
This becomes even more important if you change the overall size.
Original Tutorial and Creator Credit
Creator: The Crochet Crowd
12. Crochet Loose Fit Baggy Balaclava

A loose-fit balaclava changes the category from fitted winter mask to relaxed crochet hood. Kenikse Crochet’s tutorial intentionally creates a baggier silhouette and uses back-loop-only single crochet for the main fabric, producing visible ribbed lines while maintaining the roomy shape.
This option works well when you want the balaclava to sit over hair without tightly following the head. It also gives more of a fashion-hood appearance when worn with coats and sweaters.
Extra Ease Should Look Intentional
Simply making a fitted balaclava larger does not always create an attractive loose hood. A good baggy shape needs enough depth and width in the correct areas so the excess fabric falls around the crown and back instead of merely creating a loose face opening.
Follow the source construction when making the project, and use try-ons when adapting the concept.
Ribbing Gives a Loose Hood Visual Direction
The vertical-looking ribs help organize the larger amount of fabric. Without a strong texture, an oversized crochet hood can appear visually heavy or shapeless depending on the yarn.
Solid or lightly heathered colors make pronounced stitch direction easier to see, while highly busy yarn can shift attention away from the ribbing.
Original Tutorial and Creator Credit
Creator: Kenikse Crochet
13. Crochet Granny Square Balaclava Scarf
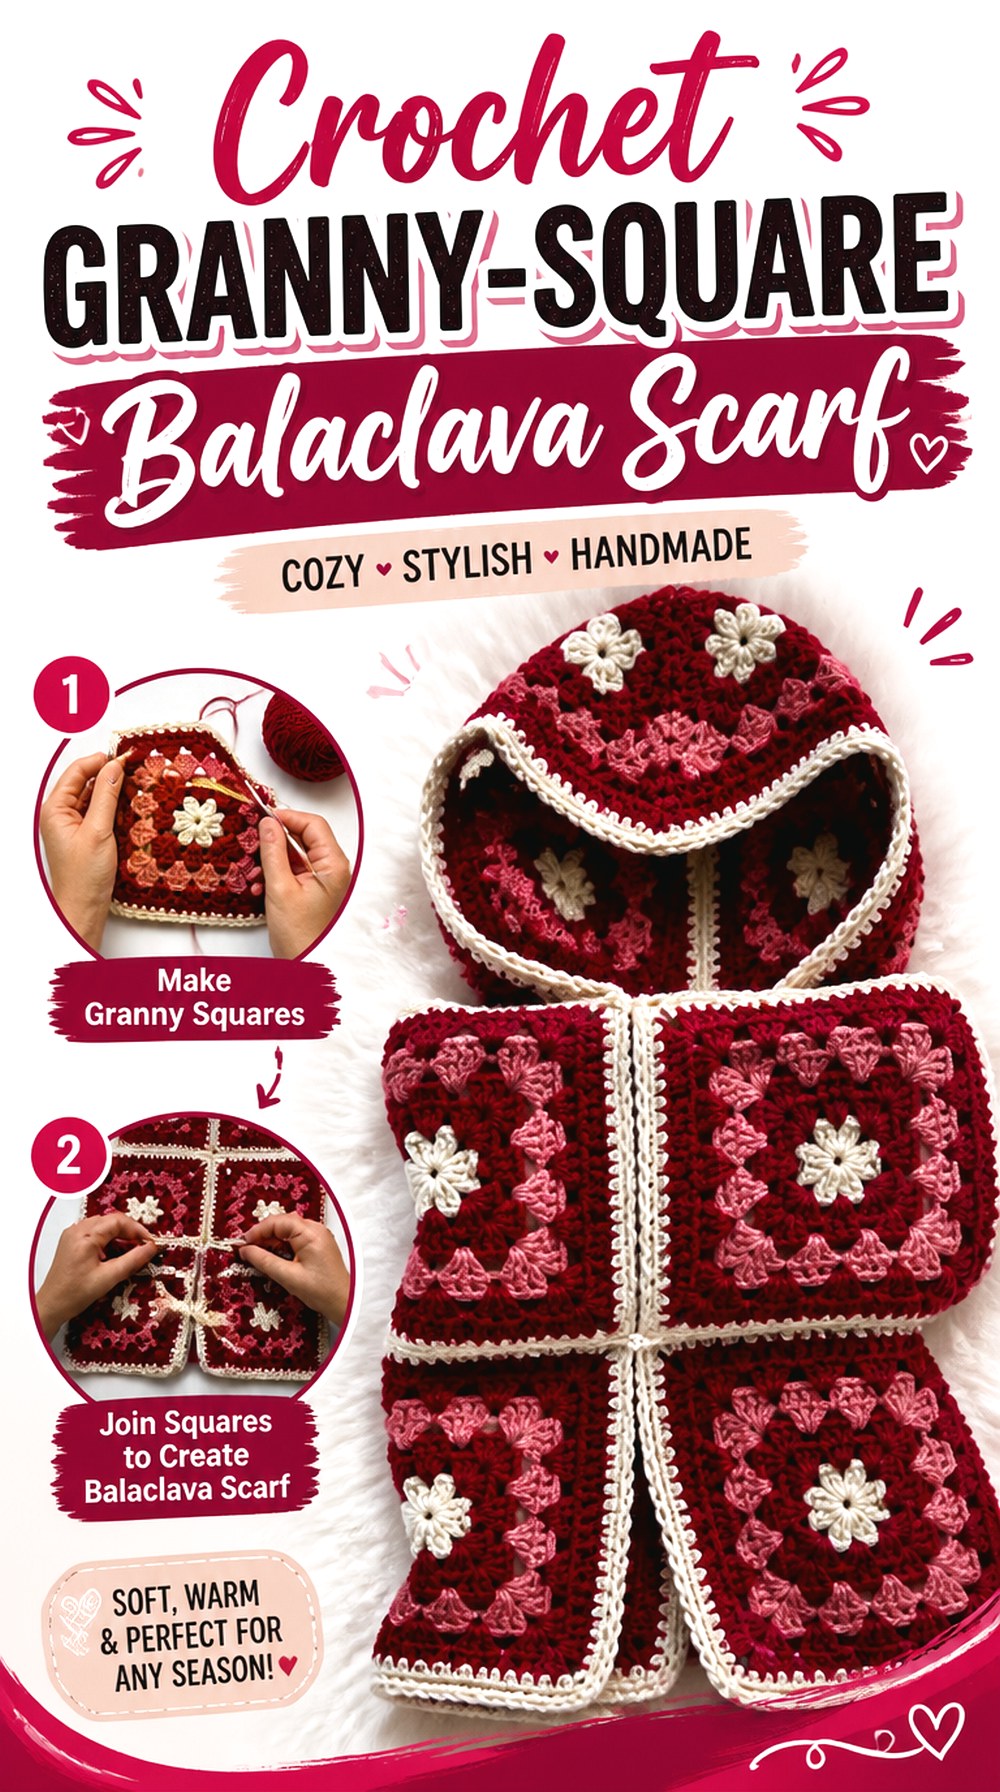
The balaclava-scarf hybrid extends crochet motifs below the hood so the finished accessory can wrap or tie around the neck. Crochet with Aisha’s tutorial uses a granny-square construction and presents the project specifically as a balaclava scarf, creating far more lower-body length than the short ribbed necklines of most standard balaclavas.
Choose this style when you want the crochet itself to replace more of the function of a separate scarf. The extra length also gives the motifs more room to become a visible part of an outfit.
Scarf Extensions Add Weight to the Hood
Once a balaclava includes long sections hanging from the neckline, the finished weight is distributed differently. Heavier yarn and dense motifs can pull downward more than they would in a short hood.
Before substituting substantially thicker yarn, consider whether the extended pieces will remain comfortable around the neck.
Granny-Square Layout Becomes Part of the Styling
With more motifs visible below the face, color placement matters beyond the crown. You can create a consistent border color, repeat a controlled sequence, or deliberately mix motifs for a more patchwork result.
Lay the completed squares out before final joining so the strongest color concentrations do not accidentally collect in one section.
Tying Changes Both Warmth and Appearance
The scarf portion can create a closer neckline when wrapped or tied, while wearing it more loosely leaves the front open. That gives this project more styling flexibility than a fixed crochet collar.
When planning your own version, consider how you normally wear outerwear so the scarf ends remain practical rather than competing with coat closures.
Which Crochet Balaclava Shape Fits Your Goal?
| If You Want… | Ideas to Compare | Main Difference to Notice |
|---|---|---|
| A close, adjustable fit | 1, 2, 9 | Drawstring, ribbing, and shaping method |
| Traditional ski-mask coverage | 4, 5, 11 | Full crown vs open crown and construction direction |
| A relaxed hood | 3, 6, 12 | Collar depth, turtleneck volume, and overall ease |
| A playful statement piece | 7, 8 | Animal ears, corner details, and convertible styling |
| Motif-based construction | 10, 13 | Short modular hood vs extended scarf format |
Conclusion
The right crochet balaclava depends less on one fashionable shape and more on how you want the accessory to behave. Choose a ski-mask construction when close face coverage matters, a loose or collar-style hood when layering comfort is the priority, or a granny-square project when modular color and motif placement are part of the appeal. Cat ears and convertible details push the accessory toward statement styling, while the balaclava scarf provides significantly more neck coverage.
Whichever direction you choose, check face-opening comfort, crown depth, yarn feel, and neckline bulk before final finishing. Use the original tutorials linked above for the creators’ exact construction details.
Frequently Asked Questions
How do I decide between a fitted and loose crochet balaclava?
Think about where you want the fabric to sit. A fitted balaclava follows the head and usually works better when you want a streamlined layer under another hood. A loose balaclava behaves more like a standalone crochet hood and gives additional room around hair and the crown. Neither fit is automatically better; compare your usual outerwear and decide whether close coverage or drape matters more.
What yarn qualities are useful for crochet worn directly around the face?
Prioritize how the yarn feels against your forehead, cheeks, and neck rather than selecting by appearance alone. Excessively scratchy or highly fuzzy fibers may be uncomfortable for some wearers, while very stiff yarn can make a close-fitting opening feel bulky. Check the yarn label for fiber content and care instructions, and make a small swatch if you are uncertain about softness or fabric density.
How can I check whether a crochet balaclava face opening will fit?
The safest approach is to check the developing piece on the intended wearer whenever the tutorial permits. Look at opening height and width as well as its position relative to the eyes, cheeks, and chin. Do not assume head circumference alone guarantees a comfortable opening. Ribbing and drawstrings can provide adjustment, but they cannot always correct an opening positioned too high or too low.
Can I use a different yarn weight than the tutorial?
Sometimes, but changing yarn weight changes more than the finished dimensions. It can affect fabric thickness, drape, stretch, seam bulk, and the size of modular pieces such as granny squares. Made-to-measure tutorials offer more flexibility, but you still need fresh measurements and fit checks. For fixed patterns, confirm the creator’s sizing and gauge information before making a major yarn substitution.
What should I check before joining granny squares into a balaclava?
Compare the blocked dimensions of every square and make sure their outer edges are compatible. Even small size differences can distort the hood when several motifs are joined. If you are mixing different granny-square designs, also compare their density and stretch. Two motifs can measure the same while behaving very differently once curved around the head.
How do I keep ribbing around the face from becoming too tight?
Avoid treating the face edging as an ordinary decorative border. Its tension directly influences comfort and can pull the surrounding hood out of shape. Check the opening while the edging is still adjustable and compare how it feels relaxed and gently stretched. If you are adapting a tutorial, follow its construction method rather than automatically adding a tighter border simply because you want the opening to look neat.15 Crochet Ear Warmer Ideas to Try


