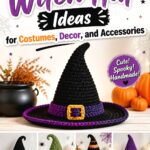
Crochet Halloween bats do not have to mean making the same stuffed animal fourteen different ways. A bat can become the entire shape of a purse, sit along the edge of a bandana, appear inside a granny square, work as a small appliqué, hang from a keyring, or turn into a soft amigurumi character with wings that fold or pose.
This collection focuses on those practical differences. Some projects are flat and easy to store with seasonal decorations, while others depend on stuffing, assembly, facial details, or stronger wing shaping. You will also find choices for wearable Halloween styling, small hanging accents, and larger plush displays. Use the comparisons to decide how much finishing you want, where the finished bat will be used, and whether crisp stitch definition, softness, portability, or a dramatic silhouette matters most.
Quick List
- Crochet Wing-Shaped Halloween Bat Purse
- Crochet Bat Appliqué Halloween Bandana
- Crochet Bat Granny Square Motif
- Crochet Tiny Bat Costume Appliqué
- Crochet Wide-Wing Bat Display Appliqué
- Crochet Halloween Bat Keychain Charm
- Crochet Poseable-Wing Bat Amigurumi
- Crochet Mini Fang Bat Amigurumi
- Crochet Chunky Halloween Bat Plushie
- Crochet No-Sew Batilda Bat Plush
- Crochet Soft Sewn Bat Plush
- Crochet Full-Body Fang Bat Amigurumi
- Crochet Two-Tone Muzzle Bat Amigurumi
- Crochet Quick Flat Bat Brooch Motif
Choose the Bat Format Before Choosing the Color
Start with function. A shaped purse needs an opening and strap that remain useful even though the outside edge forms wings. A bandana or granny square needs flatter motifs that will not interfere with wearing or joining. Small appliqués are easier to repeat for garlands and costume accents, while plush bats need enough body structure for wings and facial details to remain recognizable.
For a useful comparison, treat shape, construction, purpose, motif placement, and finishing as more important differences than color alone. A purple and black version of the same plush is still essentially the same project. A flat bat, wired-wing bat, no-sew bat, and wing-shaped purse create genuinely different making and display decisions.
Think About Yarn Structure, Wings, and Finishing
Yarn changes affect more than appearance. Smooth yarn makes small appliqué edges and granny-square motifs easier to read, while plush yarn creates a softer character but can hide individual stitches. Changing yarn weight can also alter the finished scale, so check the original tutorial before substituting when a bat needs to fit a particular bag, display, or wearable.
Wings deserve an extra check. Flat appliqué wings may benefit from careful blocking, whereas stuffed bats rely on balanced attachment so one side does not sit noticeably higher. A tutorial using wire or another internal support belongs more naturally in display decor than in a completely soft plush. For gifts intended for young children, also review eyes, hardware, wire, and other small or rigid components before deciding the project is suitable.
1. Crochet Wing Shaped Halloween Bat Purse
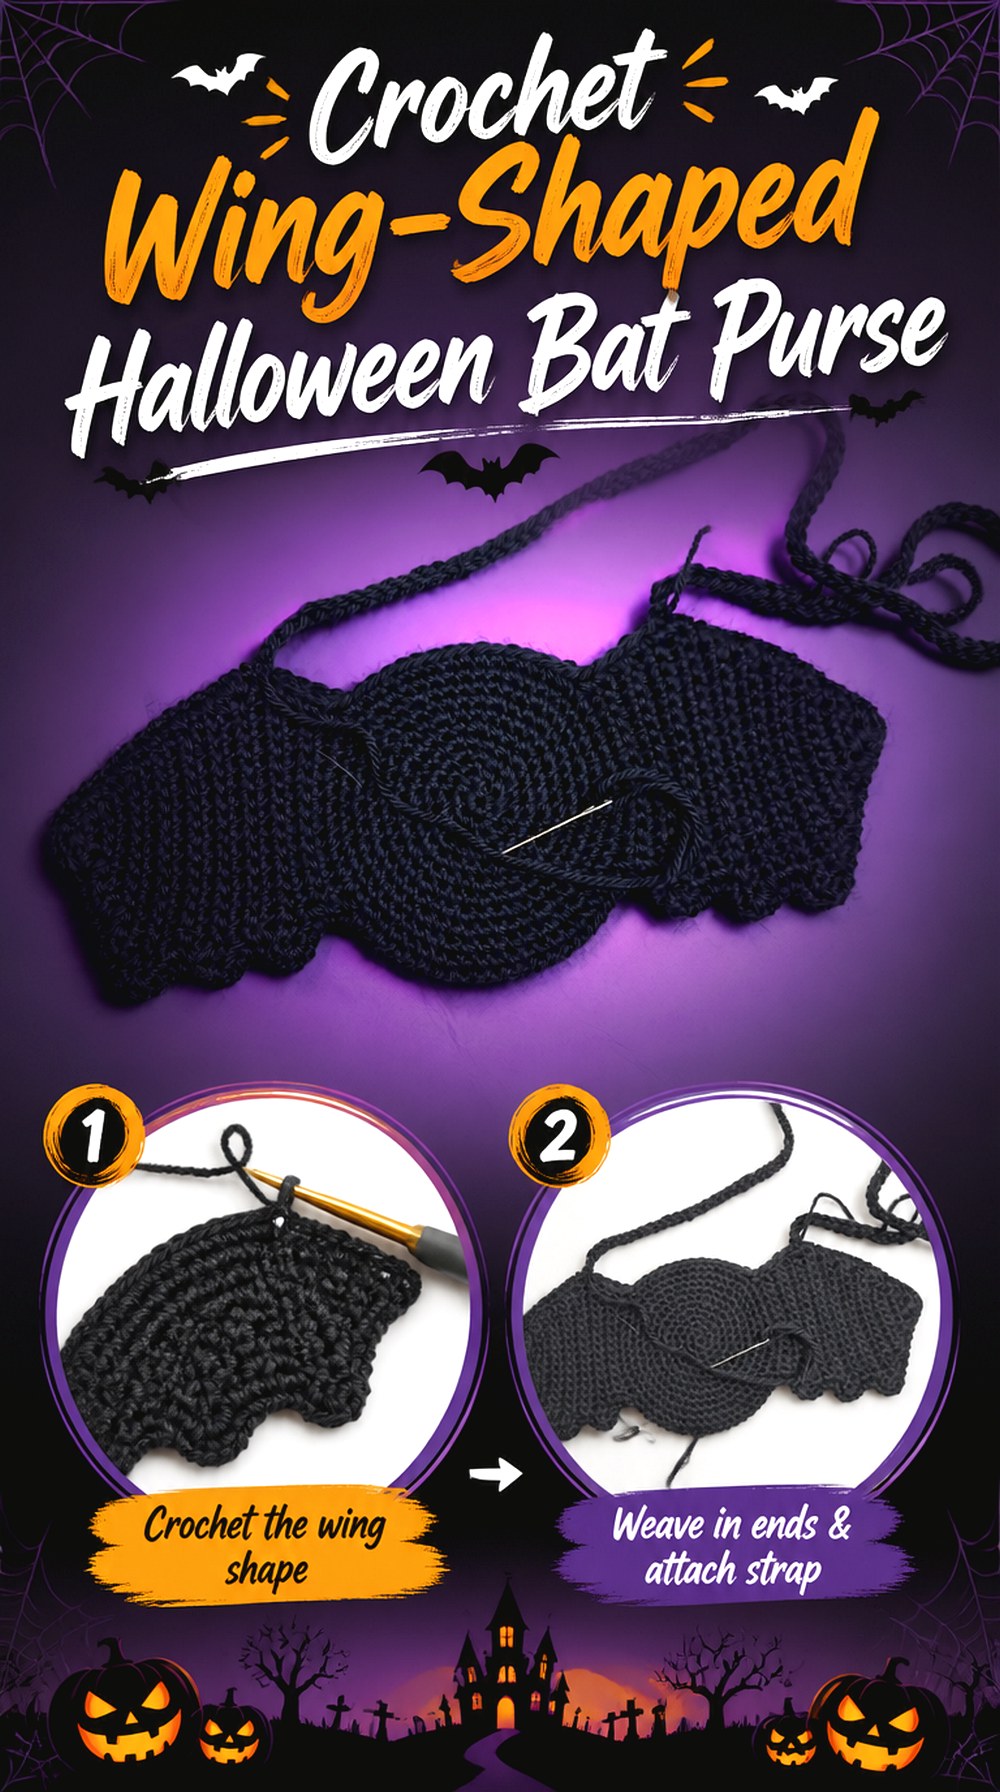
Instead of adding a bat to a conventional bag, this project makes the bat silhouette the bag itself. The finished purse spreads outward into recognizable wings around a central body, making it the strongest statement accessory in this collection. It works especially well when you want a Halloween bag that reads clearly from across a room rather than a subtle seasonal accent.
The trade-off is that the dramatic outside width does not necessarily equal usable storage space. The central body and opening determine what the purse can actually hold, so choose this project for its silhouette first and capacity second. Stitch and Hound’s tutorial covers the bat motifs, border, joining, and purse strap.
The Opening Matters More Than the Wingspan
Wide wings make the purse look substantial, but the usable opening is concentrated nearer the center. Before choosing it for trick-or-treating, events, or everyday carrying, look closely at the finished opening shown in the tutorial and compare it with what you expect to carry. If security matters, also confirm whether the original design includes the type of closure you want rather than assuming one can be added without changing the edge.
Give the Strap Area More Attention Than Decorative Edges
A purse strap handles repeated movement in a way that the decorative wing tips do not. Check where the strap connects and make sure those areas remain neat and firm during finishing. If you change yarn, remember that a stretchier fabric can change how the bag hangs once something is placed inside. The most dramatic yarn is not automatically the most practical choice for a functional accessory.
2. Crochet Bat Appliqué Halloween Bandana
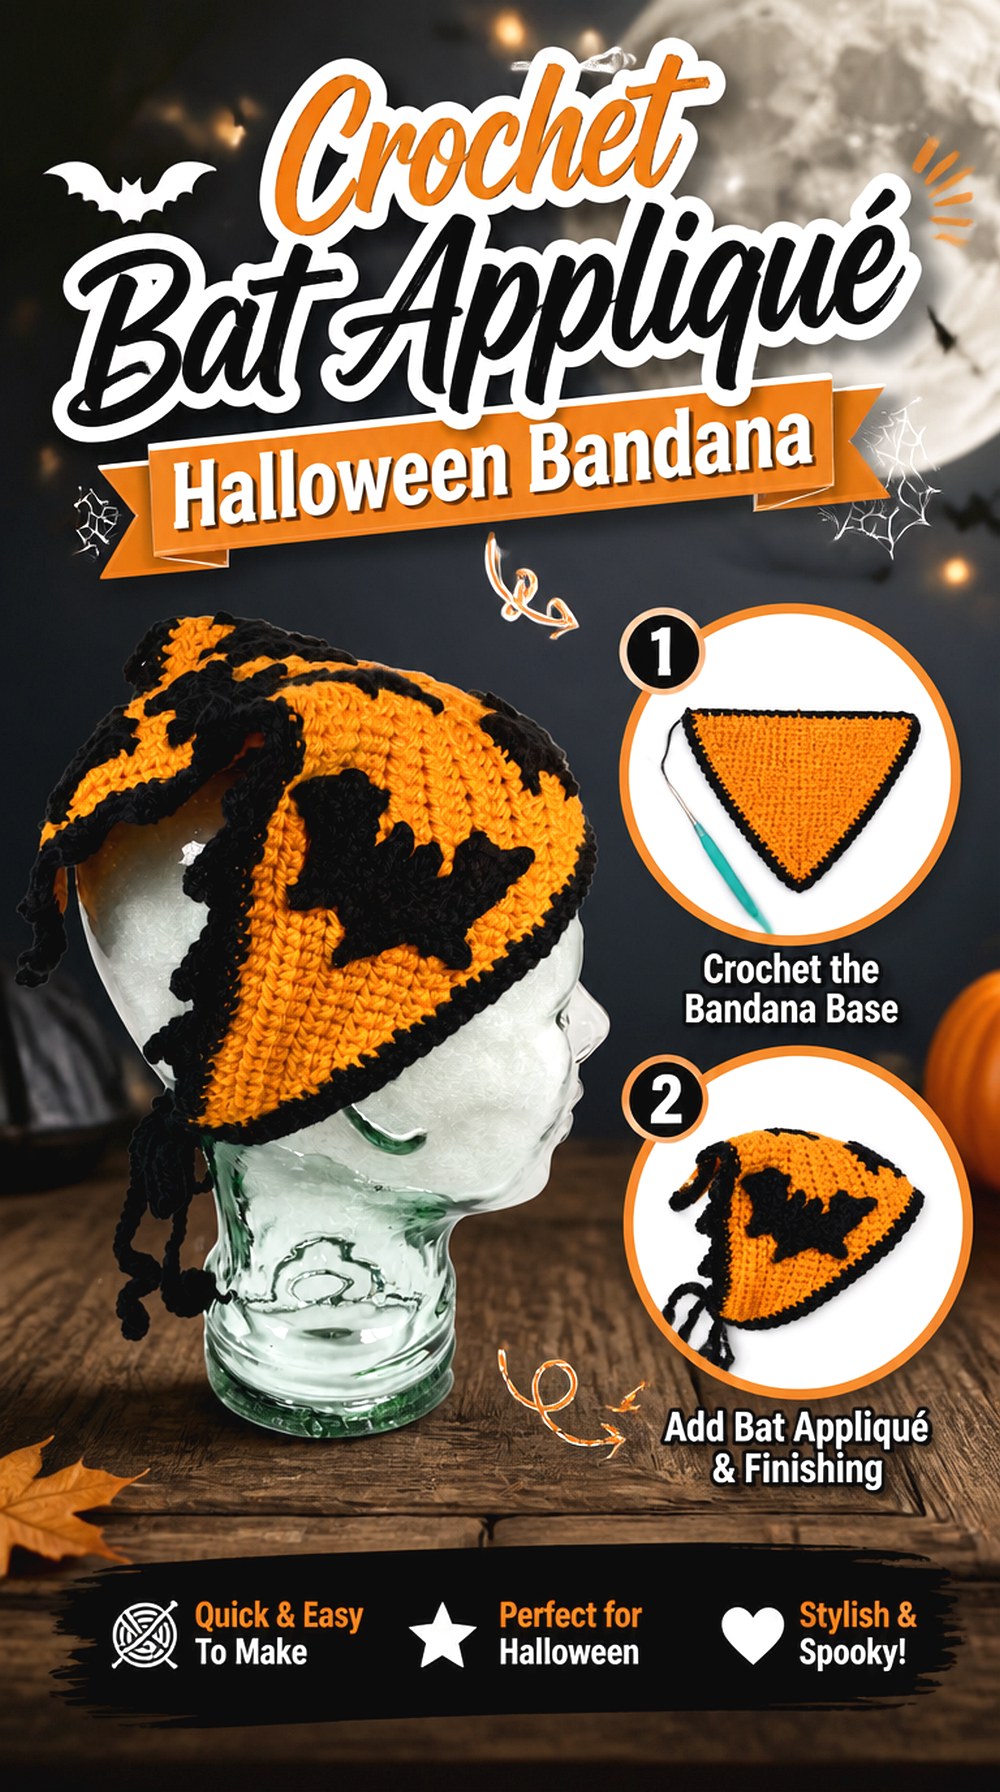
This Halloween bandana places small bats on a triangular wearable rather than turning the entire piece into a literal bat shape. That makes it easier to style with an ordinary outfit or costume because the bandana still behaves like a familiar accessory. Tiffany Bliss shows both the bandana and its bat details in one complete tutorial.
The main planning decision is how much visual weight you want around the lower edge. A few spaced bats give the accessory a cleaner look, while repeated motifs create a stronger Halloween border. Because the bats sit on fabric that curves and moves while worn, placement matters more here than it does on a flat wall decoration.
Spread the Motifs Before Sewing Them Down
Crochet the bandana first, then arrange the finished bats along the edge before permanently attaching them. This gives you a chance to check whether the center looks crowded or the sides feel empty. A flat tabletop preview is useful, but also hold the bandana in its approximate worn shape; curved fabric can make spacing look different from the way it appears when completely flat.
Keep the Ties Free of Bulky Decoration
The bat motifs are most useful where they can be seen without interfering with tying. Avoid crowding the ends with dimensional details that may twist, rub, or disappear into the knot. If you alter the number of bats, prioritize a balanced center and comfortable ties rather than forcing a perfectly repeated spacing that does not suit your finished bandana.
Original Tutorial and Creator Credit
Creator: Tiffany Bliss
3. Crochet Bat Granny Square Motif
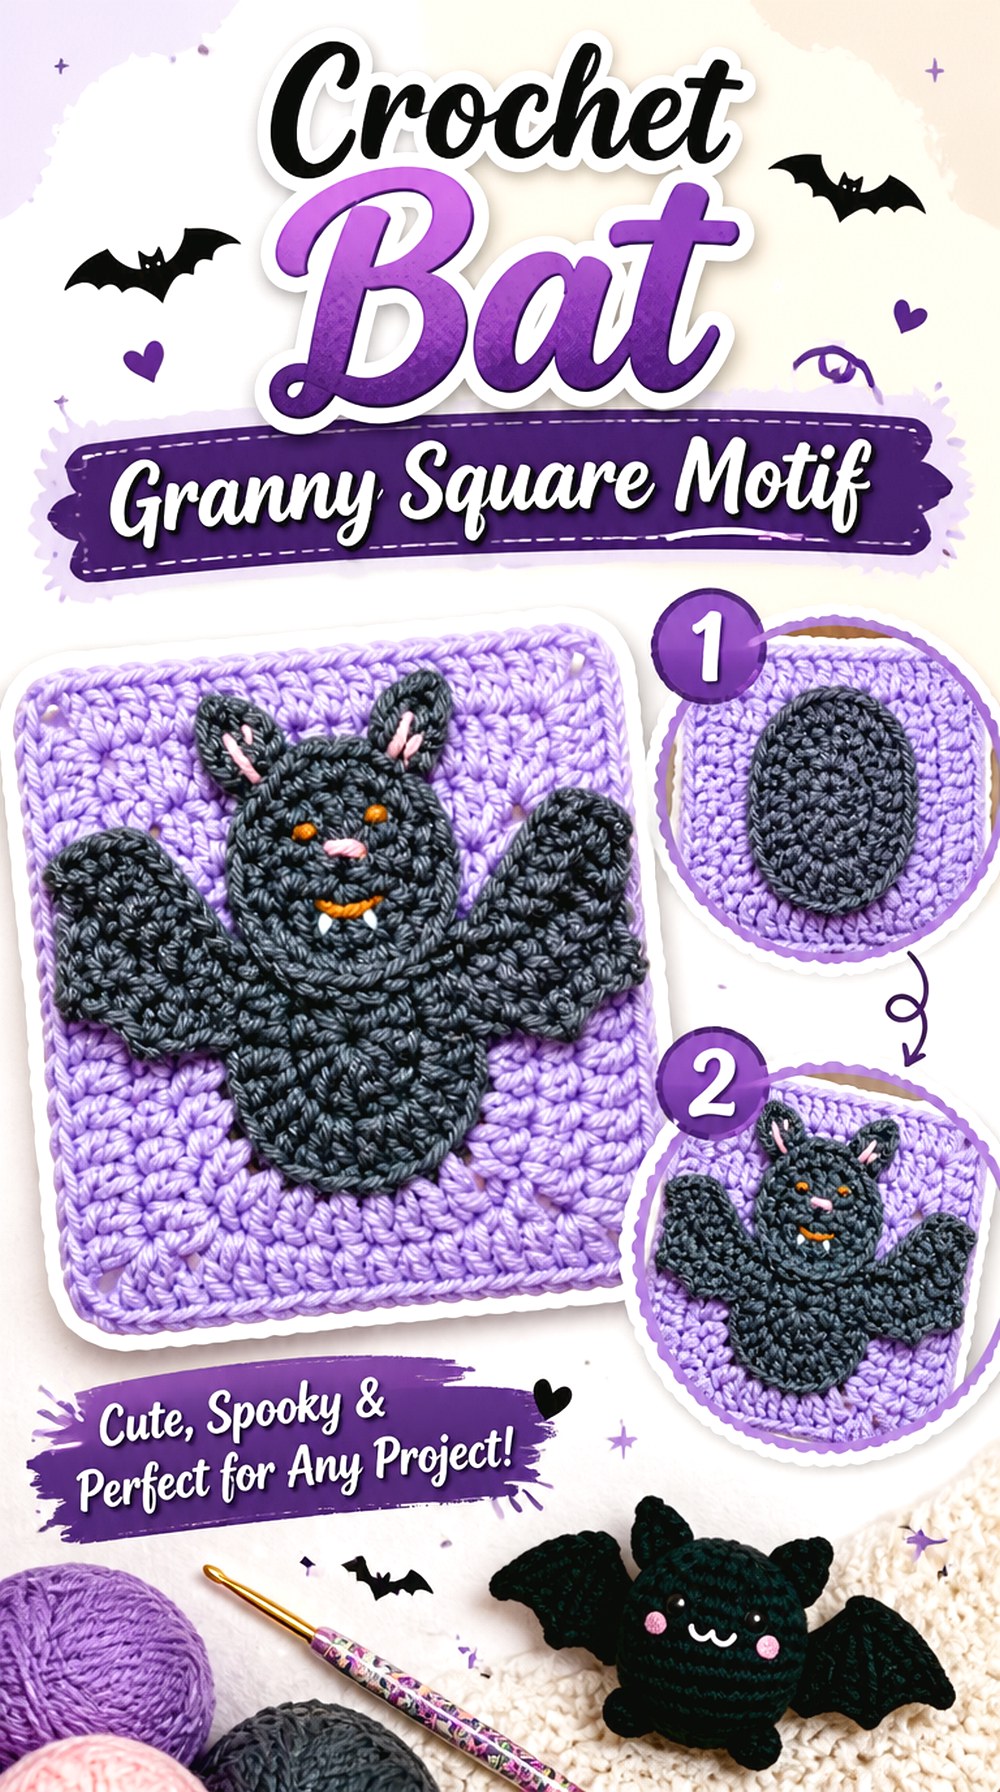
A bat granny square gives you a modular route into Halloween crochet. The bat remains the focal image, but the square format makes the finished motif easier to combine with other blocks for bags, cushions, wall panels, or larger patchwork projects. Simple Crochet’s tutorial builds the recognizable bat inside a contrasting square background.
This is a good choice when one standalone bat is not enough but making repeated plushies feels too bulky. The important checkpoint is the square itself: its blocked dimensions and outer stitch structure need to work with any other motifs you plan to join.
Match Finished Square Size Before Planning a Grid
Do not assume two Halloween granny-square tutorials will produce interchangeable blocks. Make and block one bat square first, then compare its finished dimensions with any pumpkin, ghost, skull, or filler squares you hope to combine. If one block is noticeably different, solve that mismatch before making a full stack. Small discrepancies multiply across a wide panel.
Decide Whether the Bat Needs to Face One Direction
A bag front may only need one upright bat, while a blanket or cushion made from several squares needs more deliberate orientation. Lay the blocks out before joining so none of the bats accidentally appear sideways where that is visually distracting. Repeating the same orientation gives a graphic pattern; rotating motifs can create movement, but it should look intentional.
Original Tutorial and Creator Credit
Creator: Simple Crochet
4. Crochet Tiny Bat Costume Appliqué

HappyBerry Crochet’s small bat is a compact, flat motif that can be sewn onto another project instead of becoming a standalone stuffed character. The creator specifically presents it as an appliqué suitable for Halloween decorating and embellishing items such as hats or bags.
That makes this one of the more flexible ideas in the roundup. A single bat can create a small costume accent, while several could be arranged across a larger piece. Because the silhouette is simple and the project is flat, color and placement can do more of the design work than stuffing or facial expression.
Let the Background Provide the Contrast
A black bat can disappear against a very dark hat, bag, or garment. Before sewing it down, place the motif on the intended background and view it from a few feet away. Purple, orange, gray, or another Halloween color may define the wing outline better when the base fabric is already black. Contrast is more important than following a traditional bat color.
Block the Wing Points Before Permanent Attachment
Small wing tips can curl or pull inward, especially after handling. Shape the finished motif before sewing it to a larger item so you can see its true outline. When attaching it, avoid pulling the sewing thread so tightly that the wings pucker against the background. The goal is a secure motif that still retains the silhouette shown in the original tutorial.
Original Tutorial and Creator Credit
Creator: HappyBerry Crochet
5. Crochet Wide Wing Bat Display Appliqué
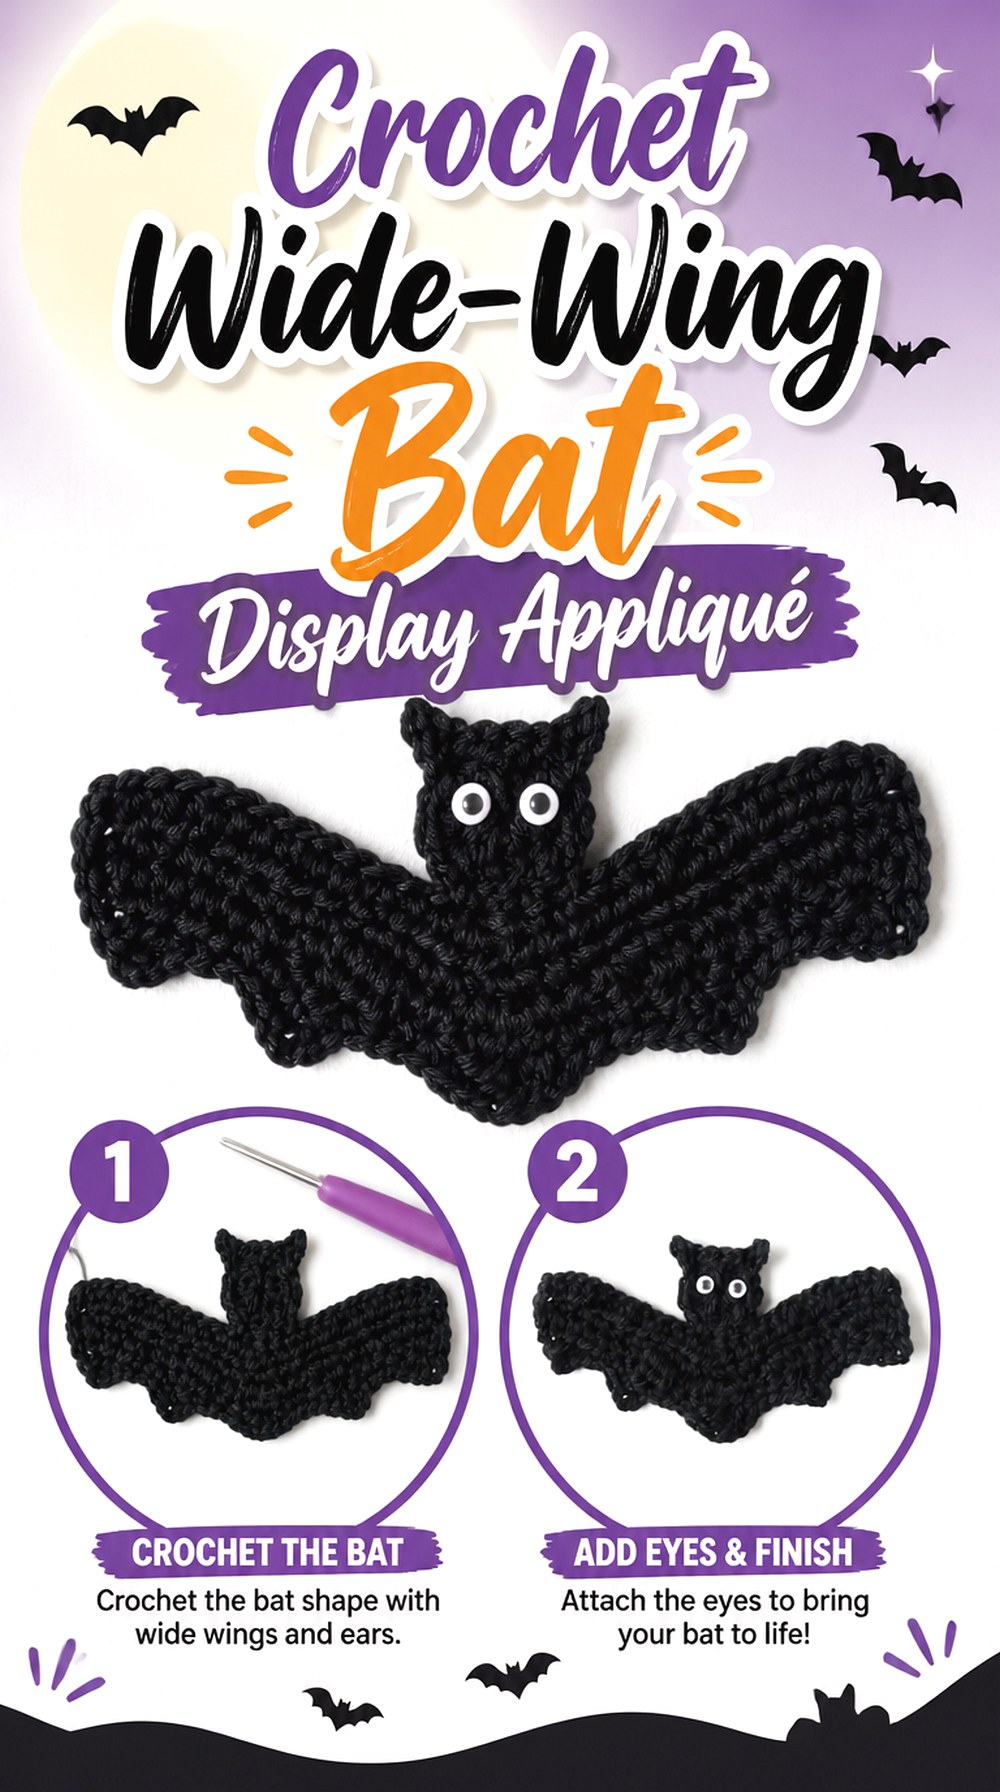
GoldenLucyCrafts offers a larger, more spread-out bat appliqué with a strong wing silhouette. The creator shows the motif as a Halloween embellishment and also uses the same bat design in seasonal decorating. Unlike the tiny costume-style bat above, this version has enough visual presence to become part of a wall display, bunting arrangement, or other flat decor.
The project suits readers who like decorating with repeated motifs but do not want the storage bulk of plush Halloween pieces. Because the outline is the main attraction, careful shaping after crocheting is worth more attention than adding many extra details.
Bigger Flat Bats Need More Deliberate Shaping
As the wings get wider, uneven tension becomes easier to see. Place the finished bat on a flat surface and compare the two wing edges before turning it into display decor. If one side curls more than the other, address the shaping first. Hanging an uneven motif can exaggerate rather than hide those differences.
Plan the Hanging Distance Before Making Multiples
For a garland-style use, make one finished bat and test it where the decoration will actually hang. A motif that looks small on a worktable may be perfectly visible above a mantel, while a very large bat can overwhelm a narrow doorway. Use the first finished piece as your scale reference before committing to a whole set.
Original Tutorial and Creator Credit
Creator: GoldenLucyCrafts
6. Crochet Halloween Bat Keychain Charm
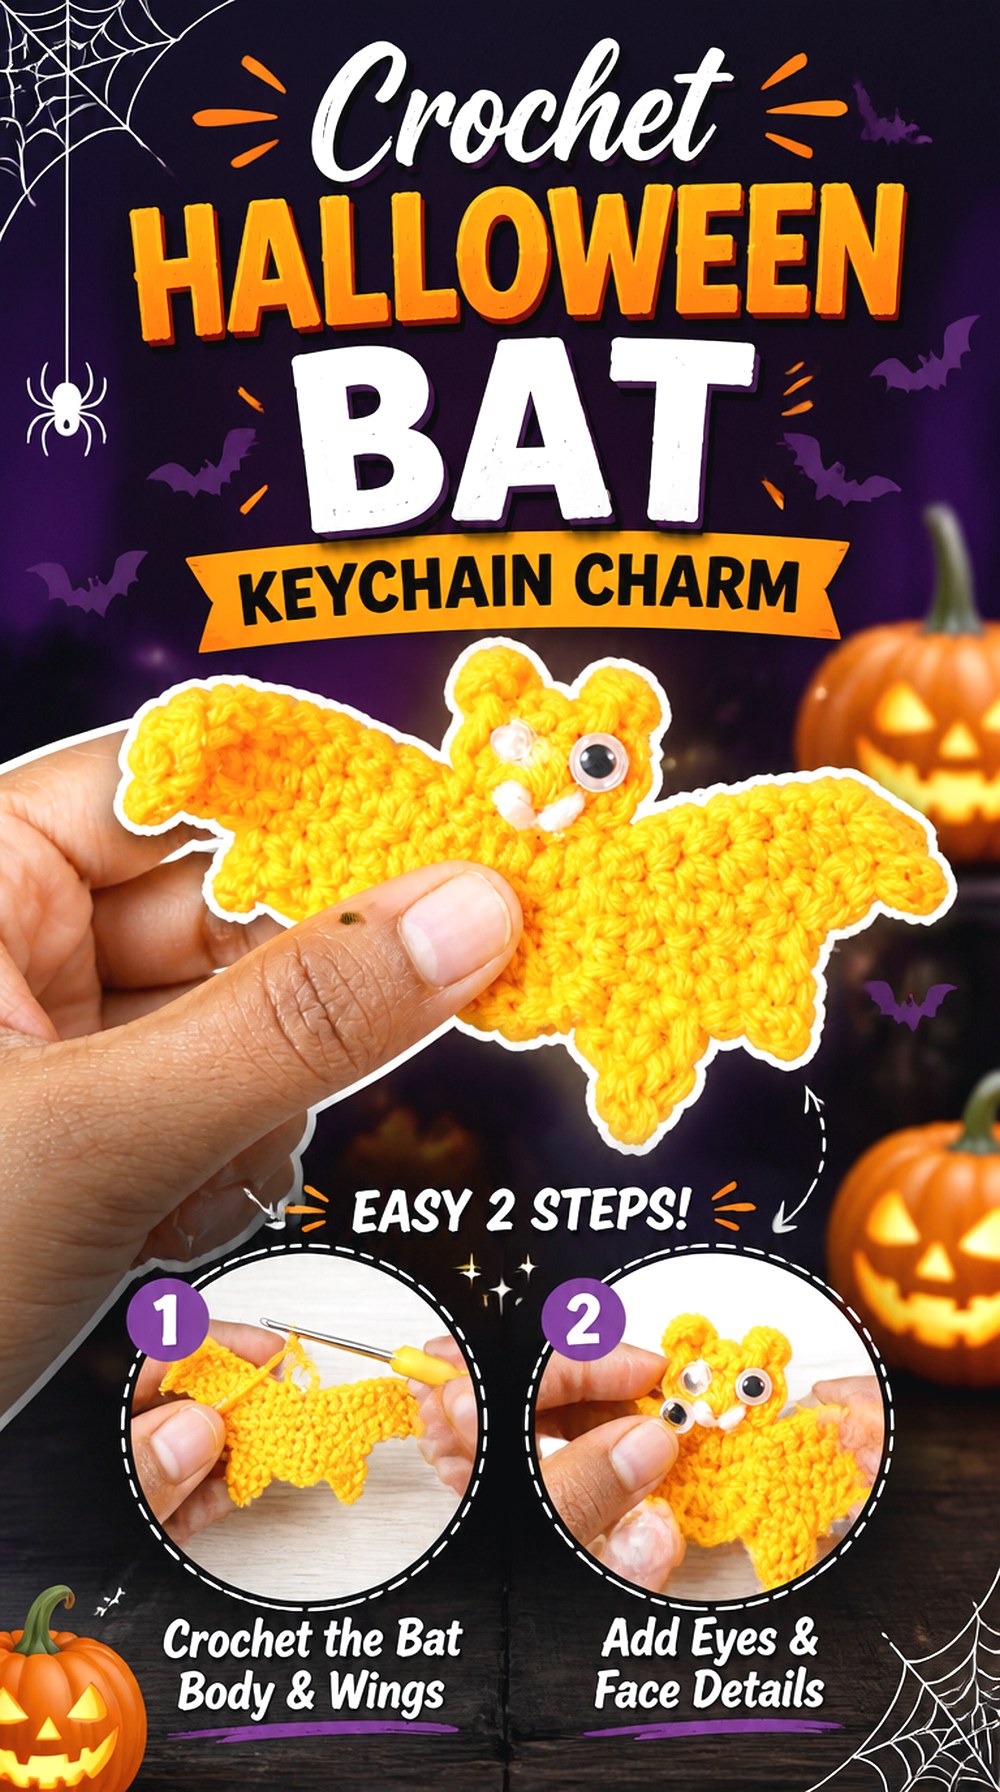
his project shrinks the bat theme into a portable keychain format. Knitting Crochet by Sanju’s tutorial shows a dimensional little bat with wings, facial details, and keyring hardware rather than simply calling a loose appliqué a keychain.
A charm has different demands from a shelf plush because it will swing, rub against a bag, and be handled repeatedly. The body can stay playful, but the attachment point deserves serious attention. This option makes more sense for bags, backpacks, or seasonal favors than for a large tabletop display.
Keep the Hardware Clear of the Wings
The bat should still read clearly when hanging. Before securing the ring, check that the hardware does not pull one wing upward or cover the ears and face. A central hanging point usually produces a more balanced presentation than attaching the ring wherever a convenient yarn tail happens to be.
Treat the Attachment Point as a Functional Join
Decorative sewing and load-bearing attachment are not the same thing. Follow the creator’s keychain guidance closely and inspect the connection before regular use. If the charm is intended for a child’s belongings, also consider the suitability of small hardware and facial components rather than assuming a crochet item is automatically appropriate for every age.
Original Tutorial and Creator Credit
Creator: Knitting Crochet by Sanju
7. Crochet Poseable Wing Bat Amigurumi
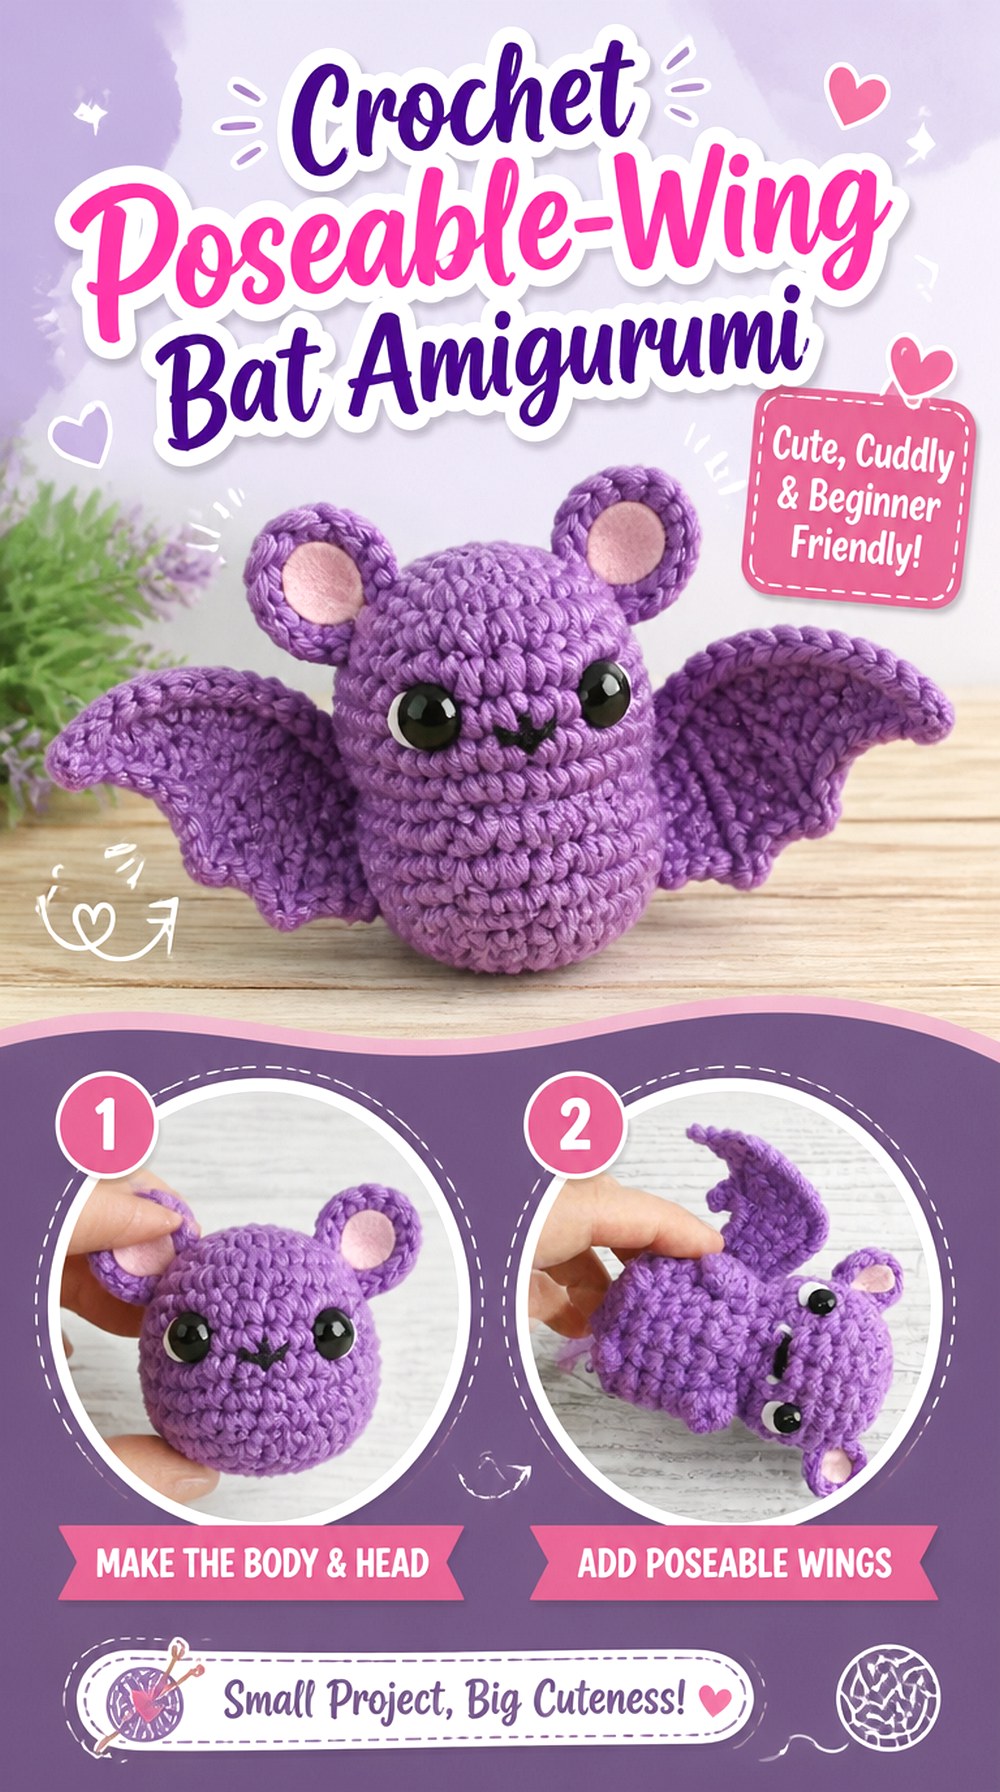
Sharon Ojala’s bat stands apart because the tutorial specifically demonstrates wire in the wings so they can be positioned. The video also covers stuffing, shaping, eyes, and final assembly. That creates a more expressive display bat than a soft plush whose wings simply hang at the sides.
This is a strong choice for a Halloween shelf, mantel, or staged vignette where changing the wing angle adds character. The same internal support that makes the bat interesting, however, also changes how it should be used. It is better treated as a shaped decorative piece than assumed to be a completely soft toy.
Poseability Changes the Intended Use
Wire lets the wings open, curve, or tuck around the body, but it also introduces a rigid internal component. Consider that before making the project for a recipient who expects a cuddly plush. For decor, the feature is an advantage because the bat can be repositioned to suit different arrangements throughout the season.
Check Both Wings Before Closing the Body
A poseable bat is most convincing when the two wings have comparable reach and placement. Before final assembly is irreversible, view the bat from the front and adjust the wing bases so one is not significantly higher or farther forward. The wire can change the outer shape later, but it cannot fully disguise an uneven attachment point.
Keep Supported Wings Away From Rough Handling
Repeatedly bending internal support at the same point can be different from simply repositioning a soft crocheted wing. Use the creator’s method and materials as intended, and do not treat the finished project as though it has no rigid parts. This matters particularly if the bat will be stored tightly between Halloween seasons.
Original Tutorial and Creator Credit
Creator: Sharon Ojala
8. Crochet Mini Fang Bat Amigurumi

Club Crochet’s small amigurumi bat keeps the scale compact while still including optional mouth and tooth details. The project is worked as a dimensional little character rather than a flat motif, and the creator’s supporting pattern information presents the bat as a miniature Halloween design.
This is useful when you want a stuffed bat but do not want the visual bulk of chunky plush yarn. Its small body also makes facial choices more noticeable. Adding too many details can crowd a tiny face, while a simpler expression keeps the silhouette doing most of the work.
Small Faces Need Restraint
Fangs can make the bat read more strongly as a Halloween character, but every detail takes up proportionally more space on a miniature body. Decide whether you want eyes plus a mouth and teeth or a cleaner face. Preview the placement before securing anything permanently; a small shift can change the whole expression.
Use the Wings to Preserve the Bat Silhouette
On a tiny stuffed project, the body can easily dominate. Make sure the wings remain visible when the bat is viewed straight on. If they fold too tightly against the sides, the finished piece may resemble a generic small plush. Follow the creator’s placement closely before experimenting with alternative angles.
Original Tutorial and Creator Credit
Creator: Club Crochet
9. Crochet Chunky Halloween Bat Plushie

The bat from crochetmezaddy is firmly in plush territory. The tutorial uses chunky yarn and shows a round, soft-bodied character with substantial wings and large facial features. This gives it much more visual and physical presence than the mini amigurumi or keychain projects.
Choose this idea when you want a Halloween bat that can anchor a shelf, basket, or plush collection. Chunky yarn makes the shape feel generous, but it also changes stitch visibility. Crocheters who rely heavily on seeing every stitch should preview the tutorial and decide whether they are comfortable working with a fuzzier, less defined surface.
Plush Yarn Can Hide the Working Structure
Thick plush fibers create softness by obscuring some stitch definition. Good lighting and consistent tension become more valuable, particularly around increases, decreases, and places where separate parts will be attached. If you substitute a smoother yarn, expect a different finished character rather than assuming the bat will retain the same plush proportions.
Pin the Wings Before Committing
Broad wings have a major effect on the expression of a round plush. Pin or position both sides temporarily, then look at the bat from the front and slightly above before sewing. Wings that sit too low can disappear behind the body; wings that sit too high may compete with the ears and face.
Choose Display Space Before Scaling Up
Chunky yarn can turn a modest amigurumi form into a much larger object. If the bat needs to fit in a Halloween basket or on a narrow shelf, confirm the finished scale from the creator before changing yarn or hook size. Increasing thickness without planning can quickly produce a bat that no longer fits its intended spot.
Original Tutorial and Creator Credit
Creator: crochetmezaddy
10. Crochet No Sew Batilda Bat Plush

Batilda offers a different construction choice: The Loopy Lamb specifically presents the bat as a no-sew design and demonstrates both mini and jumbo approaches through yarn changes. It is a useful alternative for crocheters who enjoy amigurumi shaping but dislike spending the final part of a project attaching numerous separate pieces.
“No-sew” changes the workflow, not just the finishing time. Features must appear in the right place while the project is being made, so there is less freedom to move a wing or ear after the fact. That makes careful attention to placement important even though a sewing needle plays a smaller role.
Less Sewing Means Less Late-Stage Repositioning
A sewn plush lets you pin a wing in several locations before choosing the final one. Integrated construction gives you less of that flexibility. Follow the tutorial’s placement carefully and check the emerging silhouette as you work rather than waiting until the body is finished to decide whether the wings sit correctly.
Mini and Jumbo Versions Serve Different Displays
The creator demonstrates how yarn choice can produce different scales. Choose the smaller direction for baskets, grouped decorations, or compact shelves; choose the plush-yarn direction when you want the bat to stand alone visually. Do not assume other components can remain unchanged when you substitute yarn—review the creator’s material guidance as well.
Keep “No-Sew” Separate From “No Finishing”
Even an integrated amigurumi still needs careful shaping, secure ends, and a final check of its features. Reduced assembly is useful, but it should not encourage rushing the last stage. Look at the ears and wings from the front and sides and correct any shaping issues before the project goes into storage or display.
Original Tutorial and Creator Credit
Creator: The Loopy Lamb
11. Crochet Soft Sewn Bat Plush

Wonder Crochet’s bat returns to a traditional plush construction where separate pieces are sewn together and final details complete the character. The creator’s tutorial specifically includes assembly and adding details, making finishing an important part of the project rather than something minimized or eliminated.
This design is useful if you prefer the freedom that sewn pieces provide. You can evaluate wing angle and feature placement before making the joins permanent. Compared with Batilda, it involves more finishing, but that extra assembly can also give you more control over the bat’s final expression.
Sewing Gives You More Control Over Wing Angle
Do not treat assembly merely as the last chore. Use it as a design stage. Pin or hold the pieces where the creator demonstrates them, then view the plush upright before sewing tightly. Even small changes to the wing angle can make the bat look compact, energetic, sleepy, or wide and dramatic.
Facial Details Need to Suit the Yarn Texture
The plush surface is already visually soft, so tiny face details may become lost if they lack enough contrast. Compare the eyes and other features with the yarn from normal viewing distance before final attachment. A detail that looks clear from a few inches away may disappear once the finished bat sits on a shelf.
Store the Wings Without Crushing Them
Soft wings are more forgiving than internally supported ones, but long-term compression can still affect their shape. When Halloween decor is packed away, give the bat enough room that both wings are not sharply folded beneath heavier items. A quick reshaping at the start of the next season can help restore the intended silhouette.
Original Tutorial and Creator Credit
Creator: Wonder Crochet
12. Crochet Full Body Fang Bat Amigurumi

Brunaticality’s bat has more visible creature anatomy than many round Halloween plushies. The tutorial covers a full amigurumi bat with distinct body parts and recognizable Halloween character details rather than relying on a simple ball-shaped body and wings.
That makes this project a good choice if you want the bat itself to be the main display object rather than a small accent. More separate features also mean more opportunities for alignment issues, so assembly deserves time. Readers who strongly prefer minimal finishing may find the no-sew option above a better match.
The Body Proportions Carry the Character
When a bat has more than a head-and-body blob, the relationship between legs, wings, ears, and face becomes important. Check the finished result in the creator’s video before beginning so you know which proportions make this particular bat distinctive. Avoid mixing parts from unrelated bat tutorials unless you are prepared to solve scale differences yourself.
Fangs Should Support, Not Overwhelm, the Face
Small white details can attract the eye immediately against a dark bat. Before securing them, check the expression with the wings and ears already in place. If the face is the first thing you see and the bat silhouette becomes secondary, consider whether that matches the look you actually want.
Assembly Order Is Worth Watching Before Starting
A multi-part character is easier to plan when you understand what will eventually connect to the body. Watch enough of the creator’s tutorial to identify the main components before beginning, then follow the original source for exact construction. This helps prevent finishing surprises without reproducing the designer’s detailed pattern in your own notes.
Original Tutorial and Creator Credit
Creator: Brunaticality
13. Crochet Two Tone Muzzle Bat Amigurumi

Gul’s Cozy Crochet shows a bat with multiple clearly defined parts, including legs, body, ears, wings, and a contrasting muzzle. The creator lists two main yarn colors along with smaller amounts for facial details. That makes color placement part of the character design rather than simply choosing one shade for the entire bat.
This option works especially well if you want the face to stand out from a darker Halloween body. Compared with the flatter and more graphic bats earlier in the list, it reads as a complete little creature and therefore suits a shelf or grouped amigurumi display.
Use the Muzzle Color to Direct Attention
A contrasting muzzle creates a natural focal point. Choose a shade that separates clearly from the head without fighting with the eye and mouth details. Before finishing the face, view the bat with its wings attached; the facial contrast should add personality while allowing the wide bat outline to remain easy to recognize.
Several Parts Mean Alignment Matters
The tutorial divides the project into multiple components, including legs, ears, wings, and muzzle. When attaching them, check pairs from the front rather than evaluating each piece in isolation. Matching wing height and ear angle usually matters more to the finished appearance than making every sewing stitch invisible.
Color Changes Can Alter the Mood Without Changing Construction
A dark body with a lighter muzzle gives the bat a friendly, expressive look, while closer-value colors create a subtler face. That is a useful customization route because it changes the visual mood without requiring changes to the creator’s construction. Keep the original tutorial available for the actual assembly and shaping.
Original Tutorial and Creator Credit
Creator: Gul’s Cozy Crochet
14. Crochet Quick Flat Bat Brooch Motif
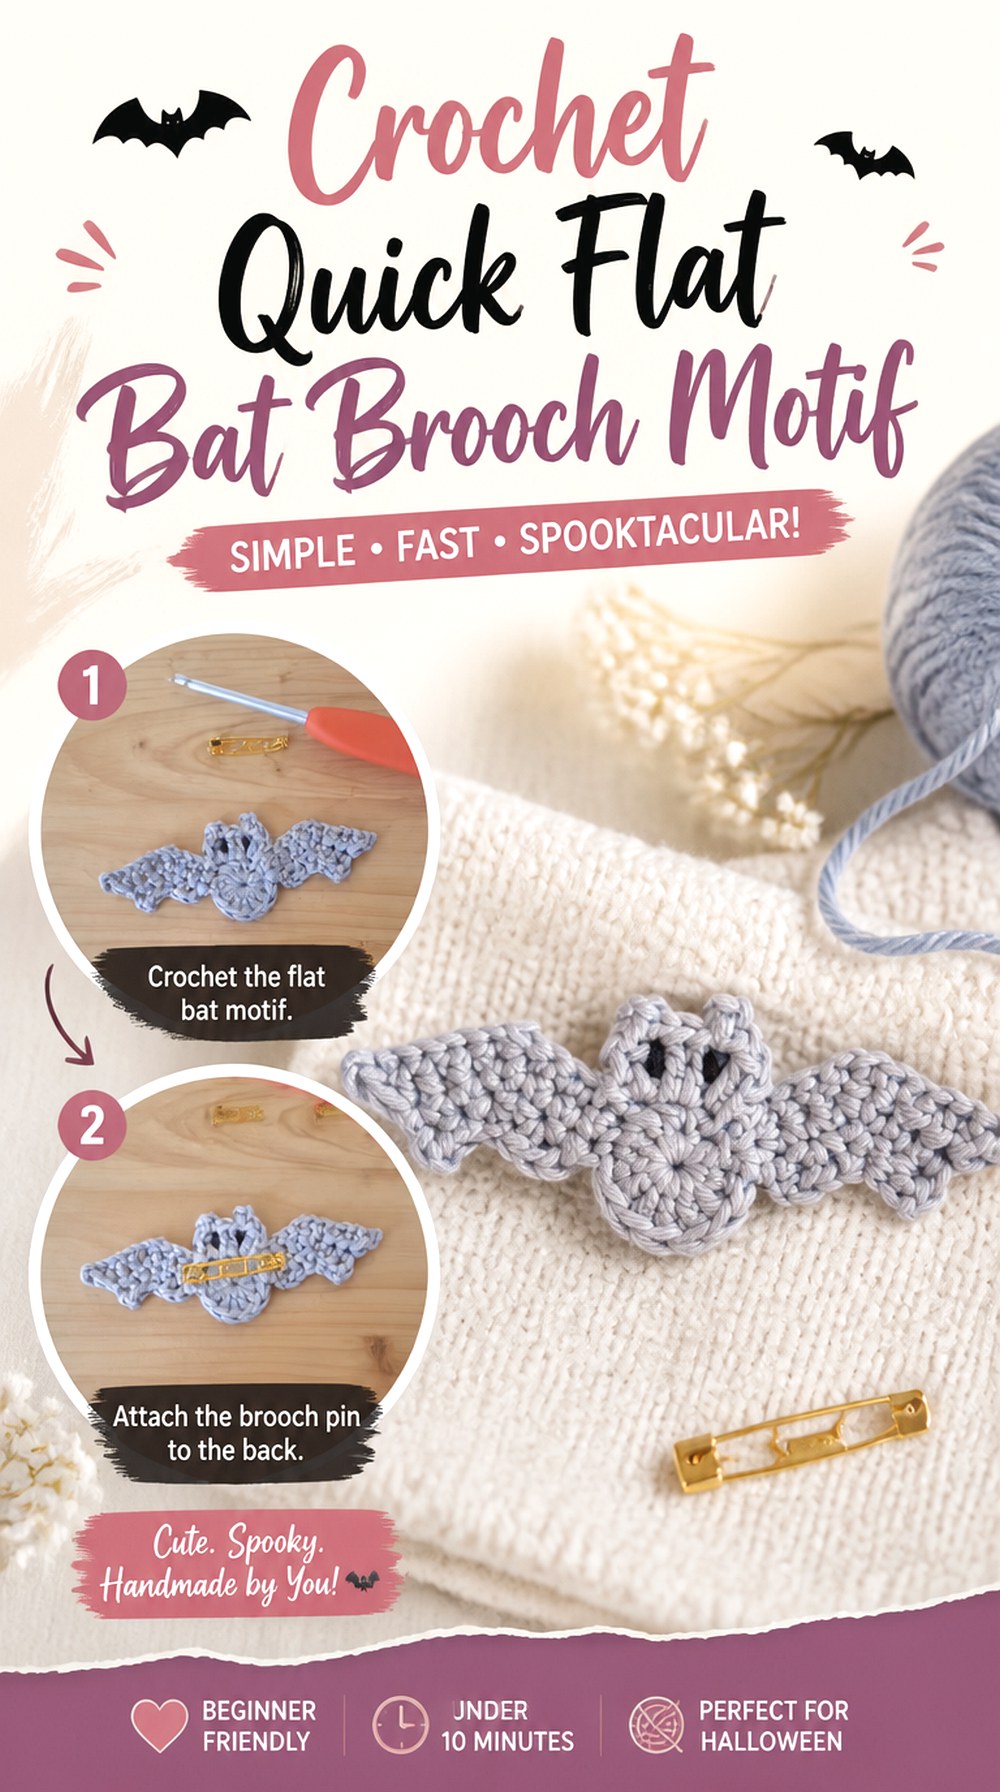
This final option from hibouchoucaillou is a small flat bat that the creator suggests can be used as a decoration, brooch, or keychain. It gives readers a very different endpoint from the large plush projects: the finished bat can become a lightweight Halloween accent without stuffing or extensive assembly.
As a brooch-style motif, placement is the main design choice. One small bat on a jacket, bag, or hat can look intentional, while a cluster of several bats creates more of a costume effect. Keep any added hardware appropriate to the way the piece will actually be worn.
Test the Motif Against the Garment First
A small black bat may disappear on dark fabric or look too tiny on a bulky coat. Place the finished motif where you expect to wear it and step back before adding brooch hardware. This check can tell you whether the current color and scale provide enough contrast or whether the bat would work better on a bag or accessory.
Added Hardware Changes the Project
The crochet tutorial creates the bat; converting it into a brooch introduces a separate functional component. Choose hardware suited to the finished motif and intended wearer, and attach it securely without distorting the center of the bat. If the item is for a child, consider whether a pin-style fastening is appropriate before using the brooch adaptation.
How These Crochet Halloween Bat Ideas Compare
| Project type | Main advantage | Main planning point |
|---|---|---|
| Wing-shaped purse | Strongest functional bat silhouette | Opening, strap support, and usable interior |
| Bat bandana | Wearable Halloween detail | Motif spacing and tie clearance |
| Granny square | Modular for larger projects | Blocked size and motif orientation |
| Small appliqué | Easy to add to existing items | Contrast and flat shaping |
| Wide display appliqué | Good for repeated decor | Wing symmetry and hanging scale |
| Keychain bat | Portable seasonal accent | Hardware attachment |
| Poseable bat | Adjustable display shape | Internal support and intended use |
| Mini amigurumi | Compact stuffed character | Small-scale face and wing clarity |
| Chunky plush | Soft statement piece | Stitch visibility and finished scale |
| No-sew plush | Reduced assembly | Feature placement during construction |
| Sewn plush | Flexible positioning | Pinning and assembly |
| Full-body bat | More detailed creature shape | Number of parts and alignment |
| Two-tone bat | Strong face contrast | Color balance and symmetrical assembly |
| Flat brooch motif | Lightweight wearable accent | Background contrast and hardware |
Conclusion
The right crochet Halloween bat depends more on use than on color. Choose the wing-shaped purse or bandana when you want something wearable, the granny square or appliqués for flat seasonal projects, and the keychain for a small portable accent. For display pieces, the poseable bat offers the most adjustable silhouette, while chunky and sewn plush bats give you a softer look. The no-sew Batilda is the clearest alternative when you want less assembly, and the detailed full-body bats suit readers who enjoy character finishing.
Once you have chosen the format that matches your space, recipient, or styling plan, use the original tutorials for exact construction, counts, materials, and creator-specific finishing details.
Frequently Asked Questions
Which crochet Halloween bat idea is easiest to store after the season?
Flat appliqués and granny-square motifs usually require less storage volume than stuffed amigurumi because they can lie relatively flat. A bandana is also compact once folded. If seasonal storage is limited, consider these before a chunky plush or a bat with supported poseable wings, which benefits from more room so its shape is not crushed.
Can I use the same yarn for every crochet bat in this list?
Not without changing the result. A yarn that works nicely for a crisp appliqué may create a very different texture in a plush, while chunky yarn can dramatically increase the scale of an amigurumi design. Follow each creator’s material guidance first. If you substitute, expect changes in stitch definition, wing firmness, finished size, and how facial details fit.
How do I keep crochet bat wings from looking uneven?
Compare the wings before final attachment or finishing. For flat motifs, shape or block the bat so the two sides can be evaluated together. For sewn amigurumi, temporarily pin both wings and view the bat from the front. Differences in attachment height or tension are easier to correct before sewing is fully secured.
Are crochet bats with safety eyes suitable for babies or small children?
Do not assume they are. Several amigurumi tutorials use eyes, stuffing, or other components, and one project uses wire while the keychain includes hardware. If the bat is intended for a young child, review every material and attachment method in the creator’s source and choose age-appropriate alternatives where necessary.
Can I turn a bat appliqué into a garland?
Yes, a flat appliqué can work well as the repeated visual element in a garland, provided you plan spacing and hanging method separately. Make one completed bat first and test it at the intended viewing distance. That will help you decide how many motifs are needed and whether the selected yarn creates enough contrast against the wall, mantel, or doorway.
Which crochet bat is better if I dislike sewing amigurumi pieces together?
The Loopy Lamb’s Batilda tutorial is the clearest choice in this collection because the creator specifically presents it as a no-sew crochet bat. Keep in mind that no-sew construction places more importance on making features in the correct position as you work, because you have less freedom to reposition them during final assembly.