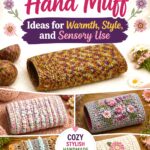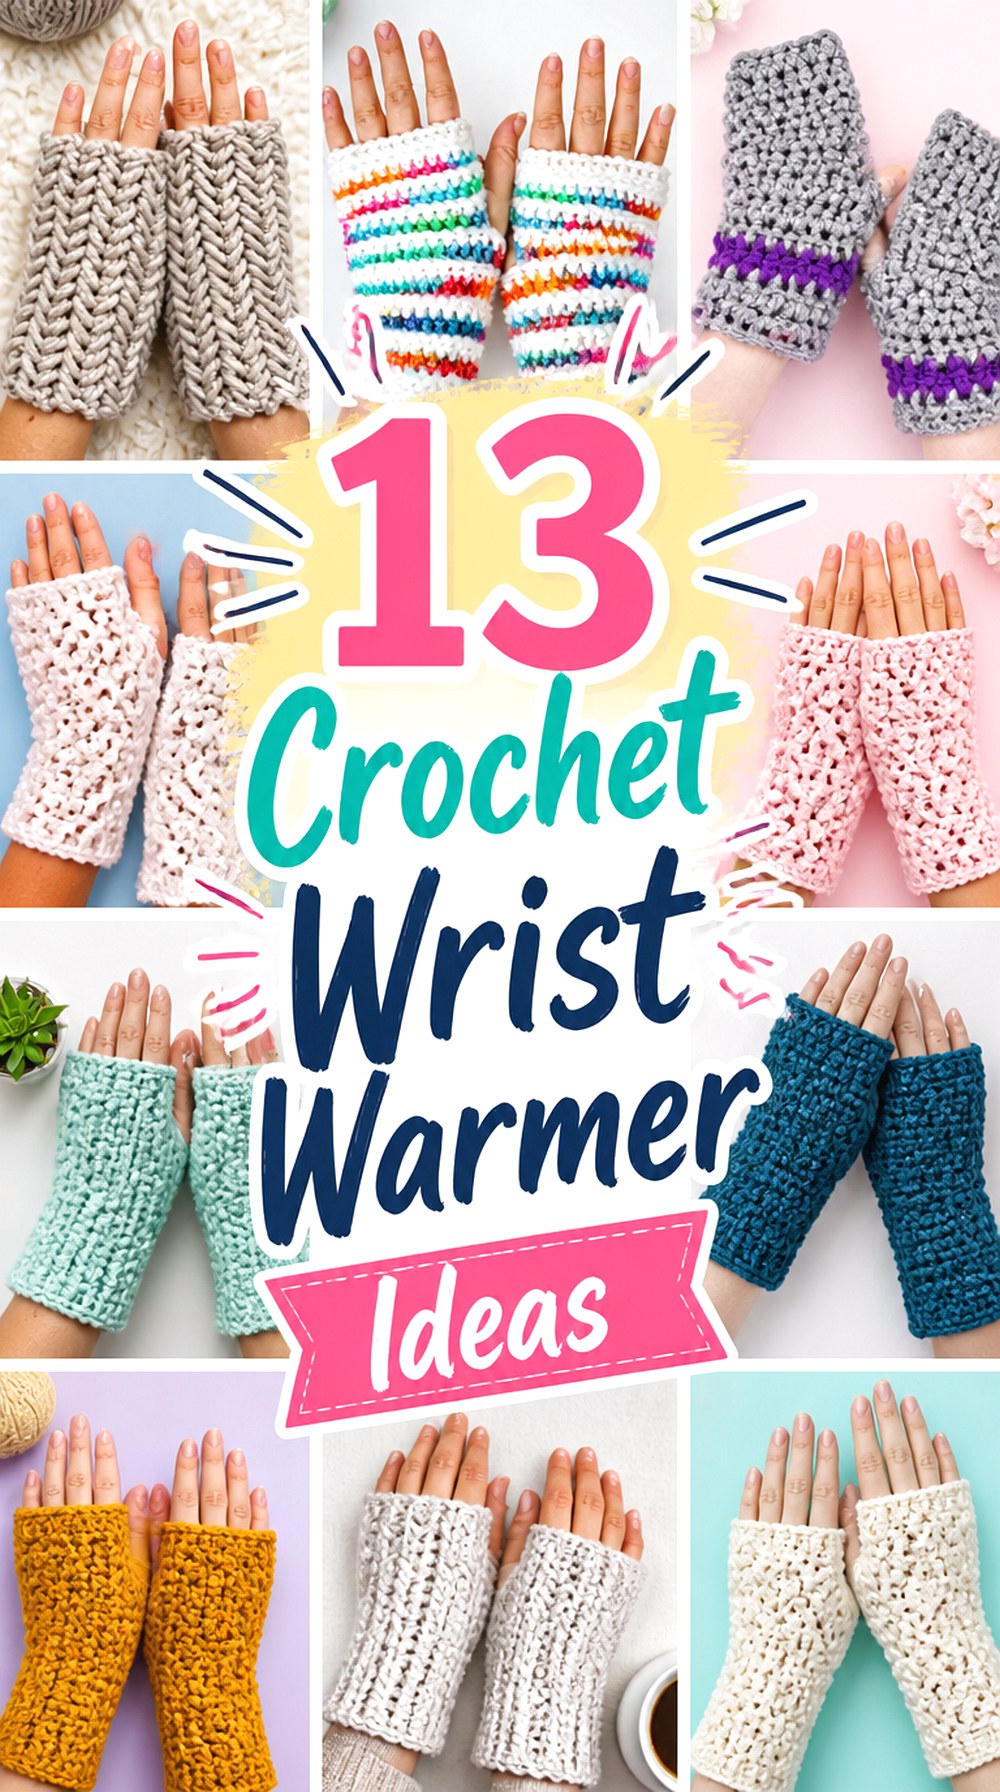

Crochet wrist warmers can be as simple as a fitted rectangle with a thumb opening or as decorative as granny-square, fan-stitch, embroidered, and deeply textured designs. That difference matters because construction affects much more than appearance. It can change how closely the warmer fits, how easily you move your thumb, how bulky the fabric feels around a sleeve, and how much attention the project needs during finishing.
The 13 ideas below cover noticeably different approaches, including fine-yarn wristlets, chunky cuffs, stretchy fingerless gloves, lacy occasion pieces, colorful striped warmers, and designs built around distinctive stitch textures. Use the comparisons and checkpoints to decide what suits your preferred fit, yarn, clothing layers, and finished look, then follow the credited creator’s tutorial for the exact construction.
Quick List
- Crochet Granny Square Wrist Warmers with Short Cuffs
- Crochet Chunky Ribbed Wrist Warmers for Everyday Layering
- Crochet Fine-Yarn Rustic Wrist Warmers
- Crochet Moss-Stitch Texting Wrist Warmers
- Crochet Tornado-Texture Wrist Warmers
- Crochet Stretch-Fit Fingerless Wrist Warmers
- Crochet Statement-Cuff Wrist Warmers
- Crochet Mixed-Texture Wrist Warmers with Strap Detail
- Crochet Fan-Lace Occasion Wrist Warmers
- Crochet Bulky Striped Wrist Warmers
- Crochet Prismatic Ridge Wrist Warmers
- Crochet Knit-Look Embroidered Wrist Warmers
- Crochet Herringbone Wrist Warmers
Plan the Fit Around the Hand, Not a Generic Size Label
Wrist warmers need to stay comfortably in place without making the thumb opening restrictive. Before choosing a tutorial, compare your hand and wrist with any measurements or sizing guidance the creator actually provides. Pay particular attention to the widest part of the hand, the wrist, the distance to the thumb opening, and how far up the hand you want the finished piece to reach.
Stretch also changes the equation. A ribbed or highly elastic fabric may tolerate more negative ease than a firm motif or dense textured fabric, while an open stitch can behave differently again. When a tutorial does not give measurements that match your needs, make a small fabric sample and judge the stretch before committing to both warmers.
Yarn Weight Changes Bulk, Drape, and Sleeve Compatibility
A thick wrist warmer can create a substantial cuff that looks intentional with coats and roomy sweaters, but the same fabric may feel crowded beneath a close-fitting sleeve. Fine yarn produces a slimmer profile and can show smaller texture or decorative details more clearly, although it generally requires more fabric to cover the same area.
Fiber behavior matters too. Some tutorials depend on a yarn’s stretch, while others create flexibility through ribbing or stitch structure. If you substitute yarn, do not assume an equal weight category automatically produces the same fit. Compare the new fabric with the tutorial’s intended result, especially around the wrist and thumb opening, before making the second piece.
Choose the Construction Style Before Choosing the Color
Flat-and-seamed wrist warmers are useful when you want to judge width directly against your hand before closing the fabric. In-the-round designs avoid a long side seam but make early circumference checks more important. Granny-square construction introduces joins and motif placement, while decorative cuffs place more emphasis on the transition between the wrist and hand.
Think about where you want the visual interest. A striking cuff works well when the warmer will show below a sleeve. A hand-focused texture is more noticeable when worn with shorter sleeves or while typing. If you want a low-profile everyday pair, simpler fabric and a clean thumb opening may matter more than elaborate edging.
1. Crochet Granny Square Wrist Warmers with Short Cuffs
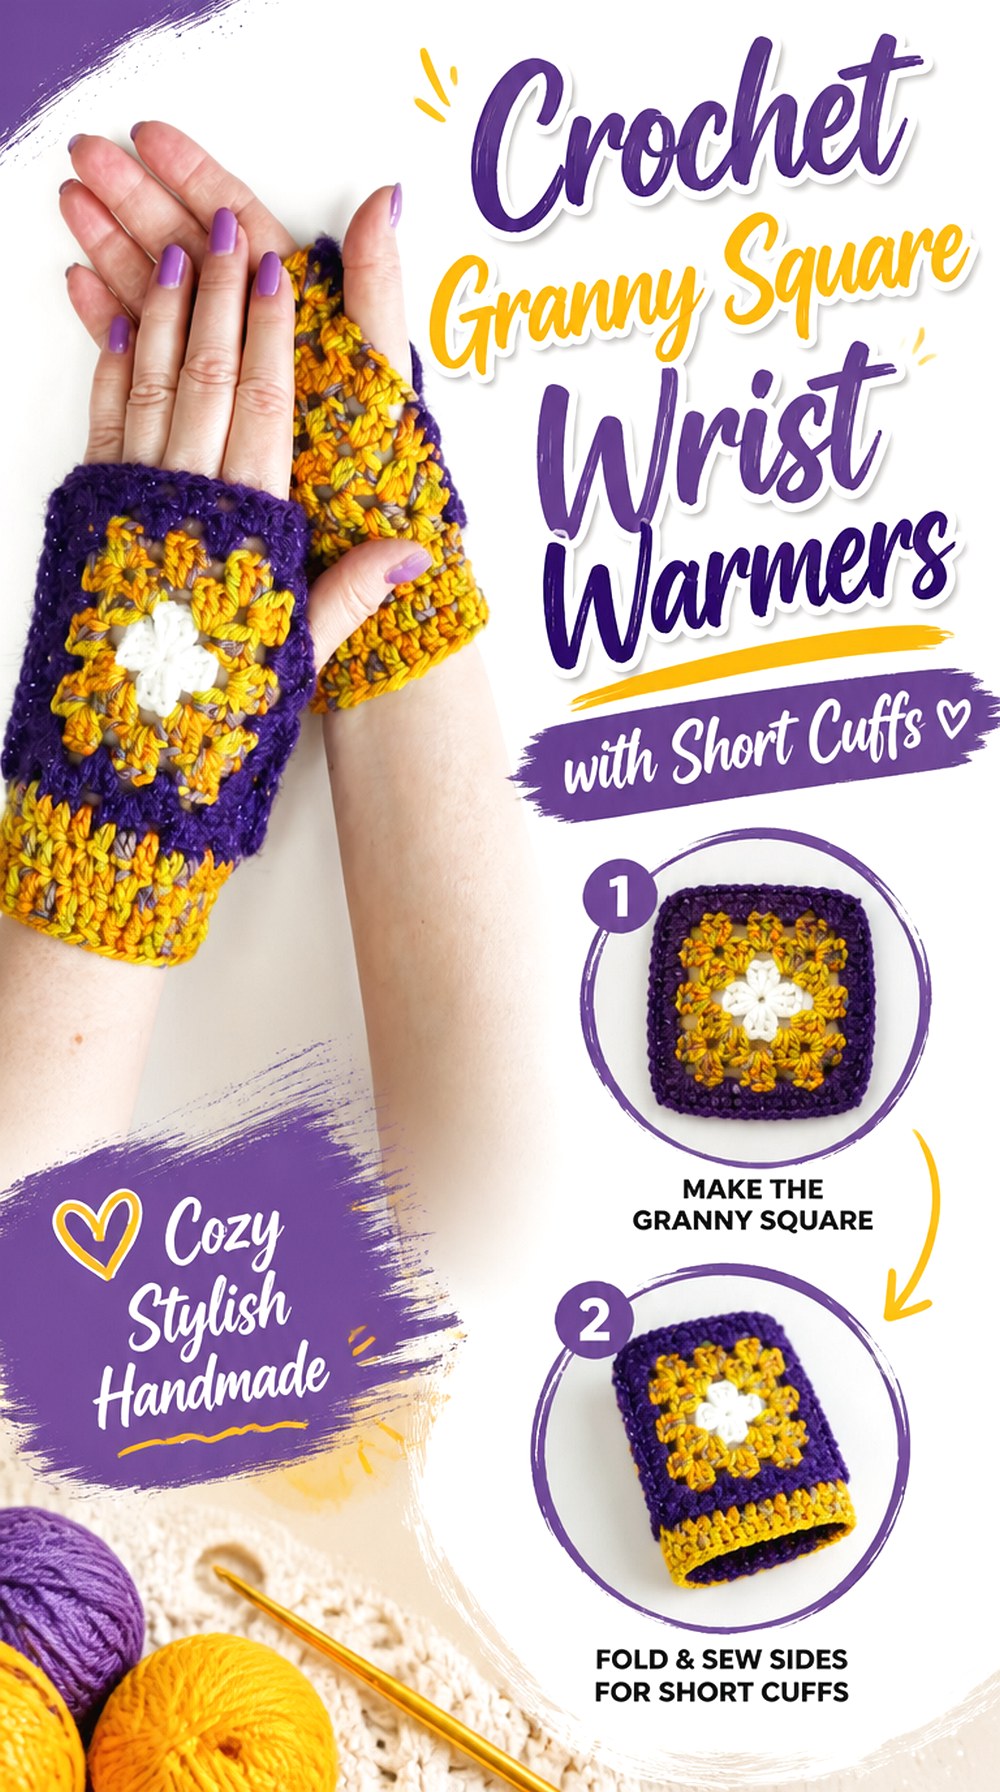
Instead of building the warmer as one continuous tube, this idea uses granny squares as the main visual feature. Crochet with Tuula Maaria’s tutorial demonstrates wrist warmers made from two granny squares for each hand, with the motifs joined and a short cuff added. That makes this option noticeably different from the mostly row-based and round-based designs elsewhere in the list.
The style suits crocheters who want color placement and motif arrangement to be part of the finished design. It also gives you a clear planning checkpoint: the completed squares need to make sense around your hand before permanent joining begins.
Block Both Squares Before Judging the Fit
A motif can change dimensions after relaxing or blocking, so fitting unprepared squares too early can lead to a misleading circumference estimate. Compare the finished dimensions of all four motifs before joining them. If one square sits noticeably larger or smaller, correcting that difference first is cleaner than trying to compensate with an uneven seam.
Color Placement Becomes Part of the Pair
Because the granny squares dominate the visible surface, their orientation affects whether the two warmers look deliberately matched or intentionally mismatched. Lay all four squares out together before assembly. Decide whether you want corresponding colors on the backs of both hands, mirrored motifs, or a more varied patchwork look.
Keep the Motif Join Comfortable Against the Hand
A decorative join may look attractive but can also create extra thickness. Before finishing both warmers, feel the joined area where it will sit against the side of the hand. A flatter join may be preferable if you plan to wear the warmers for typing or underneath close-fitting outerwear.
2. Crochet Chunky Ribbed Wrist Warmers for Everyday Layering

This is a straightforward choice when you want substantial-looking wrist warmers without motif joining or decorative embellishment. Blossom Crochet demonstrates a fingerless-glove/wrist-warmer project using chunky yarn, with the tutorial including measurement and sewing stages.
The heavier yarn gives this idea a different visual scale from the fine-yarn wristlets later in the list. It can work particularly well as an exposed cuff with casual sweaters and jackets. The main decision is whether that extra fabric thickness suits how you plan to wear the pair; something comfortable over a sleeve may be less convenient underneath a narrow coat cuff.
Check the Finished Fabric Against Your Coat Sleeve
Do not judge the warmer only on your bare hand. If it will usually be worn with outerwear, slide a fabric sample or partly finished warmer under the sleeve you expect to use. Chunkier crochet can change how comfortably the sleeve closes around the wrist.
Use the Sewing Point as a Fit Check
A seamed construction gives you an opportunity to wrap the unfinished fabric around your hand before closing it. Check both the wrist and the wider part of the hand. A fit that feels correct at the wrist can still become too tight higher up if the fabric has limited lateral stretch.
Original Tutorial and Creator Credit
Creator: Blossom Crochet
3. Crochet Fine Yarn Rustic Wrist Warmers

For a slimmer alternative to bulky cuffs, this idea takes inspiration from brittanyalicecrochet’s rustic hand/wrist warmers. The tutorial uses sock yarn and works through a flat piece before the seaming stage, creating a much finer visual scale than the chunky designs in this collection.
A finer warmer can be appealing when you want less bulk around the wrist, especially beneath regular sleeves. It also lets subtle yarn color changes carry more of the finished look. The trade-off is that yarn substitution needs more care: moving to a dramatically thicker yarn changes not only the appearance but also the dimensions and flexibility of the fabric.
Fine Fabric Makes Circumference Errors More Noticeable
With a relatively slim fabric, there is less bulky texture to disguise a fit that is slightly loose. Before completing the seam, wrap the piece around the intended hand and check whether the edges meet at the tension you actually want to wear.
Let the Yarn Supply the Visual Interest
A rustic or softly variegated yarn can provide enough variation without extra surface decoration. If you substitute a highly multicolored yarn, compare it against the stitch texture first; strong color changes can either enhance a simple fabric or make small structural details harder to see.
Original Tutorial and Creator Credit
Creator: brittanyalicecrochet
4. Crochet Moss Stitch Texting Wrist Warmers
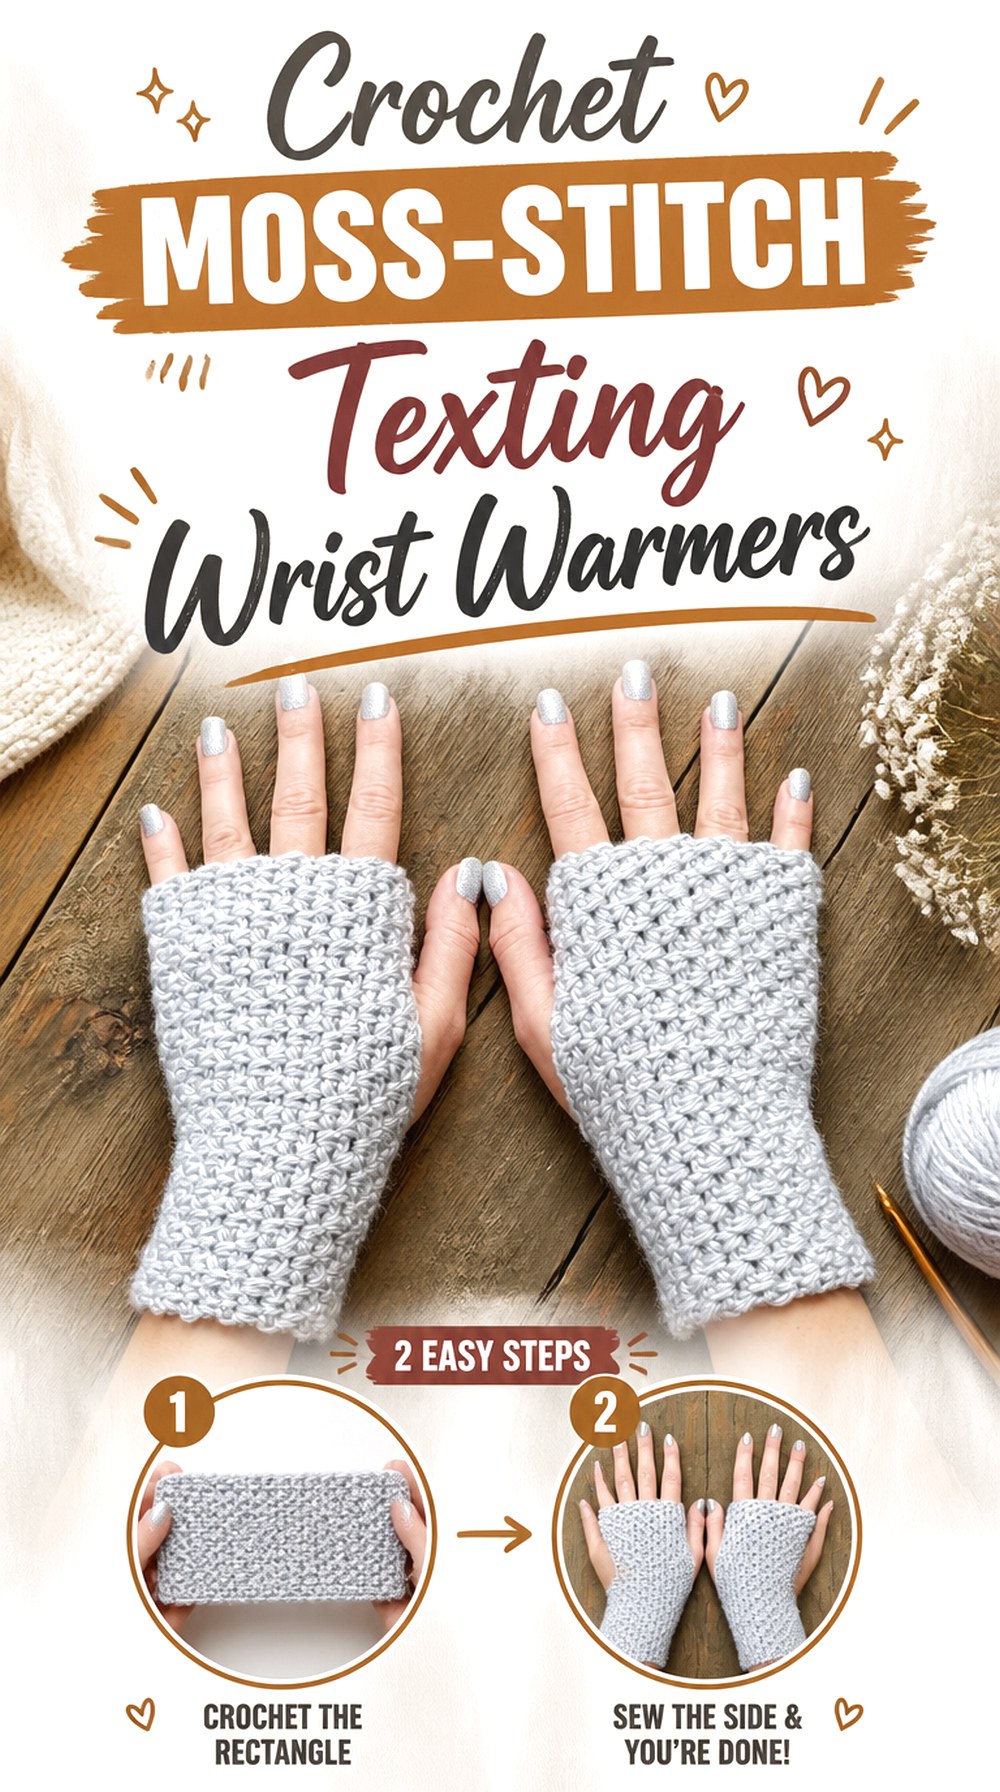
Naztazia’s fingerless-glove tutorial offers a compact everyday style intended to leave the fingers accessible. The accompanying project information identifies moss stitch as the fabric used for these gloves, while the YouTube tutorial focuses on a practical fingerless design.
This option makes sense when you want the hand covered without losing access to a phone, keyboard, or other tasks that need fingertip movement. Visually, the small-scale stitch texture is quieter than granny squares or large cables, which also makes it a useful base if you prefer solid colors or understated stripes rather than a statement motif.
The Thumb Opening Should Not Pull the Palm Sideways
After the opening is formed, move your thumb naturally rather than keeping the hand flat. If the fabric drags noticeably toward the thumb, the opening or overall circumference may need reconsideration. This is one of the most important comfort checks in any close-fitting fingerless design.
Moss Stitch Rewards Consistent Tension
The small alternating texture looks most balanced when the fabric density remains steady. If your tension loosens noticeably as the piece widens over the hand, the top can flare away from the fingers. Compare the upper edge with the wrist before finishing the second warmer.
Match the Upper Edge to Your Main Use
A warmer that finishes farther over the palm provides more coverage, while a shorter upper section leaves more of the hand unrestricted. Before adding extra length to any wrist-warmer design, bend your fingers and check where the fabric sits during typing, driving, or crafting.
Original Tutorial and Creator Credit
Creator: naztazia
5. Crochet Tornado Texture Wrist Warmers

HappyBerry Crochet centers this pair around a tornado stitch, giving the fabric directional texture rather than relying on stripes or added motifs for interest. The effect gives these warmers a stronger surface pattern than a plain ribbed rectangle while keeping the project firmly in the wrist-warmer category.
This is a useful choice if stitch texture itself is what you want people to notice. A solid or lightly variegated yarn can help the raised structure remain visible, whereas a highly contrasting multicolor yarn may compete with the stitch pattern. Check the tutorial’s fabric before deciding which element—texture or color—you want to dominate.
Give Directional Texture Enough Visual Space
Strong stitch movement can disappear when interrupted by too many color changes. If the tornado effect is the reason you chose this design, work a small sample in your intended yarn and view it from arm’s length before committing to a busy colorway.
Compare Both Warmers Before Final Finishing
Directional patterns make differences in tension easier to see. Lay the pair side by side before weaving in every end and check length, width, and the placement of the thumb openings. Small corrections are easier before finishing is completely locked in.
Original Tutorial and Creator Credit
Creator: HappyBerry Crochet
6. Crochet Stretch Fit Fingerless Wrist Warmers

The Crochet Crowd’s tutorial stands out because the sample uses Curly Q yarn specifically for its stretch, with the creator explaining that the yarn helps the glove conform to the hand. That makes fiber behavior unusually important here: the appearance of a replacement yarn is not enough to tell you whether it will behave like the tutorial sample.
This is a good design to study if you want to understand how elasticity can contribute to fit. It also illustrates why substituting yarn by thickness alone can be risky in handwear. A less elastic fabric may need a different circumference even if the yarn looks comparable on the skein.
Treat Stretch as Part of the Sizing System
Before substituting yarn, crochet enough fabric to pull it gently across the hand. If it springs back readily, the original fit concept may translate well. If it stays stretched or barely gives at all, copying the same finished dimensions may produce a noticeably different result.
Recovery Matters as Much as Expansion
A yarn that stretches comfortably but does not recover can leave wrist warmers loose after repeated wear. Test the fabric by stretching it several times and allowing it to rest. You are looking for behavior that suits handwear, not simply the ability to become wider once.
Do Not Ignore the Wrist When Fitting the Palm
Highly flexible fabric may feel comfortable across the wider hand while becoming loose around a narrower wrist. Check both areas independently before finishing. The most useful wrist warmer fit is one that permits movement without sliding constantly toward the hand.
Original Tutorial and Creator Credit
Creator: The Crochet Crowd
7. Crochet Statement Cuff Wrist Warmers

Yarnspirations’ fingerless-glove tutorial specifically highlights an unusual cuff construction, making the wrist edge more than a simple finishing band. That shifts the design emphasis downward, which is useful if your wrist warmers will peek out from coat or sweater sleeves.
Compared with heavily textured hand sections, a statement cuff gives you another way to add interest without putting extra bulk over the palm. When adapting the idea, consider whether your sleeve will cover the feature you like most. If so, a different design with hand-focused texture may make more sense for your wardrobe.
Measure Where the Decorative Cuff Will Actually Sit
A cuff can fit at the narrow wrist but become restrictive if it extends farther up the forearm. Before finishing, check the entire height against the intended wearer rather than relying on one circumference measurement taken at the wrist crease.
Keep the Cuff From Fighting the Sleeve
A pronounced cuff works best when there is room for it. Try the partly finished warmer with the sweater or coat you expect to wear most often. If the sleeve compresses the detail completely, decide whether you want a slimmer cuff or intend to wear it outside the sleeve instead.
Original Tutorial and Creator Credit
Creator: Yarnspirations
8. Crochet Mixed Texture Wrist Warmers with Strap Detail
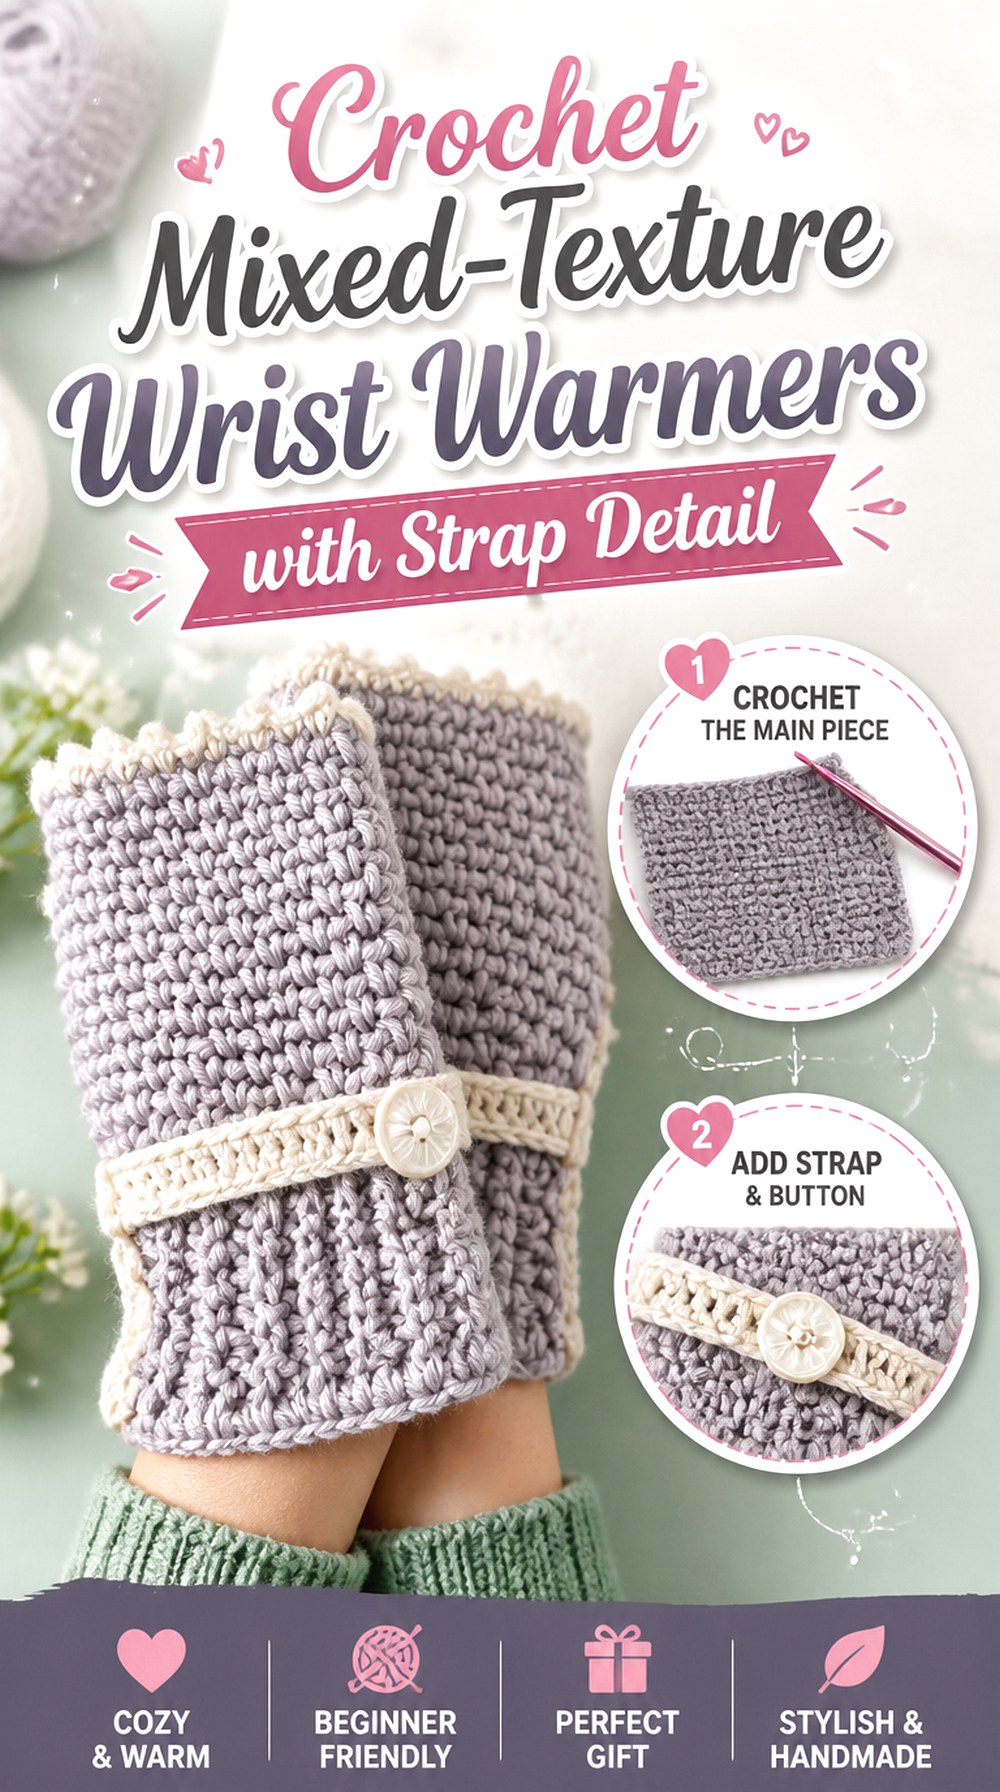
Charle Rae’s hand-warmer tutorial combines several visibly different design elements: post stitches at the cuff, moss stitch through the hand section, lacy edging, and a wrist strap. Rather than depending on one repeat across the whole warmer, this project changes texture as it moves from wrist to hand.
That layered treatment makes it a strong option when you want a more accessorized finished piece. It also creates additional fit checkpoints. A snug cuff, comfortable hand section, decorative top edge, and strap all interact differently, so fitting only one part does not guarantee the whole warmer will sit comfortably.
The Post-Stitch Cuff Should Hold Without Pinching
Raised post stitches can create a substantial cuff. Test it with the hand relaxed and again while bending the wrist. If the lower edge feels comfortable only when the wrist is straight, the fit may be too restrictive for normal movement.
Keep the Lacy Edge Away From High-Friction Areas
A decorative open edge is more exposed than dense fabric. Consider where it will sit relative to jacket fasteners, bag straps, or other surfaces that can catch loops. If the warmers are mainly for active daily use, a simpler top edge may be more practical.
Treat the Wrist Strap as Both Detail and Fit Element
A strap can visually define the cuff, but it should not be used to rescue an otherwise oversized warmer. Check the main fabric first. Then judge whether the strap sits flat and comfortably when the hand bends rather than pulling the fabric into a narrow band.
Original Tutorial and Creator Credit
Creator: Charle Rae
9. Crochet Fan Lace Occasion Wrist Warmers

Jayda InStitches uses a crochet fan stitch to create lacy fingerless gloves designed with bridal parties and prom wear in mind. That gives this idea a clearly different purpose from the heavier cold-weather options in the collection: decoration and styling take a larger role than dense hand coverage.
The open fan pattern works well when you want crochet to read as part of an outfit rather than only as a warm layer. Because the fabric is visually lighter, yarn choice, edge neatness, and fit around the hand become especially noticeable. This is also a design where adding too many extra embellishments can easily overwhelm the stitch pattern.
Match the Lace Scale to the Occasion
A smooth, understated yarn lets the fan structure do most of the visual work. If you are coordinating with formal clothing, compare the crocheted sample beside the actual garment rather than choosing yarn in isolation. Texture that looks subtle on the skein can appear much stronger once crocheted.
Open Fabric Needs a Different Fit Check
Lace can stretch and spread differently from dense crochet. Put the warmer on and look at how evenly the openings sit across the hand. If one area is stretched much more widely than another, the overall fit or tension may need adjustment.
Keep Embellishment Secondary to the Fan Pattern
If you want beads, ribbon, or another decorative accent, add the idea cautiously and confirm that it does not interfere with finger movement or catch easily. The fan stitch already provides a strong visual rhythm, so additional detail works best when it supports rather than obscures that structure.
Original Tutorial and Creator Credit
Creator: Jayda InStitches
10. Crochet Bulky Striped Wrist Warmers
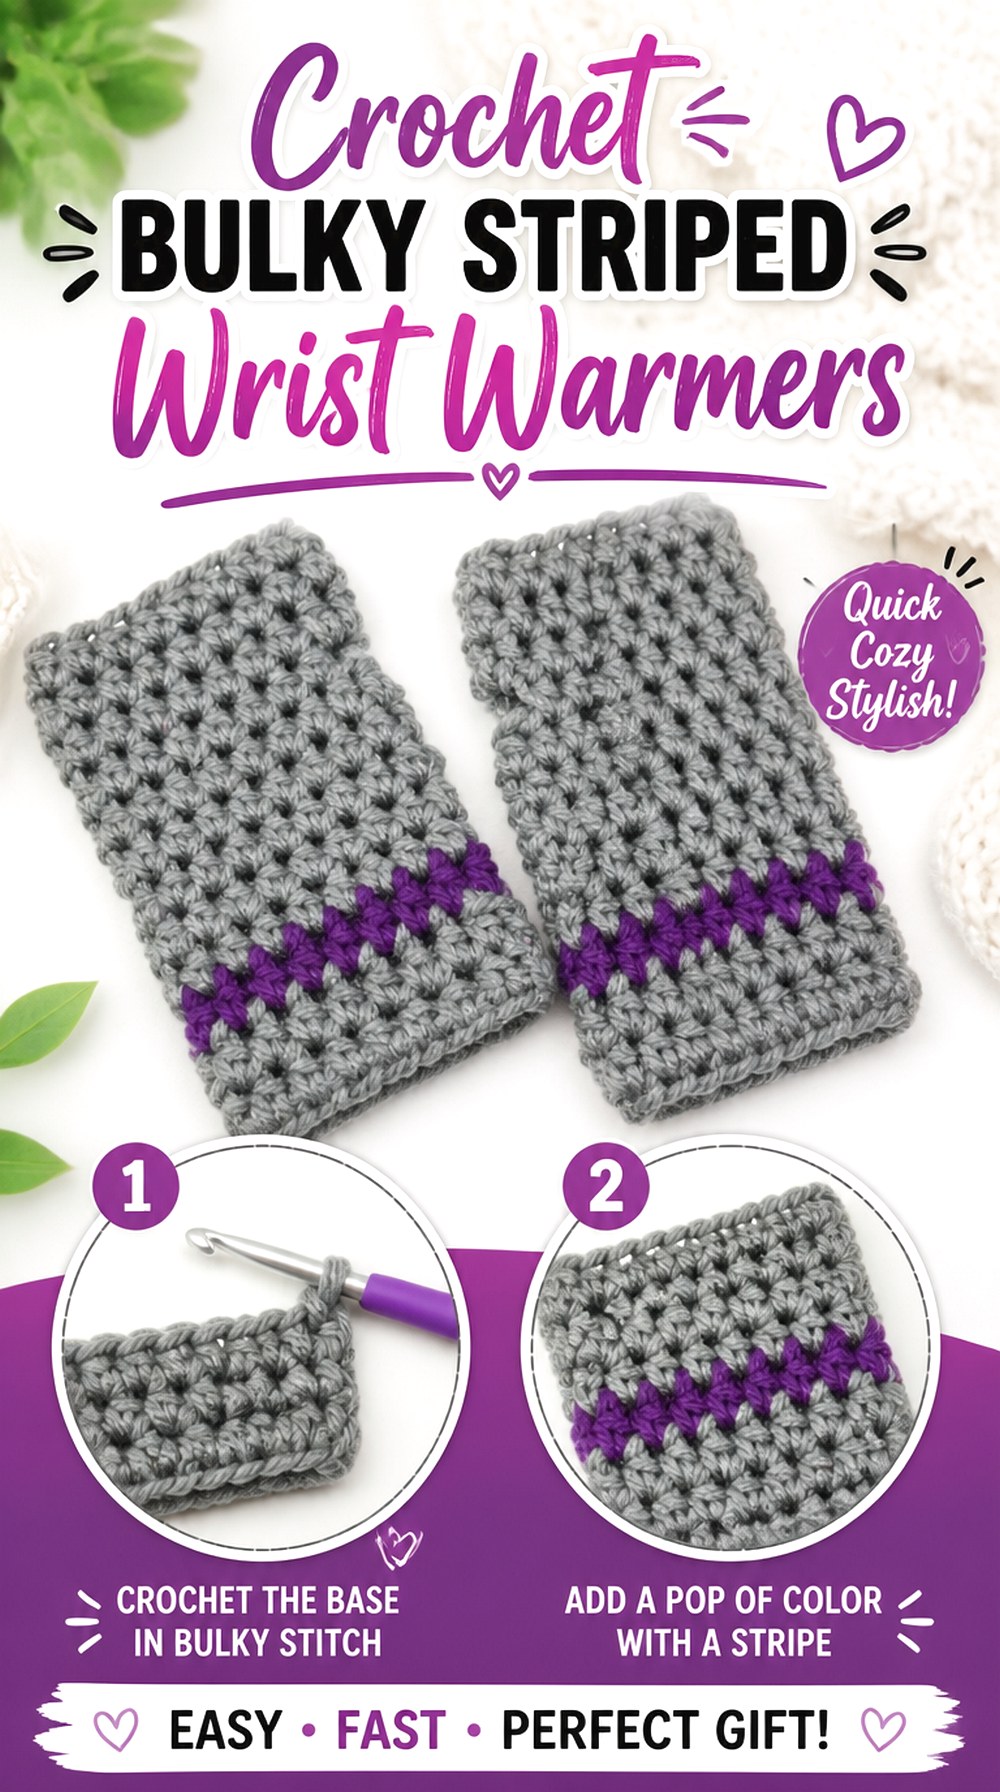
Fiber Flux’s Quick Gift Wrist Warmers use bulky yarn and include contrasting stripes, giving this pair a bold, compact appearance. The creator’s project information specifically notes that leftover yarn can be used for the stripe accents.
This design suits readers who want color contrast without managing full granny-square motifs or complicated color layouts. Because the yarn is thick, even a narrow stripe has a strong visual presence. Plan the palette before beginning the second warmer so the pair looks related, especially if you are using leftovers that may not be available in equal quantities.
Decide Whether the Stripes Should Match or Mirror
Matching stripe placement creates a conventional pair, while reversing or mirroring the colors can make intentional use of smaller leftovers. Lay your yarn choices together first and decide on the relationship before one warmer is completely finished.
Bulky Yarn Makes Edge Finish More Visible
Thick stitches magnify uneven transitions at the thumb opening and upper edge. Before fastening off, check those areas from both the palm and back-of-hand sides. A small tension inconsistency can look more prominent when every stitch is physically larger.
Original Tutorial and Creator Credit
Creator: Fiber Flux
11. Crochet Prismatic Ridge Wrist Warmers

Winding Road Crochet’s Prismatic Wrist Warmers combine color contrast with a ridged texture created through third-loop half double crochet. The creator also supplies multiple size options in the associated project information, making this one of the more sizing-focused choices in the roundup.
These warmers are worth considering if you like horizontal-looking texture and want the yarn colors to interact with the stitch structure. The raised ridges can make even simple color changes more noticeable. Because the design provides size guidance, compare the creator’s stated measurements with the intended wearer’s actual hand rather than choosing a size from age or label alone.
Third-Loop Texture Changes the Direction of the Fabric
Working into a different loop can push the stitch tops forward and create pronounced ridges. When substituting yarn, make a small sample and confirm that the ridge remains visible; very fuzzy or heavily textured yarn can soften the effect you selected the design for.
Use the Hand Circumference, Not Just the Size Name
Winding Road Crochet provides several size options, including adult choices. Treat those labels as a starting point and compare the accompanying measurements with the wearer. Hands vary enough that an age-based assumption can be less useful than an actual circumference check.
Coordinate Color Changes With the Raised Lines
If you are using two colors, decide whether you want the ridges and color transitions to reinforce one another or compete for attention. A restrained palette emphasizes construction; stronger contrast makes the warmer read more graphically from a distance.
Original Tutorial and Creator Credit
Creator: Winding Road Crochet
12. Crochet Knit Look Embroidered Wrist Warmers
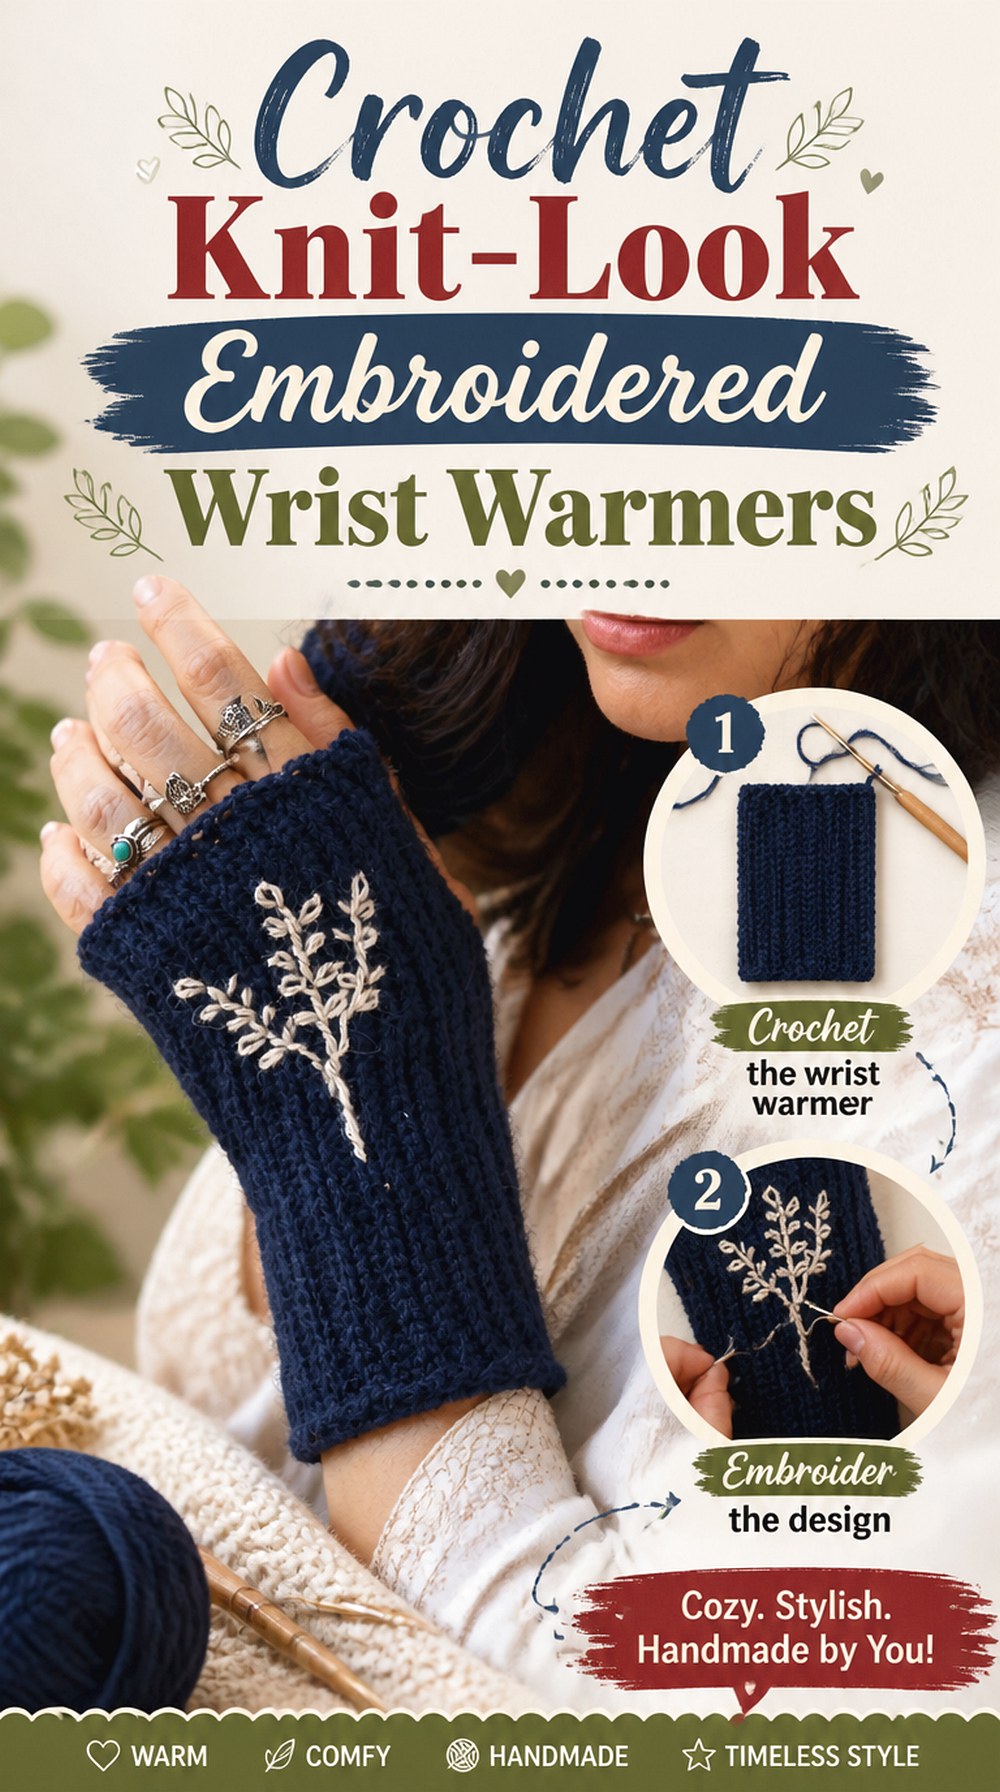
Moara Crochet’s wrist warmer is designed to resemble knitted ribbing while remaining crocheted, using front- and back-post texture. The creator also presents the project with an optional thumb opening and contrasting embroidery, and the construction is worked flat before seaming.
This gives you several styling decisions without changing the core idea. Leave the fabric simple for an understated ribbed wristlet, add the thumb opening for a more conventional fingerless fit, or use surface embroidery as a contrasting detail. It is especially suitable for readers who like a knitted visual effect but want to stay with crochet techniques.
Decide on the Thumb Opening Before You Seam
Because the creator offers the option of making the wristlet with or without a thumb hole, think about use before finishing. A simple wrist tube works differently from a fingerless glove that extends farther over the hand, so compare both the intended length and mobility you want.
Embroidery Should Follow the Stretch of the Base
Decorative stitching can reduce flexibility if it is pulled too tightly across a stretchy ribbed fabric. If you add embroidery, stretch the warmer gently while checking the decoration. The base should still expand enough to pass comfortably over the hand.
Use a Flat Fit Check Before Closing the Seam
The flat construction makes customization easier because you can wrap the panel around the wrist and hand before joining the edges. Check the fabric without overstretching it; if it only fits when pulled to its absolute limit, regular wear may feel restrictive.
Original Tutorial and Creator Credit
Creator: Moara Crochet
13. Crochet Herringbone Wrist Warmers

Diving Ducks Crochet uses herringbone stitch for these fingerless gloves, producing a strongly directional surface rather than standard vertical ribbing or an open lace pattern. The tutorial sample uses a super-bulky wool/acrylic-blend yarn and includes the joining stage in the video.
The combination of substantial yarn and angled texture makes this a statement option for readers who want the stitch pattern to be immediately visible. It is very different from the fine rustic wristlets and formal fan-lace pair above. If you substitute yarn, focus on whether the herringbone structure remains clear and whether the resulting thickness still works with your usual sleeves.
Herringbone Texture Needs Visible Stitch Definition
A highly fuzzy yarn can soften the angled structure that distinguishes this design. Crochet a small sample and look at it from a normal viewing distance. If the herringbone movement disappears, a smoother yarn may communicate the texture more clearly.
Check the Join Before Making the Second Warmer
The tutorial includes an assembly stage after the stitch pattern is worked. Once the first warmer is joined, put it on and evaluate seam thickness, circumference, and thumb placement. Any adjustment is easier to apply consistently before the matching piece is complete.
How to Choose Among These Crochet Wrist Warmer Styles
For the lowest-profile look, start with the Fine-Yarn Rustic or Knit-Look Embroidered warmers. The Chunky Ribbed, Bulky Striped, and Herringbone versions create a more substantial cuff and stronger stitch scale.
Choose Granny Square warmers when motif placement and color planning matter most. The Tornado, Prismatic Ridge, and Mixed-Texture designs put more emphasis on crochet texture, while the Fan-Lace pair is the most occasion-oriented option. If fit is your main concern, the Stretch-Fit design is especially useful for thinking about yarn elasticity, whereas flat-and-seamed projects give you an easy opportunity to wrap the unfinished fabric around the hand before closing it.
Conclusion
These 13 crochet wrist warmer ideas cover more than different stitch patterns. They range from fine, low-bulk wristlets to chunky cuffs, granny-square construction, elastic fabric, decorative lace, strong herringbone texture, and designs with distinctive cuffs or embroidery.
Choose according to where you want the visual interest and how you will actually wear the pair. A slim warmer makes more sense under narrow sleeves, while a chunky or highly textured cuff can become part of the outfit. Motif designs reward careful layout planning, and stretchy fabrics require more attention to yarn behavior. Once you have chosen the right direction, use the original tutorials linked above for the creators’ exact construction details.
Frequently Asked Questions
How tight should crochet wrist warmers fit around the wrist?
They should stay in place without restricting normal wrist and thumb movement. The exact amount of ease depends on the stitch pattern, yarn elasticity, and construction, so there is no universal circumference reduction that works for every design. Try the first warmer on before completing the second, and check it with your wrist bent as well as straight.
Are flat-and-seamed wrist warmers easier to resize?
They can be convenient to customize because you can wrap the unfinished fabric around the hand before closing the seam. However, the stitch repeat and thumb-opening construction still matter. If you change the panel width substantially, confirm that the thumb opening and upper-hand fit remain comfortable rather than adjusting only the wrist circumference.
Which yarn is better for wrist warmers: fine or chunky?
Neither is universally better. Fine yarn produces a slimmer fabric that can fit more comfortably beneath regular sleeves and can show small details well. Chunky yarn creates larger stitches and a more substantial cuff. Compare the finished fabric with the clothes you plan to wear over it, especially if coat cuffs are narrow.
Can I substitute a different yarn in a wrist-warmer tutorial?
Yes, but matching the stated yarn weight alone does not guarantee the same fit. Fiber elasticity, stitch definition, thickness, and your own tension can all change the finished fabric. Make a sample first when the project depends heavily on stretch, ribbing, raised texture, or a precise hand circumference.
How can I stop a crochet wrist warmer from becoming loose during wear?
Start by checking whether the chosen yarn recovers after stretching. Also compare the wrist and hand circumferences rather than fitting only the widest part of the hand. If the fabric expands significantly but does not spring back, simply making the original design smaller may not solve the underlying yarn-behavior issue.
Should I block crochet wrist warmers before wearing them?
Blocking can help even out stitches and is especially useful before joining motif-based projects such as granny-square warmers. However, the appropriate method depends on the yarn fiber and care instructions. Avoid assuming that every yarn should receive the same heat, steam, or wet-blocking treatment; check the yarn manufacturer’s care information first.