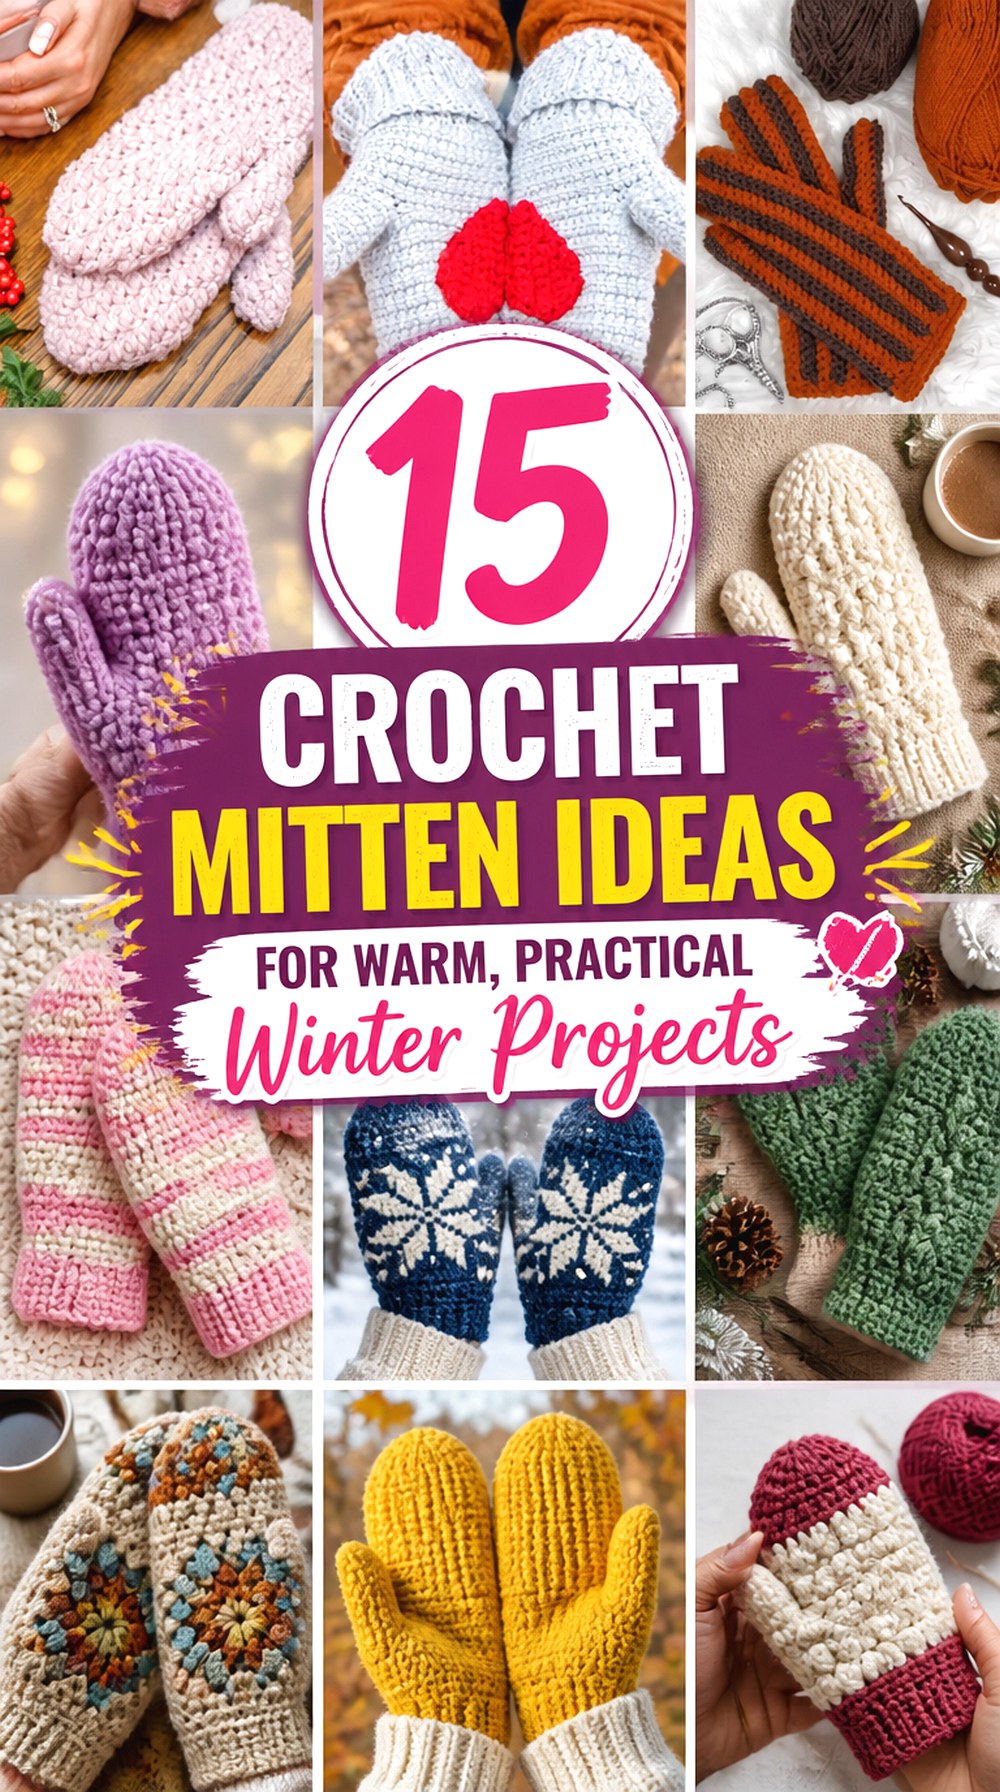

Crochet mittens can differ far more than their color. Some are worked flat and seamed, while others form a seamless tube. You can start near the fingertips or at the cuff, use thin textured fabric or bulky yarn, add raised cables, create a knit-look surface, or simplify the shape for tiny baby hands.
The 15 ideas below cover those differences rather than repeating one basic mitten in new shades. You will find adult, men’s, toddler, baby, and family-size options alongside waffle stitch, herringbone moss stitch, ribbing, cables, paired heart motifs, and double-strand construction. Each section also points out a practical fit, material, or construction detail worth checking before you commit your yarn. For exact stitch counts, rounds, sizing instructions, and creator-specific assembly, use the original tutorial linked with each project.
Quick List
- Crochet Allover Ribbed Mittens
- Crochet Two-Tone DK Rib-Cuff Mittens
- Crochet Chunky Post-Stitch Cuff Mittens
- Crochet Women’s Rounded-Top Mittens
- Crochet Raised-Ridge Adult Mittens
- Crochet Herringbone Moss Stitch Mittens
- Crochet Cable-Panel Winter Mittens
- Crochet Waffle-Stitch Two-Tone Mittens
- Crochet Bulky Men’s Single-Crochet Mittens
- Crochet Sideways One-Piece Ridged Mittens
- Crochet Seamless Family Knit-Look Mittens
- Crochet Elastic-Cuff Toddler Mittens
- Crochet Thumbless Baby Mittens
- Crochet Split-Heart Pair Mittens
- Crochet Double-Strand Cluster-Texture Mittens
Choose Mitten Construction Before You Choose the Look
The construction method affects more than the appearance. Flat or sideways designs can be comfortable for crocheters who prefer rows over working around a narrow hand opening, although the finished seam becomes part of the fit. Seamless designs avoid that seam bulk but place more importance on maintaining consistent round tension.
Starting at the fingertips can make hand length easier to assess before reaching the cuff, while cuff-up projects establish wrist fit first. Other mittens combine a separately worked ribbed cuff with a body worked in rounds. The tutorials in this collection include flat, seamless, top-down, bottom-up, and cuff-first approaches, so choose the method that matches both your preferred way of crocheting and the place where you most want control over fit.
Fit the Hand, Thumb, and Cuff as Separate Checkpoints
A mitten can match the palm and still feel wrong at the thumb or wrist. Check hand circumference, fingertip length, thumb placement, and cuff opening separately instead of assuming one size label solves every part of the fit. The amount of stretch also changes with stitch choice and yarn.
Age labels deserve similar caution. A toddler tutorial may target a particular age range, but children within that range do not all have identical hands. Adult “one size” designs also need a gauge and hand check before you make the second mitten. One men’s design in this roundup specifically emphasizes gauge and uses different thumb shaping for the two hands, which is a useful reminder not to treat every mitten as a symmetrical tube.
Let Yarn Weight Match the Texture and Dexterity You Want
Bulky yarn and doubled strands can build a substantial mitten fabric quickly, but extra thickness around the palm and thumb may feel less flexible than a finer fabric. Lighter yarn can make small texture changes easier to see and can give the hand more freedom, although the final result will depend on stitch density and gauge.
Texture matters too. Waffle stitches, cables, post stitches, herringbone surfaces, and split-single-crochet fabrics show most clearly when the yarn does not hide their structure. Before substituting yarn, compare fiber, weight, smoothness, and the tutorial gauge rather than choosing only by color. The projects here range from sport and DK through worsted and bulky constructions, plus a design using two worsted strands together.
1. Crochet Allover Ribbed Mittens

These mittens use ribbing as the main visual feature rather than limiting it to a short cuff. The repeated vertical-looking ridges give the entire hand a coordinated texture, while the top is gathered into shape and the thumb is completed as its own section. This is a useful direction if you prefer a simple surface with plenty of texture rather than cables or colorwork.
Because ribbing can contract more than a flatter stitch fabric, look at the mitten both relaxed and gently stretched before judging width. The tutorial also makes the closing and thumb stages easy to identify, which helps if those are the parts of mitten construction you usually find less intuitive.
Ribbing Changes How You Judge the Palm Width
A deeply ribbed fabric may look narrow when it is resting on a table. Measure or try it in the state it will actually be worn rather than widening the mitten simply because the relaxed piece appears slim. At the same time, avoid relying on stretch to rescue a genuinely undersized hand section. Comfortable expansion should not require the ribs to be pulled completely flat.
Watch the Gathered Fingertip for Excess Bulk
A gathered closure creates a different fingertip profile from gradual shaped decreases. Before fastening the top permanently, check whether the gathered fabric feels smooth enough on the inside and whether the mitten has enough length for the fingers to extend naturally. Thick yarn or very dense tension can make a cinched area feel more prominent than expected.
Keep the Thumb Ribbing Comfortable
The thumb experiences more bending than the straight outer edge of a mitten, so an attractive ribbed surface still needs enough room to move. Compare the thumb opening with your actual thumb rather than assuming the stretch of the fabric will compensate. If you substitute a less elastic yarn, this checkpoint becomes especially important.
2. Crochet Two Tone DK Rib Cuff Mittens

A contrasting cuff and hand section give these mittens clear color separation without requiring complicated stranded colorwork. The tutorial uses central single crochet for the main fabric, producing a compact surface with a knit-like visual effect, while ribbing keeps the wrist visually distinct. The DK-weight construction also puts this project in a different category from the chunkier winter mittens later in the list.
This is a practical choice when you want color contrast to come from large, clean areas rather than small motifs. The source also provides gauge and finished measurement information, so use those details instead of assuming that changing hooks or yarn will preserve the intended proportions.
Central Single Crochet Can Tighten Unexpectedly
Working into the center of a stitch can produce a compact fabric, especially if your natural tension is firm. Check the width of the hand section early rather than waiting until the thumb is complete. If the fabric feels board-like or difficult to insert the hook into, compare your work with the creator’s gauge before continuing.
Let the Color Break Happen at a Structural Boundary
The separate-looking cuff and hand make two colors feel deliberate rather than arbitrary. When choosing your own palette, put the stronger contrast where the construction already changes instead of inserting several extra bands that compete with the stitch texture. This keeps the mitten readable and makes small tension differences between yarn colors less visually distracting.
Compare Thumb Placement, Not Just Overall Length
The tutorial provides specific mitten and thumb-hole measurements. Those are more useful than copying only the total length because two people with similar hand lengths can have different thumb positions. Before making the second mitten, check where the opening sits when the cuff is positioned at the wrist as intended.
Original Tutorial and Creator Credit
Creator: Kenikse Crochet
3. Crochet Chunky Post Stitch Cuff Mittens

These chunky mittens combine a substantial hand fabric with a post-stitch ribbed cuff. The construction progresses from the cuff toward the fingertips, with additional shaping around the thumb area and decreases used to finish the hand. Bulky yarn gives the finished pair a more substantial winter profile than the DK and sport-weight options elsewhere in this roundup.
Choose this direction when thickness and bold stitch definition matter more to you than a low-profile glove-like fit. Because bulky yarn magnifies every layer of fabric, pay extra attention where the cuff joins the hand and where thumb shaping concentrates stitches. The accompanying pattern also discusses adjustment rather than treating the sample size as universally suitable.
Post-Stitch Ribbing Makes the Wrist a Feature
The cuff uses raised post-stitch structure rather than a plain band, so it contributes visible depth to the mitten. A smooth bulky yarn will usually show that relief more clearly than a heavily fuzzy yarn. Check that the cuff remains comfortable when stretched over the widest part of your hand; a beautiful ribbed wrist is not useful if putting the mitten on is difficult.
Bulky Yarn Can Change Thumb Dexterity
Thickness feels especially noticeable where the thumb bends and meets the palm. After the thumb opening is established, try the mitten on if possible and make sure the fabric does not bunch excessively at that junction. When substituting bulky yarns, matching category alone is not enough; different fibers and constructions can produce very different stiffness.
Cuff-Up Construction Gives You an Early Wrist Check
Because the wrist is established before the rest of the hand, you can assess whether the cuff feels secure long before finishing the mitten. That is helpful if loose cuffs are a frequent problem for you. The trade-off is that overall finger length is decided later, so keep checking the hand rather than relying only on the number of rounds from another maker.
Original Tutorial and Creator Credit
Creator: Zeens And Roger Crochet
4. Crochet Women’s Rounded Top Mittens

This women’s mitten tutorial builds a smooth, rounded hand shape with the body worked in rounds and a separately defined cuff and thumb stage. Instead of relying on a heavily textured surface, the design puts more attention on silhouette and straightforward shaping. That makes it a useful contrast to the waffle, cable, heart, and herringbone options in this collection.
The creator’s accompanying pattern covers more than one size even though the video focuses on demonstrating the construction. That makes this project worth considering when you like the basic shape but need to check a size other than the one most visible on screen. Keep the written sizing information alongside the video rather than adapting by guesswork.
A Smooth Hand Makes Shaping More Visible
Without a dramatic surface texture to distract the eye, uneven increases or abrupt changes in tension are easier to notice. Check the silhouette periodically from both the palm and side view. If one section begins flaring or narrowing unexpectedly, correct the tension or sizing issue before the cuff is added rather than hoping finishing will disguise it.
Use the Fingertip Shape as a Length Check
A rounded top needs enough room for the fingers without leaving a large empty pocket beyond them. Try the mitten on when the hand section is far enough along to assess placement. The goal is to preserve the intended rounded shape without compressing fingertips or creating unnecessary extra length.
Size Information Should Guide Adaptation
The source connects the video to an accompanying multi-size pattern. If you need a different hand circumference, use those size-specific directions and gauge information rather than adding or removing arbitrary rounds from the demonstration. Width, thumb position, and overall length interact, so a mitten rarely scales well when only one dimension is changed.
Original Tutorial and Creator Credit
Creator: Jo to the World Creations
5. Crochet Raised Ridge Adult Mittens
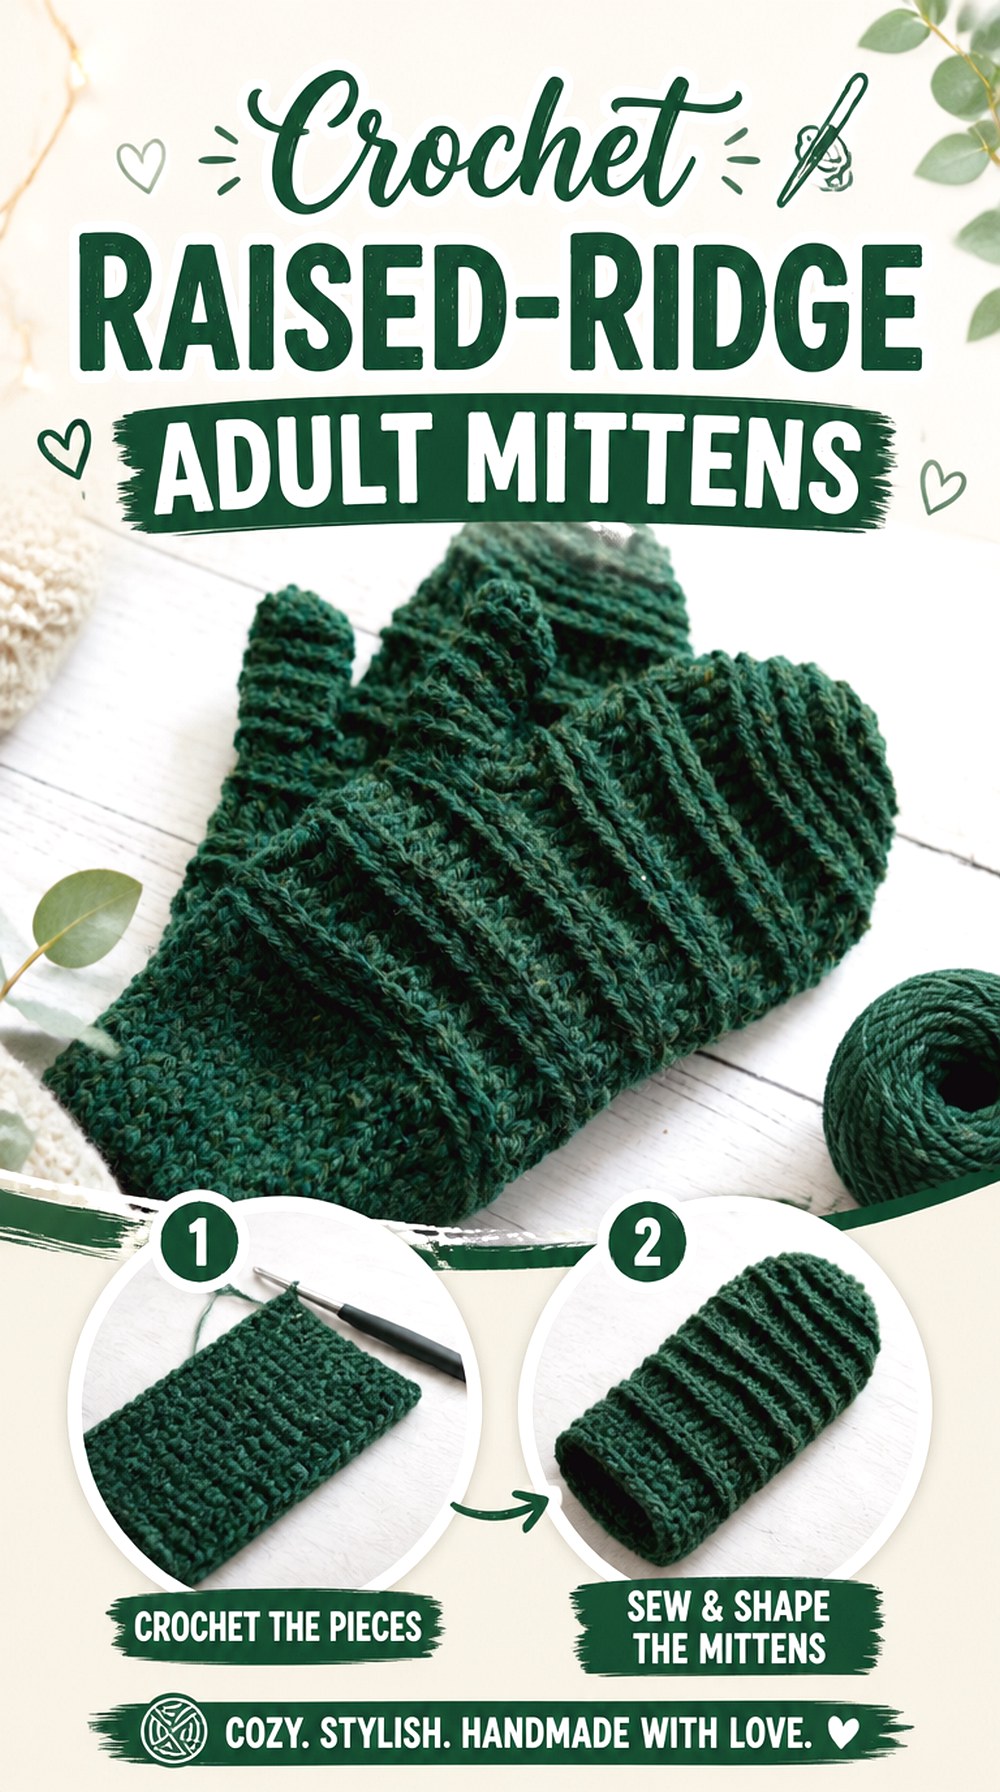
The Taylor mitten design from Rich Textures Crochet combines more than one form of raised texture, including third-loop work and front-post stitches. The result has defined horizontal and vertical surface interest without turning into a large cable motif. The source provides adult small, medium, and large sizing and constructs the cuff in rows before continuing the mitten body in rounds.
This is a strong choice if you want texture to cover the mitten more subtly than a central cable panel. It also makes yarn selection more important: a very fuzzy or novelty yarn could soften the ridges that make the design distinctive, while a smoother yarn allows the stitch changes to remain visible.
Third-Loop Work Changes the Surface Direction
Working into a different loop moves the visible strand of the stitch and creates a ridge across the fabric. That effect is one of the design’s main visual features, so inspect your work after the first textured section. If the ridge is disappearing, confirm where you are inserting the hook before repeating the section across the whole mitten.
A Dense Cuff Needs Enough Opening Stretch
The source uses a slip-stitch-based cuff, with alternatives discussed in the written pattern. Slip-stitch ribbing can look polished but may become firm when worked tightly. Before joining the cuff into the rest of the mitten, make sure it passes comfortably over the hand while still returning neatly around the wrist.
Adult Size Choice Should Start With Gauge
Small, medium, and large labels are useful only when your stitch size is reasonably close to the designer’s. Compare gauge and hand measurements before picking a size. If your yarn produces a substantially different fabric, simply choosing a larger label may also alter thumb placement and mitten length in ways you did not intend.
Original Tutorial and Creator Credit
Creator: Rich Textures Crochet
6. Crochet Herringbone Moss Stitch Mittens

These mittens use herringbone moss stitch to create a small-scale woven-looking texture rather than obvious ribs or cables. HanJan Crochet works the mitten seamlessly in the round from the lower portion upward, and the accompanying pattern covers sizes from baby through adult as well as a fingerless variation. That range makes the concept useful for coordinated family projects without assuming every hand should use identical proportions.
The texture is the main reason to choose this idea. It provides visual movement even in one color, so you do not need multiple shades to make the surface interesting. Because textured stitch patterns can pull in differently from plain crochet, gauge and comfortable hand movement deserve attention before repeating a pair.
Herringbone Texture Benefits From Clear Stitch Definition
The angled, interlocking appearance is easier to appreciate when individual stitches remain visible. A smooth DK yarn similar in character to the tutorial material will generally preserve that detail better than a highly haloed yarn. If you substitute fiber, make a small sample first and check whether the texture still reads clearly after handling or blocking.
Seamless Rounds Remove One Source of Hand Bulk
With no long side seam running along the mitten body, there is less concern about a raised join pressing against the side of the hand. The trade-off is that round tension must remain even. Watch for a gradual tightening as the hand narrows, particularly if small rounds make you pull the working yarn more firmly.
Full Mittens and Fingerless Versions Serve Different Uses
The source supports both forms, so decide which function you need before buying yarn for several pairs. A full mitten prioritizes finger coverage, while a fingerless version leaves direct fingertip access. If you are making a coordinated set for different people, the shared stitch texture can keep the pieces visually related even when their coverage differs.
Original Tutorial and Creator Credit
Creator: HanJan Crochet
7. Crochet Cable Panel Winter Mittens

Raised cables turn the back of these mittens into the focal point. MJ’s Off The Hook Designs uses post-stitch work to build a compact cable motif into a top-down mitten, followed by wrist shaping, ribbing, and a thumb. The full pattern includes sizes ranging from baby through men’s, while the video demonstration specifically focuses on the large-child version.
That distinction matters. The tutorial is useful for understanding technique and construction, but it should not be treated as a universal visual size guide. If you want an adult or baby version, use the size-specific pattern information while referring to the video for how the cable and shaping are handled.
Raised Cables Add Depth to the Back of the Hand
Post-stitch cables sit above the surrounding fabric, creating more thickness than a plain surface. That extra relief is attractive but should stay primarily where it will not interfere with gripping. A smooth, well-defined yarn also helps the cable remain recognizable; a highly textured yarn can visually merge the crossed stitches together.
The Video Demonstrates One Size, Not All Seven
The accompanying pattern offers multiple sizes, but the video demonstration centers on the large-child mitten. If you are making another size, do not copy the visible round count or proportions from the screen. Follow the appropriate written size while using the video to understand the technique, cable movement, thumb opening, and cuff construction.
Top-Down Shaping Lets You Inspect Finger Length Early
Beginning near the top means the finger section develops before the cuff is complete. Once enough of the hand exists to try on safely, check where the thumb opening and wrist transition will fall. This can prevent a nicely cabled mitten from ending up with the right width but an awkward hand length.
Original Tutorial and Creator Credit
Creator: MJ’s Off The Hook Designs
8. Crochet Waffle Stitch Two Tone Mittens

The Watson mittens use waffle stitch to create a pronounced grid texture across the hand. Lakeside Loops pairs that surface with a two-tone color option and a broad size range covering baby, toddler, child, and several adult sizes. The pattern is worked from the bottom upward in the round and also offers choices such as an optional cuff.
Compared with the chunkier cable designs, these mittens create depth through repeated small cells rather than one central motif. They are a good fit for readers who want texture distributed evenly across the whole surface. Because waffle stitch contains raised areas, matching the recommended yarn category and gauge matters if you want the mitten to retain both usable hand space and clear texture.
Waffle Cells Need Room to Stay Distinct
The grid effect depends on recessed and raised areas remaining visible. Very loose tension can soften the structure, while very tight tension can create a rigid hand. Check a small section of the mitten and flex it around your fingers. The goal is a clear texture that still bends naturally with the hand.
The Optional Cuff Changes More Than Appearance
A cuff changes wrist coverage, overall length, and the transition between sleeve and mitten. Decide whether you want the waffle texture to run close to the wrist or whether a separate cuff will provide a cleaner finishing band. If making several sizes, do not assume the same cuff depth will look proportionally identical on every hand.
The Wide Size Range Makes Measurement More Important
Baby through adult sizing gives you options, but it also makes it tempting to choose only by age or clothing size. Compare the designer’s measurements and gauge with the intended wearer. A well-matched hand circumference and thumb position will matter more than selecting a familiar label.
Original Tutorial and Creator Credit
Creator: Lakeside Loops
9. Crochet Bulky Men’s Single Crochet Mittens

This men’s mitten design uses bulky yarn and single crochet for a straightforward, substantial fabric. Unlike patterns that make both mittens identically, the written instructions distinguish right- and left-hand thumb shaping. The video demonstrates the right mitten, so the written pattern remains important when you make the matching opposite hand.
The design is especially useful as a reminder that a men’s mitten should not automatically be created by making a women’s mitten longer. Palm circumference, thumb position, and hand length all contribute to fit. The source emphasizes gauge and gives an approximate sample hand size, making measurement a better starting point than simply choosing the word “men’s.”
Right and Left Thumb Shaping Are Not Interchangeable Here
The video focuses on one hand, while the written pattern changes the shaping for the other. Mark each mitten as you work if necessary so you do not accidentally make two right hands. This is particularly important with plain surfaces, where the shaping difference may be less visually obvious before the thumbs are completed.
Bulky Single Crochet Creates a Dense Hand Fabric
Single crochet already produces a relatively compact surface, and bulky yarn increases thickness further. That combination may be appealing for winter coverage, but check whether the wearer can comfortably bend the thumb and grip objects. If substituting an even denser yarn, gauge and mobility deserve more attention than simply achieving a similar finished length.
Men’s Fit Needs More Than Extra Finger Length
Scaling only the top of the hand can leave the palm or thumb area too narrow. Use the pattern’s gauge and hand measurement guidance before beginning. If the intended wearer is available, compare the work against the actual hand before making the second mitten so you can correct fit while only one piece is invested.
Original Tutorial and Creator Credit
Creator: love.life.yarn. by Amanda Saladin
10. Crochet Sideways One Piece Ridged Mittens
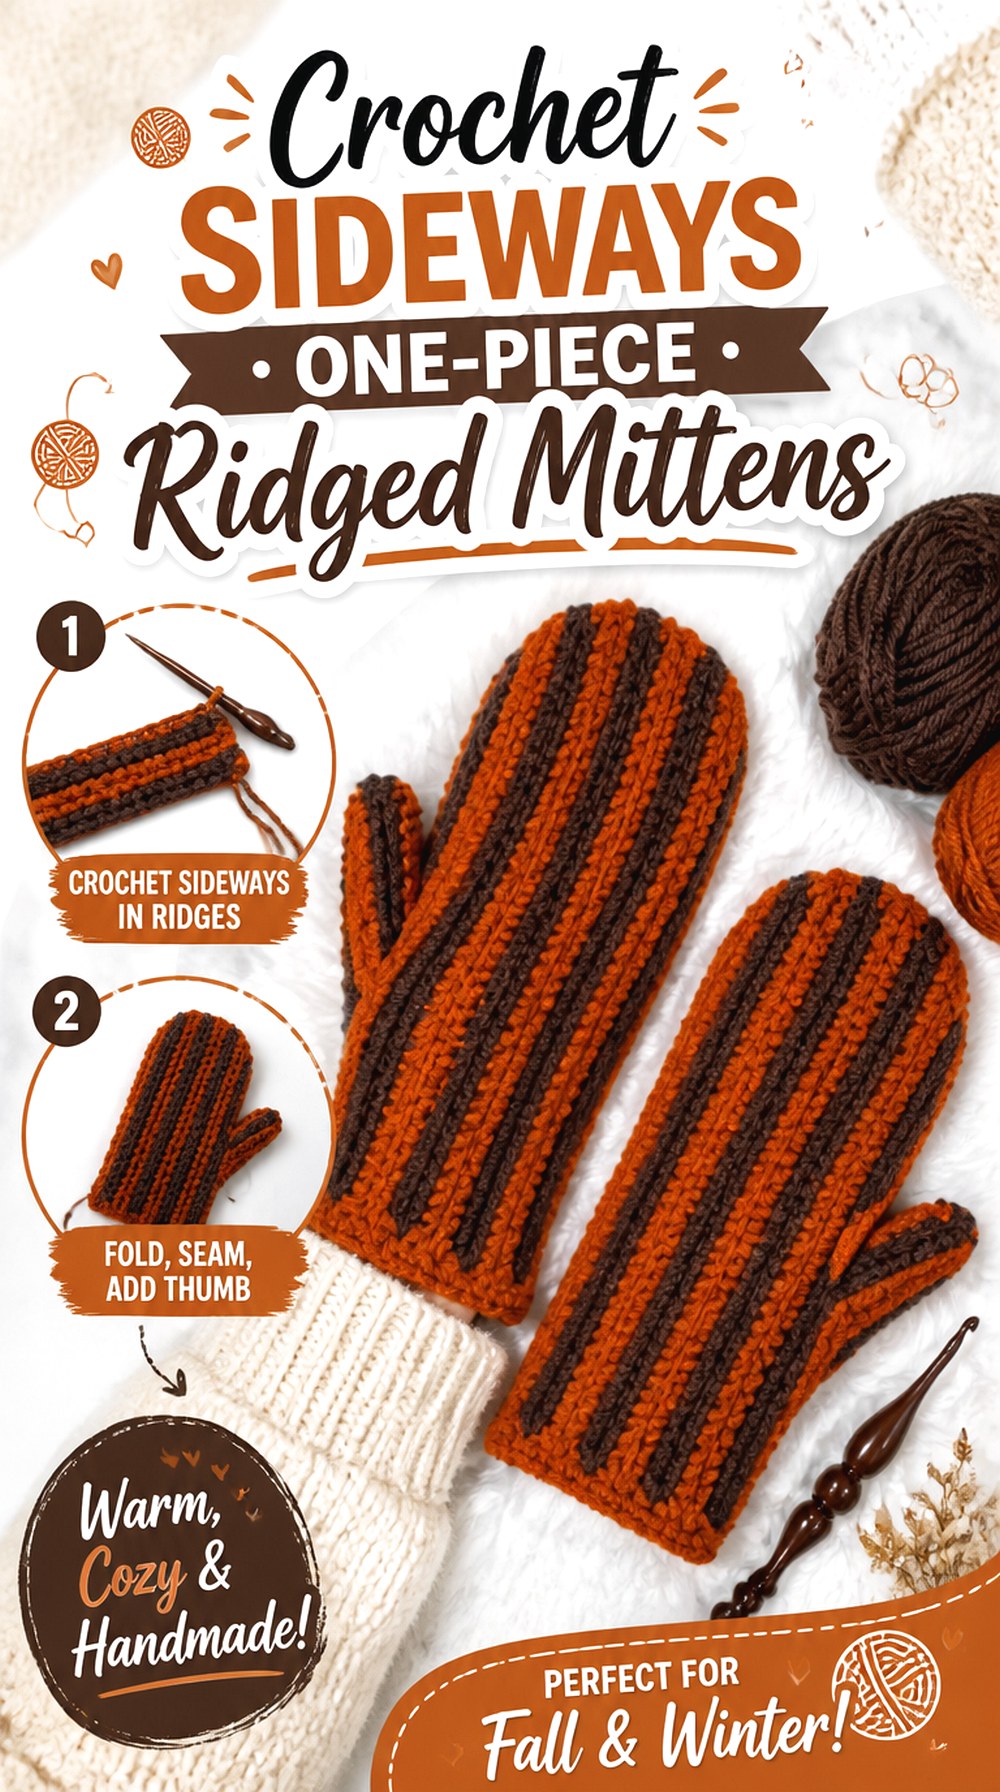
Instead of building the hand in conventional rounds, this Littlejohn’s Yarn design is worked sideways as one flat piece using back-loop single crochet. The fabric develops repeated ridges, then the panel is folded and finished into a mitten shape. The same basic construction is presented for men and women, and the right and left pieces use the same form.
This approach stands out for crocheters who enjoy working rows and would rather avoid continuously turning a small mitten tube. The trade-off is the seam: because a large part of the mitten begins as a flat panel, finishing quality has a greater effect on comfort and appearance.
Sideways Rows Put Stretch in a Different Direction
Back-loop single crochet creates pronounced ridges and allows the fabric to flex across those ridges. Because the mitten is oriented sideways, pay attention to how that stretch behaves around the hand rather than judging the panel only while it lies flat. A panel that appears short or narrow can behave differently after folding.
The Long Seam Becomes Part of the Fit
A flat construction simplifies the main crocheting but shifts some responsibility to finishing. Keep the seam neat and avoid pulling it so tightly that one side of the mitten becomes shorter or stiffer than the other. Before fastening off permanently, turn or position the seam as directed and check how it feels against the hand.
Identical Hand Shapes Simplify Pair Planning
The source notes that the right and left mittens use the same form, unlike the men’s mitten immediately above. That can make the second piece more straightforward because you are repeating rather than mirroring the main construction. Even so, compare the two panels before seaming so accidental tension drift does not leave one mitten noticeably smaller.
Original Tutorial and Creator Credit
Creator: Littlejohn’s Yarn
11. Crochet Seamless Family Knit Look Mittens

These mittens use split single crochet and related techniques to create a smooth surface that resembles knitted V-shaped fabric. Briana K’s design is worked in one piece without the long seam of the previous project, and the associated sizing runs from baby through large adult options. That combination makes it useful for family sets where you want the same visual language across very different hand sizes.
The stitch itself is the main consideration. Split single crochet can become firm when worked with excessive tension, so matching gauge affects both measurement and how pleasant the mitten feels to bend. This is not a project where forcing the hook through tight stitches is a harmless inconvenience; it can change the entire fabric.
Knit-Look Stitches Need Consistent Entry Points
The characteristic V-shaped surface comes from inserting the hook in a specific part of the previous stitch. If your entry point drifts, the texture can lose its uniform knit-like appearance. Pause after several rounds and inspect the columns before continuing, particularly in areas where shaping changes the stitch spacing.
Seamless Construction Reduces Side-Seam Bulk
Working the mitten as one piece avoids a long folded seam along the hand. That can create a cleaner interior, especially in smaller sizes. The trade-off is that you cannot rely on seaming to correct a slightly uneven flat panel, so circumference and tension need to be monitored while the mitten is still on the hook.
Nine Sizes Should Be Treated as Separate Fits
The source provides a wide family range rather than one mitten that is simply lengthened. Use the measurements and instructions for the intended size. Baby, child, and adult hands differ in more than total length, so scaling one sample informally can move the thumb opening or change palm ease.
Original Tutorial and Creator Credit
Creator: Briana K
12. Crochet Elastic Cuff Toddler Mittens

The Crochet Crowd’s tutorial focuses specifically on a toddler mitten sized for roughly ages two to four, while the broader family pattern includes additional child and adult sizes. A slip-stitch technique creates the cuff, giving the wrist a more elastic structure according to the designer. The hand itself remains simple enough that fit and cuff function stay visually important.
For toddler mittens, the wrist opening deserves extra attention. It needs to pass over the hand comfortably while still sitting securely enough for normal wear. An age range is useful for choosing a starting size, but the intended child’s actual hand remains the better check before you commit to a second mitten.
The Wrist Opening Has Two Jobs
The cuff must stretch enough for the child’s hand to pass through, then return close enough to the wrist to avoid feeling loose. Test both conditions rather than measuring only the resting cuff. If a substitute yarn has less recovery than the original, the same dimensions may not behave the same way.
Toddler Age Labels Are Only a Starting Point
The video demonstrates the two-to-four-year size, but children of the same age can have different hand measurements. Compare the pattern information with the intended wearer whenever possible. If the hand is wider but not much longer, simply adding length would solve the wrong problem.
Keep Finishing Simple Around Small Hands
A clean cuff and plain mitten body reduce the need for extra decorative attachments. If you customize a child’s pair, avoid treating loose buttons, beads, or dangling cords as harmless decoration. Any added detail should be securely constructed and appropriate to how the mittens will actually be worn and supervised.
Original Tutorial and Creator Credit
Creator: The Crochet Crowd
13. Crochet Thumbless Baby Mittens
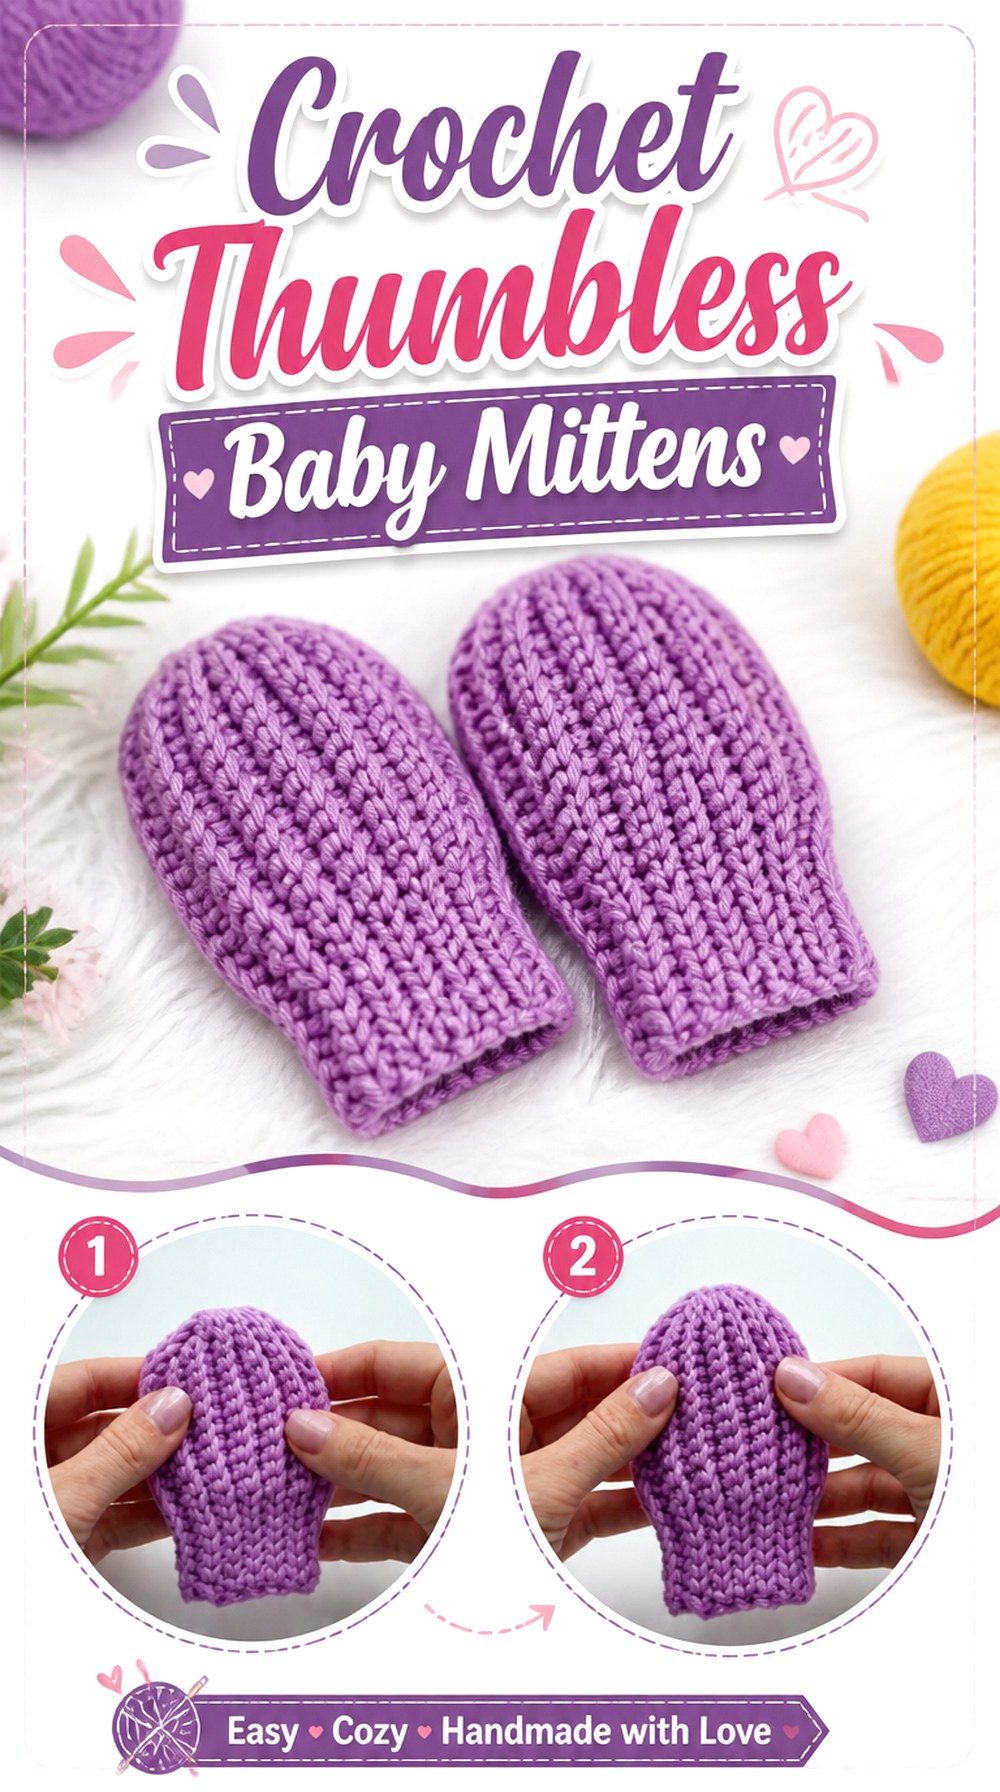
These small baby mittens remove the separate thumb entirely, creating a simple enclosed hand shape with a ribbed, elasticated cuff. Crochetclubstore describes the tutorial as intended for approximately zero to three months. That thumbless construction distinguishes the project from simply shrinking an adult mitten: the baby’s whole hand sits inside one small pocket.
The simplified shape can make dressing tiny hands less fiddly, but size and cuff comfort still need to be checked carefully. The creator also notes that changing yarn can affect the finished size. Treat fiber substitution as a sizing decision, not merely a color choice, especially on a project this small.
A Thumbless Shape Avoids Tiny Thumb Placement
There is no need to align a narrow thumb opening with a very small hand. That simplifies the silhouette and gives the fingers and thumb one shared space. The trade-off is less separated hand movement, which is normal for this particular mitten concept but makes it different in function from an older child’s shaped mitten.
Check Cuff Comfort Before Making the Pair
A baby cuff should not rely on being extremely tight to stay in place. Compare the finished opening and recovery with the intended use, and make sure the edge feels smooth. If the ribbing leaves deep pressure or requires excessive stretching to put on, revisit yarn, hook, or sizing rather than assuming it will loosen later.
Yarn Substitution Can Change a Tiny Mitten Quickly
On a small project, even modest changes in stitch size can noticeably affect the final proportions. The creator specifically notes that using a different yarn can alter size. If you substitute, make one mitten first, check the result, and only then repeat the second rather than producing a full pair based on an untested change.
Original Tutorial and Creator Credit
Creator: Crochetclubstore
14. Crochet Split Heart Pair Mittens
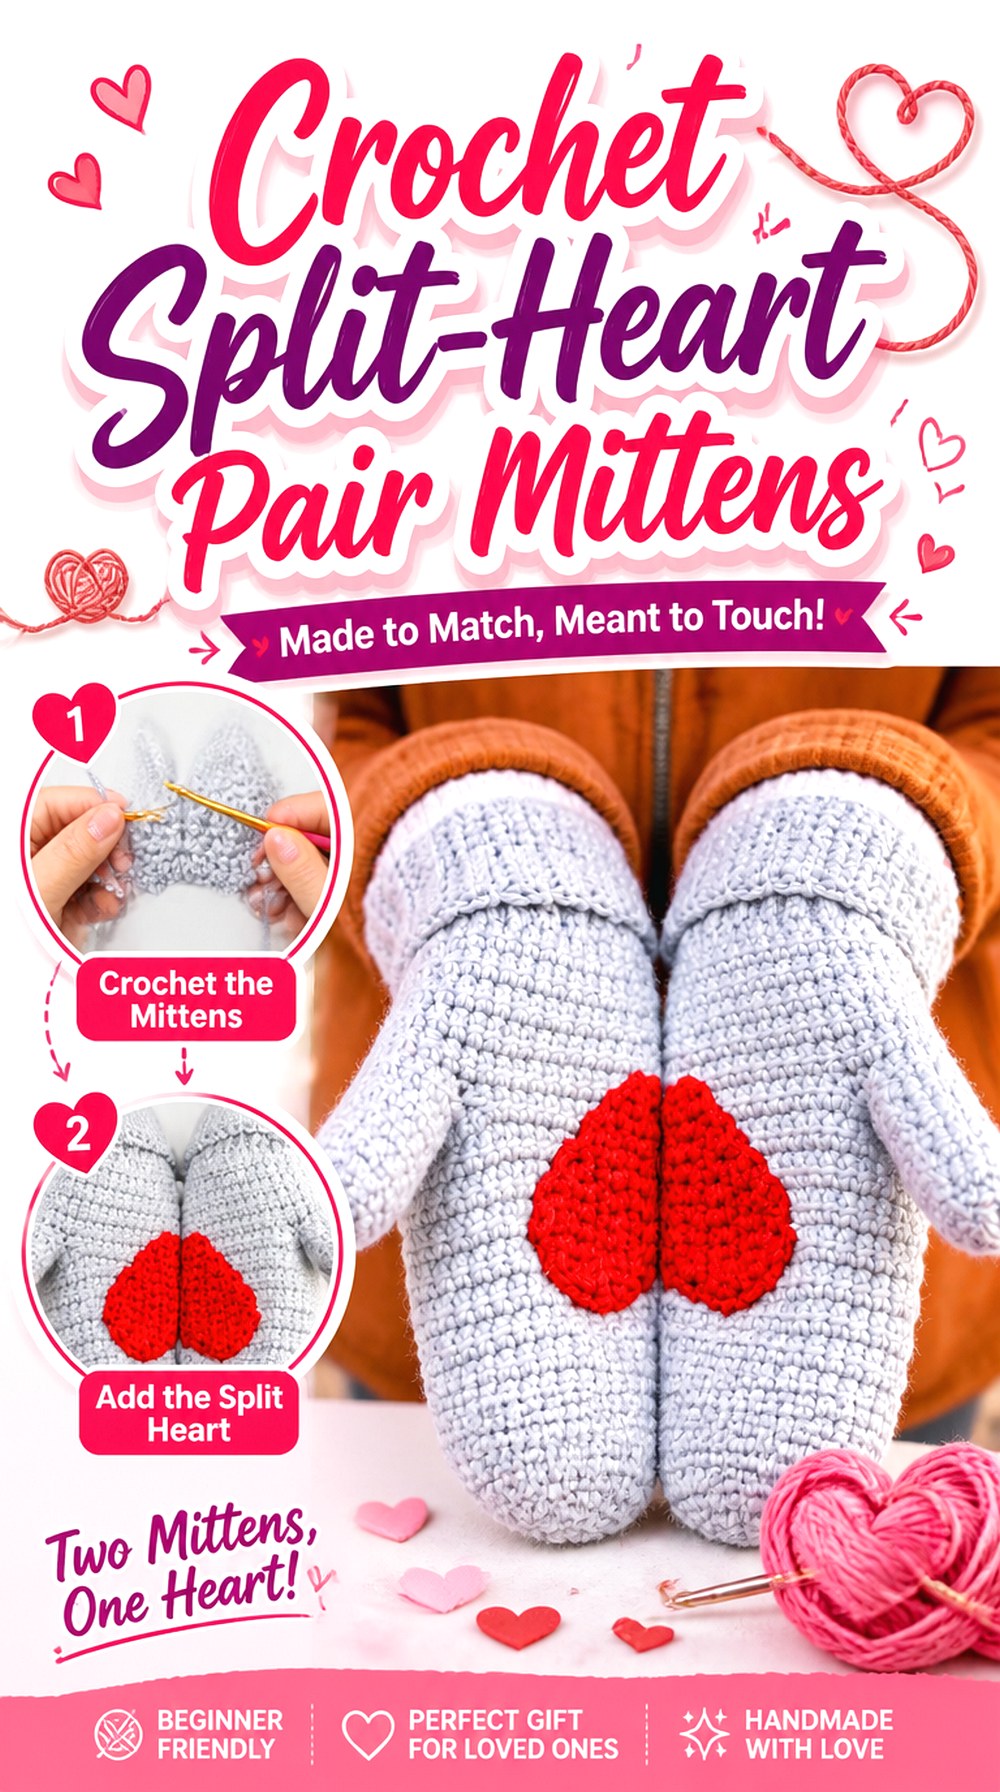
This pair treats the two mittens as one coordinated design. Each hand carries part of a heart so the motif becomes complete when the mittens are brought together. Nicki’s Homemade Crafts combines that paired graphic with ribbing and a linked-double-crochet-based fabric, and the accompanying pattern offers sizes from baby through large adult options.
The appeal is not simply decorative colorwork. Orientation becomes part of the construction because the two halves need to face each other correctly. That gives the project a built-in reason to distinguish the left and right mitten visually, making it especially suitable for a coordinated gift or statement winter pair.
The Motif Only Works When Both Hands Are Oriented Correctly
A half-heart on the wrong side of one mitten will not form the intended full image when the hands meet. Keep left and right pieces clearly identified as you work. Before finishing ends, place the pair side by side in the intended orientation and confirm that the motif direction is correct.
Contrast Determines How Clearly the Heart Reads
The heart idea depends on the two motif areas being visually distinguishable. Colors do not need to be extremely bright, but very similar values may make the halves disappear into the background. View your yarn choices together in normal daylight before starting if the completed heart effect is important to you.
Set the Size Before Fine-Tuning Motif Placement
The pattern includes many sizes, so establish the correct mitten dimensions first. Do not choose a different size merely to make the motif appear larger or smaller. A decorative half-heart should follow the hand fit, not control it; otherwise the thumb and cuff can end up incorrectly placed for the intended wearer.
Original Tutorial and Creator Credit
Creator: Nicki’s Homemade Crafts
15. Crochet Double Strand Cluster Texture Mittens
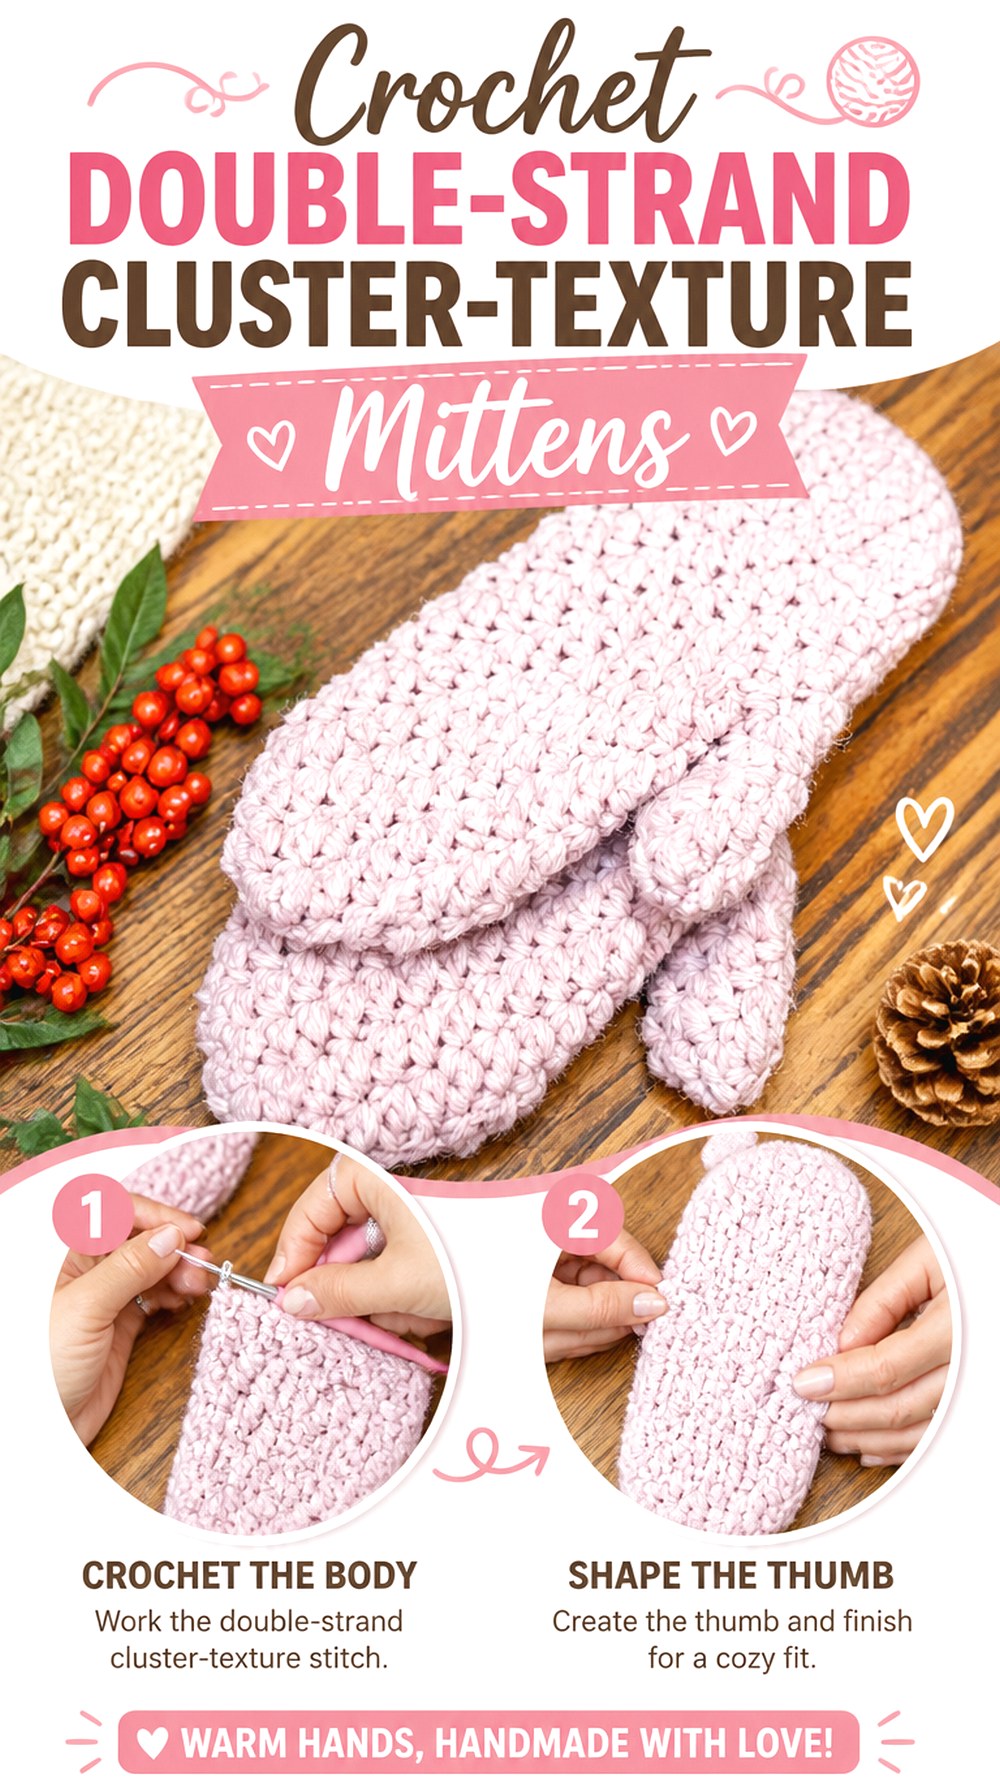
Just Be Crafty’s Winter Walk design uses two strands of worsted-weight yarn held together, creating a thicker fabric without starting from a single bulky yarn. A repeated single-crochet and double-crochet combination adds small-scale texture, while the mitten is worked seamlessly from the lower portion upward with a ribbed cuff, thumb shaping, and a decreased fingertip.
This construction is useful if you already own coordinating worsted yarns or like the blended visual effect two strands can create. It also requires more tension awareness: both strands need to travel together consistently so that one does not form loose loops on the surface. The source provides one main size, making gauge and try-on checks especially important.
Two Strands Create Thickness Without One Bulky Yarn
Holding two yarns together changes both the visual blend and the physical density of the mitten. Treat the pair of strands as one working unit and watch that both are caught in every stitch. If one strand repeatedly hangs loose, the fabric can develop snag-prone loops and an uneven surface.
The Cluster-Like Texture Adds Surface Without Large Cables
The alternating stitch combination produces small repeated texture rather than tall raised motifs. That makes this option visually quieter than the cable mittens while still being more dimensional than plain single crochet. A strongly variegated yarn may compete with that surface; solid or gently blended strands can make the stitch rhythm easier to see.
One-Size Construction Makes Try-On Checks Valuable
The source centers on one main finished size rather than a broad graded range. If your hand differs from that fit, consult the creator’s gauge and adjustment guidance rather than assuming a different hook alone will solve the problem. Check palm width, thumb position, and hand length independently as the mitten grows.
How the 15 Crochet Mitten Ideas Compare
| Crochet Mitten Idea | Main Difference | Important Check Before Choosing |
|---|---|---|
| Allover Ribbed Mittens | Ribbing covers the full hand | Judge width while the ribs are comfortably stretched |
| Two-Tone DK Rib-Cuff Mittens | Knit-look central single crochet with color-blocked cuff | Compare gauge and thumb position |
| Chunky Post-Stitch Cuff Mittens | Bulky fabric with raised cuff ribbing | Check thumb mobility and cuff opening |
| Women’s Rounded-Top Mittens | Smooth rounded silhouette | Match size information rather than estimating |
| Raised-Ridge Adult Mittens | Third-loop and post-stitch texture | Make sure the cuff is not worked too tightly |
| Herringbone Moss Stitch Mittens | Small woven-looking seamless texture | Keep round tension flexible |
| Cable-Panel Winter Mittens | Raised statement cable | Use the correct written size; video demonstrates one size |
| Waffle-Stitch Two-Tone Mittens | Deep grid texture | Keep the waffle fabric flexible enough for the hand |
| Bulky Men’s Single-Crochet Mittens | Dense men’s shaping | Follow separate right- and left-hand instructions |
| Sideways One-Piece Ridged Mittens | Flat sideways construction | Finish the long seam smoothly |
| Seamless Family Knit-Look Mittens | Split-single-crochet knit effect | Prevent the stitch tension from becoming too firm |
| Elastic-Cuff Toddler Mittens | Toddler proportions and stretchy wrist | Check the actual child’s hand instead of age alone |
| Thumbless Baby Mittens | No separate thumb | Verify cuff comfort and finished scale |
| Split-Heart Pair Mittens | Two halves form one motif | Keep left/right motif orientation correct |
| Double-Strand Cluster-Texture Mittens | Two worsted strands held together | Control both strands and check one-size fit |
Conclusion
Choose your mitten project by construction and fit before choosing it by color. The sideways one-piece and allover-ribbed ideas suit readers who prefer working in rows, while the seamless knit-look, waffle, herringbone, and double-strand versions keep the hand in continuous rounds. Cable and split-heart mittens make the surface the focal point, while the toddler and thumbless baby options address very different small-hand proportions. For extra thickness, compare the bulky and double-strand projects; for finer texture, look toward DK or sport-weight options.
Once you have selected the shape and fabric that match your intended wearer, use the original creator tutorials for exact stitch counts, sizing, shaping, and finishing details.
Frequently Asked Questions
How much ease should crochet mittens have around the hand?
There is no single amount of ease that works for every mitten because stitch stretch, yarn, lining, hand shape, and the intended fit all change the result. Follow the designer’s measurements and gauge, then check whether the mitten can bend with the hand without feeling baggy. A deeply ribbed fabric can tolerate a different fit from a dense split-single-crochet or bulky single-crochet fabric.
Should I crochet the second mitten immediately after the first?
Usually, yes. Making the second mitten while the first is fresh in your memory helps maintain similar tension and makes it easier to notice differences. Before starting, record any legitimate fit adjustment you made to the first. Also check whether the pattern uses identical pieces or separate right- and left-hand shaping; the men’s mitten in this roundup specifically distinguishes the two hands.
Can I substitute a bulky yarn for a DK mitten pattern?
Not without recalculating or following designer-approved adjustment guidance. A heavier yarn changes stitch size, overall circumference, thumb opening, fabric thickness, and potentially hand mobility. Changing the hook alone may not recreate the original proportions. If you want a truly chunky mitten, it is usually more predictable to begin with a tutorial designed around bulky yarn rather than forcing a fine-yarn pattern into a different gauge.
Why does my crochet mitten fit the palm but not the thumb?
Palm width and thumb placement are separate measurements. The hand section can have the correct circumference while the thumb opening sits too high, too low, or too close to the side. Try the first mitten on at the thumb-opening stage whenever the construction allows. If adapting a pattern, compare both the opening position and thumb circumference rather than adding general width to the entire mitten.
Are ribbed crochet cuffs always stretchier than plain cuffs?
Not automatically. Ribbing can create useful stretch, but its behavior depends on stitch choice, direction, yarn elasticity, and tension. A tightly worked slip-stitch cuff may be firm even though it has a ribbed appearance. Test whether the finished opening can comfortably pass over the hand and then recover around the wrist instead of deciding from appearance alone.
Should baby and toddler mittens use the same construction as adult mittens?
Not necessarily. Small-hand proportions and intended use can justify a different design. The baby tutorial in this collection intentionally removes the separate thumb, while the toddler project uses child-specific sizing and a stretchy cuff. Avoid simply shrinking an adult mitten by eye. Use measurements and a pattern intended for the relevant size, and keep added cords or loose decorative components out of small-child designs.
How do I keep two crochet mittens the same size?
Use the same yarn, hook, gauge, and working tension, and compare the two pieces at several points instead of waiting until both are finished. Count or measure according to the creator’s pattern rather than using the first mitten only as a visual template. If the first mitten was blocked before comparison, treat the second the same way so you are comparing fabric in equivalent conditions.


