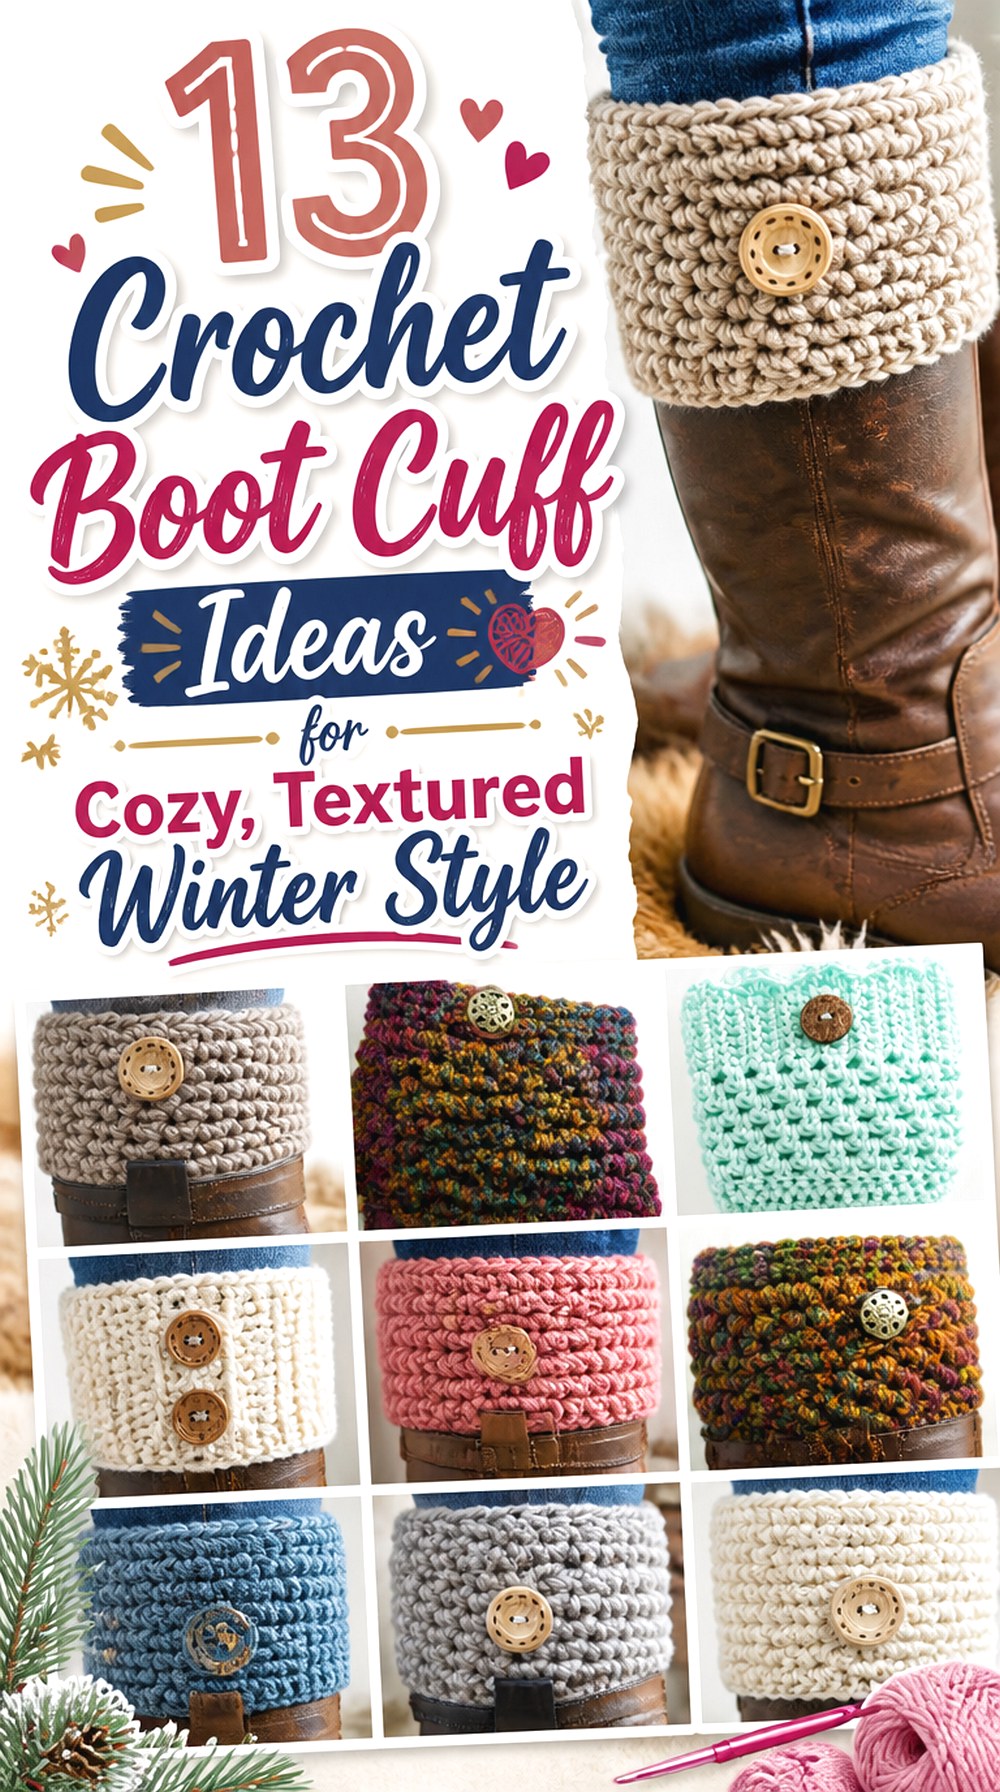

Crochet boot cuffs can create very different looks without adding the length and coverage of full leg warmers. A slim ribbed cuff can sit quietly above a fitted boot, while puff stitches, chunky ribs, ruffles, lace, scallops, and buttons turn the upper edge into a more noticeable accessory. The construction matters too: some designs emphasize stretch, while others rely on denser texture or decorative edging.
These 13 crochet boot cuff ideas cover those differences instead of repeating the same basic band in different colors. You will find custom-fit ribbing, C2C texture, reversible Tunisian crochet, lace, knit-look fabric, ruffles, puff stitches, and several approaches to decorative edging. Along the way, the comparisons and fit checkpoints can help you decide which style makes sense for your boots, yarn, and preferred amount of bulk.
Quick List
- Crochet Custom-Fit Ribbed Boot Cuffs with Picot Edge
- Crochet Chunky Ribbed Button Boot Cuffs
- Crochet C2C Textured Boot Cuffs
- Crochet Victorian-Edge Button Boot Cuffs
- Crochet Reversible Tunisian Boot Cuffs
- Crochet Knit-Look Boot Cuffs and Short Leg Warmers
- Crochet Lace Boot Topper Cuffs
- Crochet Everyday Worsted Boot Cuffs
- Crochet Super-Ribbed Boot Topper Cuffs
- Crochet Ruffled Boot Cuffs
- Crochet Bulky Single-Crochet Button Cuffs
- Crochet Puff-Stitch Boot Cuffs
- Crochet Scalloped-Edge Boot Cuffs
Measure Where the Boot Cuff Will Actually Sit
The useful measurement is the circumference of your leg where the cuff will be worn, not simply a generic calf measurement. A tall boot may place its upper edge at a narrower or wider part of the leg than an ankle-height style, so the same cuff can behave differently with two pairs of boots.
Think about how the cuff will be worn before finishing a pair. If part of it will tuck inside the boot, check that the fabric can sit comfortably between your leg and the shaft. If most of the cuff stays above the boot, pay closer attention to whether the upper edge stays in place without feeling restrictive.
Ribbed constructions can provide useful stretch, but stretch is not a substitute for checking fit. A good checkpoint is to test the first cuff with the intended boot before making the second one.
Choose Texture According to the Boot Opening
Texture changes both appearance and physical bulk. Flat ribbing and lighter openwork are useful when there is limited room inside a fitted boot shaft. Chunky ribs, puff stitches, dense Tunisian fabric, and pronounced decorative bands create a stronger visual effect but may need more space.
Placement also matters. Buttons, scallops, picots, or ruffles usually make more sense when their decorative portion stays above the boot rather than being compressed inside it. If a boot has buckles, zippers, or other hardware near the top, consider whether raised crochet details could repeatedly rub against them.
Yarn choice affects the same decision. A thicker fabric can make a small cuff look substantial, while a smoother, less bulky fabric leaves more room for stitch texture and edging to provide the visual interest.
1. Crochet Custom Fit Ribbed Boot Cuffs with Picot Edge
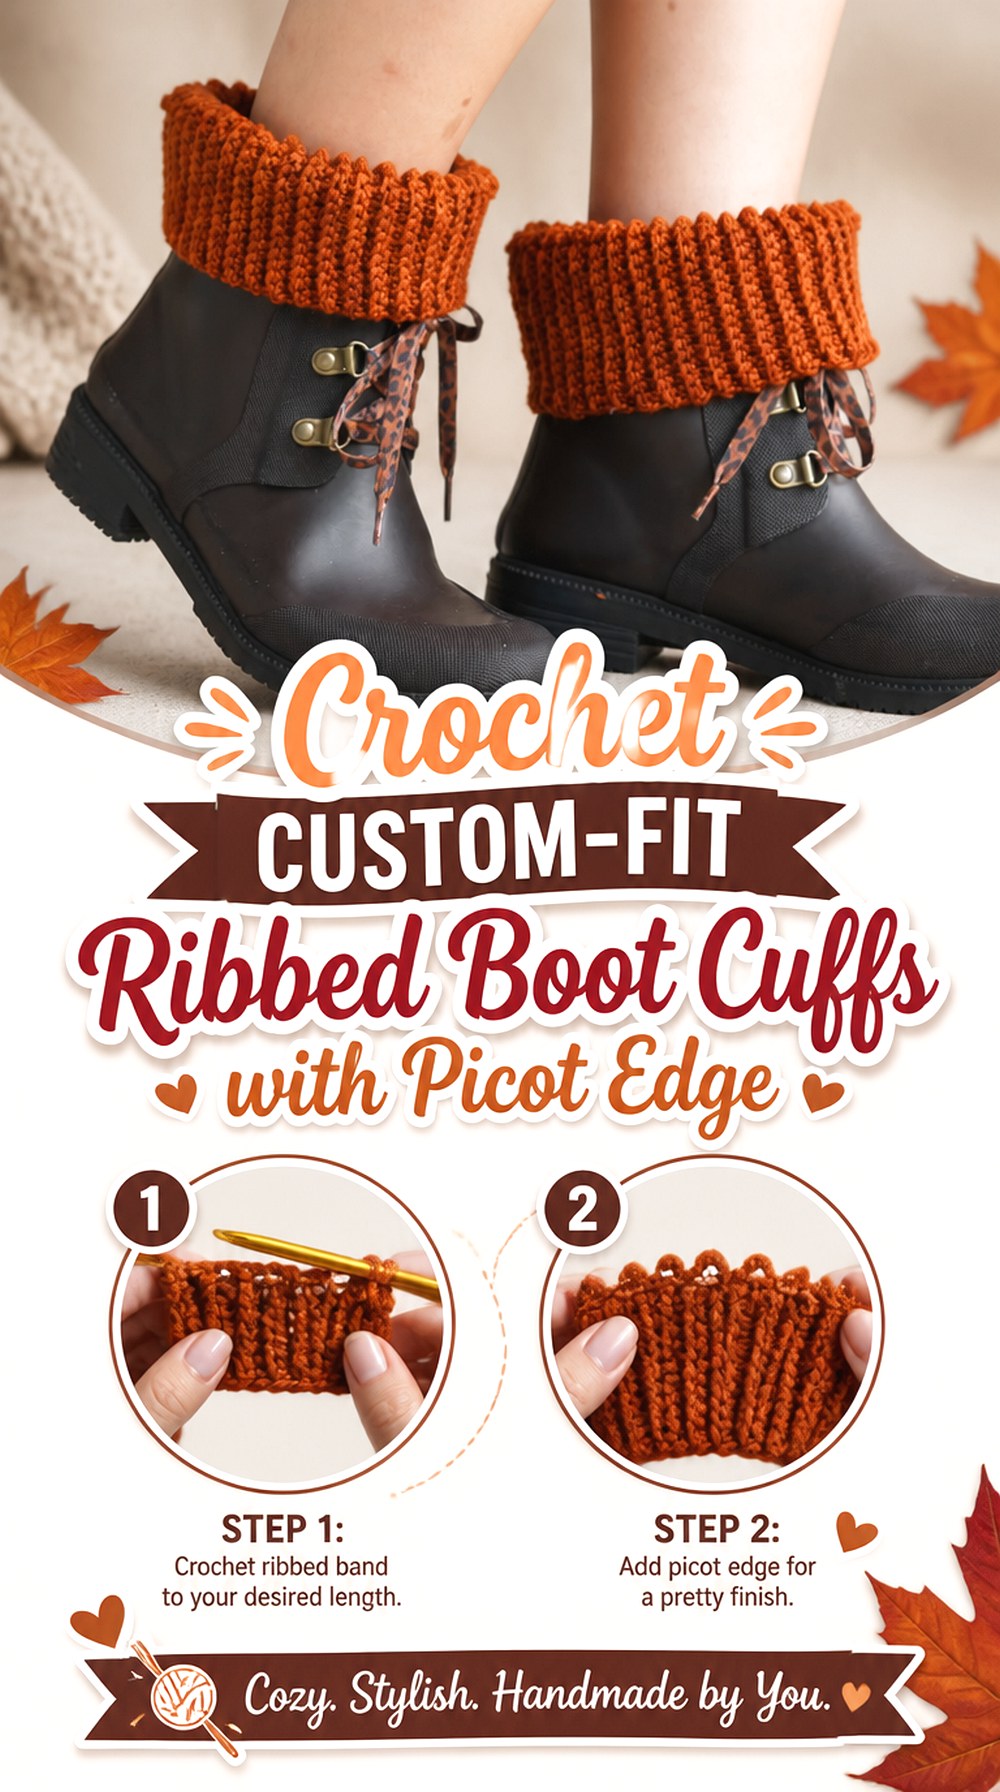
A narrow ribbed body paired with a picot-trimmed edge gives this crochet boot cuff a useful balance between simplicity and decoration. The ribbing provides the main structure, while the small pointed edge creates a finished detail that can peek above the boot without becoming as dominant as a full ruffle.
This option makes sense when you want the cuff to look polished but still work with several boot shapes. It is also a helpful choice for crocheters who want to think about fit independently of a single standard size. Because the source tutorial discusses customizing the cuffs for different yarns and sizes, the project is especially relevant when you already have a yarn in mind rather than wanting to match one exact sample.
Picot Edging Adds Detail Without a Heavy Top Band
A picot border introduces small points along the visible edge, so the decoration is concentrated where it can actually be seen. Compared with a thick ruffle or dimensional puff texture, it keeps the silhouette relatively restrained.
That makes this style worth considering for boots with a cleaner shape or outfits where you want the cuff to function as a small accent. Before finishing, check how much of the picot edge remains visible when the cuff is positioned at the actual boot line.
Custom Fit Starts at the Actual Boot Line
The tutorial specifically includes guidance for custom-fit cuffs, which is useful because boot height changes where the accessory sits on the leg. Measure at that location rather than relying only on a general clothing size.
The practical checkpoint is stretch as well as circumference. The cuff needs enough give to pull into place, but its relaxed fit should still suit the intended position. Check this on the first cuff before duplicating it.
Check the Seam Before You Commit to Both Cuffs
With a ribbed cuff, an uneven join can stand out because the surrounding texture creates clear vertical lines. Before considering the first cuff finished, look at the joined area from the outside and make sure the transition does not noticeably twist the fabric.
Also note where you prefer the seam to sit when the cuff is worn. Making that decision on the first cuff helps you finish the second one consistently without needing to alter the construction itself.
2. Crochet Chunky Ribbed Button Boot Cuffs
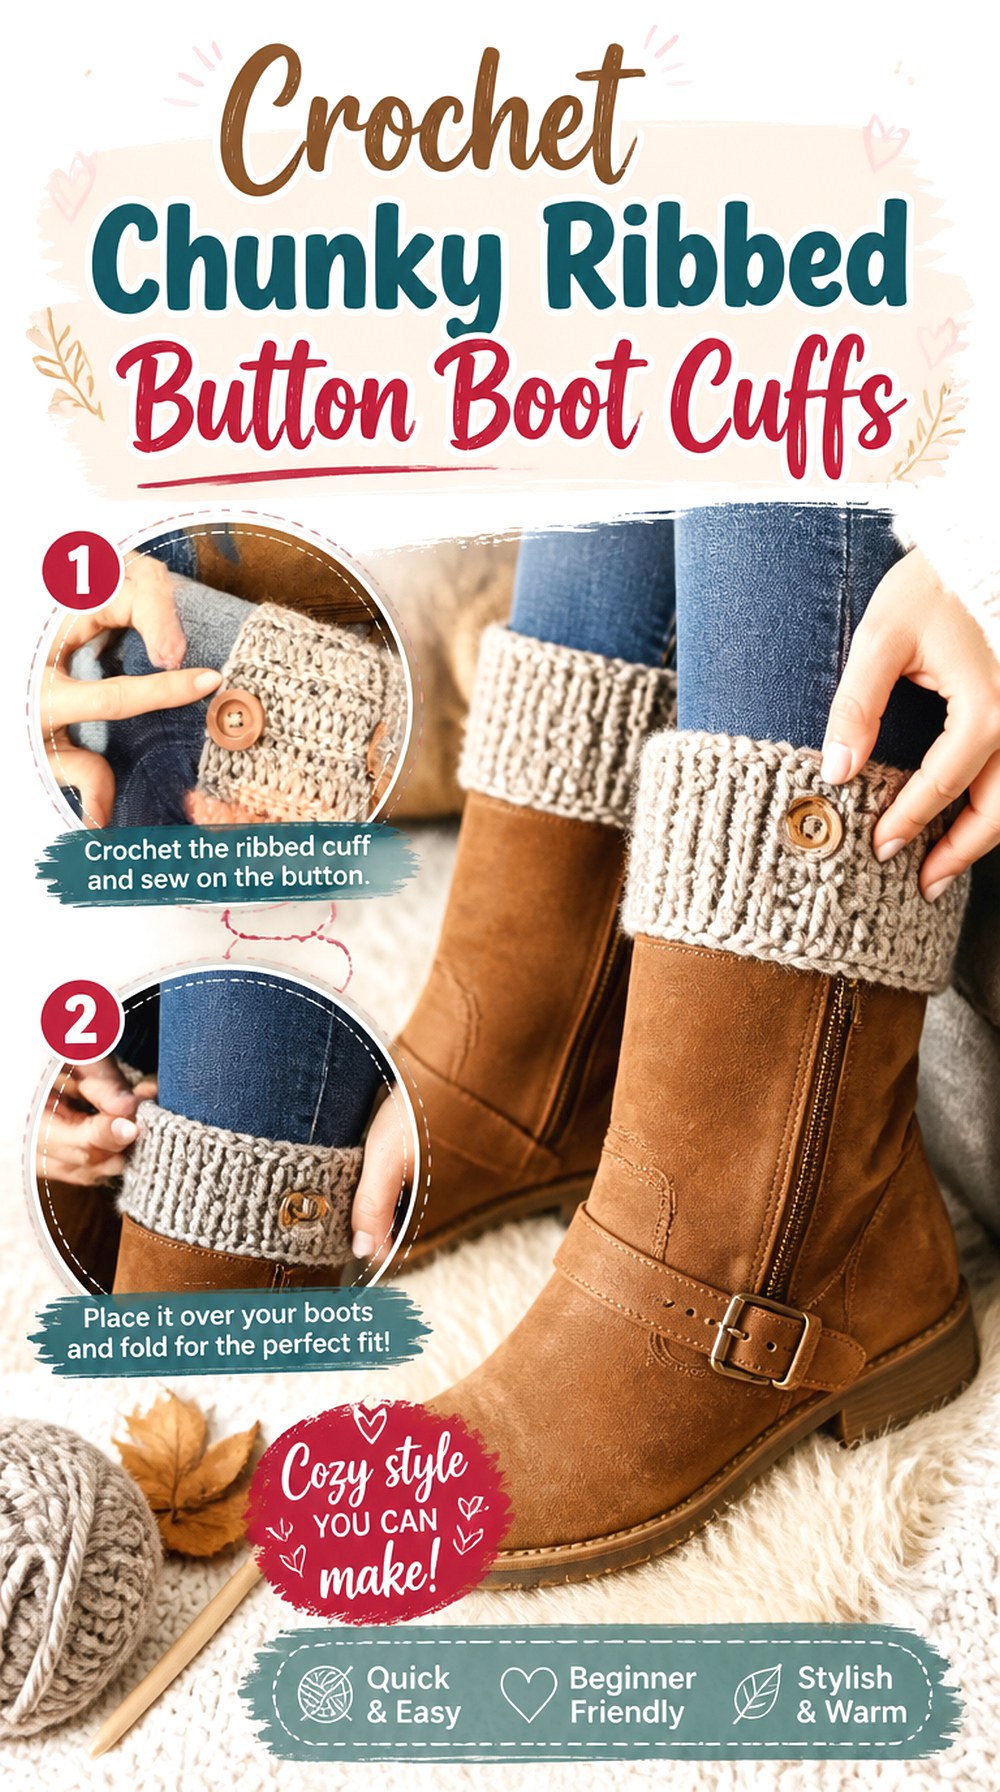
These crochet boot cuffs combine substantial ribbing with decorative buttons, creating a warmer-looking accessory with more visual weight than the slimmer picot style. The ribbed surface gives the cuff a strong vertical texture, while the buttons create a defined focal point near the visible section.
This design works particularly well when the cuff itself is meant to be noticeable rather than almost disappearing into the boot. The source tutorial uses a chunky approach and includes two buttons, so it is worth thinking about both shaft space and button placement before choosing it. A roomy boot opening will generally accommodate a thicker crochet layer more easily than a very close-fitting shaft.
Chunky Ribbing Needs Space Inside the Boot Shaft
Thicker ribbed fabric can compress, but it still occupies more room than a lightweight lace or flatter cuff. Try the first finished section with the boot you plan to wear rather than evaluating comfort on the leg alone.
If the boot already fits closely around your calf, the amount of fabric that extends inside the shaft becomes an important design consideration. Keeping more of the textured section above the boot may preserve the look while reducing unnecessary layering.
Buttons Should Stay Above the Boot Edge
The buttons are decorative details, so they are most useful where they remain visible. If they fall directly against a tight boot opening, they may disappear from view or create an awkward raised spot.
Position the cuff on your leg with the boot before deciding how you like the finished orientation. Also check nearby zippers or buckles. A small rotation of the cuff can often place the decorative side where it is visible without crowding existing boot hardware.
Match the Second Cuff Before Finishing
Pronounced ribbing makes differences between two cuffs easier to notice. Once the first cuff has reached the fit and height you want, use the finished object as a comparison reference while working on its partner.
This does not require copying measurements from someone else’s project. Instead, compare your own two pieces in a relaxed state and after gentle stretching. Matching the pair before final finishing can prevent one cuff from sitting noticeably higher or feeling firmer than the other.
Original Tutorial and Creator Credit
Creator: MJ’s Off The Hook Designs
3. Crochet C2C Textured Boot Cuffs
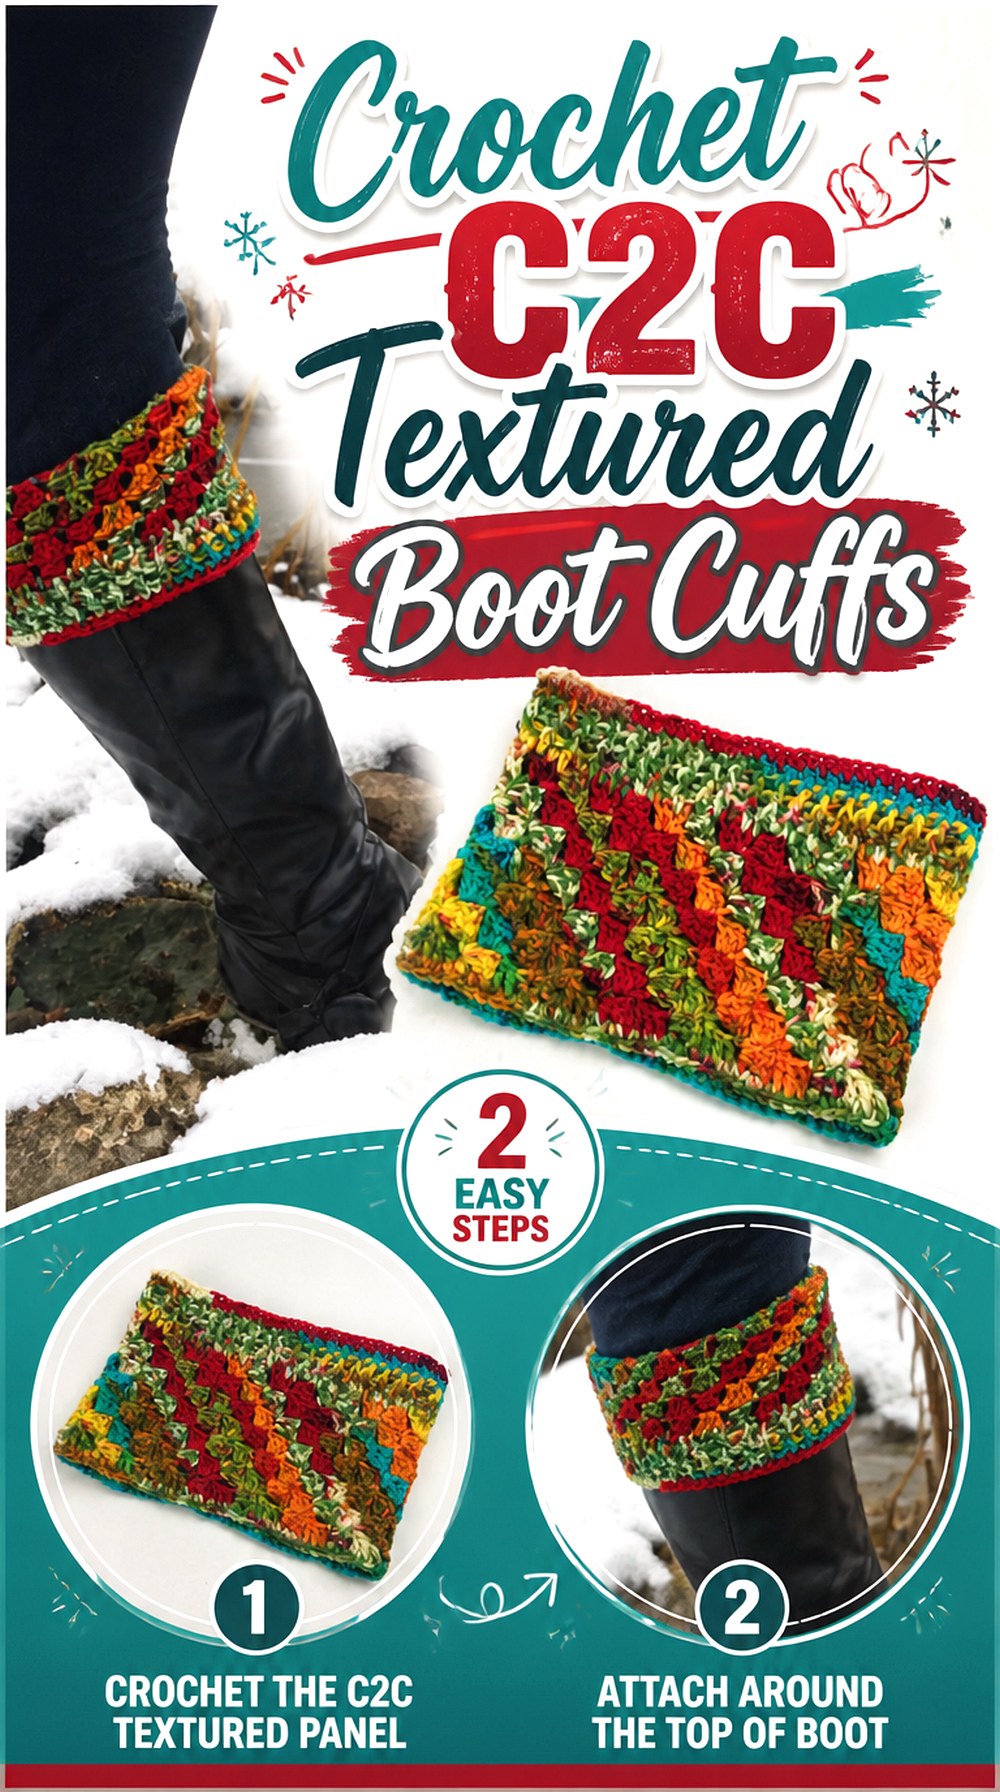
Corner-to-corner construction gives these crochet boot cuffs a different visual language from conventional horizontal or vertical ribbing. Instead of relying on one straight band of texture, the fabric develops a more block-like, directional surface that makes the cuff itself the main design feature.
This is a good option when you want to explore C2C crochet on a wearable accessory rather than committing to a large blanket or panel. The finished cuff can still serve the same practical role around a boot opening, but its texture makes it stand apart from the simpler bands in this collection. The Crochet Crowd tutorial is specifically devoted to C2C boot cuffs, providing a direct project match rather than a technique that has to be adapted from another item.
Diagonal C2C Texture Changes the Visual Direction
C2C fabric creates movement across the cuff rather than emphasizing only straight vertical ribs. That directional texture can be especially noticeable in a solid or lightly variegated yarn where the stitch structure remains readable.
Before choosing a highly busy color combination, decide whether you want the eye to notice the construction or the color first. When texture is the main reason for selecting this design, a yarn that keeps the individual blocks visually distinct can help preserve that effect.
Block Structure Can Feel Firmer Than Simple Ribbing
A textured C2C cuff does not behave exactly like a deeply elastic ribbed band, so fit should be checked on the actual leg and boot instead of inferred from a ribbed project you have made before.
Pay particular attention to how comfortably the cuff moves into place and whether the boot shaft compresses the fabric. If the finished cuff feels more structured, the preferred circumference may differ from a softer style even when both are meant for the same person.
Watch the Edge Alignment at the Join
Directional texture makes alignment important because a poorly matched join can interrupt the visual flow of the blocks. Before completing the finishing, position the edges together and look at the outside surface rather than judging only from the working side.
Once joined, try the cuff with its intended boot and rotate the seam to a less prominent position if preferred. That simple styling decision can let the C2C texture remain the dominant feature.
Original Tutorial and Creator Credit
Creator: The Crochet Crowd
4. Crochet Victorian Edge Button Boot Cuffs
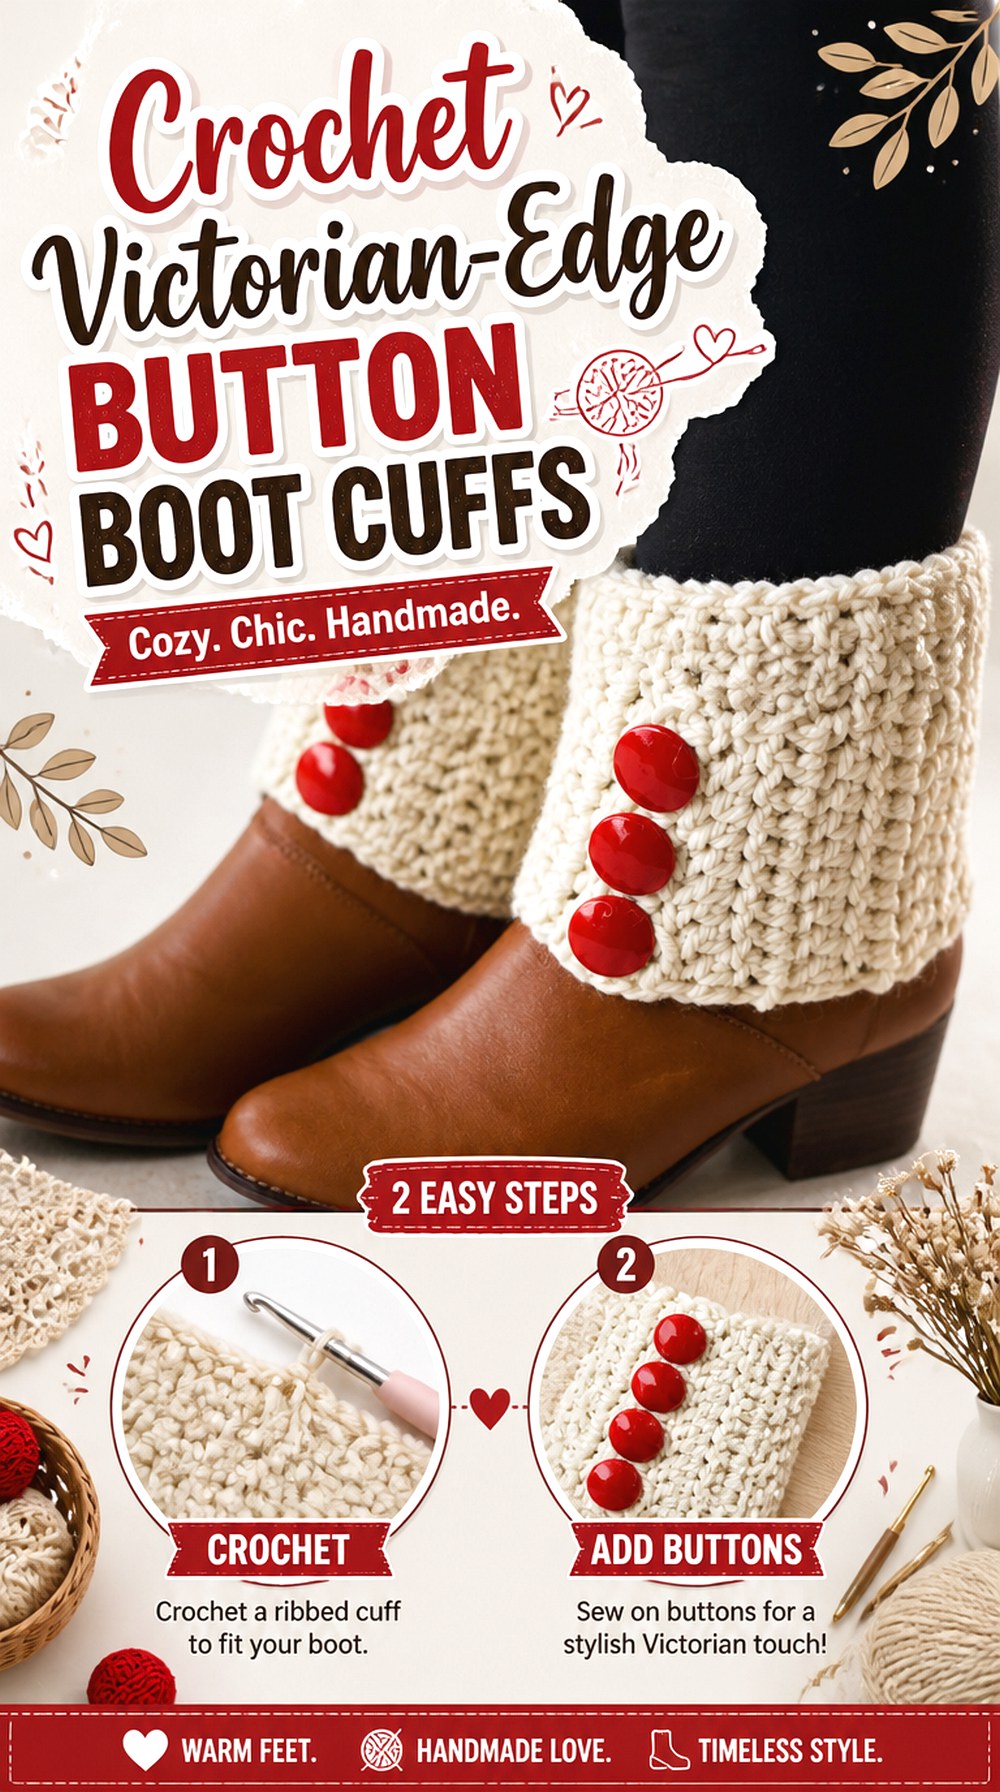
This crochet boot cuff puts more attention on the top band, combining a relatively straightforward body with an ornate-looking edge and button detail. The result has a dressier character than a plain ribbed cuff without requiring the entire surface to be highly textured.
That contrast is the reason this idea earns its own place in the collection. The AllFreeCrochet tutorial describes a mostly double-crochet cuff with a Victorian-type edge used around the button area, making the trim rather than the body the visual focus. It can work well when you want a decorative cuff to show clearly above a boot while keeping the lower portion visually quieter.
The Victorian-Style Band Should Remain Visible
The decorative edge is doing most of the design work, so first decide how far you want it to extend above your boot. If the boot hides most of the trim, the finished accessory will read very differently from the intended look.
Try positioning the cuff before final styling and look at it while standing, not only when the boot is sitting on a table. This gives you a more useful sense of the amount of decorative edging that actually remains visible.
Treat the Buttons as Surface Detail, Not a Fit Fix
Decorative buttons can suggest a closure even when they are not intended to provide meaningful adjustment. Do not assume they will compensate for a cuff that is too loose or too tight unless the tutorial specifically constructs them for that purpose.
Instead, settle the circumference independently and use the buttons as part of the presentation. Check their position against the top of the boot so they remain visible and do not press uncomfortably against the shaft.
A Smoother Body Keeps the Decorative Edge in Focus
When the top band already contains strong detail, the simpler body helps prevent the cuff from looking visually crowded. That gives you more freedom to decide where color contrast belongs.
You might prefer one color throughout for a quieter look or use the edge and button area as the main accent. Before combining multiple yarns, compare their thickness and behavior so the decorative section does not unexpectedly flare or tighten simply because the materials differ.
Original Tutorial and Creator Credit
Creator: AllFreeCrochet
5. Crochet Reversible Tunisian Boot Cuffs
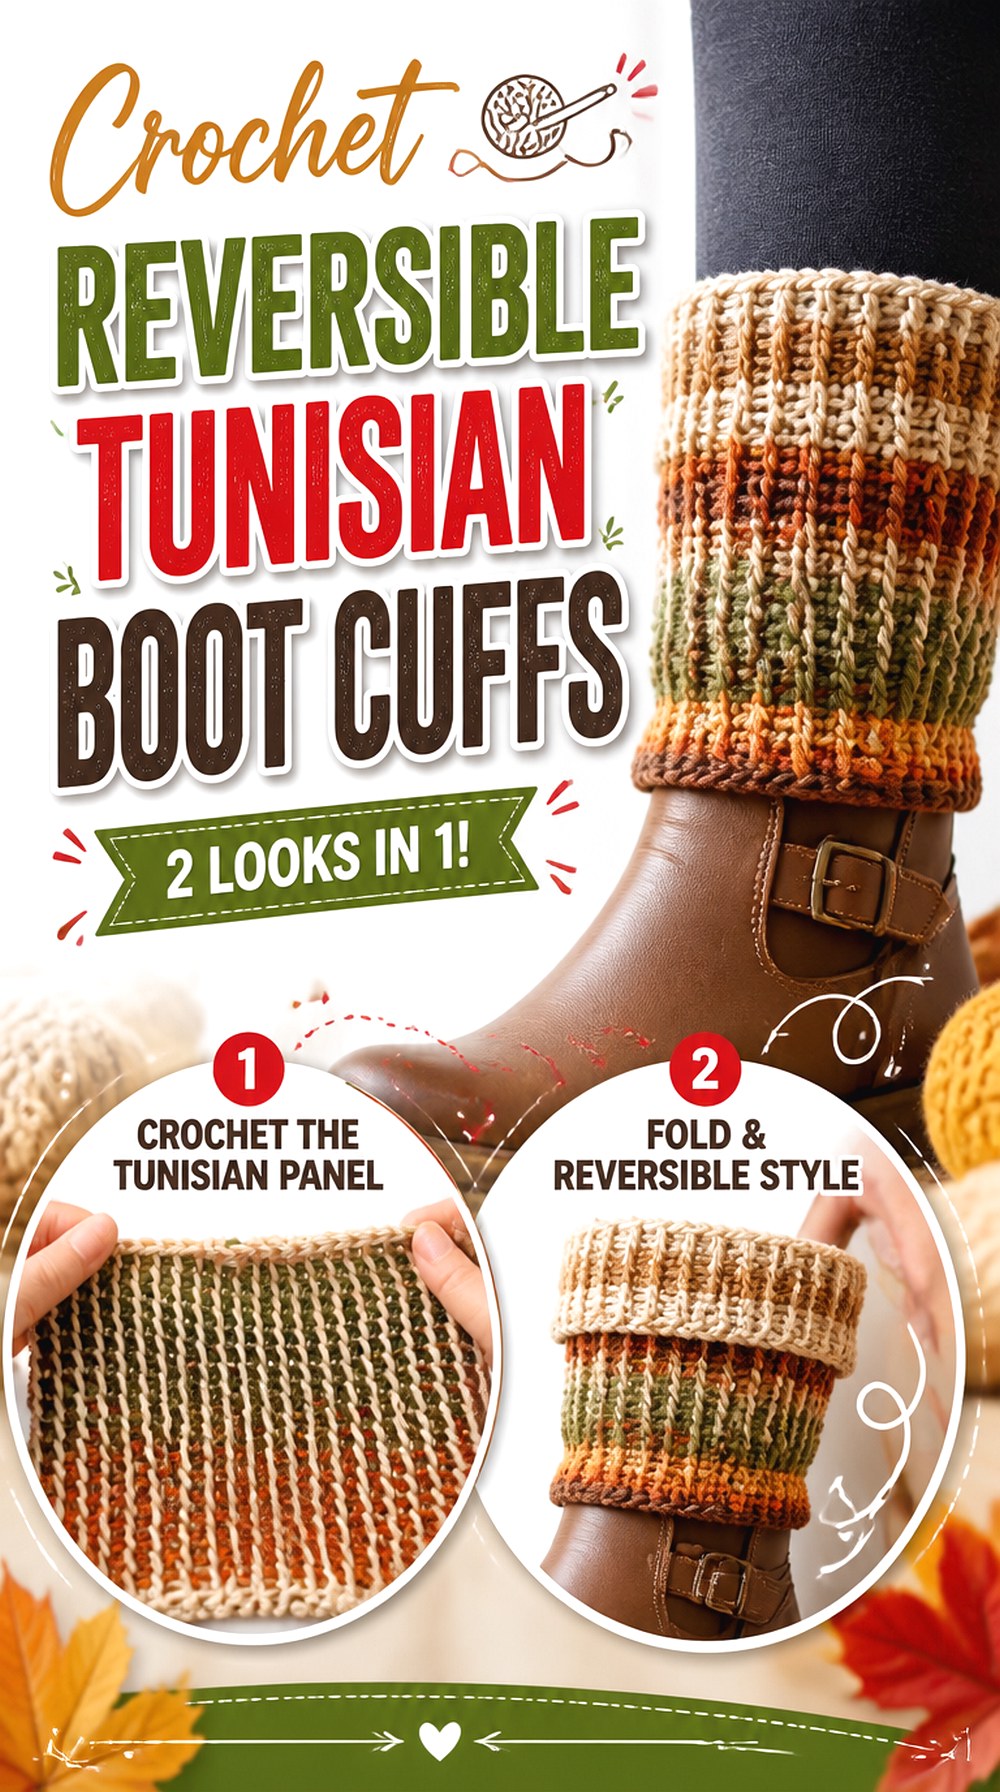
Reversible Tunisian crochet gives this boot cuff a denser, more fabric-like character than conventional openwork or standard ribbing. It is an especially distinctive choice for someone who wants the construction method to be as interesting as the final accessory.
B.Hooked Crochet’s tutorial uses a double-ended crochet hook and presents the cuffs as reversible, so this project also introduces a tool and technique difference that none of the standard-crochet cuffs in the list require. The two usable surfaces provide styling flexibility, but the denser structure deserves consideration if your boots fit closely around the calf. Think of this as a texture-focused cuff for boots that leave enough room to show and accommodate the fabric.
A Double-Ended Hook Is Part of the Construction
This project is not simply a conventional crochet cuff worked to imitate Tunisian texture. The source tutorial specifically calls for a double-ended crochet approach.
That matters when choosing the idea because you should confirm that you have the appropriate tool before planning your yarn or fit. It is also worth watching enough of the tutorial first to understand how the working method differs from a standard one-hook boot cuff.
Reversibility Gives You Two Useful Surfaces
A reversible accessory gives you a practical styling choice each time it is worn. Instead of treating the second surface as the hidden inside, consider how both sides coordinate with the boots and clothing you expect to pair with the cuffs.
If you use contrasting yarns, think about whether both resulting faces suit your wardrobe. The advantage is strongest when either side looks intentional rather than when one combination is technically reversible but unlikely to be worn.
Dense Tunisian Fabric Can Change Boot Compatibility
Tunisian fabric can create a substantial surface, so do not rely on measurements from a lighter lace or ribbed cuff and assume the same wearing experience. Fit depends on both circumference and fabric behavior.
Before completing the pair, test how the first cuff sits at the boot opening and whether the portion inside the shaft feels comfortable. A slightly different placement may work better than trying to force dense fabric into a narrow space.
Original Tutorial and Creator Credit
Creator: B.Hooked Crochet
6. Crochet Knit Look Boot Cuffs and Short Leg Warmers
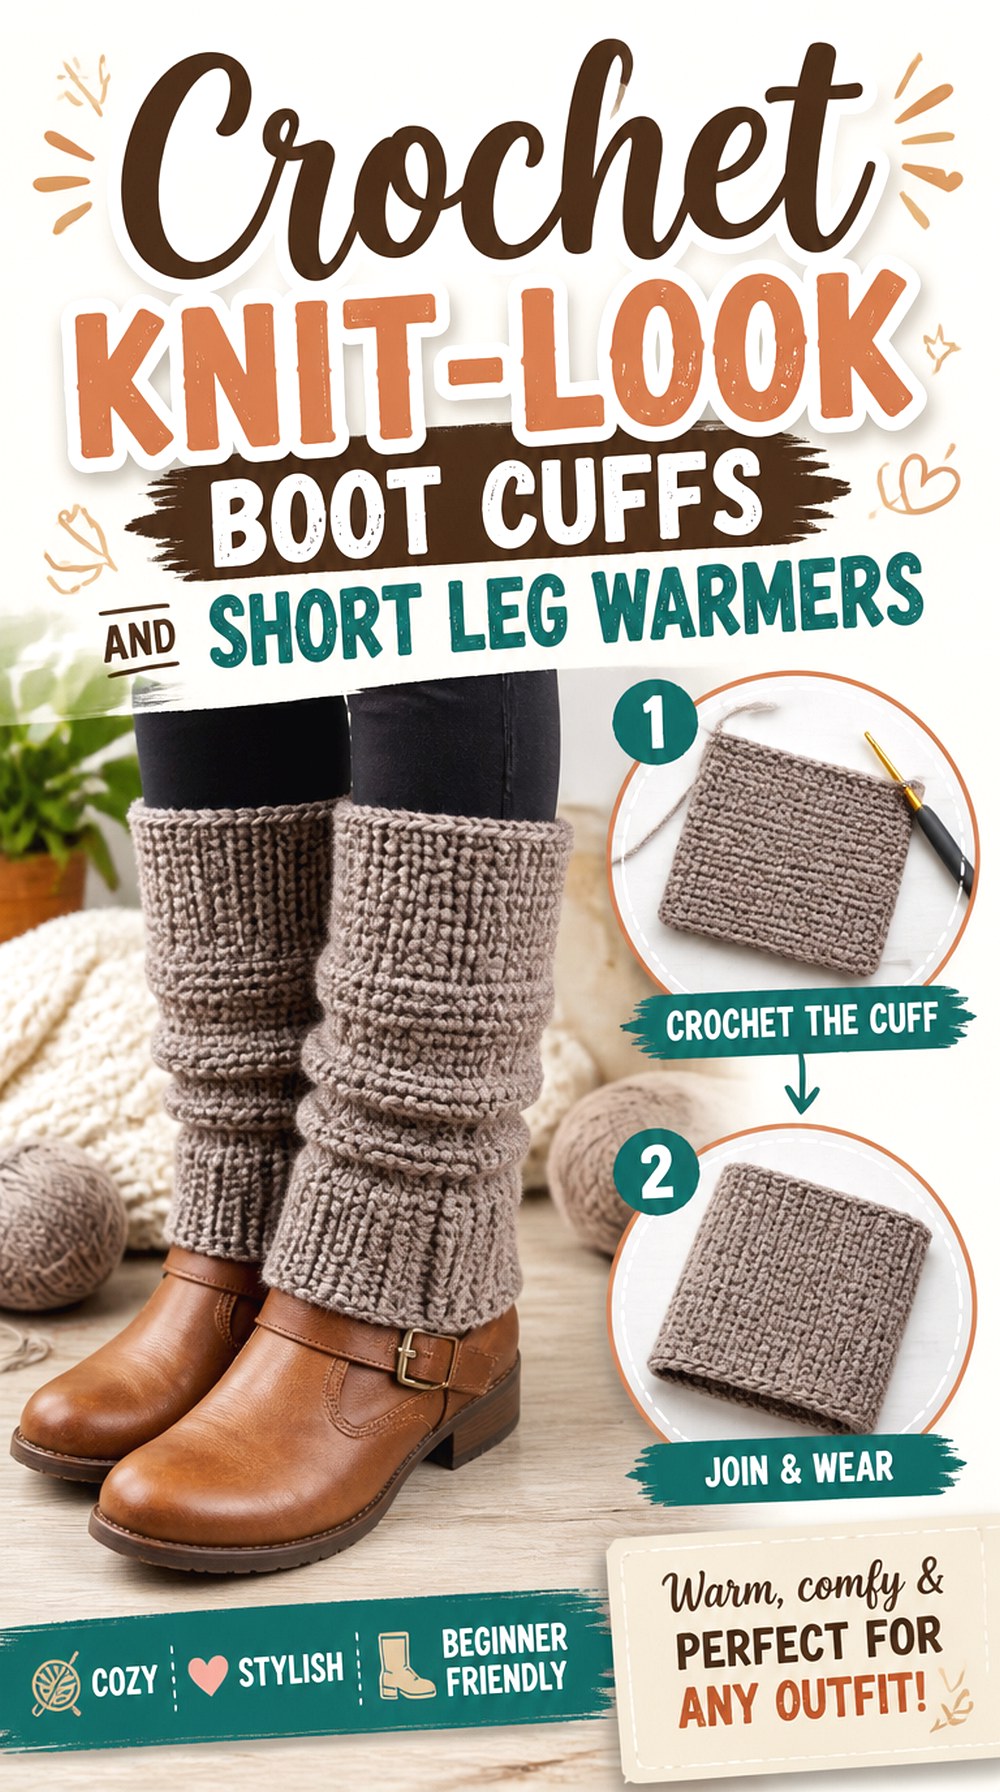
This style sits between a compact boot cuff and a short leg warmer, making it useful when you want more coverage than a narrow topper. The crochet fabric is designed to create a knit-like appearance, so the interest comes from the surface texture and silhouette rather than buttons or a dramatic border.
Sirin’s Crochet presents the project specifically as a knit-look leg warmer or boot cuff, which gives you flexibility in how the finished piece is styled. That flexibility also makes height an important decision. A taller version can remain visible above a lower boot, while a shorter version can act more like a conventional cuff at the top of a taller shaft.
Decide First: Short Cuff or Taller Leg Warmer
Before choosing the finished height, think about the boots you will actually wear. A tall cuff can bunch differently when paired with a high shaft, while a short topper may disappear when worn with a lower boot.
The source design accommodates the idea of both a boot cuff and leg warmer, so use that versatility deliberately. Decide whether you want only a strip of texture above the boot or a larger section covering the lower leg before settling on proportions.
Knit-Look Texture Benefits From Even Tension
A knit-inspired surface relies heavily on consistent-looking stitches because irregular tension can become more visible across a relatively plain fabric. This is less about achieving a specific numerical gauge and more about keeping the texture visually uniform.
Pause after a noticeable section has developed and let the fabric relax before judging it. If one area looks much tighter or looser, it is easier to address the inconsistency early than after completing a matched pair.
Taller Versions Need a Second Fit Check Higher on the Calf
If you extend the concept toward a leg warmer, one circumference measurement may no longer describe every point the fabric covers. The leg can widen as the piece moves upward.
Check both the intended lower and upper positions before committing to a taller version. You do not need to invent a universal sizing formula; the useful comparison is between the shape of your own leg and the amount of stretch in your own crochet fabric.
Original Tutorial and Creator Credit
Creator: Sirin’s Crochet
7. Crochet Lace Boot Topper Cuffs
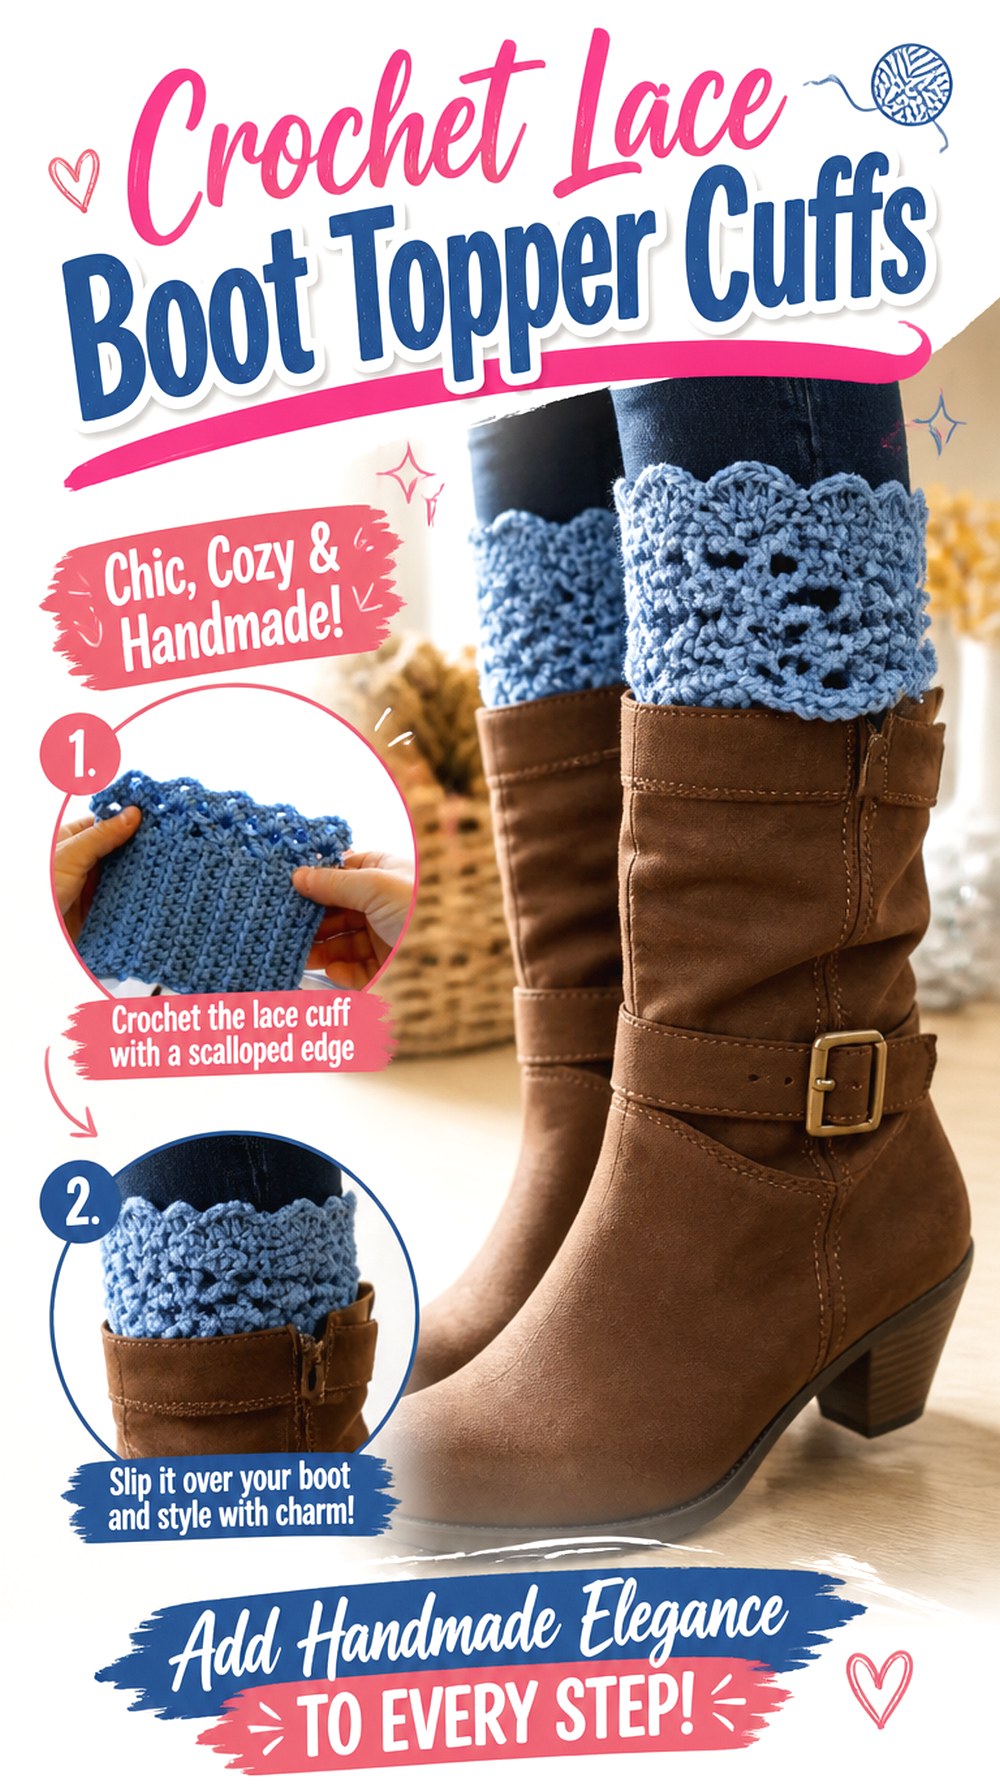
Lace changes the personality of a boot cuff more than simply switching yarn colors. These cuffs use open decorative texture to create a lighter-looking topper, making them a useful contrast to the chunky, Tunisian, and puff-stitch options elsewhere in the collection.
Jonna Martinez’s tutorial specifically presents crocheted lace boot cuffs, so the openwork is part of the project rather than an adaptation added afterward. This style is a strong choice when you want the crochet visible above the boot but do not want a thick band dominating the outfit. The openings in the fabric also mean that stitch definition, yarn contrast, and neat finishing can have a larger influence on the final appearance.
Open Lace Needs Enough Contrast to Be Seen
A lace texture is easiest to appreciate when its open areas remain visually distinct. If the cuff and surrounding clothing are nearly identical in color and value, some of the detail may blend away.
That is not necessarily a problem if you want subtle texture, but it should be intentional. Before choosing yarn, picture the cuff against the tights, leggings, or jeans you normally wear and decide whether you want the lace to blend in or clearly outline its pattern.
Keep Delicate Openwork Clear of Abrasive Boot Hardware
Open crochet contains more exposed loops and edges than a dense plain fabric. If the top of your boot includes rough hardware, hook-and-loop fasteners, or a sharp decorative edge, check where those elements meet the cuff.
Rotating the lace section or keeping more of it above the shaft may reduce unnecessary rubbing. This is particularly worth checking before making the second cuff, because repeated snagging can affect the appearance even when the original fit is comfortable.
Confirm the Lace Repeat Before Resizing
When resizing an openwork design, the pattern repeat can matter more than it does for a plain band. Adding or removing width without considering that repeat may interrupt the decorative layout.
Instead of guessing at an adjustment, consult the creator’s tutorial for the construction logic and then compare it with your required circumference. The goal is to preserve the lace design while reaching a usable fit, not to force a decorative repeat into an incompatible measurement.
Original Tutorial and Creator Credit
Creator: Jonna Martinez
8. Crochet Everyday Worsted Boot Cuffs
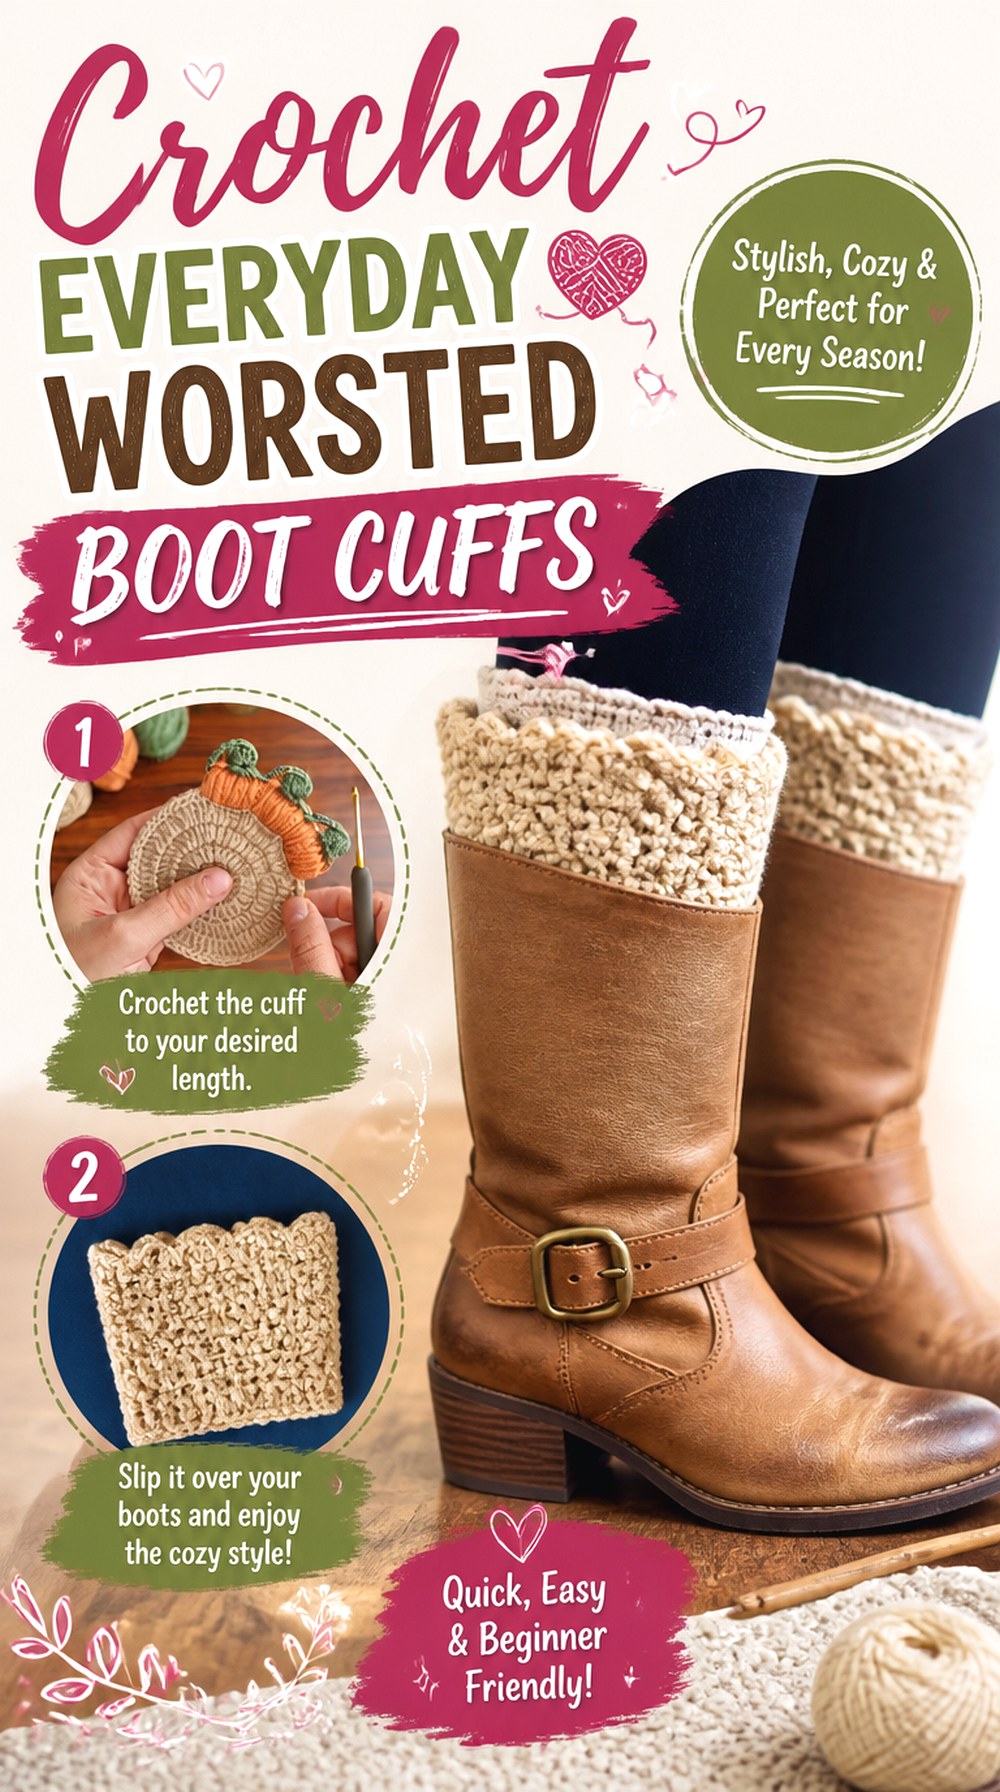
Not every boot cuff needs an ornate edge or highly dimensional stitch. This option focuses on a straightforward, wearable shape made with a medium-weight yarn approach, creating a useful middle ground between airy lace and very chunky winter texture.
The DIY FROM HOME CROCHET tutorial is centered specifically on boot cuffs and uses medium worsted yarn, making it a relevant source for someone who wants a conventional cuff before experimenting with more decorative variations. The simpler finished form also gives color more influence. A neutral shade can make the cuffs blend naturally with several boots, while a stronger contrast can turn the same basic silhouette into a more visible accessory.
Medium-Weight Fabric Is a Practical Middle Ground
A medium-weight cuff can provide visible crochet texture without automatically creating the thickness of a bulky-yarn design. That may be useful when the boot shaft has some room but not enough for a very substantial fabric layer.
Still, yarn category alone does not determine fit. Compare the actual fabric you produce with the space inside the chosen boot, particularly if you crochet tightly or select a stitch structure that creates a firm surface.
Use Size Guidance as a Starting Point, Not a Guess
When a tutorial supplies size guidance, compare it with your own leg rather than choosing only by a general label. The circumference where the cuff sits is more informative than assumptions based on standard clothing sizing.
If you are between the available examples, consider how stretchy your fabric feels and where the boot top lands. Checking the first cuff on the intended wearer remains more reliable than committing to both pieces before evaluating the fit.
A Simpler Surface Gives Color More Influence
Because there is less decorative competition from ruffles, elaborate edging, or dimensional puffs, yarn color becomes a larger part of the final look. That can be useful if you want cuffs that coordinate closely with a coat, scarf, or pair of boots.
For a versatile accessory, consider how the yarn looks against both the boot and the pants or tights above it. Those two neighboring colors can affect whether the cuff feels subtle or high contrast.
Original Tutorial and Creator Credit
Creator: DIY FROM HOME CROCHET
9. Crochet Super Ribbed Boot Topper Cuffs
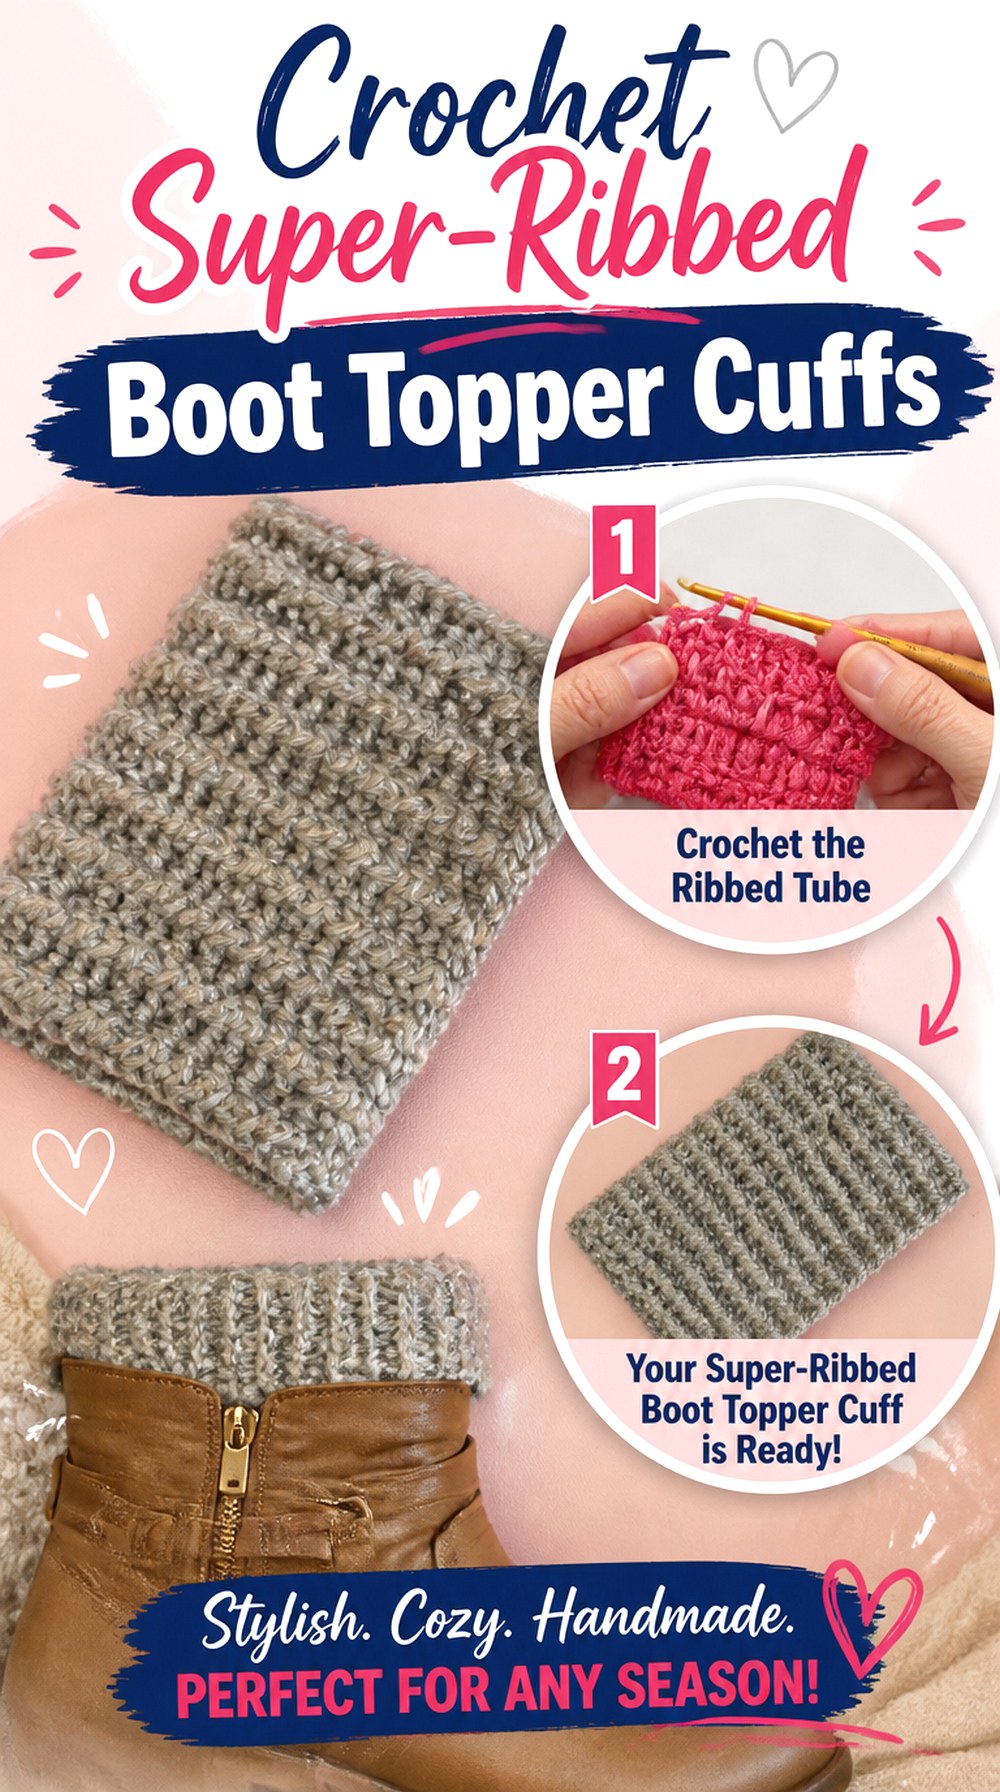
Deep, continuous ribbing makes these crochet boot toppers look intentionally textured from top to bottom. Unlike designs that reserve decoration for a button band or scalloped edge, the entire cuff contributes to the finished appearance.
Make, Do & Craft – Crochet presents this project as a super-ribbed boot topper and notes that the concept can be made using different yarn choices. That makes it appealing when the ribbed structure itself is what you want to showcase. Because yarn substitutions change the resulting fabric, however, this is not a reason to skip measuring. Treat every new yarn-and-hook combination as its own fit decision rather than assuming it will behave like the sample.
Deep Ribbing Is the Main Design Feature
When the entire cuff is ribbed, the texture creates strong vertical lines around the leg. It can visually coordinate well with other ribbed winter accessories, but adding too many extra decorations may compete with the feature that makes this design distinctive.
If you plan to use a multicolored yarn, work enough fabric to see whether the color transitions preserve the ribbing. A highly active color pattern may soften the visual effect of the raised and recessed lines.
Any-Yarn Flexibility Still Requires a Fresh Measurement
Being able to adapt a concept to another yarn does not mean different yarns produce identical dimensions or stretch. A change in fiber, thickness, hook, or personal tension can alter the resulting cuff.
After substituting yarn, evaluate your fabric rather than relying on the dimensions of another version. Check its relaxed circumference, how far it stretches comfortably, and whether that behavior suits the exact point where your boot cuff will sit.
Stretch Should Recover After You Pull the Cuff On
A cuff may stretch enough to pass over the foot or calf but still be unsatisfactory if it remains permanently widened afterward. Ribbing is most useful when the fabric can return toward its resting shape.
Before finishing the pair, gently put on the first cuff and remove it a few times. Look at how the rib structure responds. If it stays noticeably distorted, reconsider the fit or yarn choice before duplicating the same result.
Original Tutorial and Creator Credit
Creator: Make, Do & Craft – Crochet
10. Crochet Ruffled Boot Cuffs
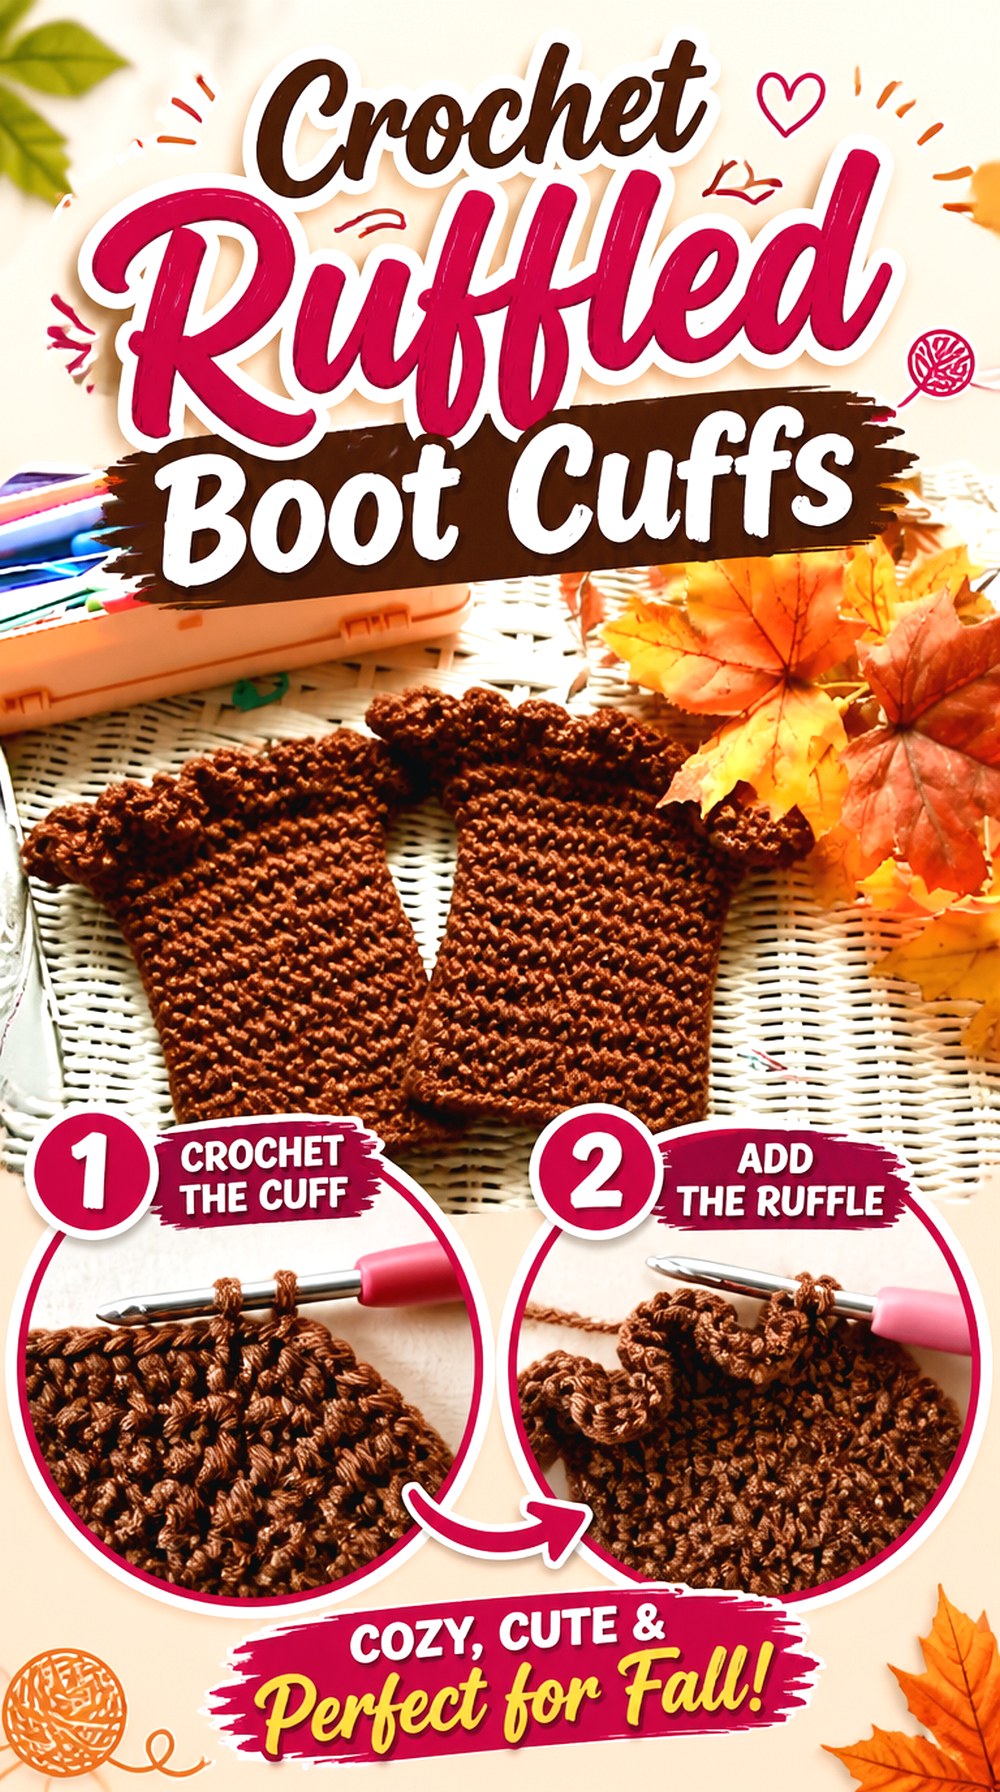
A ruffled upper edge gives these crochet boot cuffs a much softer and more decorative silhouette than straight ribbing or dense texture. Instead of ending in a clean horizontal line, the cuff expands into visible folds above the boot, making the trim the obvious focal point.
Made With Love By Glama’s tutorial is devoted specifically to “Ruffly Boot Cuffs,” so this choice offers real structural variety within the collection rather than another minor surface change. Ruffles work best as a deliberate visible feature. If most of the decorative section is pushed inside the boot, both its shape and purpose can be lost, so boot height should influence how you position the finished cuff.
Ruffles Need Room Above the Boot Opening
A ruffle occupies more visual and physical space than a straight border. Before choosing this idea, look at how much leg remains visible above your boots and whether there is enough room for the trim to sit without being crowded by a coat hem or other layers.
The effect can also change with boot width. A broader shaft may frame the ruffle differently from a close-fitting boot, so evaluate the finished silhouette as a complete outfit rather than as an isolated crochet piece.
Keep the Flounce From Folding Into the Shaft
If the decorative edge drops too far into the boot opening, the ruffle can become compressed instead of spreading outward. Position the cuff so its transition into the flounce occurs where the boot no longer presses firmly against it.
Try this before finalizing both cuffs. Small differences in height can determine whether the ruffle stays visible, particularly if your boots have a curved or asymmetrical upper edge rather than a perfectly level shaft.
Pair the Ruffle Scale With the Boot Shape
A dramatic ruffle can become the focal point of a simple boot, while a more restrained flounce may coordinate better with boots that already contain buckles, straps, fur trim, or other strong details.
You do not need every element of the outfit to compete for attention. When planning color and yarn, consider the ruffle’s dimensional shape as part of the decoration. Even one solid shade can look substantial once the folds are visible.
Original Tutorial and Creator Credit
Creator: Made With Love By Glama
11. Crochet Bulky Single Crochet Button Cuffs
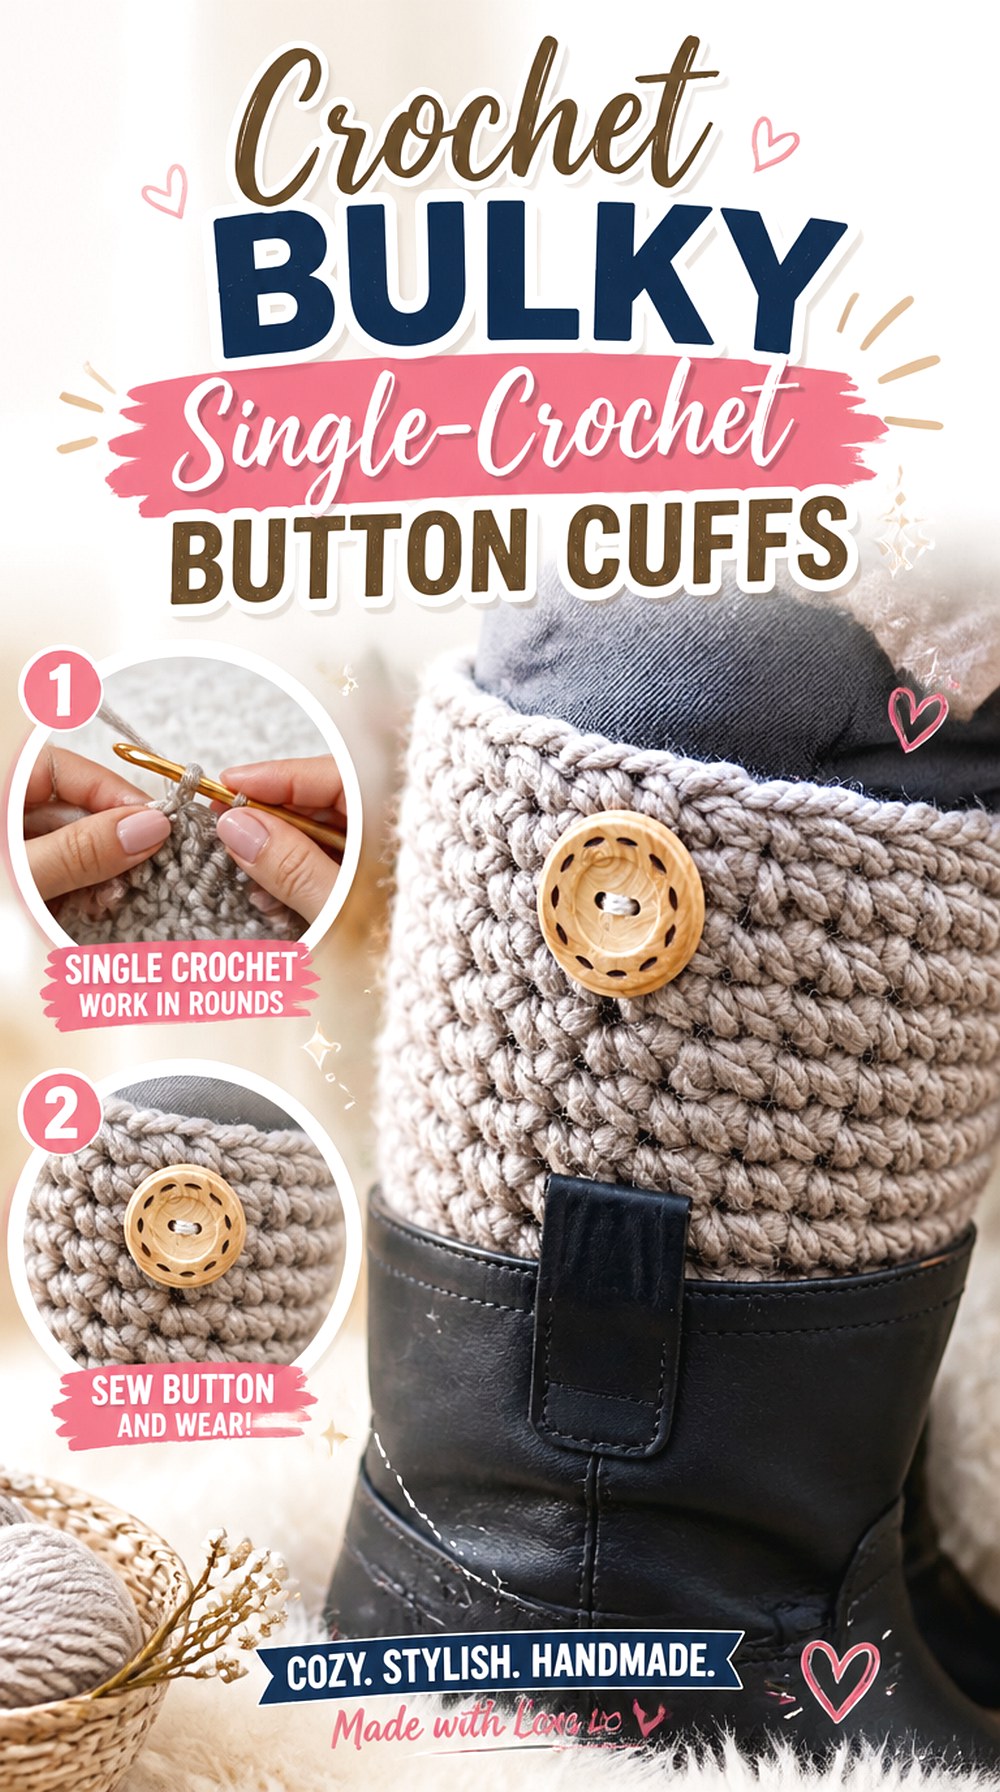
This design shows how a very simple crochet surface can still create a substantial boot cuff when paired with bulky yarn and decorative buttons. Unlike the heavily ribbed button option earlier in the list, the emphasis here is on a straightforward single-crochet fabric and uncluttered shape.
Melanie Ham’s tutorial identifies single crochet, bulky yarn, and decorative buttons as key parts of the project. That makes the cuff useful for someone who prefers a calmer texture but still wants enough thickness to be visible above a winter boot. It is also a good reminder that button embellishment does not require elaborate stitchwork; a simple background can make the small details stand out more clearly.
Simple Single Crochet Keeps the Surface Calm
A plain single-crochet body has less directional texture than deep ribbing or C2C blocks. That makes the overall effect easier to coordinate with boots that already contain decorative stitching, buckles, or other details.
The quieter surface can also suit a strongly colored or heathered yarn. Before adding more embellishment, consider whether the buttons already provide enough contrast. Keeping the design restrained can be the feature rather than something that needs to be “fixed” with additional decoration.
Bulky Yarn Makes a Plain Cuff More Substantial
Simple stitches do not necessarily create a lightweight accessory. The tutorial uses bulky yarn, which gives the uncomplicated fabric a fuller winter look.
That thickness should be considered when checking the boot opening. If the shaft is snug, determine how much of the cuff actually needs to sit inside it. A thicker yarn can make a beautiful visible band while still being uncomfortable if too much material is trapped between the leg and a fitted boot.
Place Decorative Buttons Where They Cannot Rub
Buttons add a useful focal point, but their position should work with the boot as well as with the crochet. Check whether the boot has a zipper, buckle, or rigid edge near the same area.
Rotate the cuff if necessary so the decorative side remains visible without repeatedly pressing against another hard element. If you substitute heavier buttons, also consider how their weight affects the fabric rather than assuming every decorative button will behave the same way.
Original Tutorial and Creator Credit
Creator: Melanie Ham
12. Crochet Puff Stitch Boot Cuffs
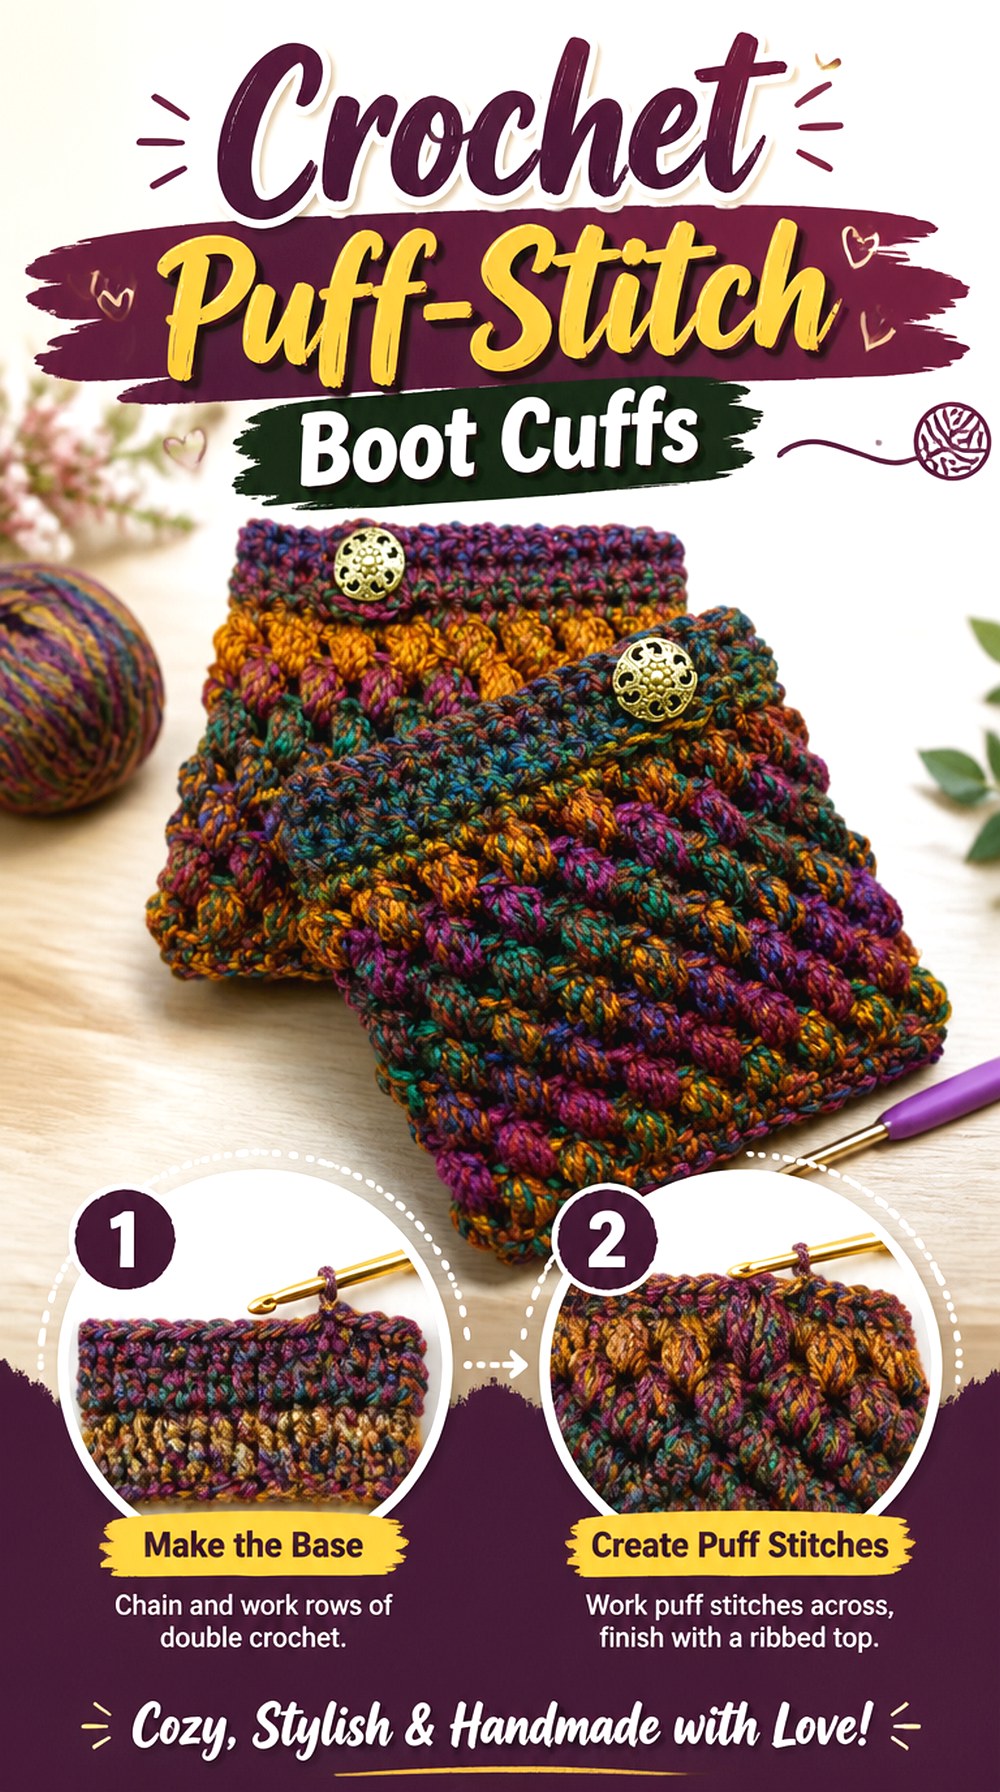
Puff stitches create raised pockets of texture across these crochet boot cuffs, giving the fabric a dimensional surface that looks noticeably different from ribbing, lace, or smooth single crochet. The texture can make even a single-color cuff visually active because light and shadow define the raised stitches.
Bag-O-Day Crochet has a full tutorial devoted specifically to puff-stitch boot cuffs, so this project provides a direct route to the dimensional style rather than requiring you to adapt the stitch from another accessory. Because the surface projects outward, this design deserves an early boot-fit check. It may suit a roomier opening better than a very close shaft where the texture would be compressed.
Puff Stitches Add Volume as Well as Texture
A raised stitch does more than change the appearance of the fabric. It also changes the profile of the cuff, particularly when several dimensional stitches sit near or inside the boot opening.
Before making both cuffs, place the first one where you intend to wear it and check the side view as well as the front. If the boot squeezes the texture flat, a different placement may show the stitch work more effectively.
Raised Texture Looks Clearest in Unfussy Yarn
Puff stitches already create strong surface variation. A very busy yarn can compete with that structure, while a more visually consistent yarn lets the shadows around each raised area define the pattern.
This is a styling choice rather than a fixed rule. If you enjoy multicolor yarn, work a sample large enough to see how the color changes interact with the puffs before committing to the pair. The goal is to decide which feature you want to dominate.
Test the Boot Opening Before Making the Matching Cuff
Dimensional stitches make early fit testing especially useful because a circumference that seems fine off the body may feel different once the fabric is compressed against a boot shaft.
Complete enough of the first cuff to evaluate its real thickness and placement. If adjustment is needed, it is more efficient to resolve it before duplicating the piece. Use the source tutorial for its exact construction rather than trying to correct fit by altering random parts of the stitch sequence.
Original Tutorial and Creator Credit
Creator: Bag-O-Day Crochet
13. Crochet Scalloped Edge Boot Cuffs
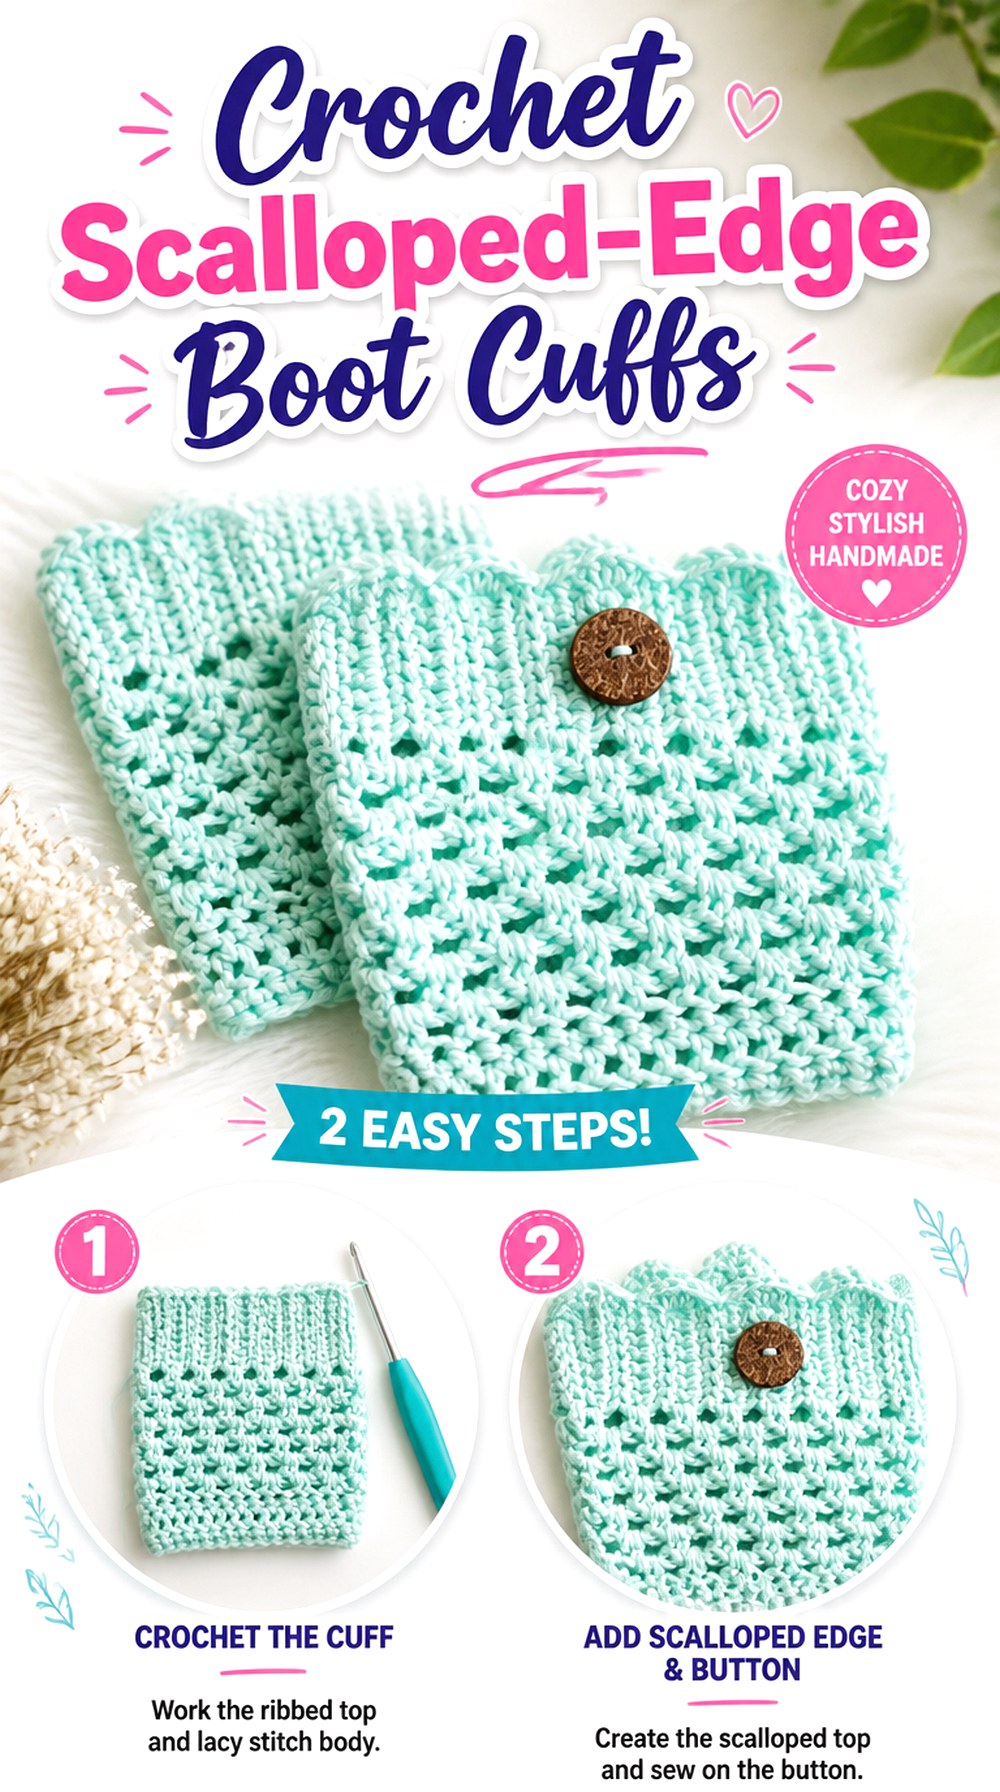
Scalloped edging offers a decorative finish that sits between tiny picots and a full ruffle. The rounded border creates a clearly shaped top edge while keeping the cuff’s silhouette relatively controlled, making it useful when you want visible detail without a large amount of flare.
The iKNITS boot-cuff tutorial is associated with a scalloped finished style, giving this final idea a different edge treatment from the lace, Victorian, and ruffled versions above. This design can work particularly well when only the upper inch or so of the cuff is meant to attract attention. The key is positioning the shaped border where the boot will not cover or flatten it.
Scallops Give a Cleaner Edge Than a Full Ruffle
Rounded scallops still create movement along the top of the cuff, but they do not need the same outward volume as a pronounced flounce. That makes them a useful middle option for someone who finds a straight edge too plain and a ruffled cuff too dramatic.
Compare the border against your boot before choosing additional embellishments. The repeated curves may already provide enough detail, particularly on boots with a smooth, undecorated upper shaft.
The Border Needs Even Spacing to Sit Neatly
Because the edge contains a repeated visible shape, uneven spacing can attract attention more readily than it would along a plain straight top. When the border has developed, lay the cuff flat and look at the overall rhythm of the scallops rather than inspecting only individual stitches.
If something appears noticeably crowded or stretched, consult the tutorial before proceeding. Preserving the repeat is more useful than making an unsupported adjustment that changes the intended edging.
Let the Scalloped Top Peek Above the Boot
The easiest way to lose the defining feature of this cuff is to position the scallops too low. Put on the intended boot and check how much of the rounded edge remains visible when standing normally.
This is also a useful time to decide where any seam or less decorative area should face. Once you know the preferred orientation, finish the second cuff to mirror or coordinate with the first rather than making that styling choice after both are complete.
Which Crochet Boot Cuff Style Fits Your Boots Best?
For closely fitted boot shafts, start by comparing the flatter options: the custom ribbed picot cuff, lace topper, everyday worsted cuff, or scalloped style can provide visible detail without relying on very bulky surface texture. That does not guarantee a particular fit, so the first cuff should still be tried with the intended boots.
Roomier boots give you more freedom to showcase chunky ribs, bulky single crochet, puff stitches, or dense Tunisian fabric. If decoration is the priority, choose according to the edge you want to see: tiny picots for subtle detail, Victorian-style trim or buttons for a defined accent, scallops for a shaped border, or ruffles for the most pronounced silhouette.
For construction variety, the C2C and reversible Tunisian options stand furthest from a conventional crochet band, while the knit-look design is useful when you want the project to extend toward short leg-warmer territory.
Conclusion
The most useful way to choose among these 13 crochet boot cuff ideas is to start with the boot rather than the decoration. A close shaft may pair more comfortably with flatter ribbing or lace, while a roomier opening gives dimensional puff stitches, bulky yarn, dense Tunisian fabric, and ruffles more space to show. Then decide whether you want the main interest to come from all-over texture, a shaped edge, buttons, or additional height.
Whichever style you choose, make the first cuff your fit checkpoint before completing its match. Measurements, yarn behavior, boot height, and fabric thickness can all change the result. Use the original tutorials linked with each idea for the creators’ exact construction details and project-specific instructions.
Frequently Asked Questions
Should crochet boot cuffs fit tightly around the calf?
They should suit the intended wearing position without feeling uncomfortably restrictive, but there is no single universal tightness that works for every construction. Ribbing, lace, dense Tunisian fabric, and bulky crochet can behave differently even at similar relaxed measurements. Check the first cuff on your leg and with the intended boot. You need enough room to put it on comfortably while still achieving the placement you want above the shaft.
Where should I measure for a crochet boot cuff?
Measure around the part of your leg where the cuff will actually sit. Boot height matters because a tall boot and a short boot may reach different circumferences on the same calf. If some crochet will be tucked inside the shaft, also check how much room the boot provides at that location. Measuring the intended wearing position is more useful than relying on a generic calf measurement or clothing size.
Which crochet boot cuff styles create the least bulk?
Open lace, relatively flat ribbing, and simpler medium-weight fabrics generally create less dimensional surface than puff stitches, substantial ruffles, bulky yarn, or dense Tunisian crochet. The actual result still depends on yarn, hook choice, tension, and construction. If your boots fit closely, make enough of the first cuff to test the fabric inside the shaft before completing the pair rather than choosing solely by how thin the sample appears.
Can I use a different yarn from the crochet boot cuff tutorial?
Sometimes, but a yarn substitution can change circumference, stretch, thickness, drape, and the amount of room the cuff occupies inside the boot. Do not assume that following the same construction with a different yarn automatically produces the same fit. When a creator specifically explains customization, follow that guidance. Otherwise, compare your own fabric and measurements carefully and use the tutorial for the project’s intended construction details.
Are buttons on crochet boot cuffs usually adjustable closures?
Not necessarily. Several boot-cuff designs use buttons mainly as decoration, so their appearance should not be interpreted as proof that the cuff can be resized by moving or fastening them. Check the specific tutorial before relying on a button for adjustment. If the buttons are decorative, establish the cuff’s fit independently and then position the embellishment where it remains visible and does not rub against a zipper, buckle, or boot edge.
How can I keep two crochet boot cuffs looking like a matched pair?
Use the completed first cuff as a direct comparison while working on the second. Check relaxed dimensions, visible height, stretch, edge shape, seam placement, and the orientation of details such as buttons or scallops. If your yarn changes color naturally, decide whether exact color matching matters before starting the second piece. Comparing the pair during construction is more useful than noticing a difference only after all finishing is complete.