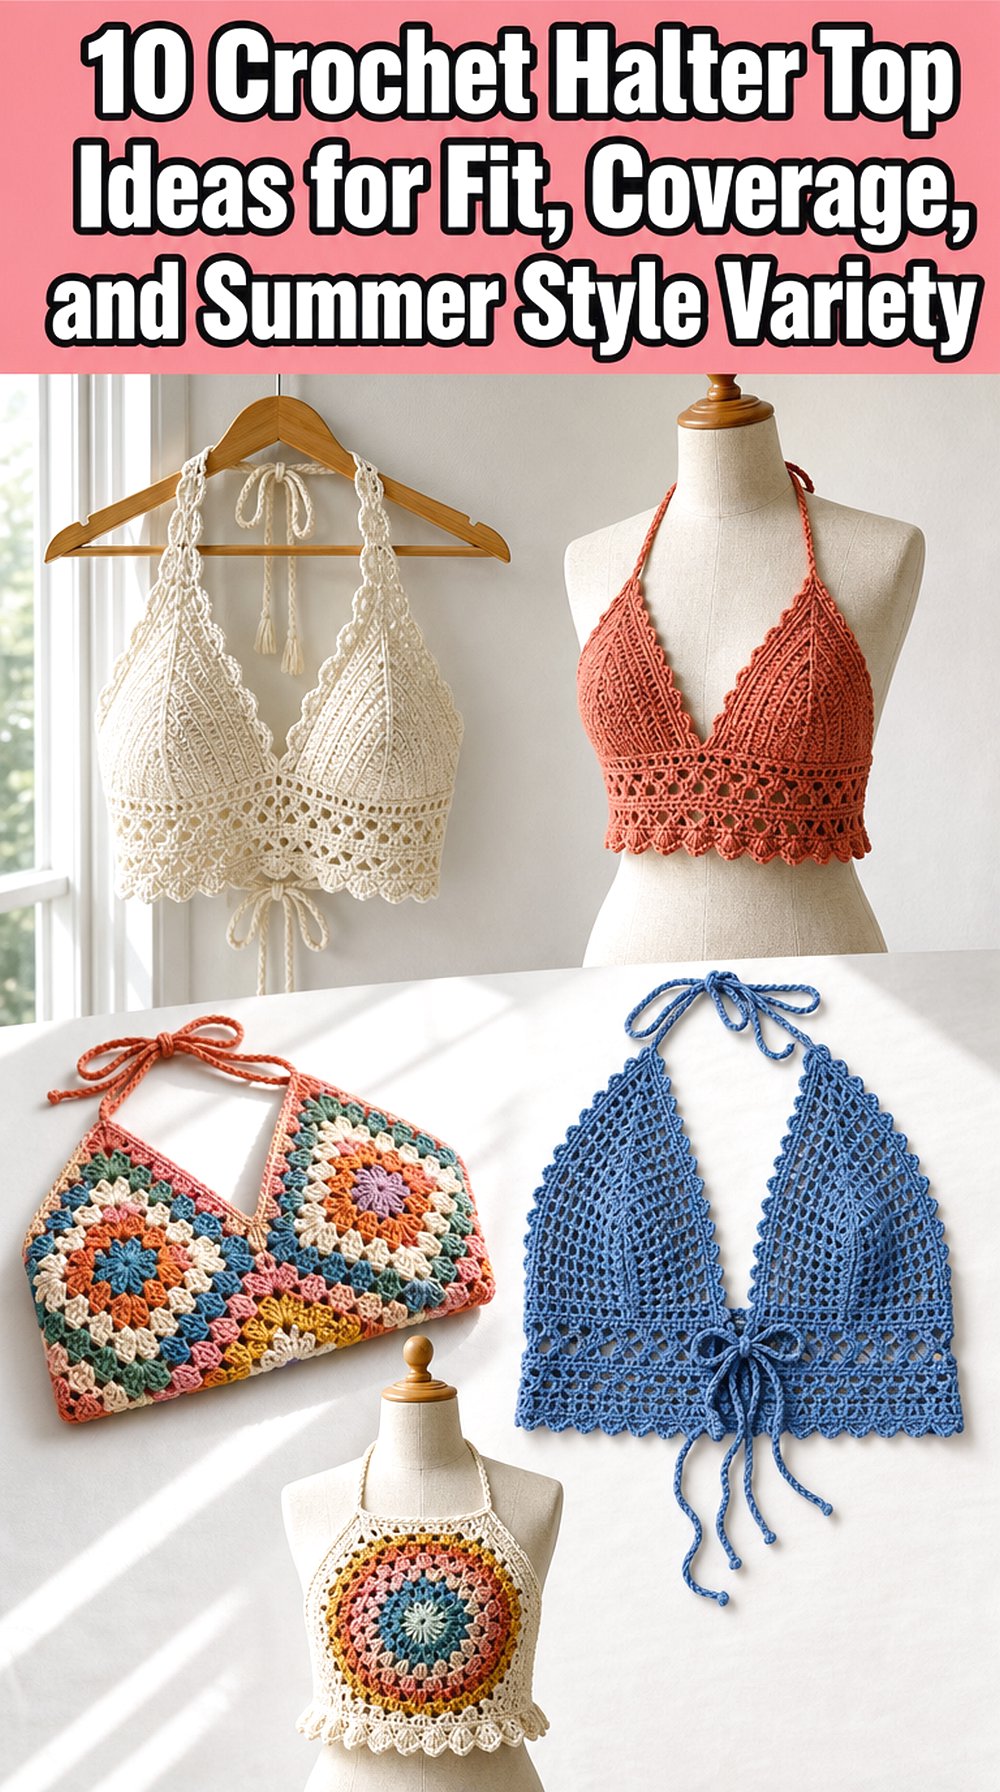

Crochet halter tops can look very different depending on the front shape, neckline, back ties, and amount of openwork. Some designs lean toward a close cropped fit, while others use motifs, mesh panels, ruffles, or wrap sections to create more movement and adjustability.
This list brings together ten halter top ideas with different construction styles and finished looks. You will find options with lace detail, triangle shaping, elastic-band structure, granny squares, daisies, mandala work, mesh, wrapped bands, and multi-way ties, so it is easier to choose a tutorial that matches the coverage and styling you want.
Quick List
- Crochet Lace-Detail Halter Top
- Crochet Triangle-Detail Halter Top
- Crochet Elastic-Band Halter Neck Top
- Crochet Ruffled Halter Top With Buttons
- Crochet Granny Square Halter Top
- Crochet Daisy Motif Halter Top
- Crochet Mandala Center Halter Top
- Crochet Mesh Tie-Front Halter Top
- Crochet Wrapped-Band Halter Top
- Crochet Multi-Way Wrap Halter Top
Why These Crochet Halter Tops Are Worth Making
A halter top is a useful crochet wearable because small fit changes can make a big difference. Neck ties, back ties, cups, panels, bands, and motifs all affect how the finished piece sits on the body. That makes this category worth comparing before choosing a tutorial.
These projects also give readers several coverage choices. A mesh top may work best over another layer, while a granny square or daisy motif top may be chosen for its decorative front. Ruffles, wrapped bands, and mandala centers add detail without making every option feel the same. Before starting, readers should confirm size notes, measurements, back views, and material lists from the original creator.
1. Crochet Lace Detail Halter Top

A lace-detail halter top gives the front a lighter, more open look while still keeping the familiar halter shape. This option is useful for readers who want a summer crochet top with a defined neckline and decorative texture rather than a plain solid panel. The design is also described as adaptable to different sizes, so it may appeal to anyone who prefers a tutorial built around fit rather than only one fixed sample size.
Look at the Lace Placement
The lace detail is the feature that separates this halter from the more solid and motif-based tops in the list. Before choosing it, look at where the open sections sit on the finished garment. Openwork near the front can change how much coverage the top gives, so readers may want to plan what they will wear underneath.
Check the Fit Information
The source describes the top as adaptable to any size, which is helpful for a wearable. Still, readers should review how the creator explains measuring and shaping before buying supplies. A halter neckline depends on both the body fit and the neck ties, so it is worth checking whether the guide matches your preferred amount of ease.
Plan What to Wear Underneath
Because this design includes lace detail, layering may be part of the final look. Readers who want more coverage can consider the top as a warm-weather layering piece rather than a stand-alone garment. The original guide should be used for exact construction details, while personal coverage needs should guide color, yarn opacity, and styling choices.
Original Tutorial and Creator Credit
Creator: Lanas y ovillos
2. Crochet Triangle Detail Halter Top
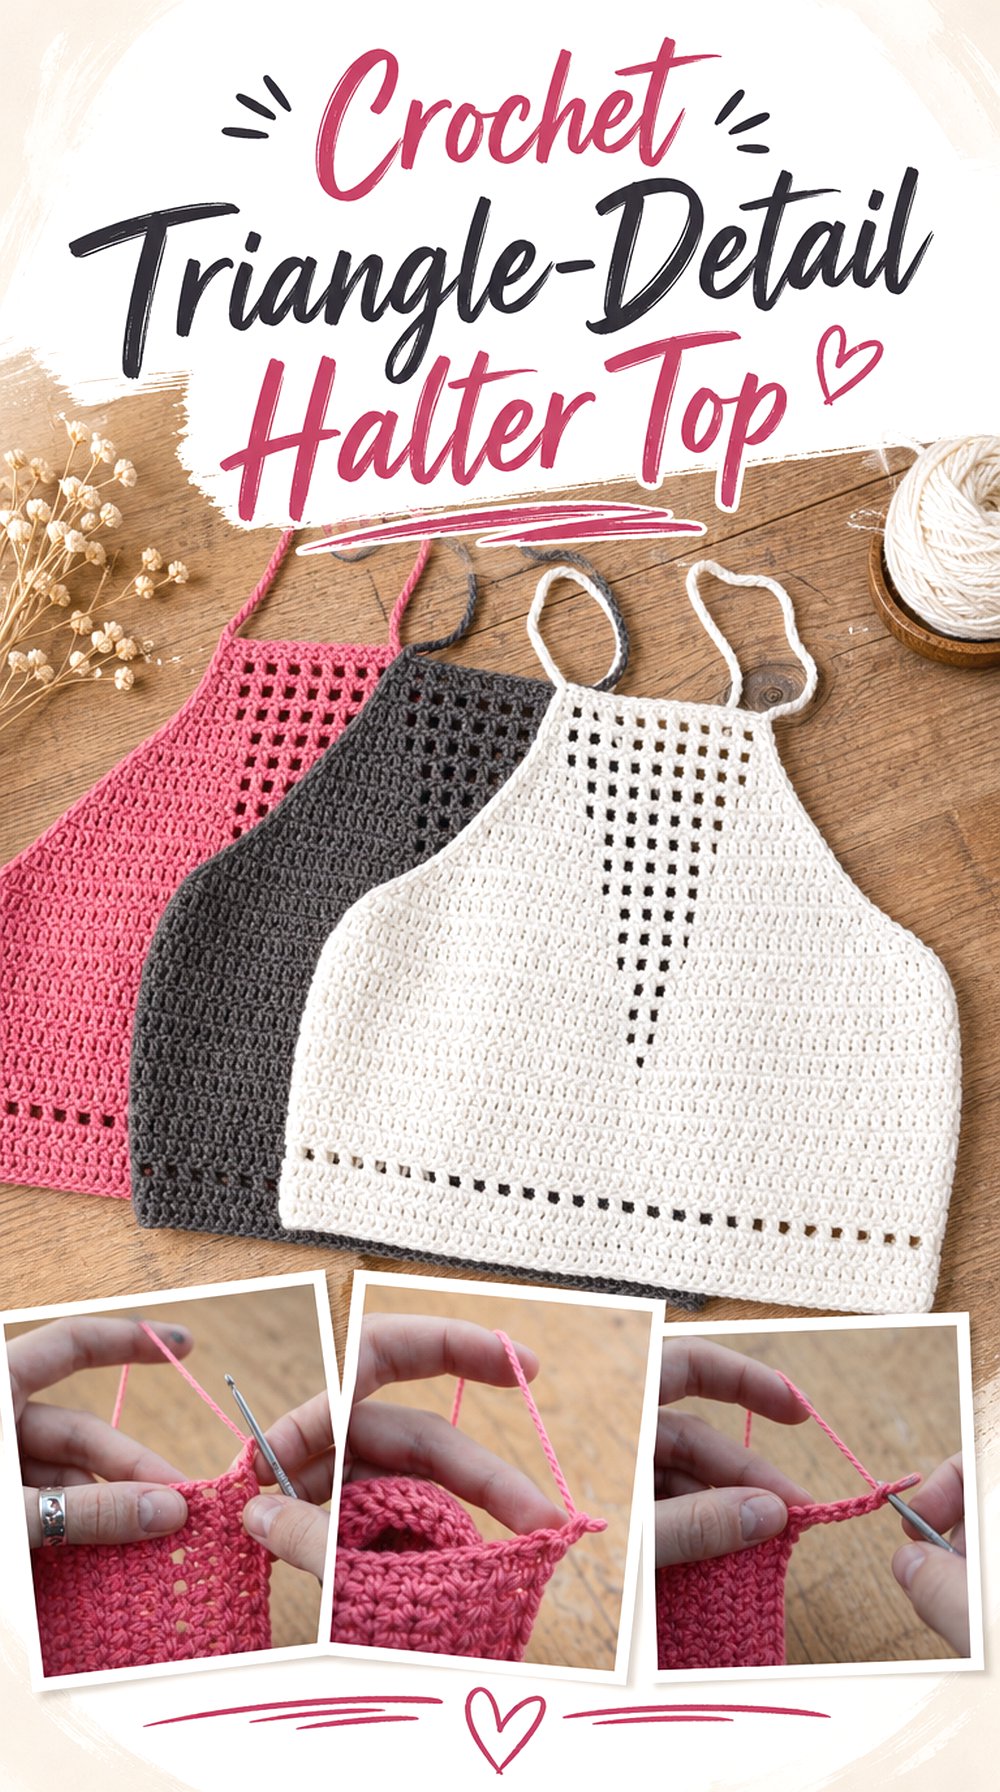
Triangle detailing gives this halter top a sharper front shape than a basic rectangular or banded crop top. The finished look feels structured through the center, with the triangle detail acting as the main visual point. This project may suit readers who want a crochet halter that is still simple in outline but has a noticeable design feature at the front.
Focus on the Front Shape
The triangle detail is the first thing to study here because it controls the visual direction of the top. A pointed or angled front can feel different from a square, mesh, or granny motif front. Before starting, readers should decide whether that center shape works with the garment length and coverage they want.
Confirm the Material Notes
The creator’s description includes hook and yarn information, which gives viewers a starting point for checking supplies. For a fitted halter, material choice can affect drape, firmness, and stretch. Rather than substituting blindly, readers should compare the listed materials with what they have and check whether the creator explains any sizing effects.
Check the Back View
A halter top is not only about the front. The back view matters because ties, straps, and open areas can change how secure or covered the garment feels. Before committing to this triangle-detail style, viewers should look for a clear finished back view and decide whether the strap placement suits their comfort level.
Original Tutorial and Creator Credit
Creator: aquahannah
3. Crochet Elastic Band Halter Neck Top
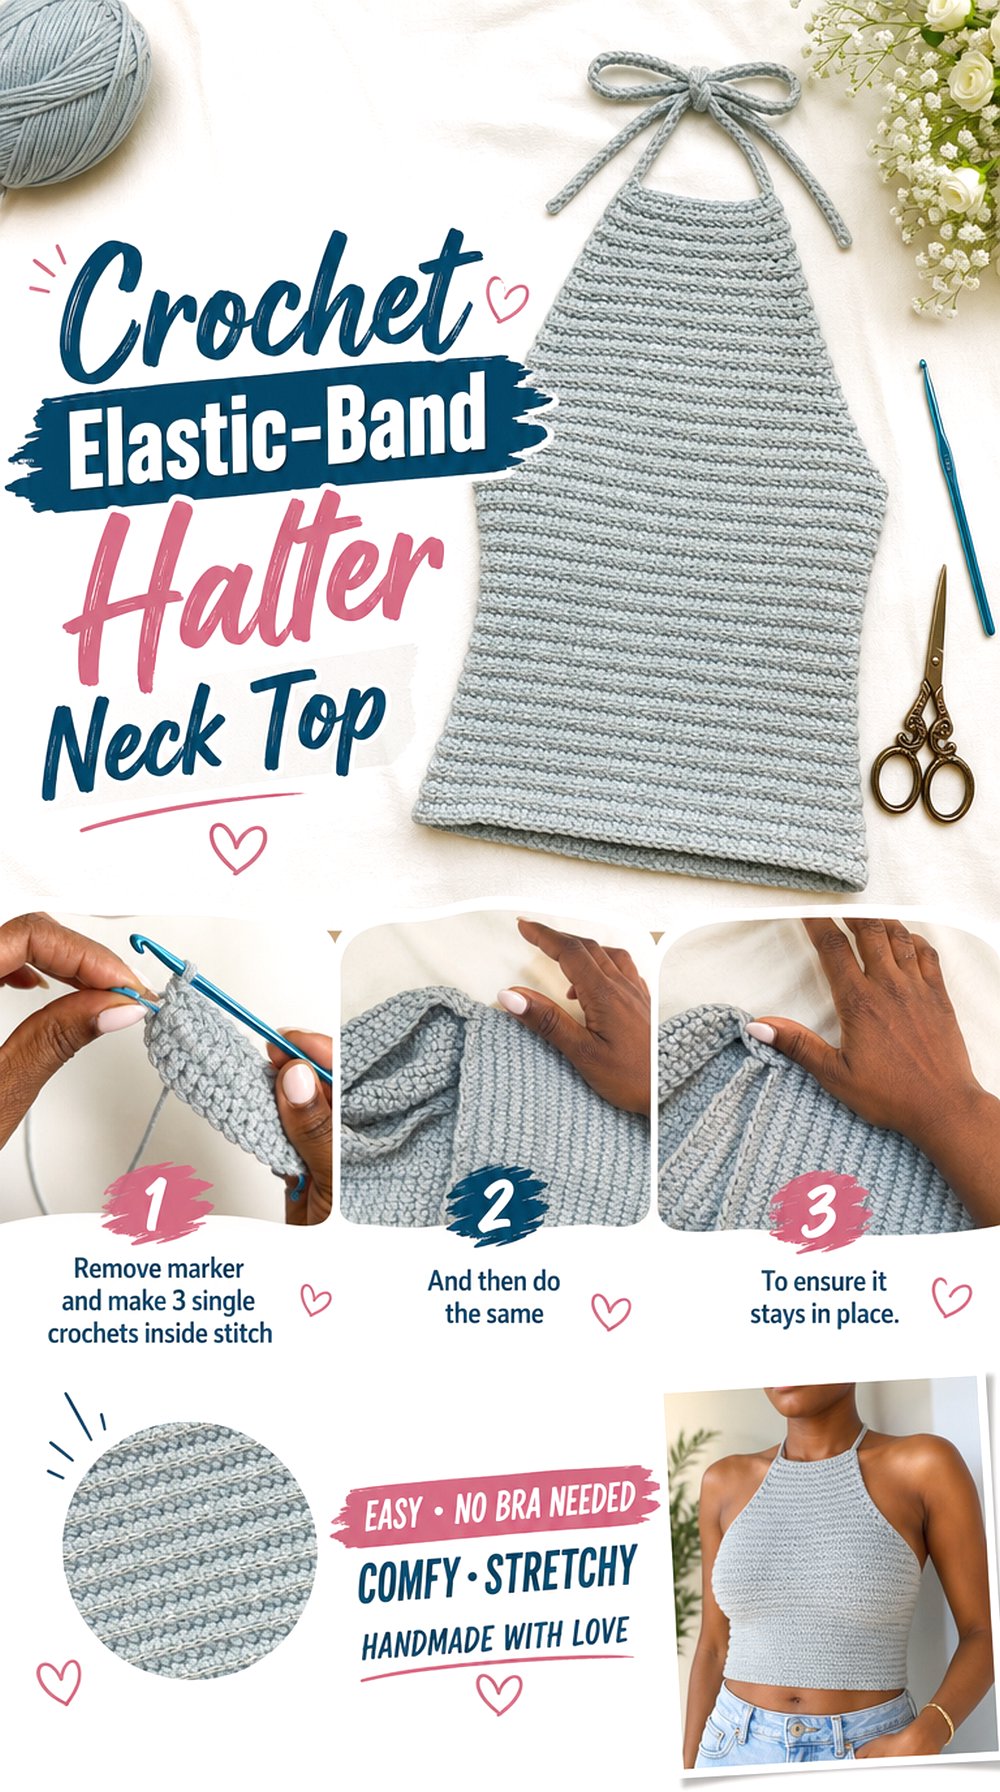
This halter neck top stands out because the creator mentions elastic band yarn in the midsection. That detail gives the project a different focus from the decorative motif tops, since the lower area is part of the fit conversation. The overall look is neat and close-fitting, making it a practical option to review carefully if you want a halter with a more defined under-bust or midsection area.
Review the Band Area
The elastic-band section is the main feature to understand before choosing this tutorial. A band can affect how the top sits and how much structure the lower edge has. Readers should watch how the creator presents this area and confirm whether the material is something they can source before planning the project.
Think About Coverage
This design is described as a halter neck top with a neat, simple surface. Even so, coverage depends on personal fit, yarn behavior, and the finished measurements. Before starting, readers should look at the neckline, armhole area, and back view to decide whether they would wear it alone or over another fitted layer.
Confirm Any Extra Components
Because this project uses an extra band material, it is especially important to record the complete supply list. Readers should not assume that standard yarn alone will create the same result. Check the creator’s material notes, look for any linked product details, and make sure the added component matches the intended fit of the finished top.
Original Tutorial and Creator Credit
Creator: YarnByJodie
4. Crochet Ruffled Halter Top With Buttons
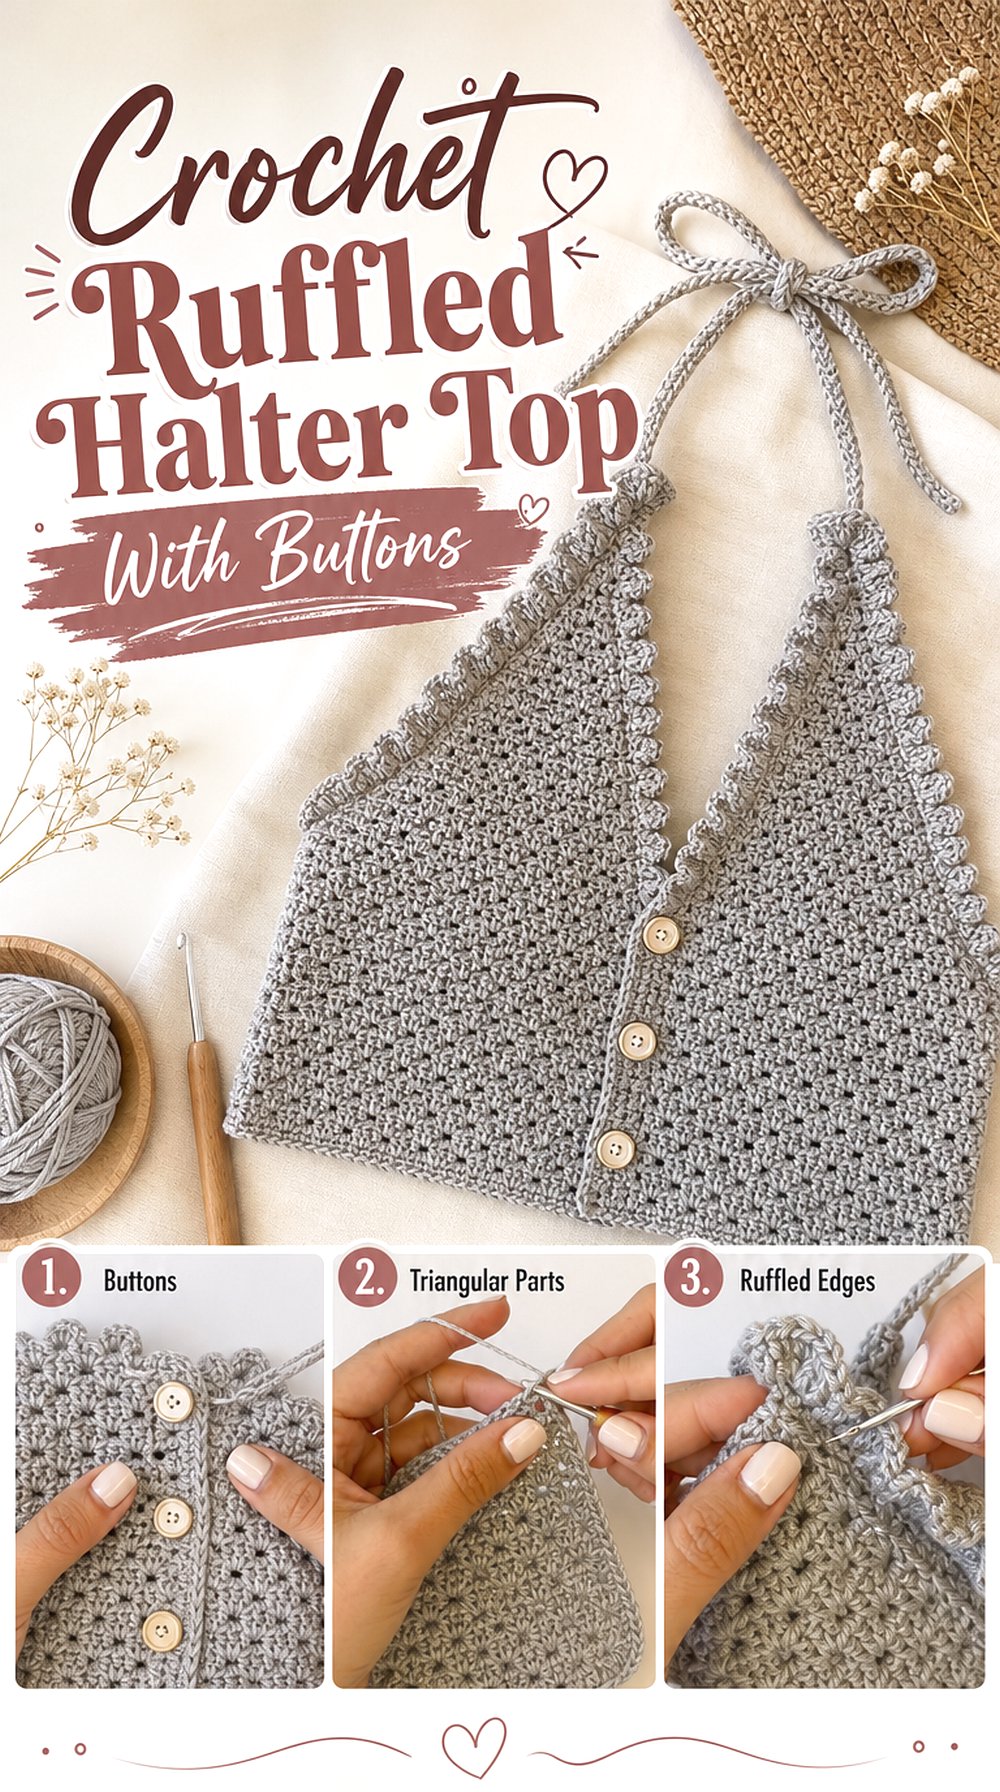
Ruffles and buttons give this halter top a more finished, decorative edge than the plainer fitted styles. The project includes ruffle details along the edges, and the tutorial chapters also point to button work. This makes it a useful idea for readers who want a halter top with extra trim and closure interest rather than a simple tie-only finish.
Keep the Ruffle Edge Balanced
The ruffles are the detail that gives this top its softer outline. Readers should look at how full the ruffle appears on the finished garment and whether it frames the neckline, lower edge, or both. Too much extra texture may not suit every wardrobe, so it is worth deciding whether the ruffle is the main reason to choose this design.
Look Closely at the Buttons
Buttons change the way a halter top is handled, even when ties are still present elsewhere. They may affect how the front or lower section opens, closes, or sits. Before starting, readers should confirm the button size, placement, and whether the creator shows them clearly enough to follow without guessing.
Note the Measurement Stage
The tutorial includes a measurement section, which is important for a wearable with ruffles and buttons. Readers should not skip over fit checks just because the top looks decorative. The cleaner the measurement work is at the beginning, the more likely the ruffle and button details will sit where they are intended.
Original Tutorial and Creator Credit
Creator: Azunudo
5. Crochet Granny Square Halter Top
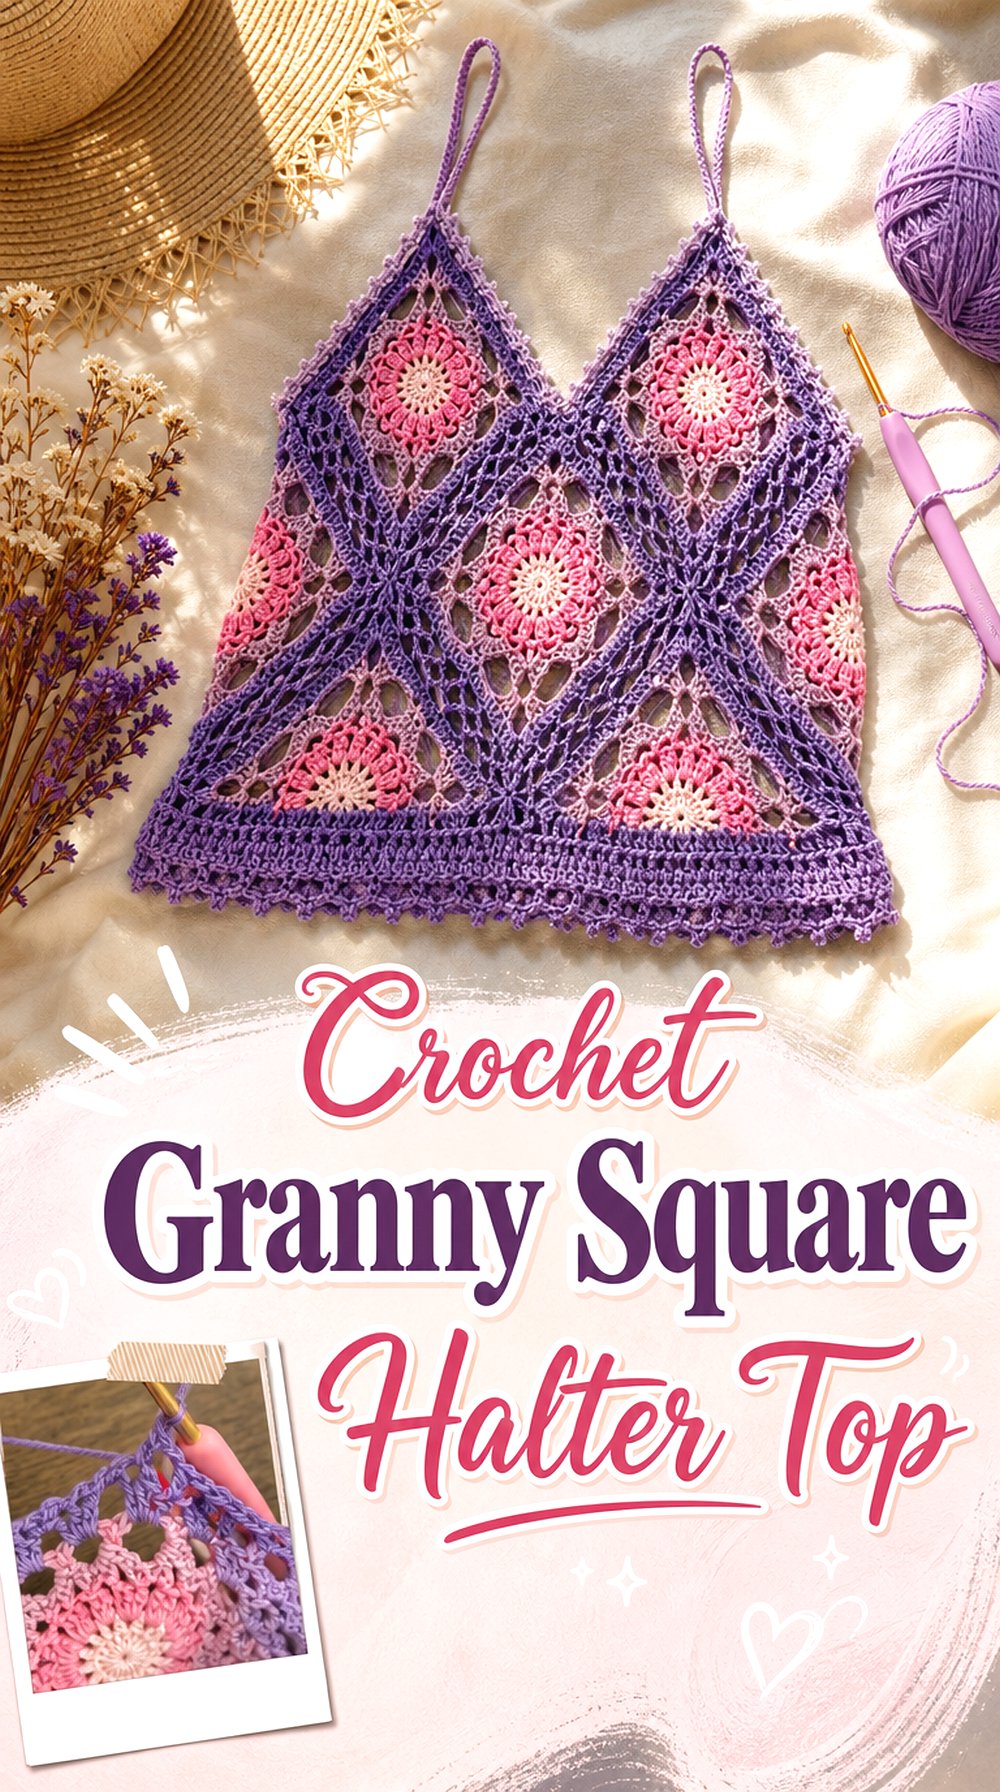
A granny square halter top brings a colorful motif layout into a wearable shape. This version uses granny square motifs, with the description noting pink, lavender, and purple tones. It feels different from the lace, triangle, and banded designs because the front interest comes from joined blocks rather than one continuous surface.
Compare the Motif Layout
The granny square arrangement is the main design choice in this top. Before choosing it, look at how the squares form the front and how they meet the halter straps. Motif placement matters because the seams and color blocks become part of the finished style, not just hidden construction.
Watch the Joining Section Closely
Joined motifs need careful orientation. Readers should watch the joining portion with attention so the squares face the right direction and the top keeps a balanced shape. This is not a place to rely on memory alone, especially if using more than one color or arranging motifs before the final assembly.
Check the Top Edge
The top edge affects how cleanly the granny square shape turns into a wearable halter. Look for edging, strap placement, and any finishing notes around the neckline. A good edge can make motif work look intentional, while an unclear edge may leave readers needing to replay that part of the original source.
Original Tutorial and Creator Credit
Creator: Crochet Studio 22
6. Crochet Daisy Motif Halter Top

A daisy motif halter top is a strong choice for readers who want the front design to feel floral and graphic. The tutorial focuses on a daisy crochet motif and includes finishing, neck ties, back ties, and tips on lining. That combination makes it different from the granny square top because the motif itself creates the main decorative statement.
Keep the Daisy Motif Clear
The daisy motif is the reason to choose this project, so it should remain easy to see in the finished top. Color contrast, yarn texture, and finishing can all affect how clearly the flower shape reads. Readers should use the original source to follow the motif work rather than trying to recreate it from the finished photo alone.
Check the Tie Placement
This top includes neck and back tie straps, so placement matters for both fit and wearability. A floral front can look balanced only if the ties hold the shape where intended. Before beginning, readers should look at the final try-on or display view and decide whether the tie positions match their comfort and coverage needs.
Review the Lining Tips
The source includes a section with tips on lining, which is worth reviewing before the top is finished. Lining can affect opacity, comfort, and how wearable a motif top feels. Readers who need more coverage should check what the creator actually explains instead of assuming every floral crochet top will be worn the same way.
Original Tutorial and Creator Credit
Creator: Ateliê da Jô
7. Crochet Mandala Center Halter Top

The mandala center gives this halter top a circular focal point across the front. It is a more dramatic idea than the lace-detail or triangle-detail options because the decorative work sits right at the center of the garment. The source also notes an open back design, so this project is best reviewed with both the front motif and back coverage in mind.
Center the Mandala Visually
A mandala design depends on placement. If the circular detail sits too high, low, or off-center, the whole top may feel unbalanced. Readers should study the finished front view and follow the creator’s exact shaping guidance rather than treating the motif like a loose decoration that can be placed anywhere.
Check the Open Back
The open back is part of the finished look, so readers should decide whether that amount of exposure suits how they plan to wear the top. Back ties and strap placement can also affect how the front motif sits. A back view is especially useful before choosing yarn or deciding on an underlayer.
Review the Written Pattern Links
The creator’s description includes written pattern links, which may be useful for readers who prefer more than video instruction. Before relying on those resources, check whether they are current, paid or free, and written for the same version shown in the tutorial. For a motif-based garment, having a second reference can make following the shape easier.
Original Tutorial and Creator Credit
Creator: Shyler crochets
8. Crochet Mesh Tie Front Halter Top

A mesh tie-front halter top gives the collection a lighter, more open option. The creator describes a mesh or net pattern with a tie-front design and an open back. This idea is useful for readers who want a crochet top that is clearly meant for layering, beach styling, festival outfits, or warm-weather looks where airflow and visible texture matter.
Think About Mesh Coverage
Mesh changes the way a halter top functions. It can look airy and decorative, but it also means the top may need an underlayer depending on personal comfort. Readers should study the finished photos or try-on view and decide whether the mesh spacing gives the coverage they want before choosing this project.
Check the Tie-Front Finish
The tie-front detail is both decorative and practical. It can change the way the center front sits, especially over another layer. Before beginning, viewers should look closely at how the ties hang, where they close, and whether the creator explains adjustments for the finished fit.
Confirm the Size Tips
The description mentions tips for adjusting size, which is important for a mesh garment. Open stitch patterns can behave differently from dense fabric, so readers should check the creator’s sizing notes instead of guessing from another top they own. The original tutorial should guide the exact counts and shaping.
Original Tutorial and Creator Credit
Creator: by Kristine
9. Crochet Wrapped Band Halter Top
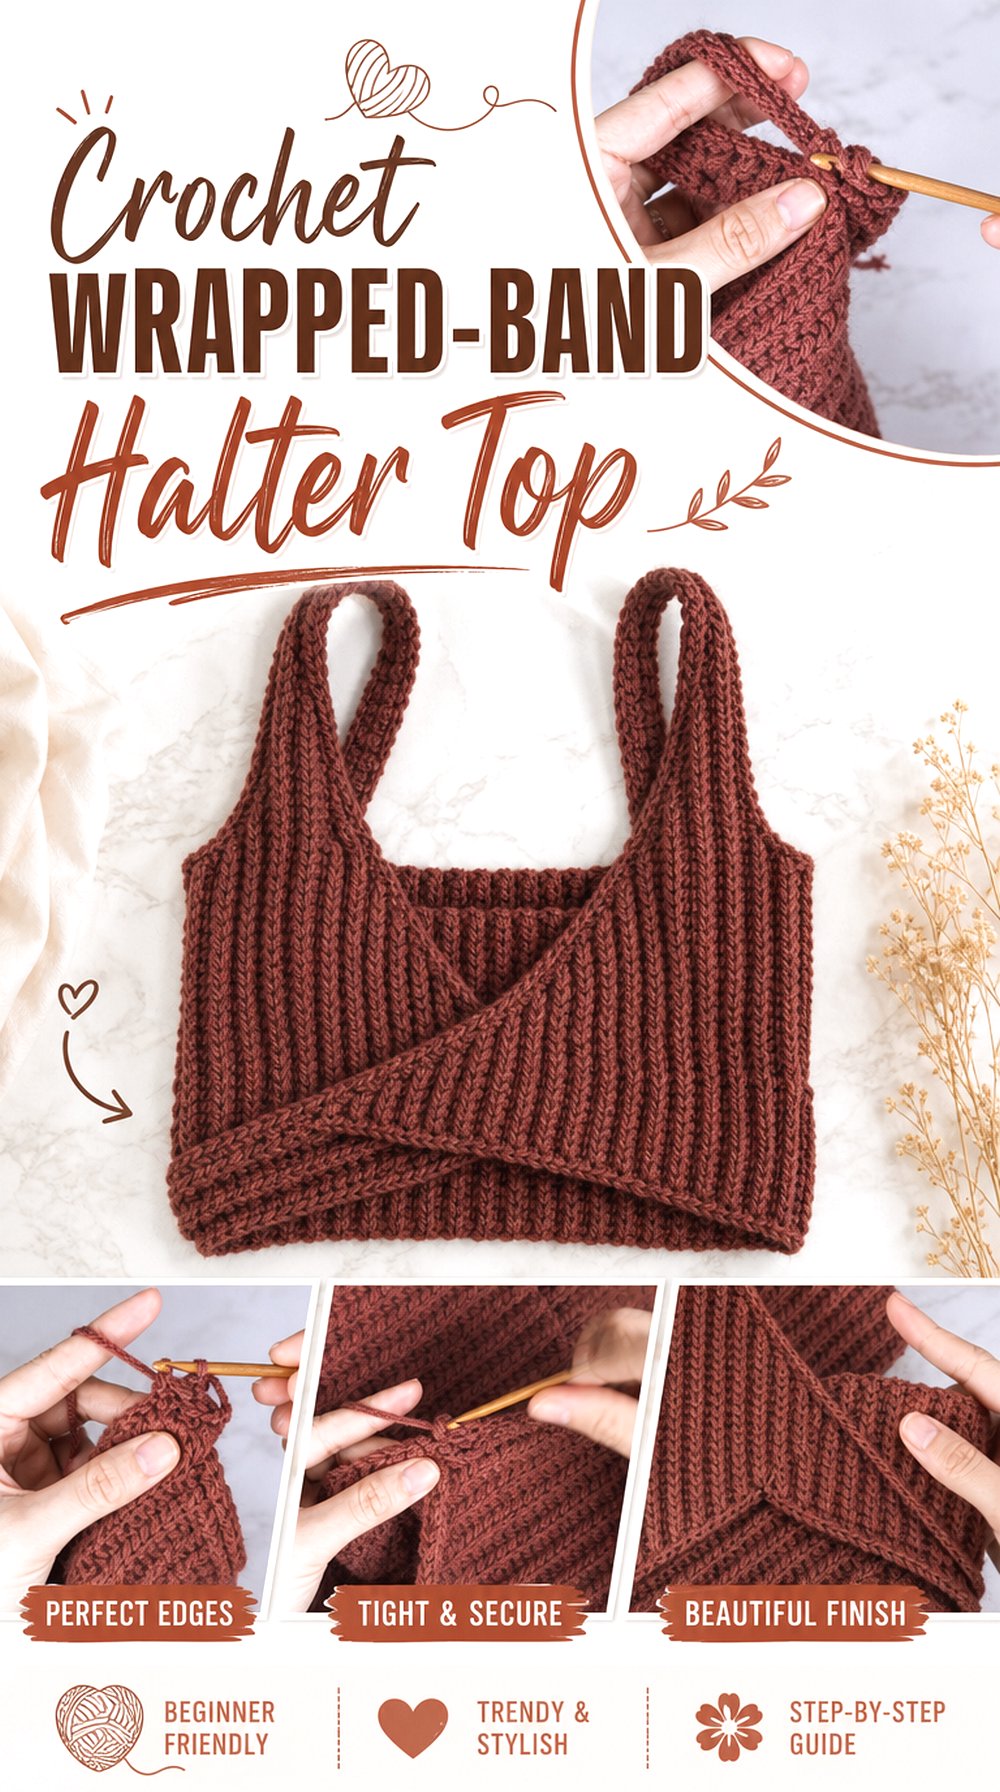
This wrapped-band halter top has a stronger garment shape than many tie-only versions. The source describes a thick halter strap and a wrapped bottom band, giving the top a clear upper and lower structure. It may suit readers who want a cropped halter that looks more like a shaped garment than a simple triangle or mesh cover.
Study the Bottom Band
The wrapped bottom band is the feature that makes this design stand apart. It frames the lower edge and can affect how the top sits around the body. Readers should watch the band section carefully and check whether the finished width and placement match the cropped look they want.
Compare the Front and Back Panels
This project includes front and back panel work, so the overall fit is not only controlled by ties. Readers should compare how the front, back, straps, and side seams come together in the finished view. A panel-based halter may feel more garment-like, but it also makes measurement checks more important.
Use the Written Pattern Carefully
The description includes a pattern link, which can help viewers who prefer written support. Readers should check that the written pattern matches the video they are following and avoid mixing instructions from different versions. The video remains the source for exact construction details, especially at shaping and finishing points.
Original Tutorial and Creator Credit
Creator: TCDDIY
10. Crochet Multi Way Wrap Halter Top
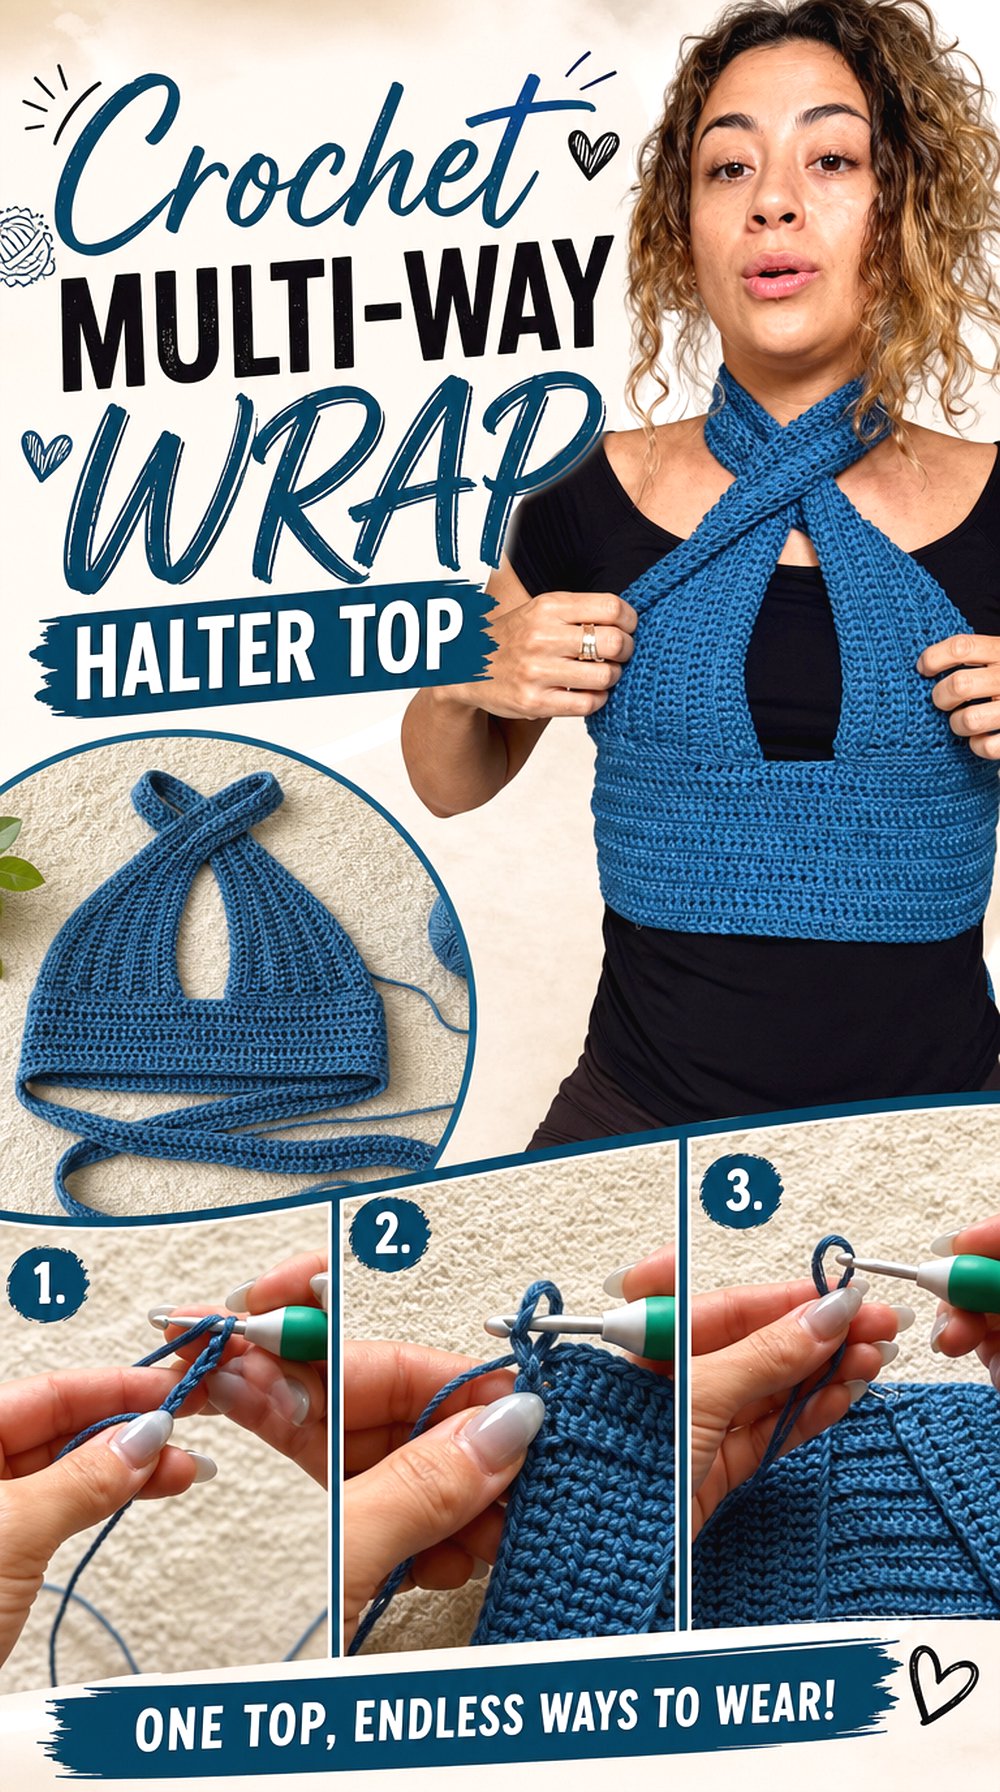
A multi-way wrap halter top offers the most styling flexibility in this group. The source describes a tie-back crochet top and shows ways to wear it, with separate neck and waist panel measurements included in the description. This idea is different from the others because the final look can change depending on how the panels are wrapped and tied.
Consider the Wearing Options
The main reason to choose this project is the multi-way format. Readers should look at the different wearing options and decide which version they would actually use most often. A top that can wrap several ways may be useful, but it also requires comfort with tying, adjusting, and checking the fit each time.
Note the Panel Measurements
The creator lists neck and waist panel measurements for the sample, which gives readers useful context. Those numbers should not be treated as universal sizing, but they can help viewers understand the proportions of the finished piece. Anyone needing more or less coverage should watch how length adjustments are discussed.
Check the Tie-Back Fit
Tie-back construction puts a lot of fit control in the final styling. Readers should check whether the back ties feel secure enough for their intended use and whether the panel width gives the coverage they want. For a multi-way top, testing the wrap position against personal measurements is especially important before finishing.
Original Tutorial and Creator Credit
Creator: Emma Warrender
Conclusion
These crochet halter top ideas cover a wide range of finished looks. The lace and triangle designs keep the shape simple with front detail, while the elastic-band and wrapped-band tops focus more on structure. Granny square, daisy, and mandala options make the front decorative, and the mesh tie-front or multi-way wrap styles offer lighter coverage and more styling flexibility. Choose based on neckline, back view, coverage, and adjustment needs, then use the original tutorials for exact construction details.
FAQs
How do I choose the right crochet halter top tutorial?
Start with the finished shape rather than the thumbnail alone. Check the neckline, back ties, armhole area, garment length, and front coverage. A mesh halter, mandala top, and wrapped-band crop will not fit or layer the same way, so choose the tutorial that matches how you plan to wear the finished piece.
What should I check before making a crochet halter top?
Look for a clear material list, size notes, measurements, back view, and finishing information. For motif tops, check how pieces are joined. For fitted tops, review the measurement section carefully. If a tutorial does not clearly state a detail you need, confirm it before buying yarn or starting.
Can crochet halter tops be adjusted for different sizes?
Some tutorials explain size adjustment, but the method varies by design. Tie-back and made-to-measure styles may offer more flexibility, while motif or panel-based tops may need more careful planning. Always follow the creator’s own sizing guidance instead of changing stitch counts or panel lengths without understanding the construction.
Should I line a crochet halter top?
Lining depends on the design, the yarn, and your coverage preference. Open mesh, lace, daisy, and mandala styles may need an underlayer or lining if you want more opacity. Only follow lining instructions when the creator provides them clearly, or treat the top as a layering piece.
Can I sell crochet halter tops made from YouTube tutorials?
Do not assume selling is allowed. Check the creator’s description, pattern terms, website, or shop policy for finished-item rules. Some creators allow sales with credit, while others may limit use. Credit is respectful, but it does not replace clear permission when a design has specific terms.


