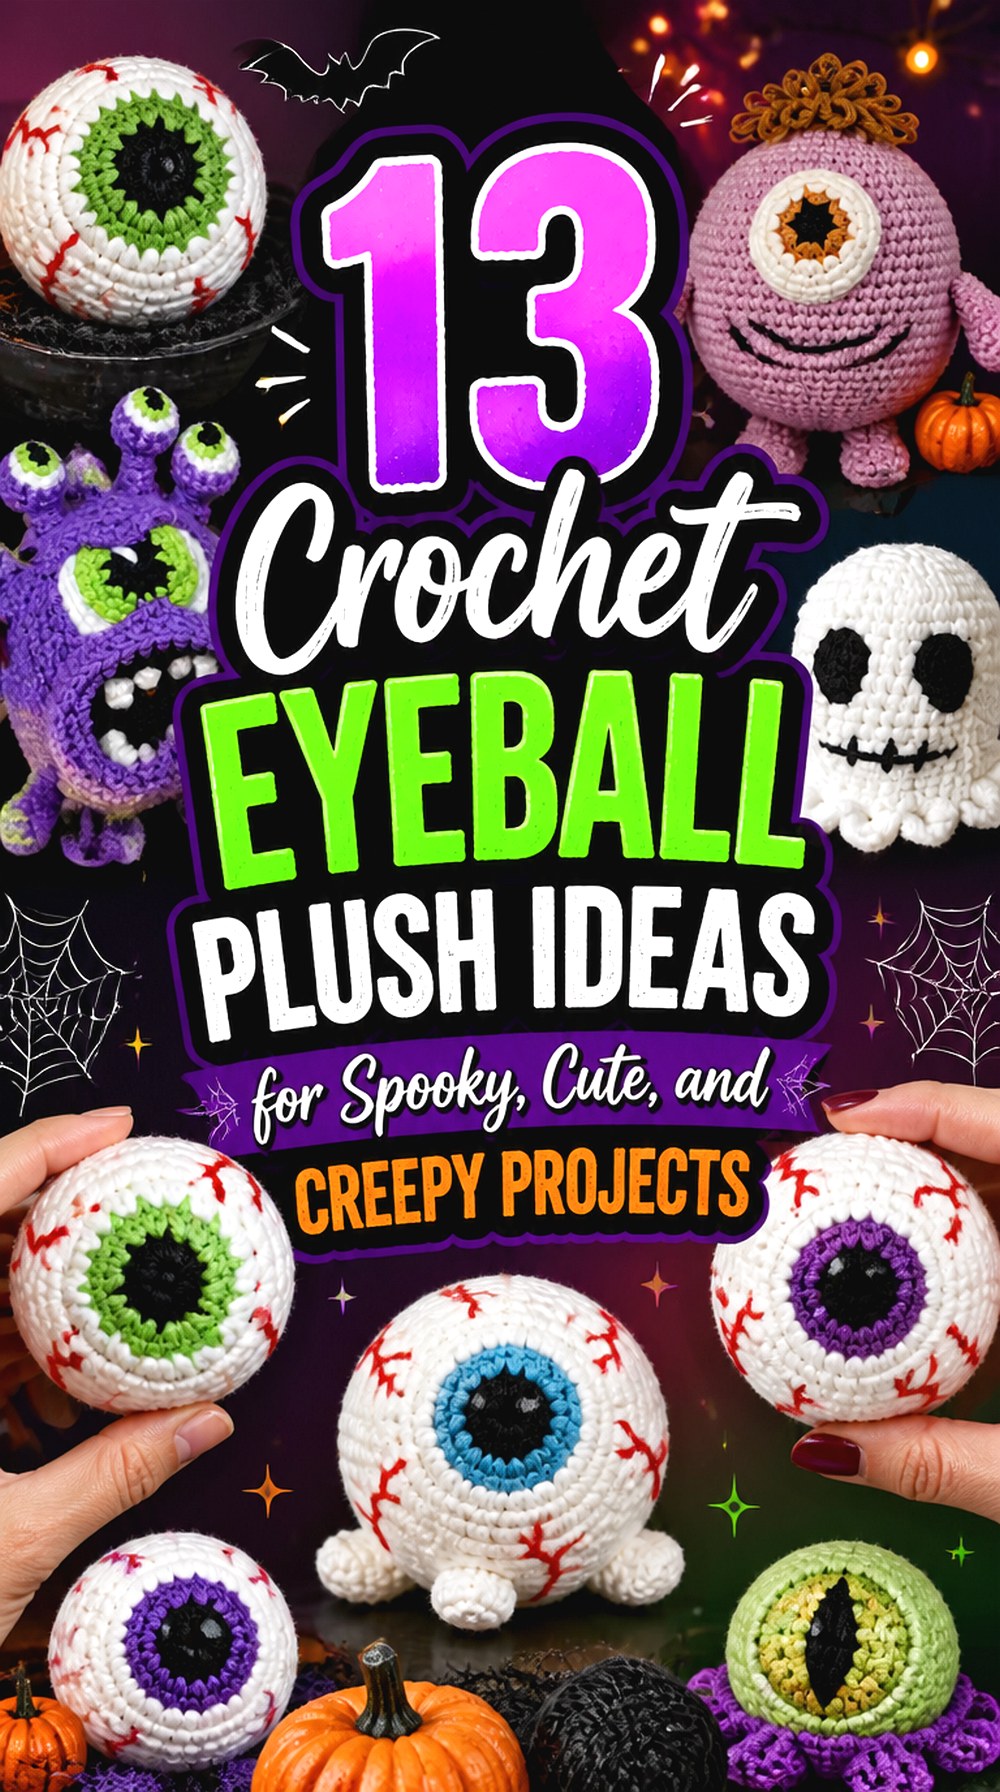

Crochet eyeball plush projects can range from tiny Halloween favors to oversized cushions, and the difference is about much more than iris color. Some designs focus on a realistic bloodshot appearance, while others turn the eye into a soft squish, keychain, whimsical ball, party decoration, or full fantasy creature.
This collection helps you compare those different directions before choosing a tutorial. You’ll find compact spheres, a two-tone iris design, an eyeball pillow, a large blanket-yarn squish, embroidery-focused versions, repeatable party eyes, and eye-centered monsters. Pay attention to how scale, stuffing, yarn texture, surface details, and added components change both the appearance and practical use of the finished piece. The ideas are deliberately separated by meaningful construction or use differences rather than simple color swaps.
Quick List
- Anatomical-Style Crochet Eyeball Plush
- Crochet Halloween Handout Eyeball Plush
- Crochet Two-Tone Iris Bloodshot Eyeball Plush
- Crochet Oversized Eyeball Squish Plush
- Crochet Round Eyeball Pillow Plush
- Crochet Mini Eyeball Keychain Plush
- Crochet Modular Halloween Eyeball Plush
- Crochet Whimsical Monster-Eye Plush Ball
- Crochet Crisp Cotton Eyeball Plush
- Crochet Embroidered-Detail Eyeball Plush
- Crochet Party-Bowl Eyeball Plush Set
- Crochet Beholder Eyeball Monster Plush
- Crochet Cyclops Character Plush
Choose the Eyeball Construction Before the Color
Start by deciding what the finished eye needs to do. A nearly spherical amigurumi eye works well for tabletop displays, bowls, or small seasonal arrangements because it looks recognizable from several angles. A pillow or oversized squish has a different job: the front-facing iris becomes more important because the project will normally be viewed from one primary side.
Accessory-scale eyeballs need another kind of planning. A keychain has hardware and repeated movement to consider, while a monster or cyclops requires the eye to work as part of a larger character. If realism matters, look closely at iris transitions and vein placement. For a cartoon effect, exaggerated proportions and a simpler eye surface can be more effective than extra anatomical detail.
Yarn, Stuffing, and Small Details Change the Result
For stuffed eyeballs, the crochet fabric needs to contain the filling without distracting gaps. Changing to a thicker yarn can enlarge the project, but it also changes stitch definition, weight, and the relationship between the pupil, iris, and white sections. Plush or blanket yarn creates a softer, less sharply defined surface; smoother yarn can make color boundaries and embroidery easier to see.
Stuff gradually and check the shape from multiple angles instead of judging only the iris-facing side. Overfilling can stretch the fabric and distort circular color sections, while uneven filling can create flat spots.
If the finished project is intended for a baby, young child, or pet, treat detachable hardware and small embellishments cautiously. Securely crocheted or embroidered details may be more appropriate than loose components, depending on the intended recipient.
1. Anatomical Style Crochet Eyeball Plush
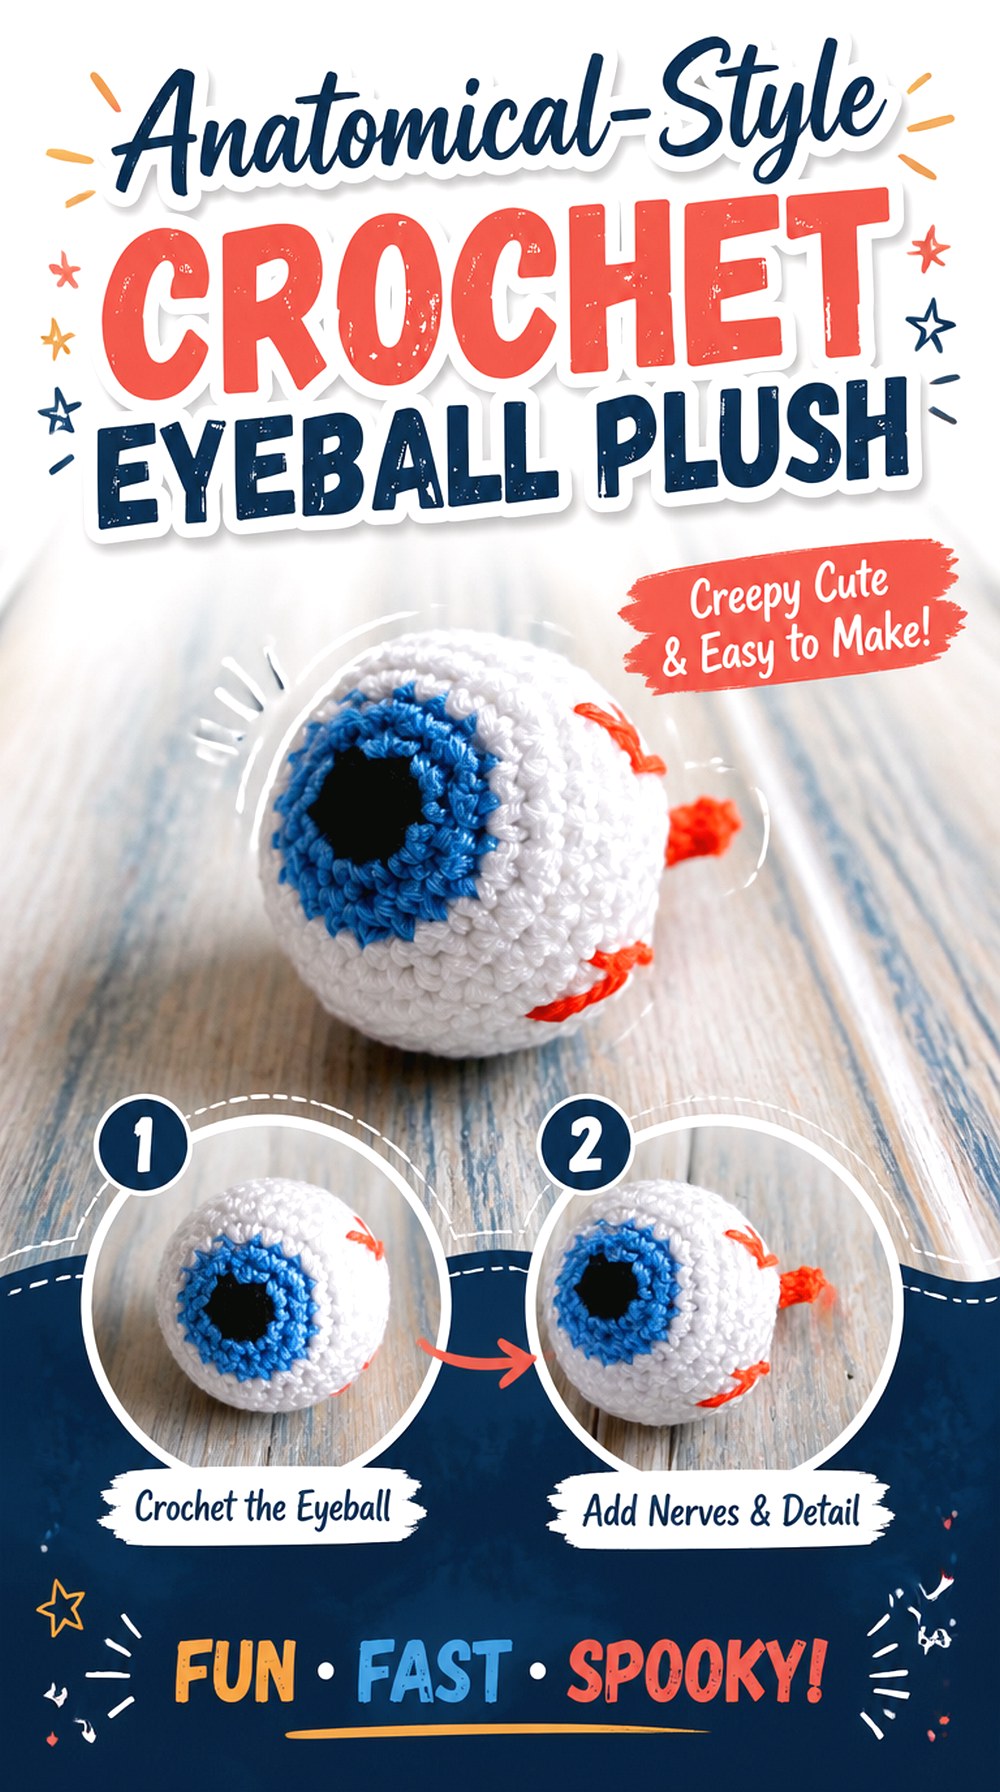
This version leans toward the unsettling, anatomical side of crochet eyeballs rather than a cheerful cartoon eye. HappyBerry Crochet’s finished design uses the familiar pupil, iris, white eye, and red detailing to make the object read as a disembodied eye instead of a generic striped ball.
It is a useful choice when the goal is Halloween display, creepy prop styling, or an eye with enough visual detail to stand on its own. Compared with the simpler spheres later in this list, the surface decoration carries more of the personality, so careful finishing matters as much as achieving an even round form.
Red Details Create the Anatomical Effect
The red accents have a large visual impact because they interrupt the clean white portion of the eye. Keep that in mind when choosing between a subtle and deliberately gruesome finish. Sparse lines leave more open white space and make the iris dominant; heavier red detailing pushes the project toward horror decor.
Whichever direction you choose, check the finished sphere before adding extra surface work. Embroidery pulled too long by an overlay can visibly indent a stuffed form.
Keep the Iris Visually Centered
An eye can be technically round but still appear crooked if the iris drifts away from the visual center. Before closing and finishing the plush, look at it straight on as well as from the side.
This matters especially with anatomical-looking designs because viewers naturally focus on the pupil first. If the front face looks skewed, adjusting stuffing distribution before final finishing may improve the presentation more effectively than adding more decorative detail.
Original Tutorial and Creator Credit
Creator: HappyBerry Crochet
2. Crochet Halloween Handout Eyeball Plush
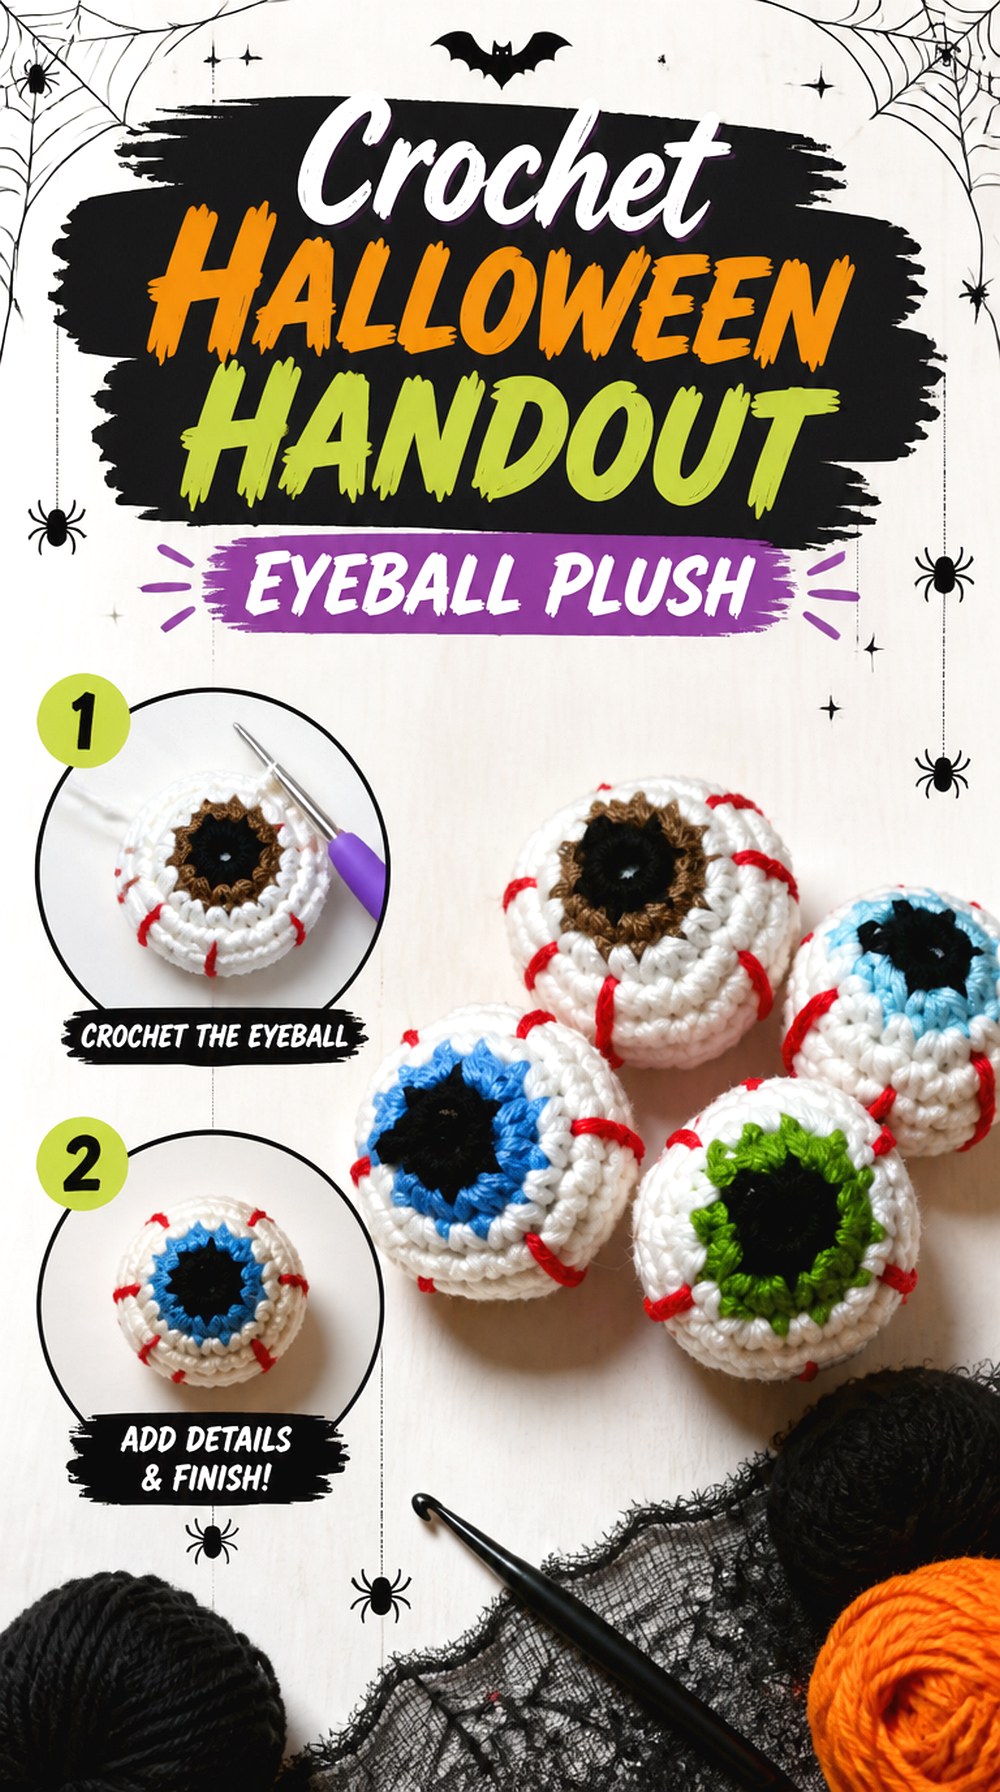
For a straightforward Halloween eyeball, this tutorial from Llama Mama Kayla keeps the focus on a recognizable stuffed eye without turning it into a larger monster or home accessory. The creator specifically presents the project as something that could be passed out for Halloween, making this idea useful when you want several small handmade pieces rather than one major statement plush.
That repeated-use purpose changes the priorities. Consistent shape, tidy color changes, and manageable finishing matter more than elaborate embellishment. You can still vary iris colors across a group, but the underlying form should stay consistent if you want the collection to look intentional.
Repetition Makes Shape Differences More Obvious
When several eyeballs sit together, small differences in stuffing and shaping become easier to notice. If you are making a group, compare each newly stuffed eye with the previous one before closing it.
You do not need perfectly identical handmade pieces, but similar firmness and overall roundness will create a more cohesive set. It also helps to keep the placement of the main color sections visually consistent rather than relying on iris color alone for variation.
Think About the Recipient Before Adding Extras
For adult Halloween favors, embellishments and attachments can be selected mainly for appearance. If these are being given to children, assess every added component separately.
A decorative piece that looks secure on a shelf may not be suitable for active play. Avoid assuming that a finished amigurumi is automatically child-safe. Consider the age of the recipient, how firmly components are attached, and whether embroidered or crocheted details would be a better fit than small detachable pieces.
3. Crochet Two Tone Iris Bloodshot Eyeball Plush
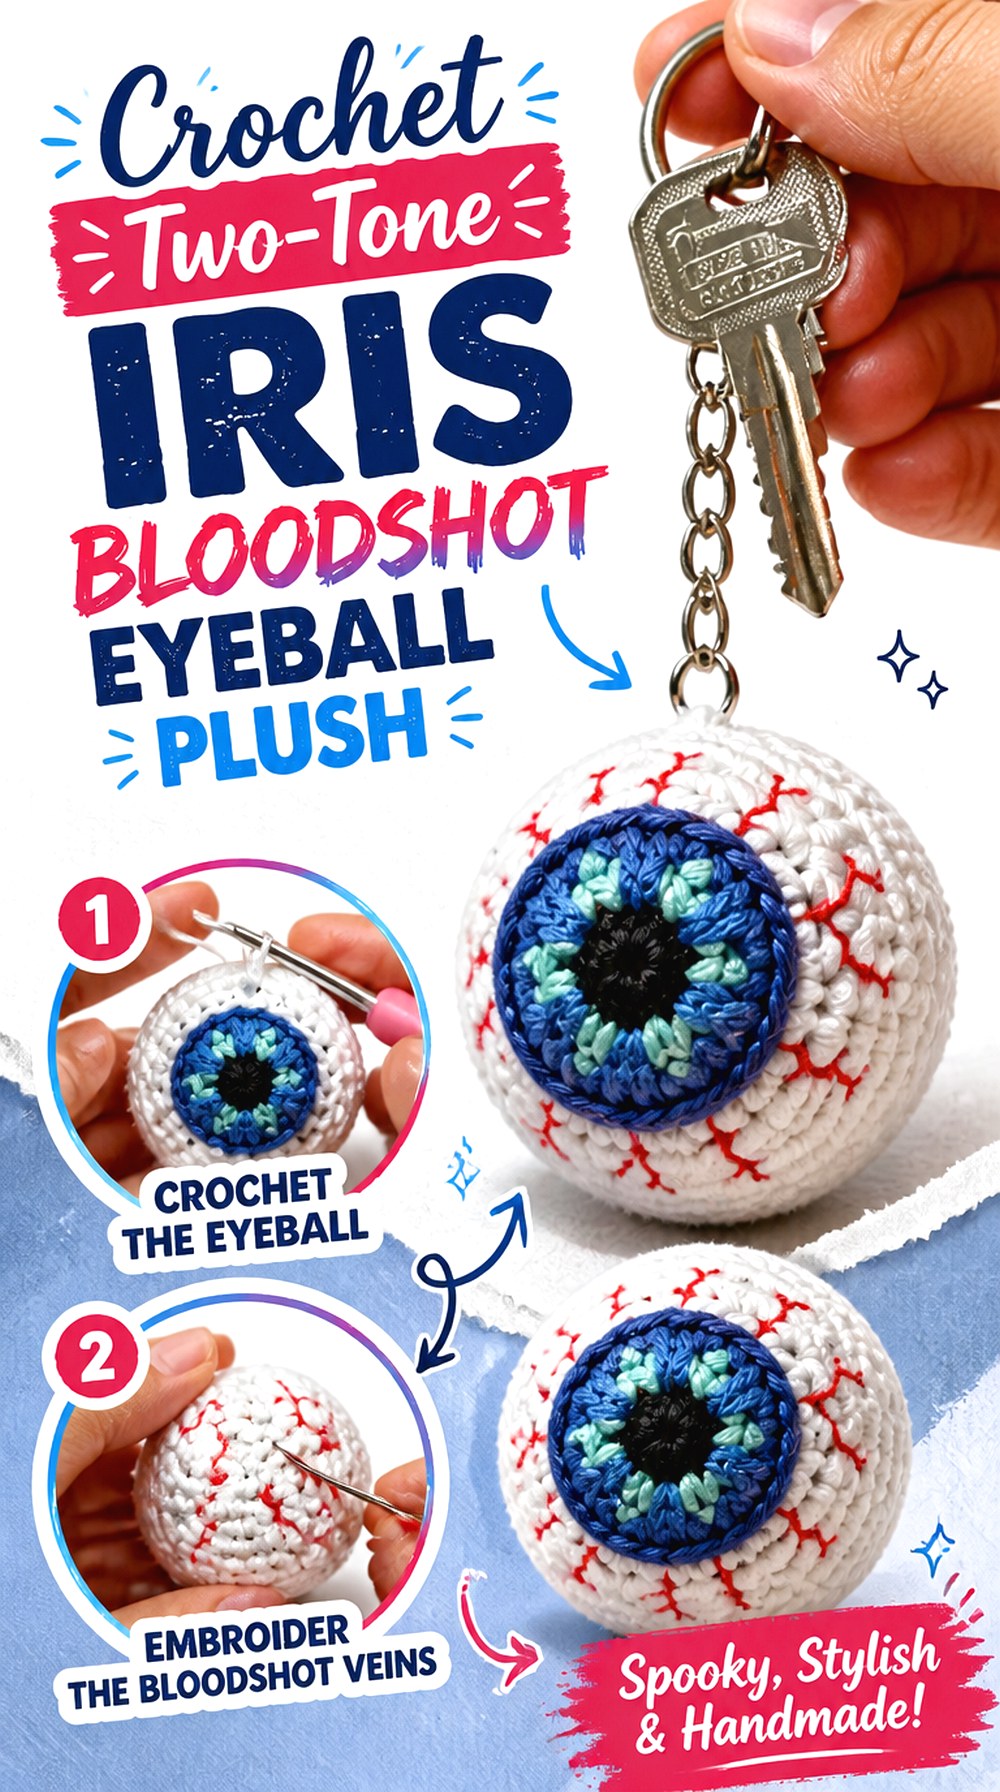
Hooked On Patterns gives the iris more attention than many basic eyeball amigurumi designs. Instead of relying on a single ring of iris color, the tutorial builds a more detailed two-color effect before moving into the white portion of the eye, then finishes the design with optional vein details.
That makes this a stronger choice when the front of the eye needs to carry the project visually. In a bowl of Halloween decorations or a hanging display, the layered iris can remain noticeable even when the individual plush is relatively compact. It also offers more color-planning possibilities without changing the basic identity of the project.
A Two-Color Iris Needs Deliberate Contrast
Two iris shades only create useful depth if they remain distinguishable after crochet texture is taken into account. Two extremely similar colors may merge visually, especially from across a room.
Compare the yarns beside the white and black portions before committing to the combination. A stronger value difference between the inner and outer iris can make the center easier to read, while closely related shades create a quieter transition. Neither is universally better; choose based on the effect you want.
Veins Should Support the Iris, Not Hide It
Red or dark-pink vein details can turn a clean eye into a convincing bloodshot Halloween piece, but adding more lines does not automatically make the design stronger.
Once the sphere is stuffed, rotate it and decide where empty white space is useful. Leaving some areas relatively clear keeps the eye from becoming visually crowded. If you add surface embroidery, keep the tension relaxed enough that the stitches sit on the fabric rather than pulling deep channels into it.
Original Tutorial and Creator Credit
Creator: Hooked On Patterns
4. Crochet Oversized Eyeball Squish Plush
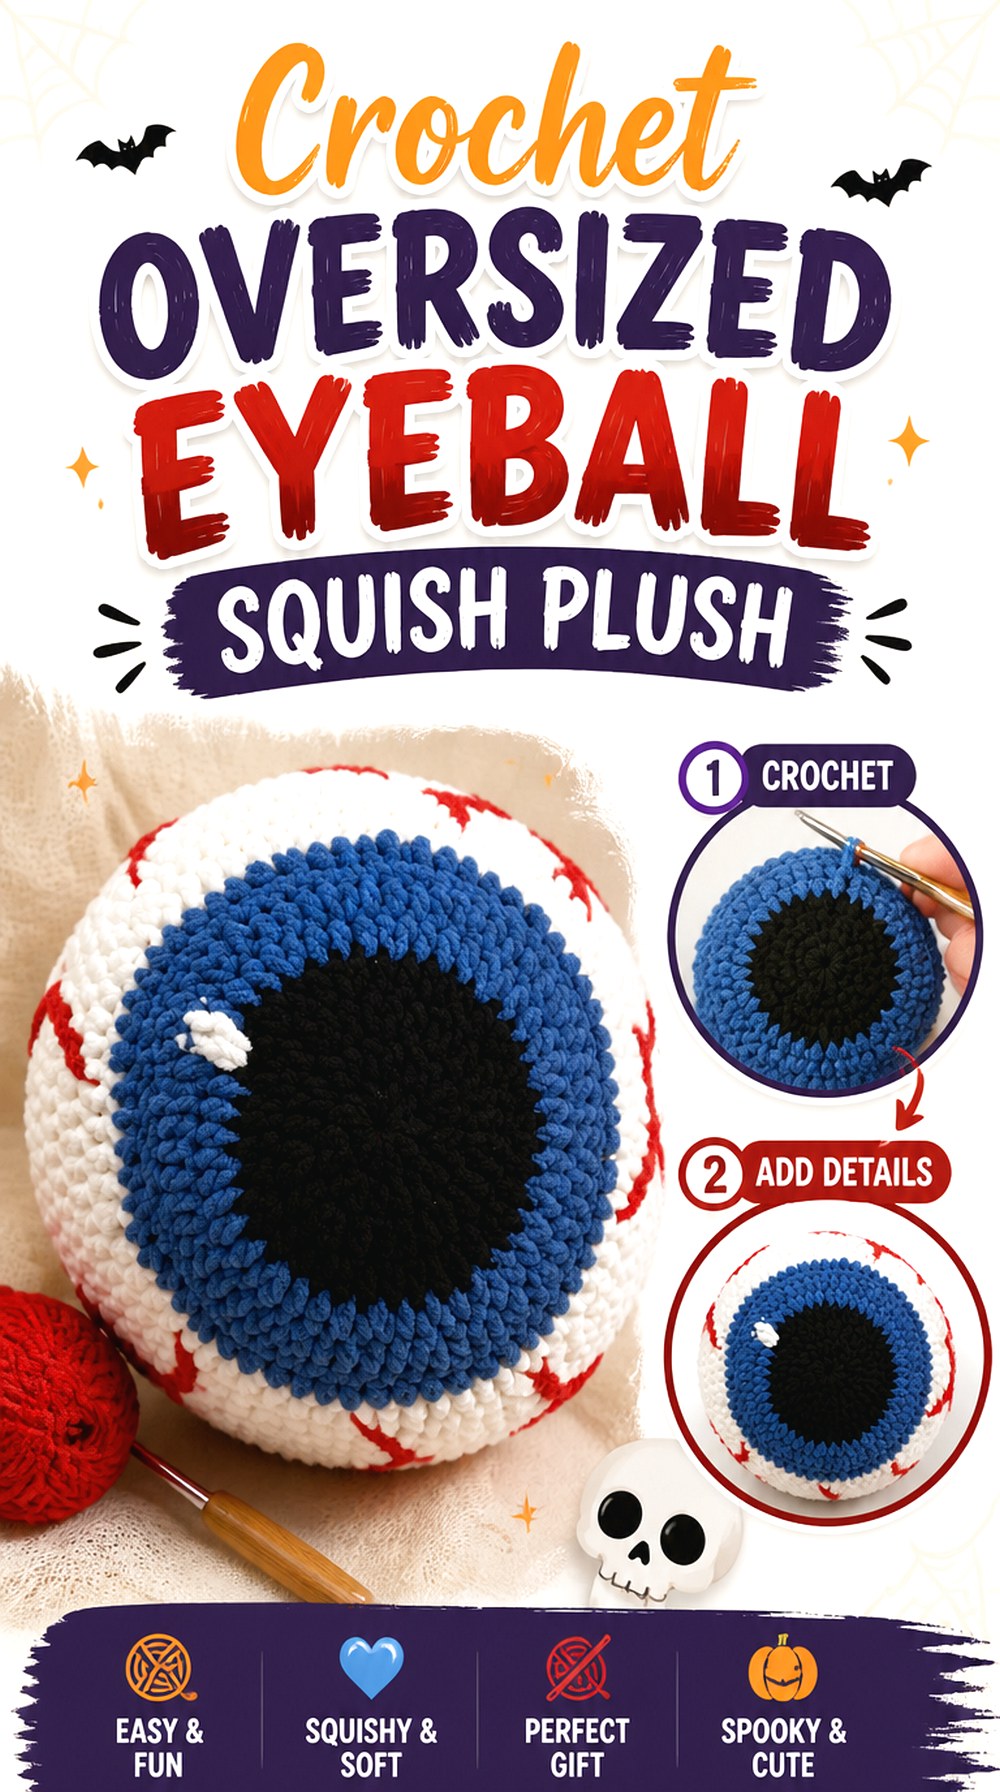
This Moogly project moves the eyeball from small amigurumi territory into substantial squish decor. Tamara Kelly’s tutorial uses super-bulky blanket yarn, so the finished eye has a visibly softer, thicker surface than the compact yarn versions elsewhere in this collection.
The larger format changes how the design reads. Instead of being a small Halloween accent, the eyeball becomes a focal object that can sit with seasonal pillows or other oversized plush decor. It is a good direction when scale and softness matter more than tiny anatomical detail, because the broad color areas remain easy to recognize from farther away.
Blanket Yarn Softens Fine Eye Details
Thick plush yarn changes the visual boundary between pupil, iris, and white. The fuzzy surface can make tiny accents less crisp than they would appear in a smoother yarn, but that same texture gives the project its squishy character.
Choose this format if tactile softness and large-scale impact are priorities. If you want extremely fine veins or highly defined anatomical marks, a smoother, smaller-scale eyeball may give those details more room to register.
Large Plush Shapes Expose Uneven Filling
A small dip in a miniature amigurumi may barely register. On a large spherical squish, a flat side can change the whole silhouette.
Turn the project as it is filled and assess the opposite side as carefully as the iris-facing front. The aim is not to pack it as firmly as possible; it is to distribute the filling or insert evenly enough that the broad round shape supports the eye design instead of fighting it.
Check How Much Room the Finished Piece Needs
An oversized eyeball functions more like a cushion or statement plush than a bowl-sized decoration. Before choosing it, consider where it will actually be stored or displayed outside Halloween season.
A large piece works well when you want one dominant decoration rather than many small items. If storage is limited, the pillow or smaller sphere options may be easier to accommodate while still delivering the same unmistakable eyeball theme.
Original Tutorial and Creator Credit
Creator: Tamara Kelly – Moogly
5. Crochet Round Eyeball Pillow Plush
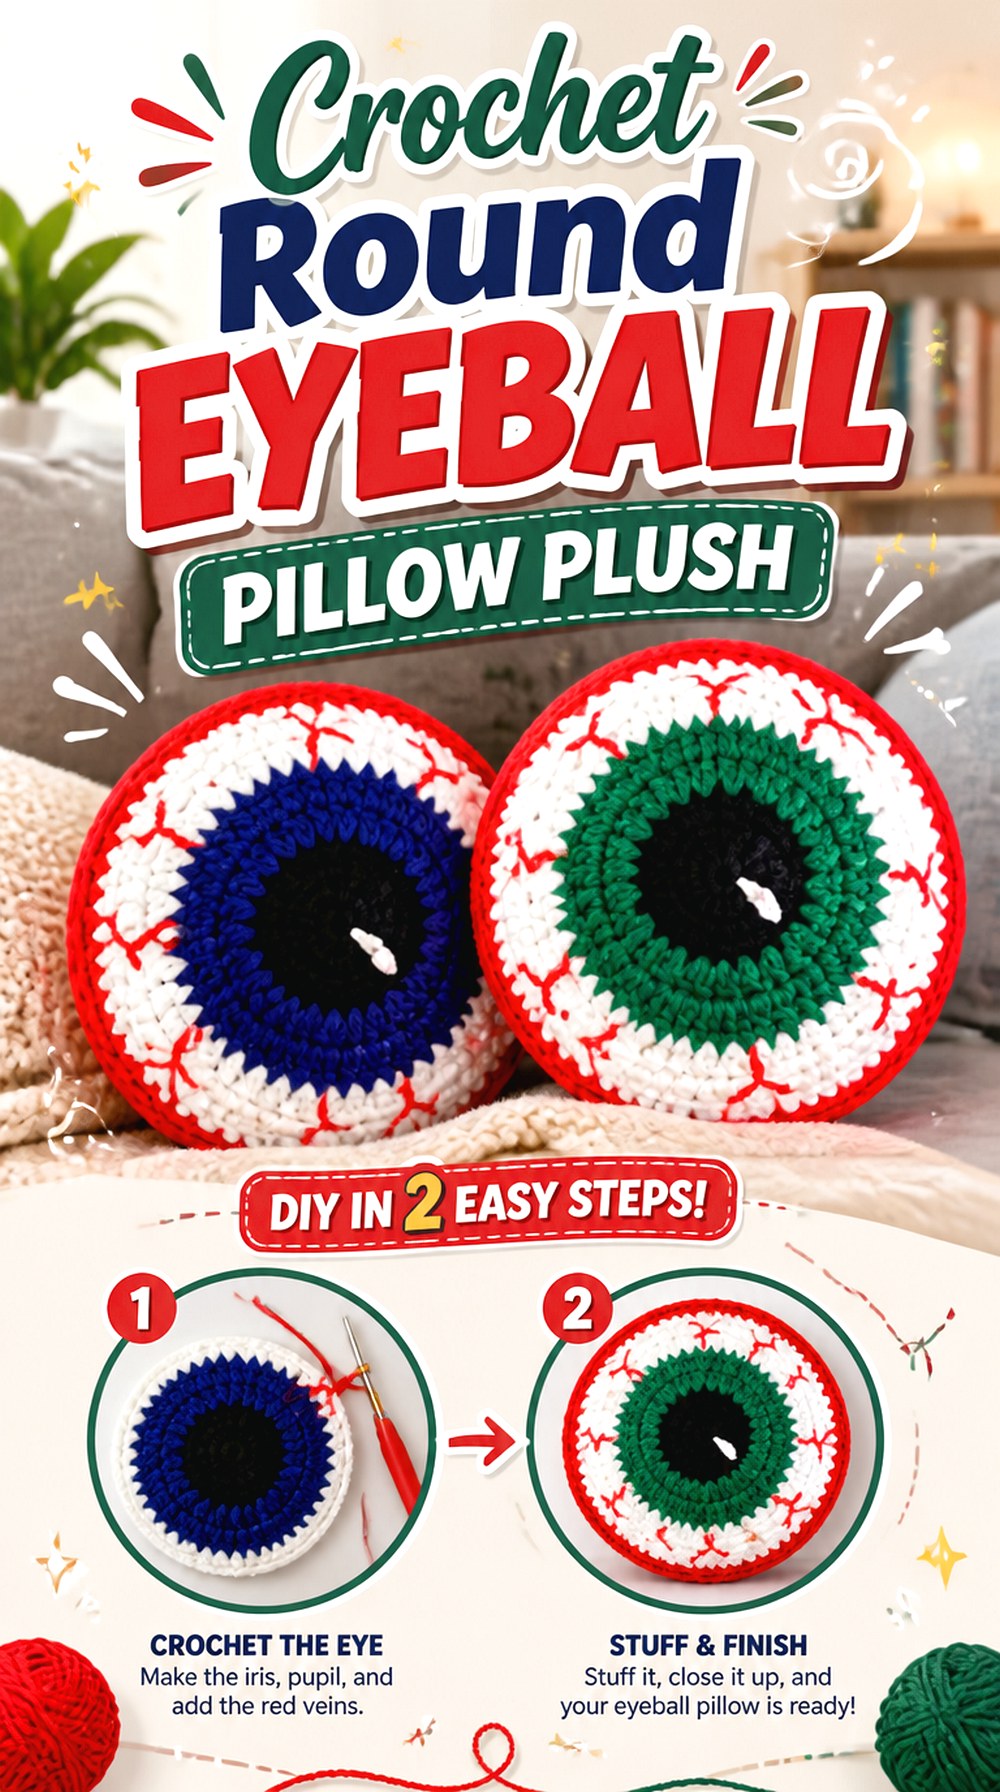
Sara Sach’s creepy eyeball pillow shifts the design away from the small amigurumi sphere and toward soft home decor. The front reads as a broad eye graphic, making it especially suited to a couch, chair, bed, or Halloween pillow arrangement.
The tutorial’s construction also uses two strands of yarn held together, according to the accompanying pattern information. That creates a different fabric and scale from the finer single-strand eyeballs in this list. Choose this direction if you like the eyeball motif but would rather make something that works visually alongside other seasonal cushions instead of a freestanding miniature object.
A Pillow Face Needs a Strong Front View
Unlike a sphere that may be viewed from almost every angle, a decorative pillow normally has a clear front. That makes the relative size and placement of the pupil, iris, white, and red sections particularly important.
Periodically lay the work in its intended viewing orientation. A color transition that seems fine while the fabric is moving around in your hands can look noticeably off-center once the whole eye is seen as one large graphic.
Held-Double Yarn Changes the Fabric
The source pattern specifies yarn held together, which gives this project a different fabric character from many small eyeball amigurumi designs.
If you substitute materials, do not assume the same visual scale or firmness will remain unchanged. Yarn thickness affects the size of the color sections, the weight of the pillow, and how much stitch texture shows. Confirm the creator’s material guidance before making a major substitution.
Shape the Edge as Carefully as the Center
The iris attracts attention first, but an uneven outer edge can make an otherwise centered eye look distorted. Before final finishing, place the pillow on a flat surface and check the overall silhouette.
Redistribute filling where possible instead of concentrating it in the center. For decorative use, a balanced profile usually reads more cleanly than a heavily packed center surrounded by underfilled edges.
Original Tutorial and Creator Credit
Creator: Sara Sach Crochet Designs
6. Crochet Mini Eyeball Keychain Plush
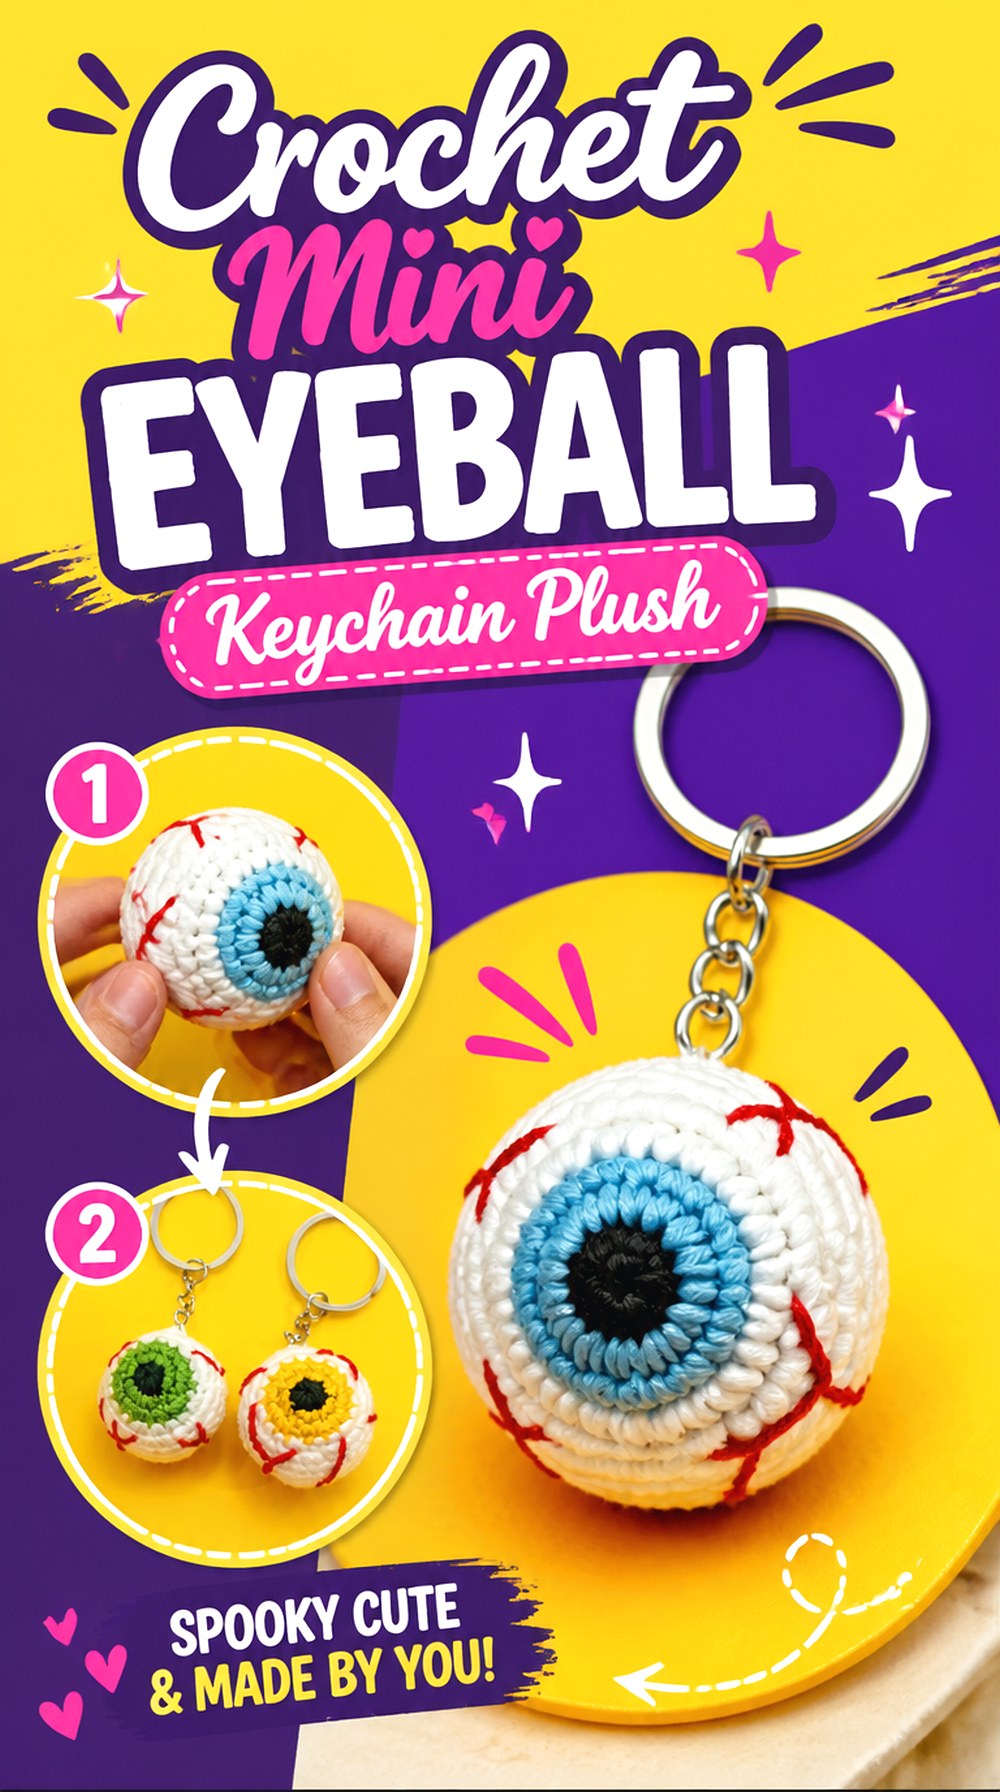
Lemon Crochet takes the eyeball concept into accessory territory with a small stuffed version designed as a keychain. The important difference here is not simply that the eye is smaller; it will also be handled, swung from hardware, placed in bags, and exposed to more friction than a shelf decoration.
That makes finishing decisions especially important. A clean compact shape keeps the eye recognizable, while a secure hanging point determines whether it remains practical as an everyday charm. This is a useful option when you want the eyeball theme in a portable format rather than a Halloween decoration that stays at home.
The Hanging Point Takes More Stress Than the Plush
A keychain attachment concentrates movement in one small area. Before using the finished piece, inspect where the loop or hardware meets the crochet fabric.
If you adapt the tutorial with different hardware, make sure the attachment is supported by the fabric rather than pulling against one loose strand. The eye itself may be soft, but its connection point needs to tolerate repeated movement if it will actually travel on keys, a backpack, or a bag.
Keep Added Details Proportionate to the Mini Scale
Fine veins, oversized embellishments, or thick knots can overwhelm a very small eye. At keychain scale, a clear pupil-to-iris-to-white relationship often does more visual work than adding many surface elements.
View the piece from roughly arm’s length before deciding it needs more detail. If the eye already reads instantly at that distance, extra embroidery may add clutter instead of definition.
Original Tutorial and Creator Credit
Creator: Lemon Crochet
7. Crochet Modular Halloween Eyeball Plush
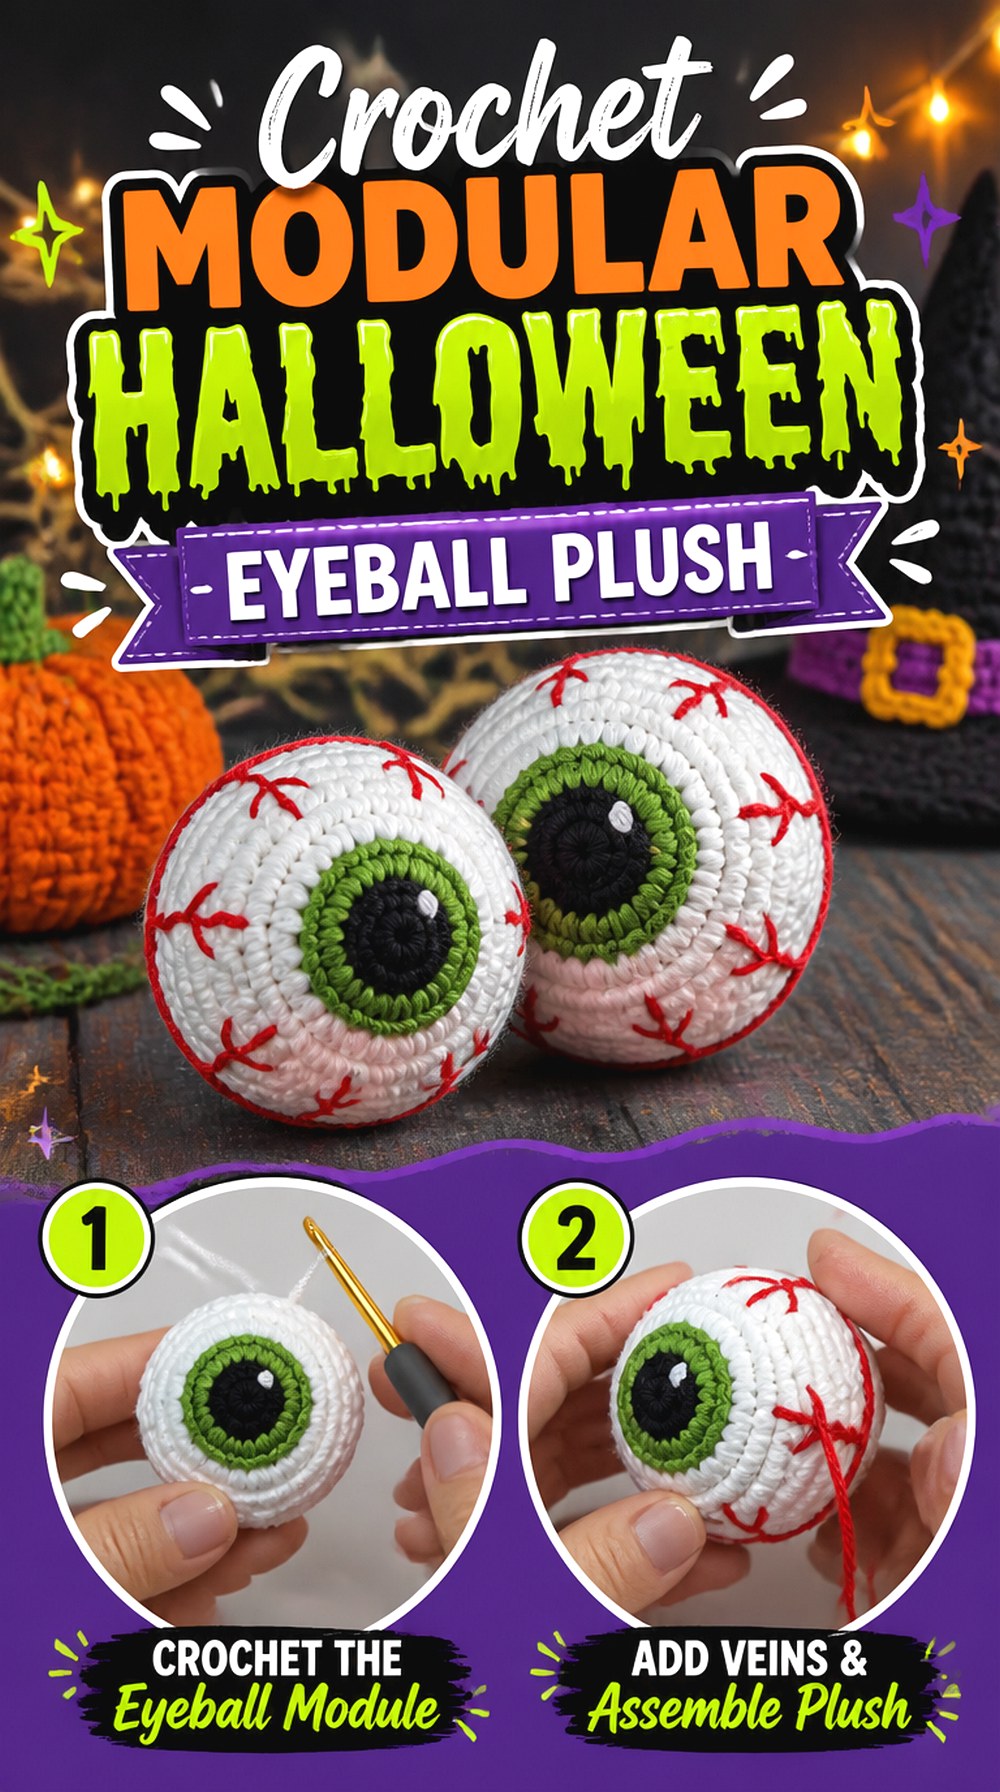
Sharon Ojala’s tutorial offers a compact eyeball that works well as a standalone Halloween decoration but can also function as one piece in a larger spooky arrangement. That modular quality is useful if you want the eye itself to remain simple enough to pair with monsters, jars, bowls, garlands, or other seasonal amigurumi.
Compared with a dedicated pillow or oversized squish, this direction is much less committed to one display format. Make a single eye as an accent, or repeat the basic form and decide on the presentation afterward. The tutorial also includes a clear supplies section before the project begins.
Design the Eye for Its Final Viewing Angle
If an eyeball will sit independently, it benefits from looking balanced from several sides. If you already know it will be attached to another object, the front-facing iris becomes the priority.
Decide that before investing heavily in surface decoration. A partially hidden eye does not need elaborate detail on every side, while a loose display piece may look unfinished if all of its visual interest is concentrated in a very narrow front zone.
A Simple Sphere Is Easier to Reuse
The advantage of a relatively straightforward eyeball is adaptability. It can remain an independent plush or become a component in a bigger Halloween scene without competing with too much visual styling.
If you plan to combine it with another crocheted object, compare scale before sewing anything together. The eye should look deliberately oversized, undersized, or proportional—not accidentally mismatched because the two projects happened to use different yarns.
Original Tutorial and Creator Credit
Creator: Sharon Ojala
8. Crochet Whimsical Monster Eye Plush Ball
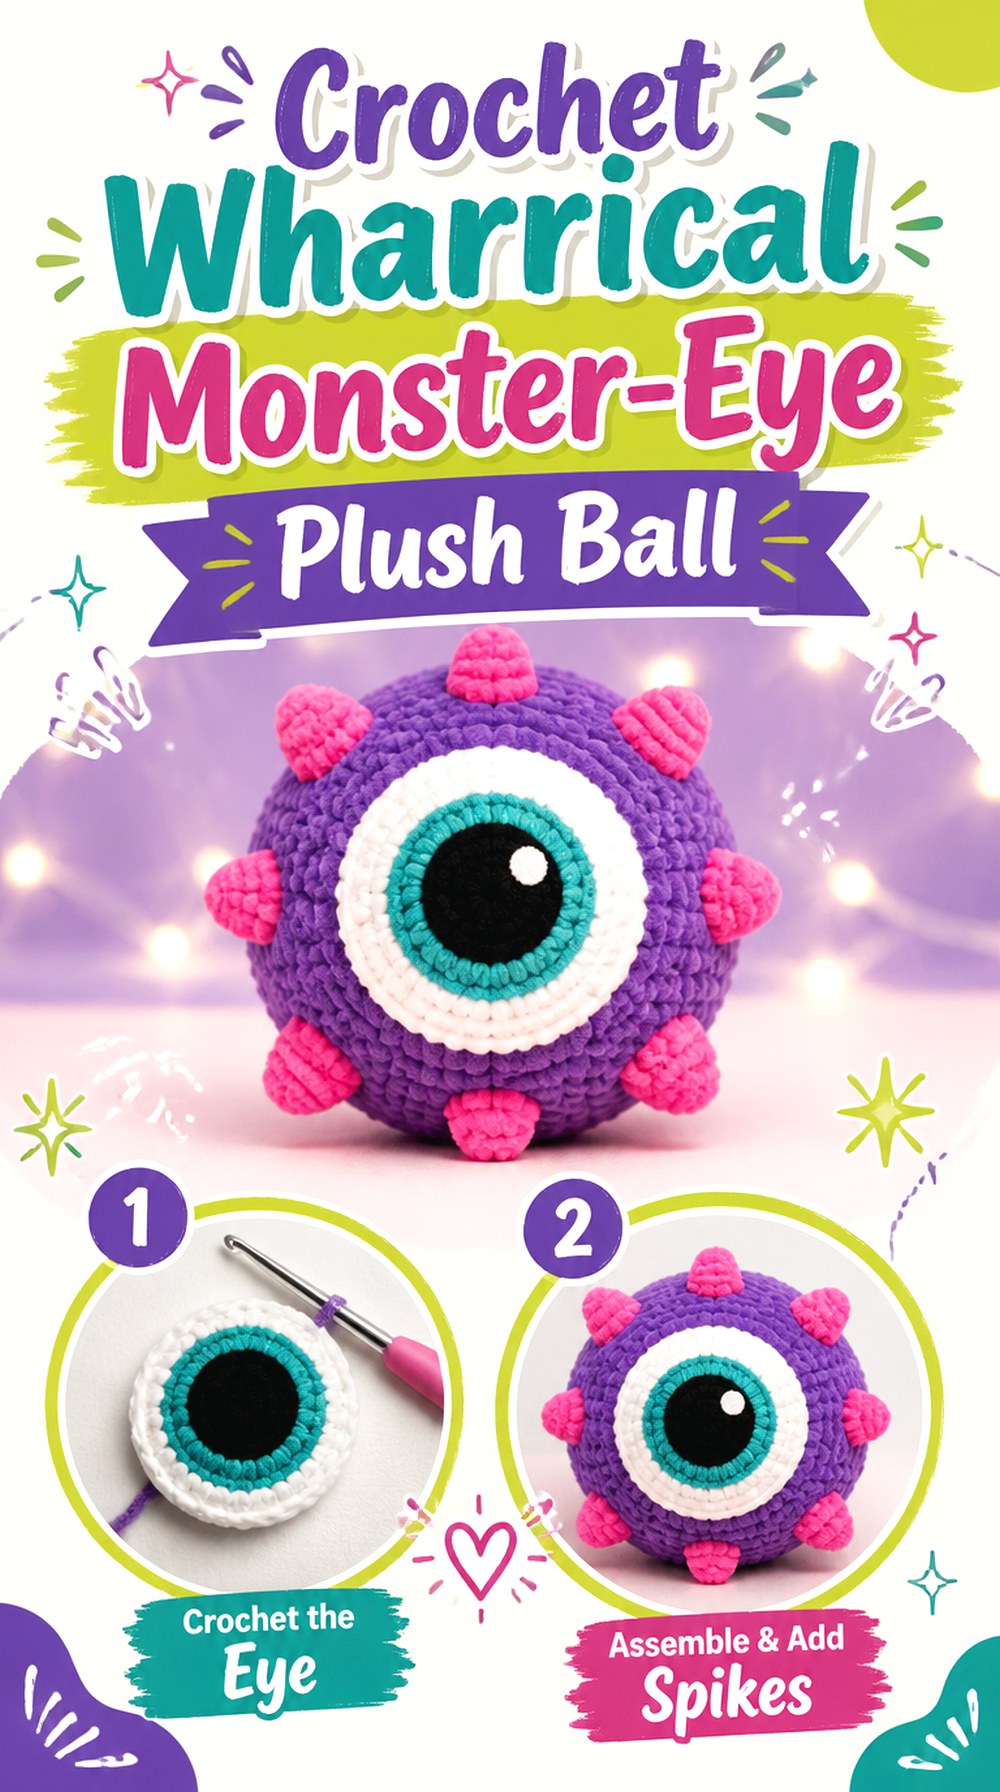
All Crafts Channel approaches the eye with a more whimsical feel. The video description presents the crocheted eyeball as a playful design that can be used around toy and monster-themed projects, giving it a less anatomical personality than the bloodshot options earlier in the list.
This makes the idea useful when you want “weird and cute” rather than horror realism. A cartoon-like eye can also tolerate exaggerated iris colors and playful proportions more easily because anatomical accuracy is not the main objective. Treat it as a character-building element: expression and readability matter more than reproducing a realistic human eye.
Exaggeration Works Better When It Is Intentional
A large pupil, bright iris, or broad white section can make a whimsical eyeball expressive, but random proportion changes may simply make it look misshapen.
Choose one feature to emphasize. If the iris is the main statement, keep surrounding details quieter. If the plush will become part of a monster, consider how much of the eye will still be visible once other facial or body elements are nearby.
Use the Eye as a Character Component
A cartoon eyeball does not have to remain an isolated sphere. Its simplified visual language can work as the face of a monster or as a feature on another playful crochet object.
Before attaching it to something larger, pin or temporarily position it and view the entire character from a distance. Placement can change the expression dramatically, particularly when one oversized eye becomes the main facial feature.
Original Tutorial and Creator Credit
Creator: All Crafts Channel
9. Crochet Crisp Cotton Eyeball Plush
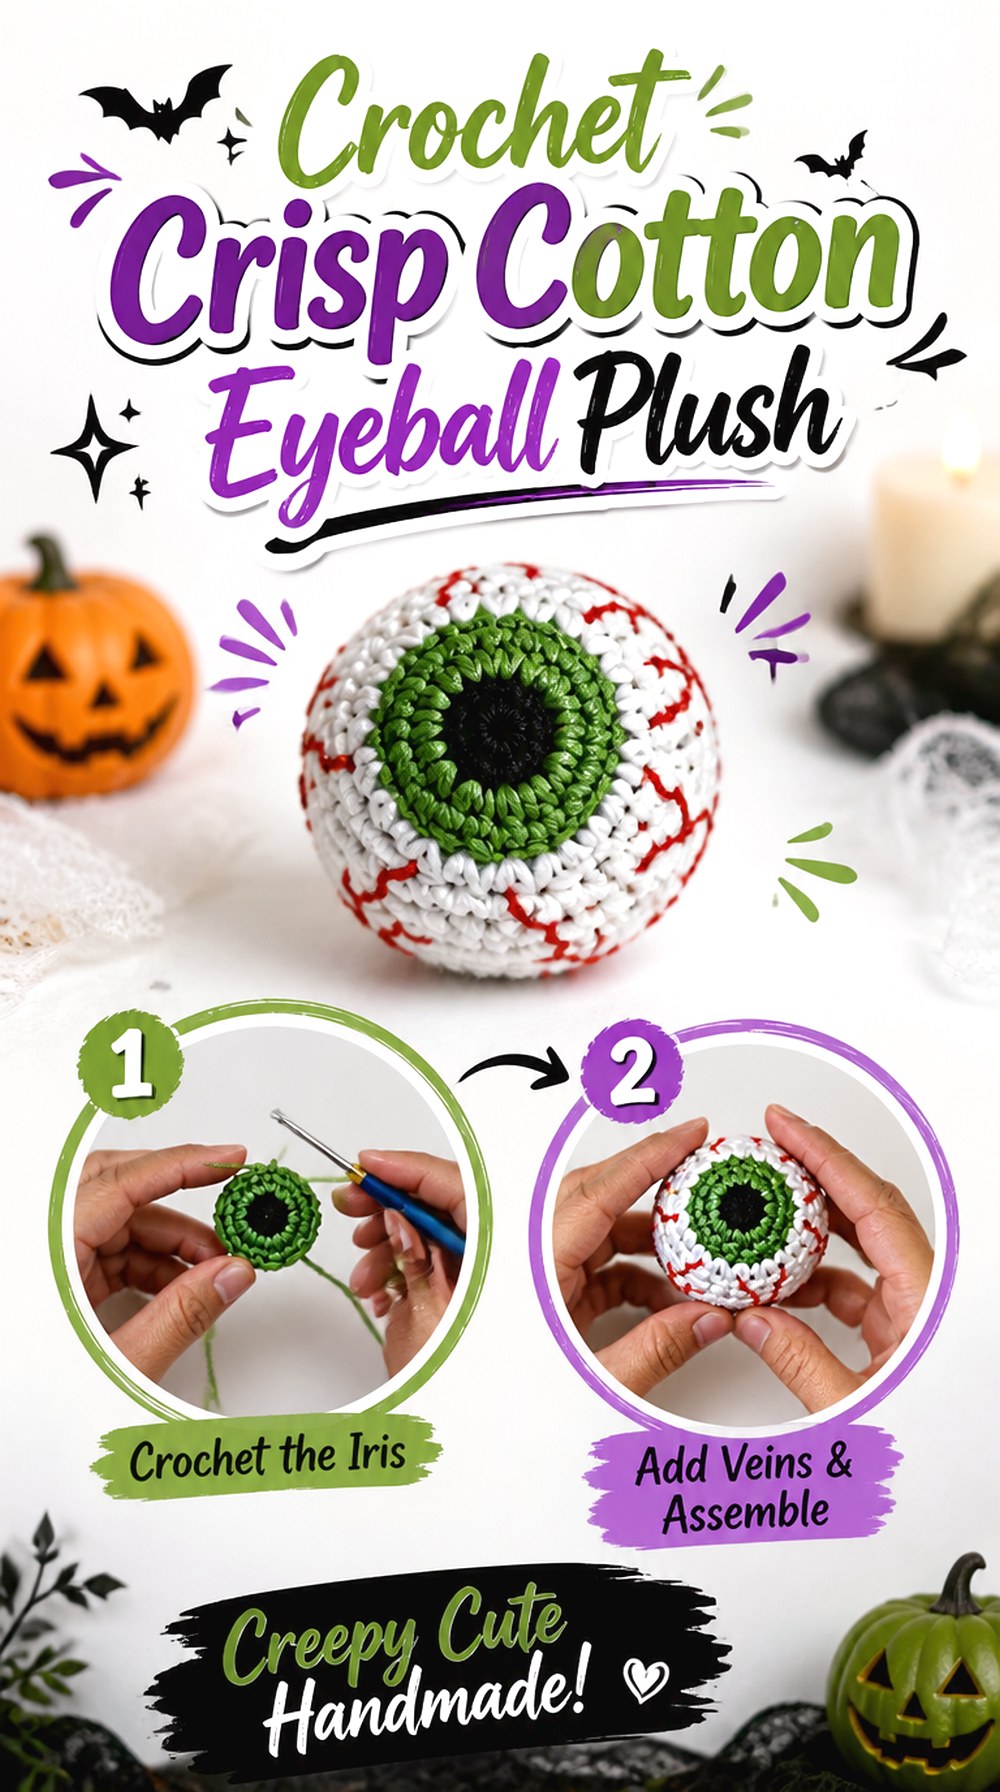
Crochet With Greta demonstrates a spooky stuffed eyeball using cotton yarn and a small hook in the materials shown for the tutorial. That combination gives this project a useful place in the collection: it emphasizes compact stitch definition rather than the fuzzy softness of blanket-yarn squishes.
A smoother surface can be helpful when you want the pupil, colored iris, white section, and red accents to remain visually distinct. This type of eye suits small seasonal arrangements and close-up displays where the crochet texture itself will be visible rather than softened by a thick plush yarn.
Smooth Yarn Makes Every Color Boundary Visible
Defined stitches can make an iris look crisp, but they can also reveal irregular color changes more readily. Take time to inspect the front of the eye whenever the yarn color changes.
This is especially useful if you are planning a strongly contrasting palette. High contrast creates a dramatic finished eye, but it also draws attention to the exact edge between sections. Consistent tension will help those boundaries look intentional.
Compact Fabric Needs Balanced Stuffing
A dense small eye can become surprisingly firm if too quartz-shaped yarn item from eye section for tutorials. Hmm typo? Need rewrite. We are in final draft, can’t tool, must mentally correct.
Need continue carefully no weird language.
A densely crocheted small eye can become overly dense if too tension from work… Let’s fix fully in final output if we haven’t sent yet; we’re composing in analysis? Actually this is final drafting but not yet dispatched. Need rewrite section.
Compact Fabric Needs Balanced Stuffing
Dense crochet fabric gives stuffing less room to redistribute than a very soft, stretchy plush fabric. Add filling in small amounts and rotate the eye often so one side does not become harder or flatter than another.
Stop when the project holds the intended shape rather than continuing simply because more filling will fit. The correct feel depends on the design and intended use, so use the tutorial’s finished appearance as the checkpoint instead of an invented firmness rule.
Original Tutorial and Creator Credit
Creator: Crochet With Greta
10. Crochet Embroidered Detail Eyeball Plush
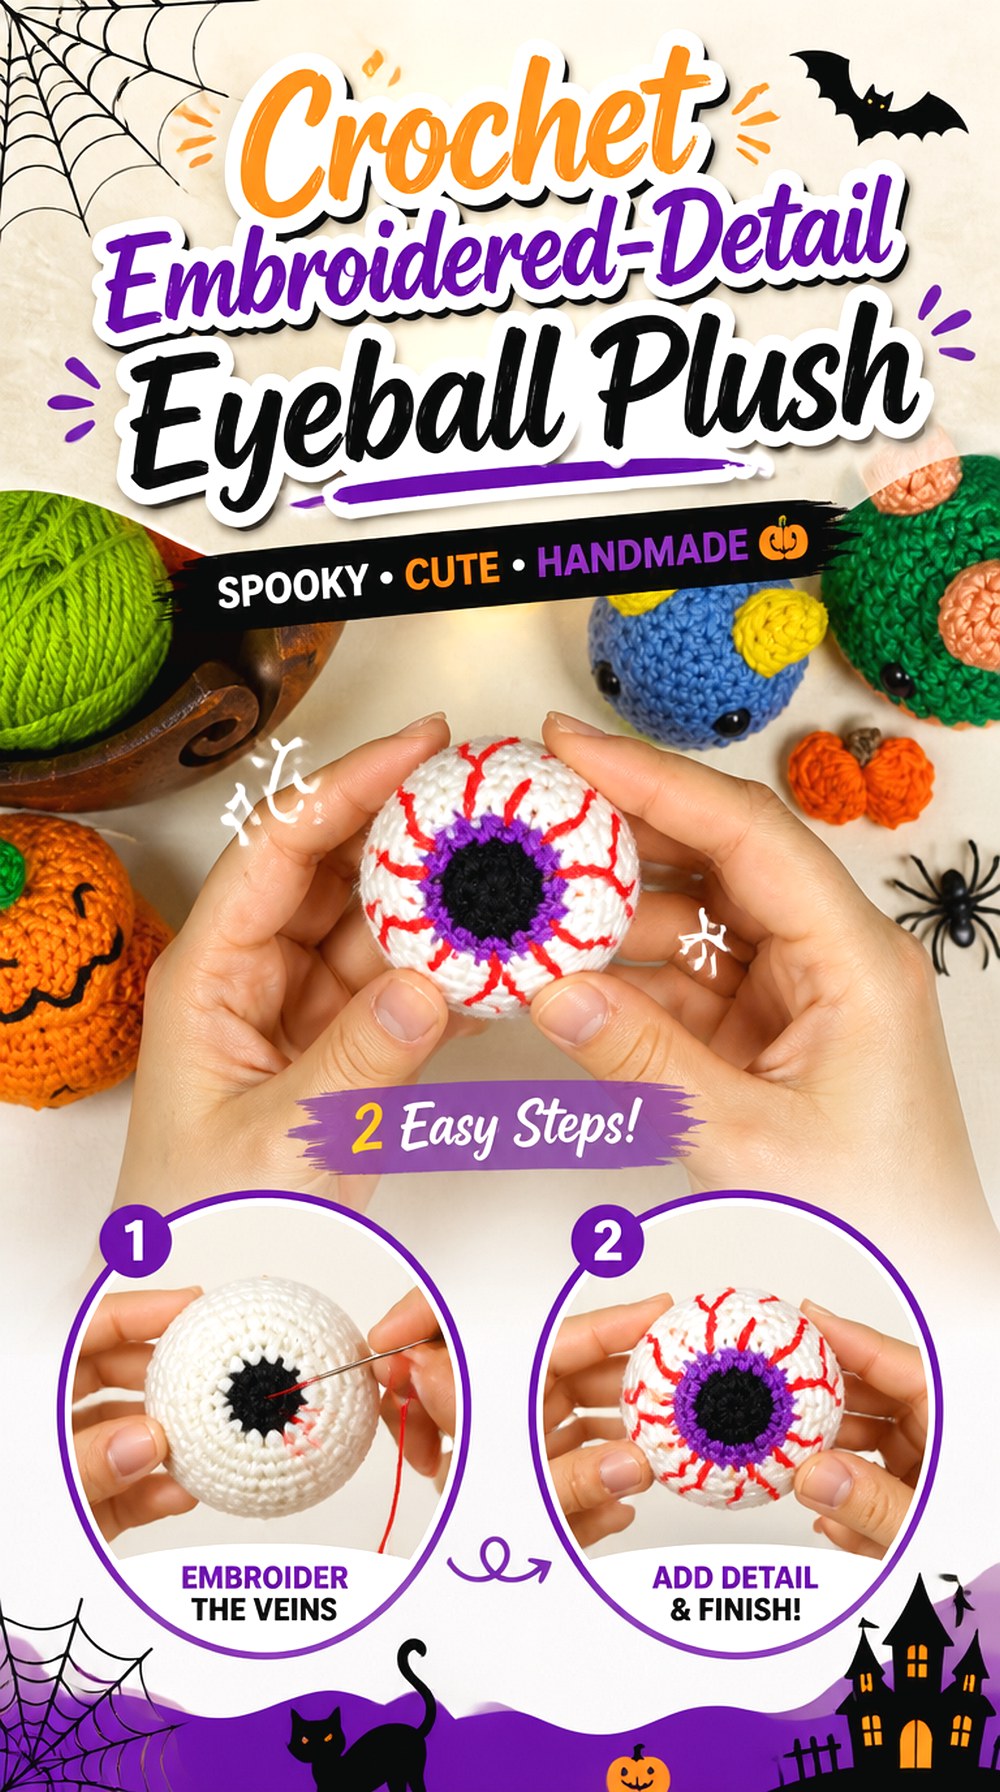
BlueFoxPaws emphasizes a simple crocheted eyeball form finished with embroidery, making this idea a good choice when you want surface detail to do more of the visual work. The video description specifically notes that basic embroidery techniques are part of the project.
That creates a useful contrast with designs where nearly every visual change is built directly into the crochet. Embroidery can be placed after the form is stuffed, letting you judge the actual three-dimensional surface before deciding where the final creepy details should sit. It also gives each eye room for controlled variation without changing its underlying construction.
Embroider After You Understand the Final Curve
Lines that look evenly spaced on a flat or partially stuffed piece can spread differently once the sphere reaches its full shape. When possible within the tutorial’s workflow, use the final curvature as your visual reference.
Rotate the eyeball as you plan the details. You may want veins to branch around the visible sides rather than disappear immediately toward the back, especially if the finished piece will sit loose on a tabletop.
Loose Surface Stitches Preserve the Shape
Embroidery should sit securely on the crochet, but excessive tension can pull the underlying fabric inward. That is particularly noticeable on a smooth sphere because each indentation changes the outline.
Add one section, inspect the surface, and then continue. Slight irregularity can make bloodshot lines look more organic, while repeated straight, equally spaced marks may read as decoration rather than veins.
Original Tutorial and Creator Credit
Creator: BlueFoxPaws
11. Crochet Party Bowl Eyeball Plush Set
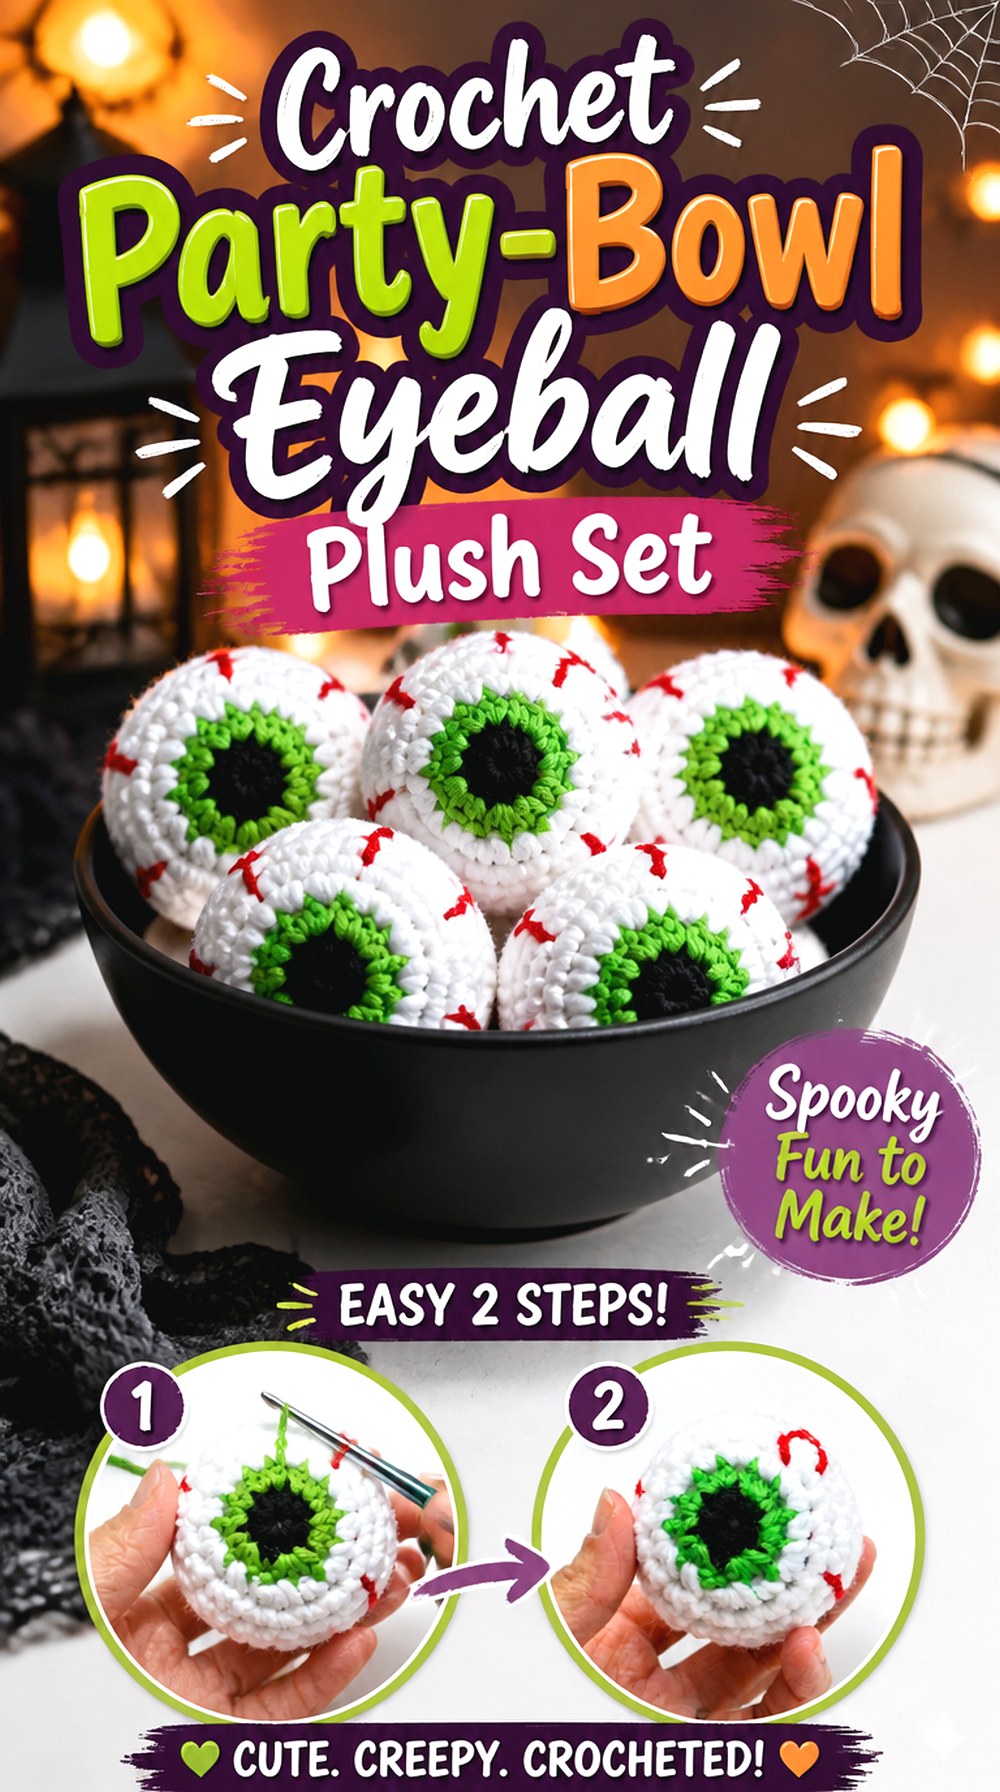
YARNutopia’s project is particularly suited to the idea of making eyeballs as a collection rather than treating every eye as a separate statement piece. Nadia Fuad’s accompanying project page describes the finished pieces as plush eyeball amigurumi and discusses grouping them for Halloween displays and party use.
That makes this a useful choice for jars, bowls, table arrangements, or repeated seasonal accents. Instead of spending most of the visual effort on one complicated eye, you can let repetition create the impact. Different iris colors can give a batch variation while the repeated silhouette keeps everything tied together.
Consistency Matters More in a Group Display
One slightly oval eye can look charming on its own. Put ten differently shaped eyeballs in one bowl and the variation becomes much more noticeable.
If you want a deliberately coordinated set, use the first finished eye as a reference for the others. Compare overall roundness and the relative visual size of the pupil and iris. Exact duplication is unnecessary, but repeating the same basic proportions makes color variation look purposeful.
Choose Filling for the Intended Use
The creator’s project page discusses several possible uses and alternative fillings, but a decorative plush does not have the same requirements as a weighted object or game piece.
For ordinary plush display, use a filling appropriate to that purpose. If considering loose grains, beans, or another weighted material, think about containment, moisture, cleaning, children, and pets rather than assuming it behaves like standard fiberfill.
Original Tutorial and Creator Credit
Creator: Fuad Azmat / YARNutopia by Nadia
12. Crochet Beholder Eyeball Monster Plush
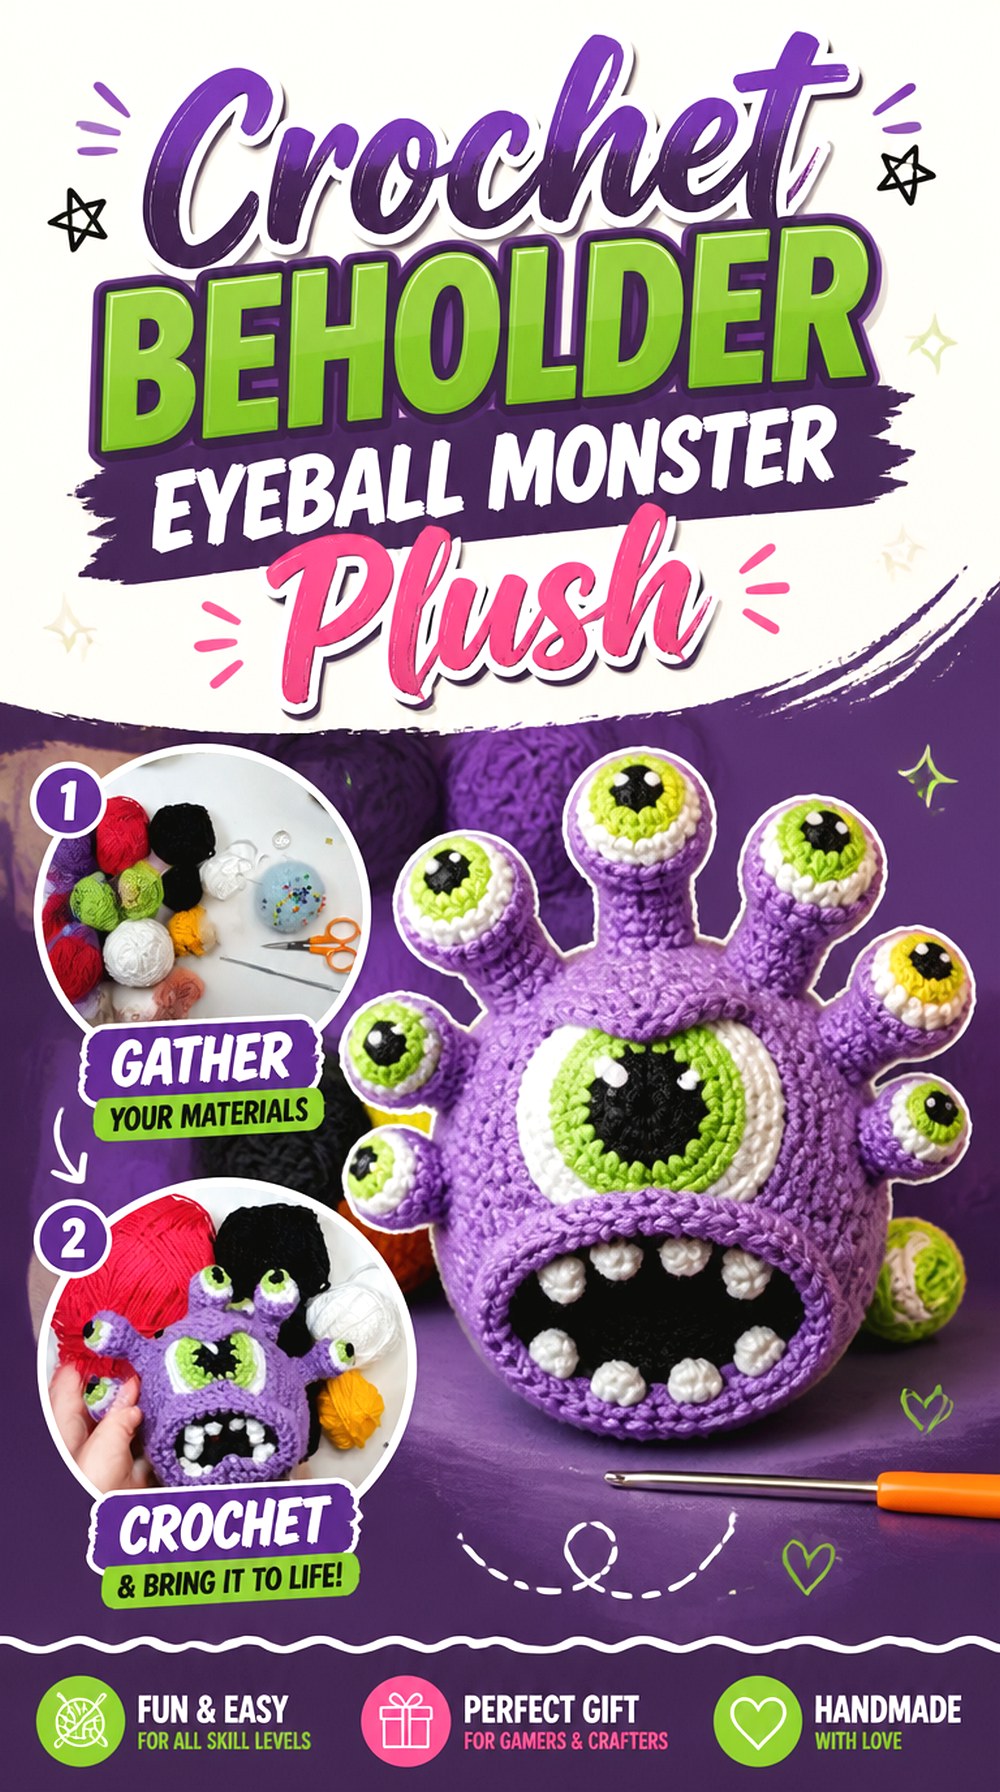
ComplicatedKnots takes the eyeball idea much further by turning the central eye into a complete fantasy monster. The Beholder tutorial includes the primary eye, eyelid, mouth, separate eyestalks, and final assembly, so this is meaningfully more involved than a single stuffed sphere.
Choose this direction if the eye itself is only the starting point and you want a display character with a stronger silhouette. The extra pieces create movement and personality around the central eyeball, while the mouth prevents the finished object from reading as simply a decorated ball. It is one of the clearest choices here for fantasy or tabletop-gaming-inspired decor.
The Main Eye Must Compete With the Eyestalks
Once several smaller eye elements surround the body, the central eye can lose emphasis if every feature has equal visual weight.
Before assembly, place the components together loosely and look at the whole figure. Strong contrast around the main iris can help preserve the focal point, while more restrained surrounding colors let the eyestalks frame it instead of competing with it.
Assembly Controls the Monster’s Silhouette
With a basic eyeball, roundness carries most of the form. A Beholder adds multiple projections, which means their direction becomes part of the finished design.
Arrange the eyestalks before securing them permanently. A balanced radial spread creates a different personality from an intentionally uneven, chaotic arrangement. The tutorial should remain your source for its exact assembly method, but visually previewing the placement can help you decide how you want the monster to read.
A Mouth Changes the Project From Eye to Creature
The mouth is an important distinction here because it gives the plush a clear face instead of simply surrounding an eyeball with extra appendages.
Check the relationship between the mouth and central eye before finishing. If they appear too far from the same visual center, the expression can feel disconnected. This is less about anatomical realism and more about making several exaggerated features feel like parts of one intentional character.
Original Tutorial and Creator Credit
Creator: ComplicatedKnots
13. Crochet Cyclops Character Plush
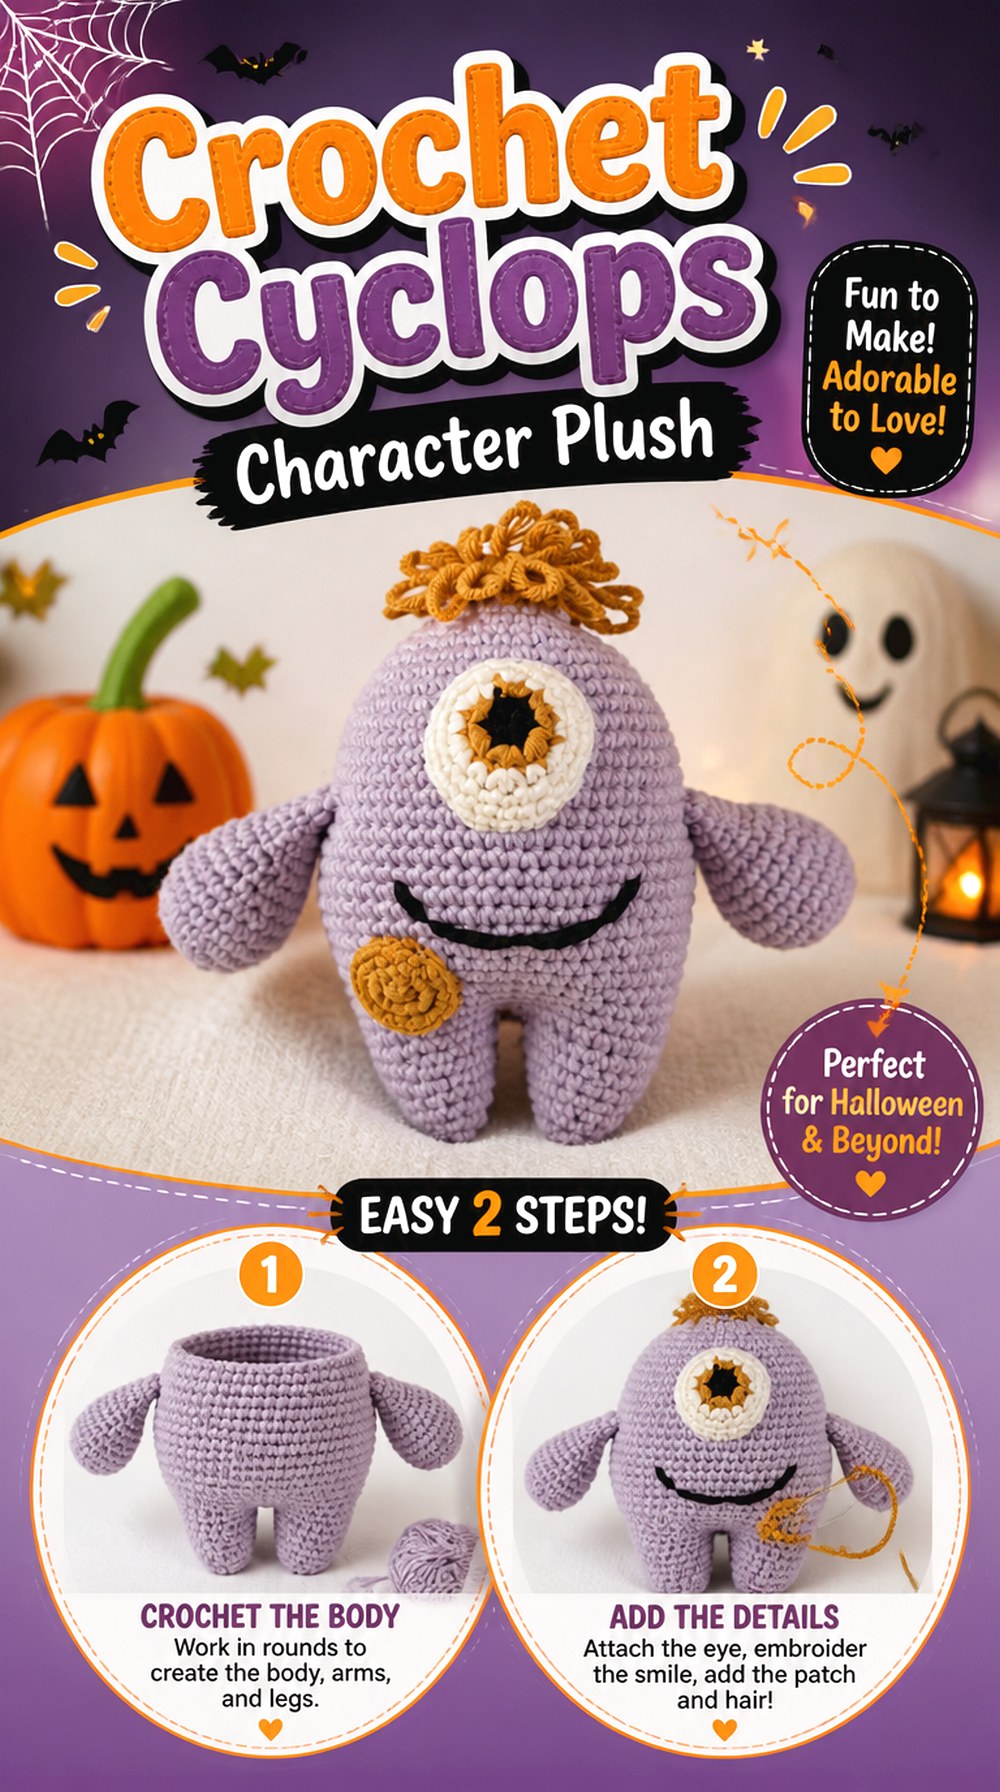
This tutorial from Les AMIgurumis de Yara turns one oversized eye into the defining facial feature of a full-bodied cyclops. The video covers separate character elements including the eye, arms, hair, body, legs, and finishing, making the final project very different from the free-floating eyeballs elsewhere in the collection.
It is a useful choice when you want the eyeball theme to feel cute, strange, and character-driven instead of anatomical. The central eye still needs enough contrast to stay dominant, but the surrounding body gives you additional opportunities for color, texture, and personality without simply adding more veins to another sphere.
Center the Eye Before the Face Gets Busy
A cyclops gives you only one major eye, so small placement differences can noticeably change the character’s expression. Before permanently attaching the eye components, compare their position with the body’s centerline and any surrounding hair or surface details.
Perfect mathematical centering is not always necessary—a deliberate offset can create personality—but make that choice while viewing the whole character rather than judging the eye in isolation.
Body Details Turn the Eyeball Into a Character
Spots, hair, limbs, and other contrasting elements can reinforce the monster personality, but the design still needs a visual hierarchy.
If every body detail uses equally strong contrast, the central eye can stop being the focal point. Consider reserving the strongest light-dark contrast for the eye while allowing secondary details to support it. This keeps the single-eye concept obvious even when the character becomes more elaborate.
Plan the Final Pose During Assembly
A character plush has a front, a stance, and a preferred display angle in a way that a loose eyeball sphere does not. Before completing assembly, place the body upright and assess how the limbs and eye work together from that angle.
This is particularly worthwhile if the plush will sit on a shelf. A well-positioned eye can face the viewer while the surrounding features create movement without making the character appear visually tilted.
Which Crochet Eyeball Plush Style Should You Choose?
| If you want… | Start with… | Main planning point |
|---|---|---|
| A creepy anatomical look | Ideas 1, 3, or 10 | Prioritize iris definition and controlled vein placement |
| A small Halloween favor | Ideas 2 or 11 | Keep repeated shapes and finishing reasonably consistent |
| A portable eye accessory | Idea 6 | Pay extra attention to the hanging attachment |
| A large soft statement piece | Ideas 4 or 5 | Plan storage, stuffing distribution, and viewing direction |
| A versatile small decoration | Ideas 7, 8, or 9 | Decide whether it will stay independent or join a larger display |
| A fantasy character | Ideas 12 or 13 | Plan the main eye together with the surrounding body parts |
The biggest choice is between an eyeball as the entire object and an eyeball as the focal feature of something larger. Once that is decided, yarn texture, size, embroidery, and color become much easier to choose.
Conclusion
For classic creepy decor, the anatomical, two-tone iris, and embroidery-focused eyeballs give you the most room to play with bloodshot details. If softness and scale matter more, the oversized squish or round pillow turns the same motif into substantial home decor. The keychain and repeatable party eyes are better suited to smaller projects, while the Beholder and cyclops move beyond a simple sphere into full character construction.
Whichever direction you choose, judge the eye by shape, focal-point placement, finishing, and intended use rather than iris color alone. Use the original tutorials linked with each idea for the creators’ exact construction details, materials, and assembly guidance.
Frequently Asked Questions
What yarn works well for a crochet eyeball plush?
It depends on the result you want. Smooth yarn can show crisp pupil, iris, and embroidery details, which is useful for small or realistic-looking eyeballs. Plush or blanket yarn creates a softer surface and makes more sense for large squishes where tactile texture matters.
When changing yarn from a tutorial, remember that thickness can affect overall scale, fabric density, stuffing visibility, and the apparent proportions of each color section.
How do I keep the iris centered on a crochet eyeball plush?
Check the eye from directly in front as the shape develops rather than judging it only while holding the piece at an angle. Once stuffing is added, rotate the project and make sure uneven filling is not making the iris appear displaced.
If the tutorial builds the iris as part of the main crochet fabric, follow its color placement carefully. If eye pieces are attached separately, preview their position before permanent assembly.
Can I resize a crochet eyeball plush with thicker yarn?
Using a thicker yarn and corresponding hook can often produce a larger version of the same general construction, but it is not a precision sizing method. The new yarn can change drape, firmness, stitch definition, stuffing needs, and the visual proportions of surface details.
For a major size change, check whether the creator specifically discusses yarn substitutions or alternative sizes instead of assuming every material can be swapped without affecting the result.
How can I make an eyeball plush look creepier without changing its construction?
Surface treatment can change the mood substantially. Strong iris contrast, irregular red vein embroidery, darker surrounding colors, and a more anatomical presentation can push a basic sphere toward horror decor without requiring a completely different underlying form.
Add details selectively. If veins become too much at in a temporary arrangement, remove? Can’t remove easily. Need fix: “Preview embroidery placement with short yarn pieces or visual planning before stitching.” Good.
Preview the placement before stitching permanently. Leaving some white space around the iris can actually make the bloodshot details more noticeable.
Are safety eyes necessary for crochet eyeball plushies?
No. Many eyeball designs create the pupil and iris from crocheted color sections or embroidery, so plastic safety-eye hardware is not inherently required.
If a project does use small hardware, consider the intended recipient before following that option. A decorative shelf piece for an adult has different requirements from something intended for a baby, young child, or pet. For those recipients, assess small detachable components carefully and choose an appropriate alternative when needed.
How do I keep a stuffed eyeball from becoming lumpy?
Add stuffing gradually and distribute it toward the sides rather than pushing one large bundle into the center. Rotate the piece regularly and view the silhouette from the side, back, and iris-facing front.
More stuffing is not automatically better. If the fabric begins stretching enough to expose filling or distort the color sections, adding more can worsen the shape. Use the tutorial’s finished appearance as your main reference for the intended firmness and profile.