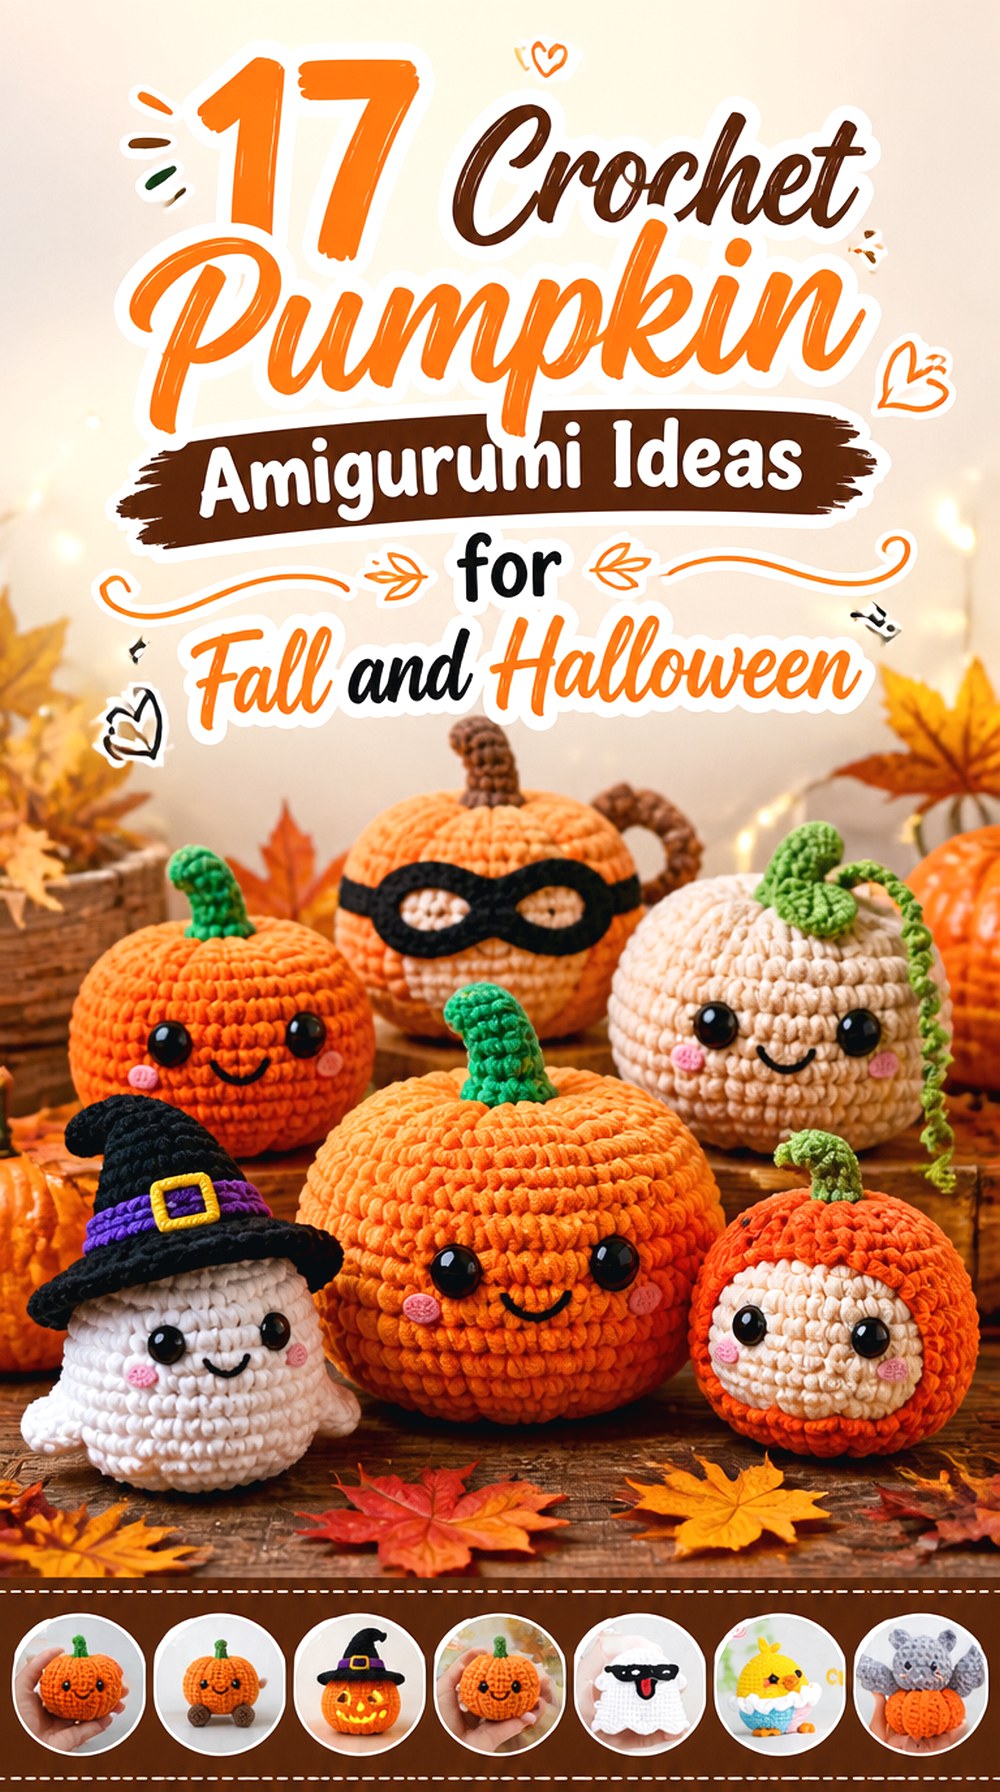

Pumpkin amigurumi can be much more varied than a row of orange stuffed spheres. The projects in this collection include compact ribbed pumpkins, character-style softies, a pumpkin pie slice, a keychain, animal hybrids, deeply sculpted forms, and a stacked centerpiece. Some lean toward traditional fall decor, while others have faces, feet, ears, wings, or other playful details that make them better suited to Halloween displays and handmade gifts.
The most useful way to choose between them is to look past color first. Construction style affects rib definition, assembly, stability, and how easily a finished pumpkin can be displayed or carried. The ideas below highlight those differences so you can compare shapes, finishing demands, decorative details, and adaptation possibilities before following the original creator’s tutorial.
Quick List
- Crochet Mini Ribbed Pumpkin
- Crochet Smiling Round Pumpkin Softie
- Crochet Pumpkin Pie Slice Amigurumi
- Crochet Pumpkin Kitty Cat
- Crochet Pumpkin-Costume Bear
- Crochet Pumpkin Keychain Charm
- Crochet Jack-O’-Lantern Pumpkin Figure
- Crochet No-Sew Vine Pumpkin
- Crochet Deep-Rib Sculpted Pumpkin
- Crochet Stacked Pumpkin Centerpiece
- Crochet Cabled Cottage Pumpkin
- Crochet Botanical Fruit Pumpkin
- Crochet Sitting Pumpkin Buddy
- Crochet Oblong Gourdie Pumpkin
- Crochet Pumpkin Turtle
- Crochet Pumpkin Ghost
- Crochet Pumpkin Bat
Choose the Pumpkin Shape Before Choosing the Yarn
Shape has a bigger effect on the finished personality of pumpkin amigurumi than color alone. A compact round pumpkin works naturally in a bowl or shelf arrangement, while an oblong pumpkin creates a more gourd-like profile. Stacked pumpkins need enough structure to keep the composition visually balanced, and character pumpkins introduce additional considerations such as feet, ears, wings, or limbs.
Yarn substitution can also change those shapes. A thicker, softer yarn may enlarge a project and soften fine surface details, while a smoother yarn can make ribbing, cables, and facial features easier to see. If you substitute yarn, treat the tutorial’s finished dimensions as specific to the creator’s materials unless the creator explicitly provides alternatives. Focus first on the silhouette and construction you want, then choose a compatible yarn-and-hook combination.
Stuffing and Rib Definition Need to Work Together
Pumpkin shaping depends on the relationship between the crocheted fabric, stuffing, and whatever method creates the characteristic grooves. Overfilling can fight against deep rib definition, while underfilling may leave a softie looking collapsed rather than pleasantly rounded. The goal is not maximum firmness; it is enough support for the particular pumpkin shape.
Before closing a stuffed project, look at it from the side as well as from above. Check whether the form is evenly supported, whether facial features still sit where intended, and whether later shaping will have room to create clear sections. Projects with cables or built-in texture need a different visual check: make sure the stuffing supports the fabric without flattening the surface pattern that made you choose that design.
Think About Small Parts Before Making a Pumpkin as a Gift
Faces, stems, keychain fittings, ears, wings, and tiny limbs can turn a plain pumpkin into a memorable character, but they also change how the finished item should be used. Safety eyes and other small detachable components may not suit an item intended for a baby, young child, or unsupervised pet. Embroidered features can be an alternative when appropriate.
Decorative attachments deserve the same attention. A pumpkin that will sit on a shelf experiences very different handling from a bag charm that may be pulled, twisted, or caught on other objects. Check attachment points based on the intended use, and do not assume that a decorative amigurumi tutorial establishes toy safety or load-bearing durability unless the creator specifically addresses those issues.
1. Crochet Mini Ribbed Pumpkin
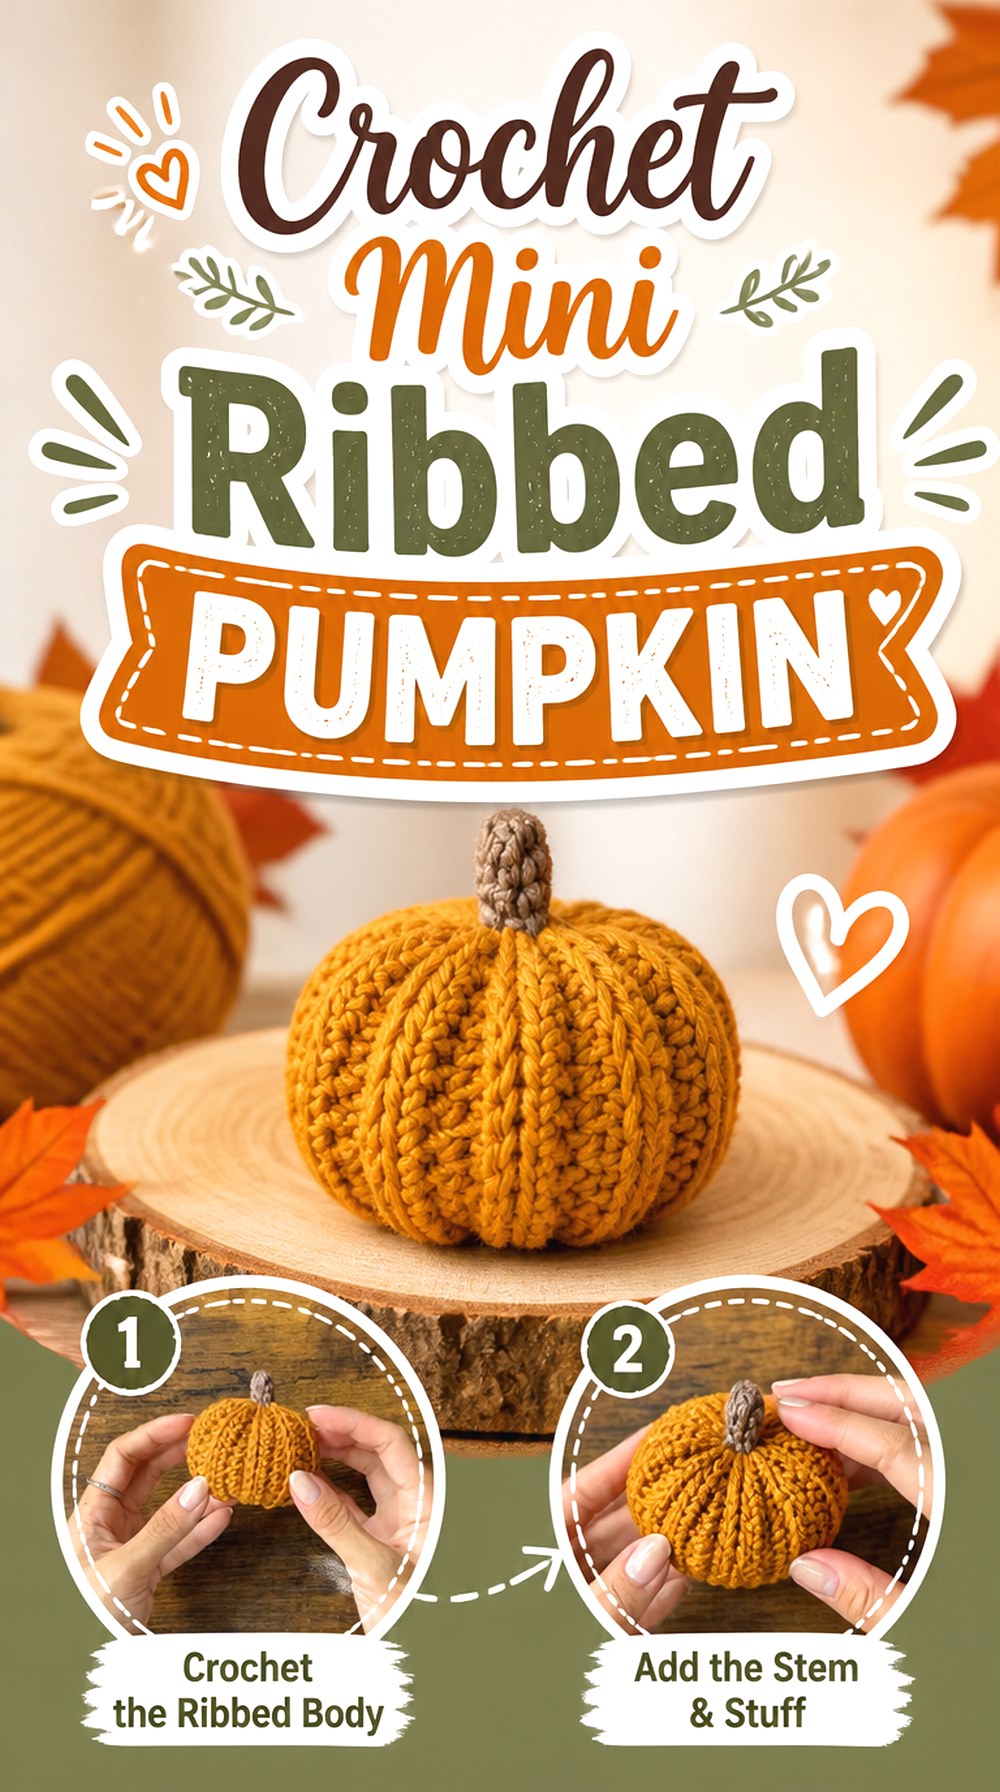
This compact Crochet Mini Ribbed Pumpkin is a useful choice when you want a traditional fall shape without committing to a large display piece. VivCrochets demonstrates a pumpkin whose body is worked flat before being assembled and shaped, creating visible vertical texture rather than relying on color changes for interest. The smaller scale makes the idea especially adaptable to tabletop groupings, place-setting decor, or several pumpkins arranged together.
Because the visual appeal comes from the ridged body and contrasting stem, this is also a good project to compare with the rounder, continuously worked pumpkins later in the list. Choose it when pronounced surface lines matter more than a perfectly smooth amigurumi finish.
Worked-Flat Ribs Make the Construction Visually Distinct
A flat textured panel can make the pumpkin’s rib direction easy to see before the final form is assembled. That gives you an early checkpoint: look across the fabric and make sure the vertical texture remains consistent instead of waiting until after stuffing to notice an uneven area. When changing yarn, consider whether the fiber gives enough stitch definition for those ridges to remain visible.
A Small Pumpkin Still Needs Balanced Finishing
On a compact body, the stem can occupy a surprisingly large share of the silhouette. Before securing decorative finishing, compare the stem visually with the width and height of the stuffed pumpkin rather than assuming that a proportion used on a larger pumpkin will translate well. If several mini pumpkins will be displayed together, slight variation in stem angle can add interest without requiring completely different body patterns.
2. Crochet Smiling Round Pumpkin Softie
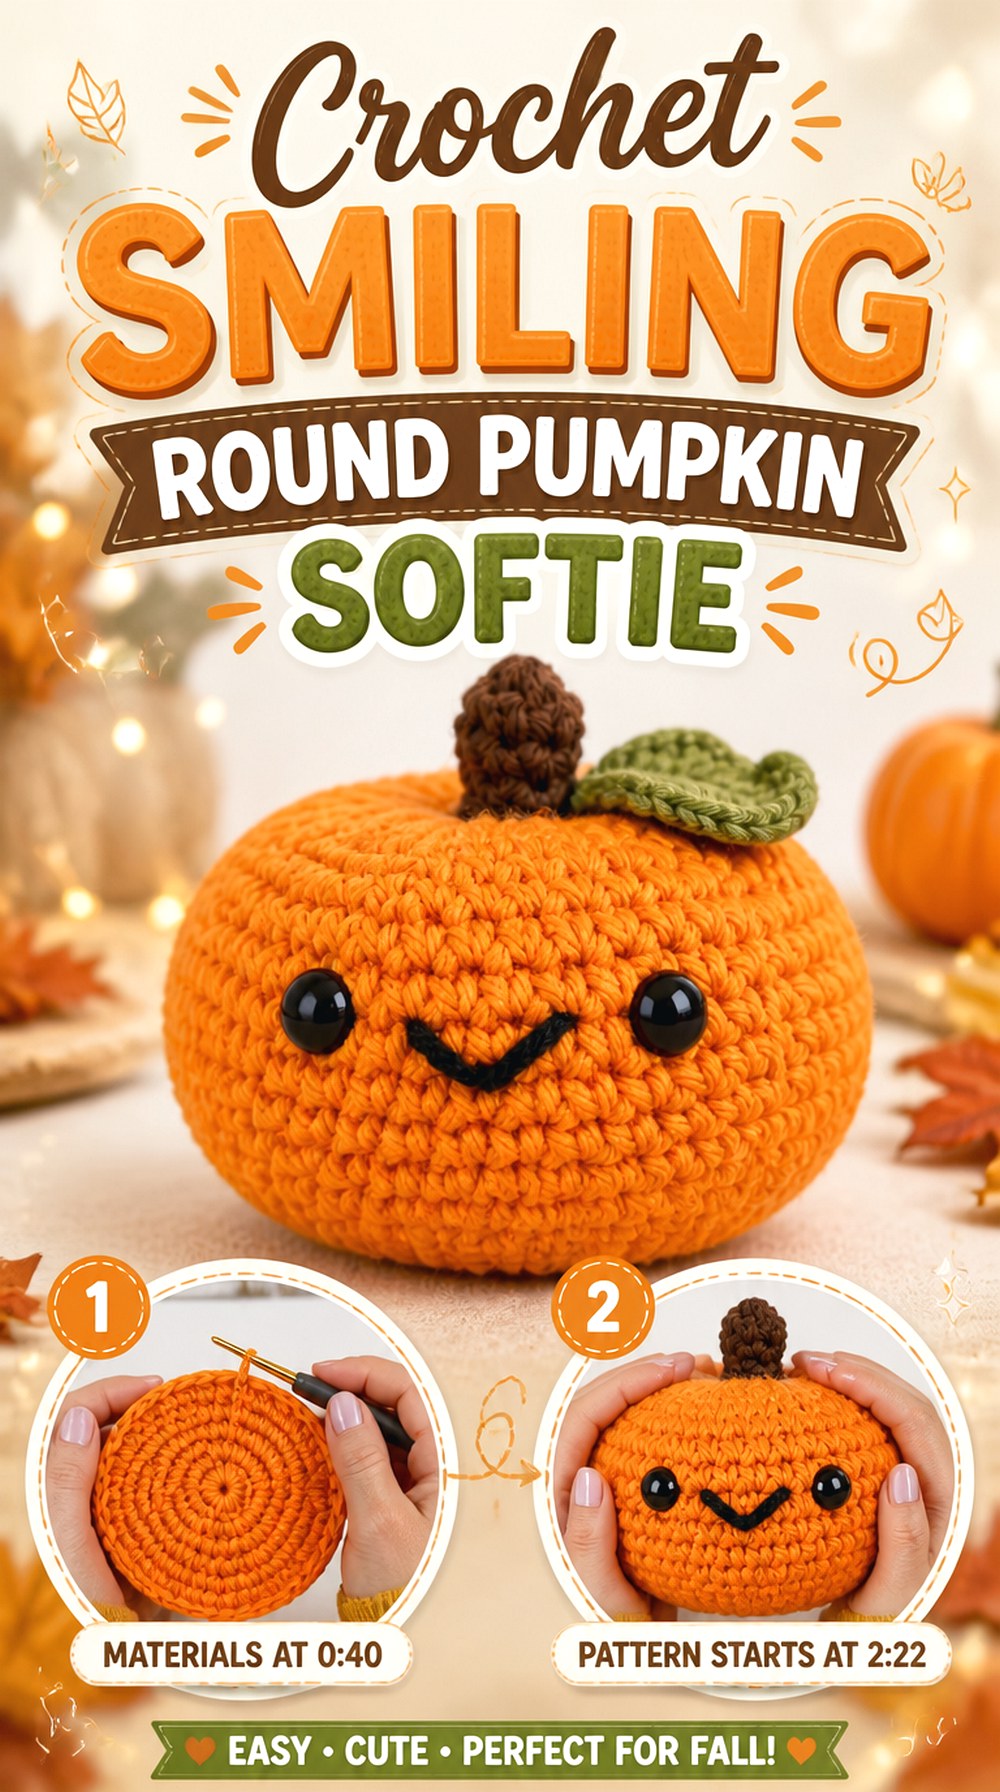
A face immediately shifts a pumpkin from neutral seasonal decor toward character amigurumi. This Crochet Smiling Round Pumpkin Softie follows that route with a rounded stuffed body, shaped pumpkin sections, a stem, and a cheerful expression. It can work as a standalone shelf character rather than needing to be grouped with several decorative pumpkins.
The round form also offers a useful contrast with the oblong, cabled, and animal-based ideas below. If your main goal is recognizable pumpkin shaping with a simple character face, this format keeps the concept focused. Pay particular attention to when the face is positioned in relation to the pumpkin grooves, because both elements compete for the visual center.
Place the Expression Between the Strongest Pumpkin Lines
Facial placement can look different once a round pumpkin has been pulled into distinct sections. A face that seems centered on an unshaped body may shift visually when deeper grooves appear beside it. Before finalizing permanent facial details, identify which section will serve as the front and check the expression from normal viewing distance rather than only while holding the piece close to your work surface.
Roundness Depends on Even Stuffing
A spherical softie makes uneven stuffing more noticeable because there are fewer other design elements to disguise a flat or lopsided area. Add stuffing with the final contour in mind, especially around the upper and lower curves. If you plan to deepen the pumpkin sections after stuffing, leave enough flexibility for shaping rather than making the body so rigid that the grooves barely register.
Decide Whether It Is Decor or a Handled Softie
A smiling pumpkin may invite more handling than an undecorated centerpiece. That makes the intended use worth deciding before you choose facial components. For a display-only piece, decorative options are broad. For a pumpkin intended for a young recipient, assess all small parts and attachment methods carefully and consider embroidered facial features where that better suits the use.
Original Tutorial and Creator Credit
Creator: Hooked by Robin
3. Crochet Pumpkin Pie Slice Amigurumi
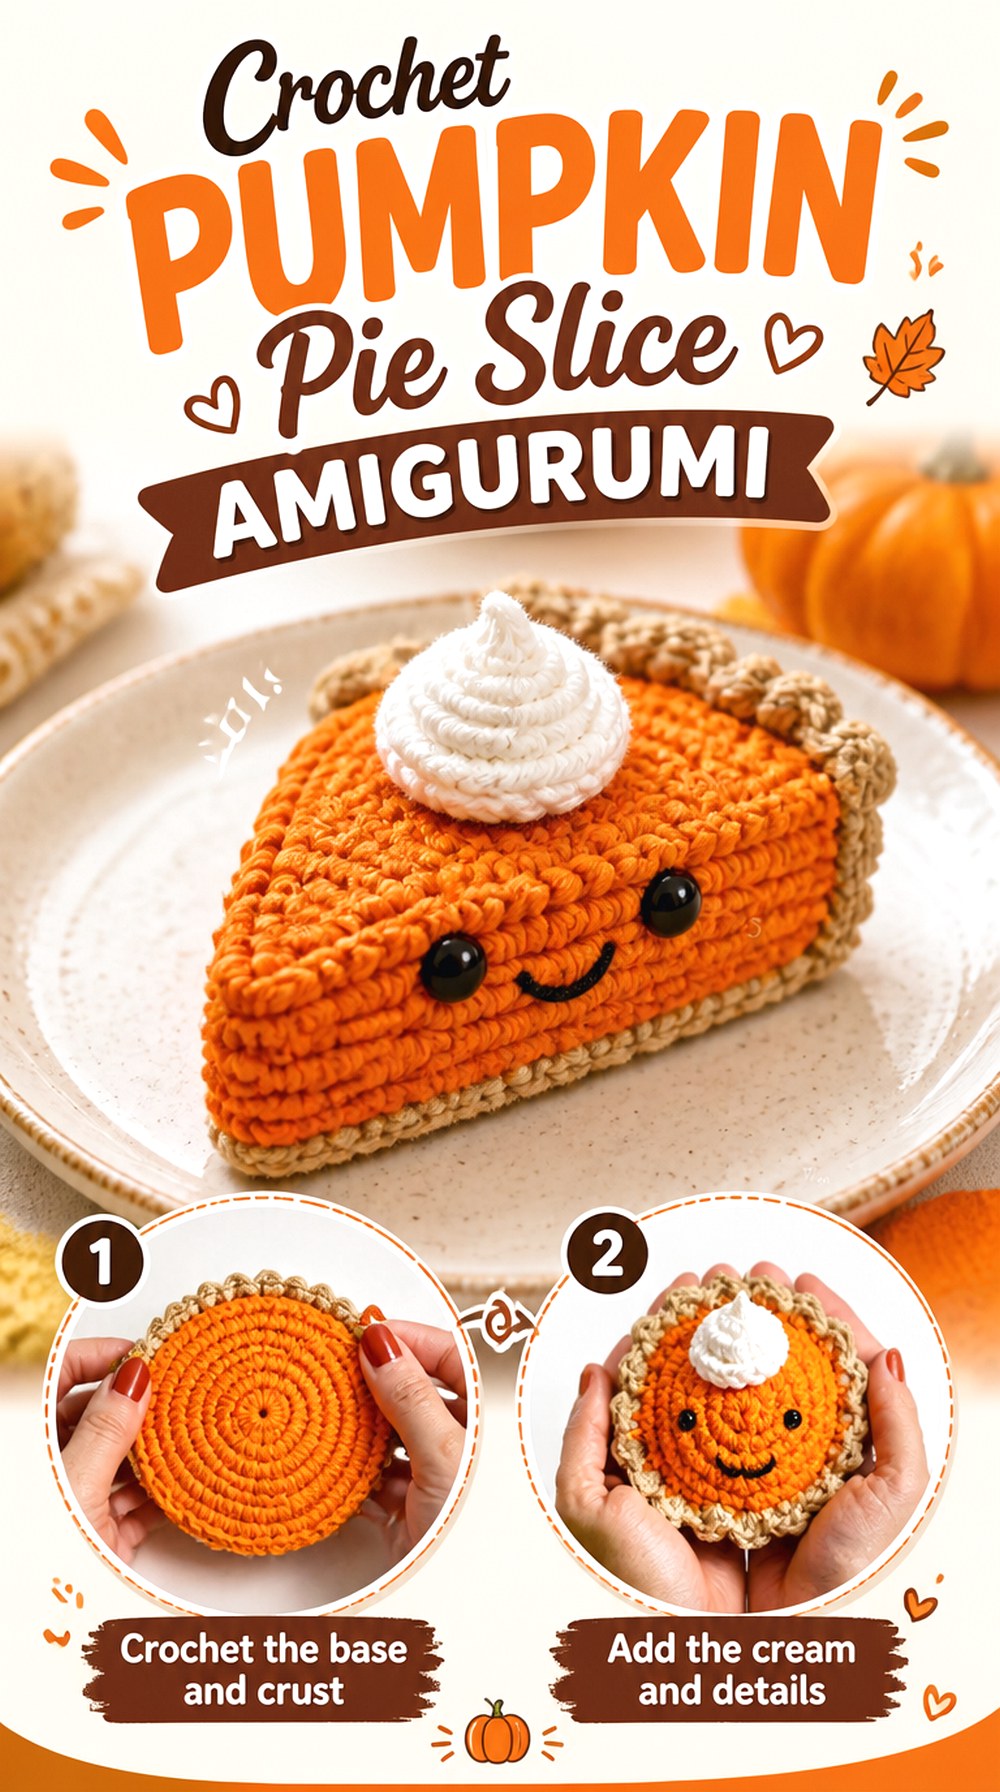
Not every pumpkin amigurumi needs to look like a whole pumpkin. This Crochet Pumpkin Pie Slice Amigurumi turns the seasonal theme into a wedge-shaped food softie, complete with contrasting crust and a whipped-cream-style topping. The different silhouette makes it particularly useful when a collection already contains several round pumpkins and needs something that breaks up the repetition.
A pie slice also changes the construction priorities. Instead of judging whether pumpkin ribs look evenly spaced, you are looking for a clear wedge profile, recognizable layers, and toppings that sit convincingly on the finished form. It is a playful option for Thanksgiving-themed displays as well as broader fall amigurumi collections.
The Wedge Profile Has to Stay Readable
The success of a pie amigurumi depends on the triangular slice remaining recognizable after stuffing. If the sides bulge too much, the object can lose its food-like geometry. As you fill the piece, compare the point, back edge, and top surface instead of judging fullness from one angle. A slightly softer fill may sometimes preserve flat surfaces better than forcing as much stuffing as possible into the form.
Contrasting Layers Do More of the Visual Work
The pie filling, crust, and topping each communicate a different part of the design. If you change the palette, maintain enough contrast for those sections to remain visually separate. Colors that are too strongly influenced a single tonal range can make the wedge read as one block of crochet rather than a slice with distinct components.
Check Small Toppings for the Intended Use
A dimensional topping creates character but also becomes an exposed attachment point. For shelf decor, that may be mainly a finishing concern. For something that will be handled frequently, check that the topping and facial details are secured for the intended use. Avoid assuming that decorative food amigurumi is automatically suitable for young children simply because it is soft.
Original Tutorial and Creator Credit
Creator: Heather Corinne Crochets
4. Crochet Pumpkin Kitty Cat
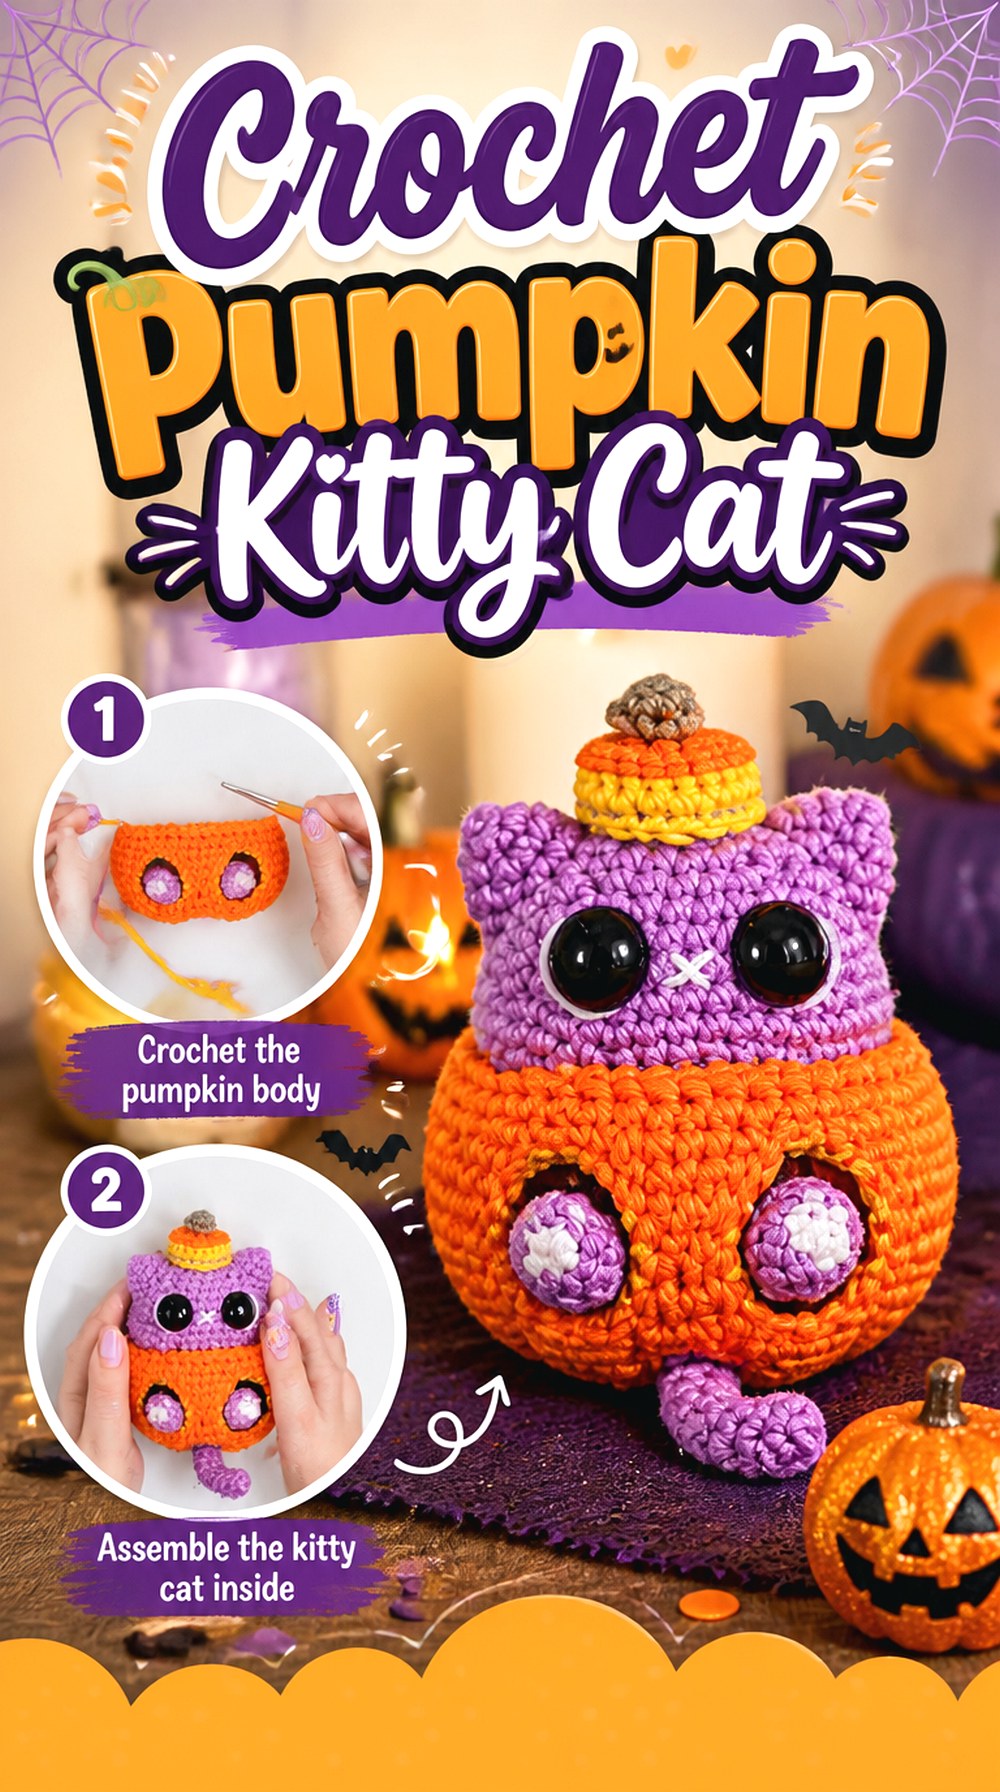
This Crochet Pumpkin Kitty Cat combines feline features with a pumpkin body for a Halloween character that is clearly different from conventional fall decor. ComplicatedKnots’ tutorial presents the concept as a pumpkin kitty, using recognizable cat details alongside the orange seasonal form. It is a strong option if you want one project to serve as the playful focal point of a Halloween amigurumi grouping.
Hybrid characters need a little more visual planning than plain pumpkins. The pumpkin texture still has to read clearly, while the ears and other character details need enough prominence for the cat theme to register. If those elements become too much actively involved in mixing the context, the result can lose the clean silhouette that makes this combination appealing.
Let the Cat Features Interrupt the Pumpkin Shape Deliberately
A plain pumpkin benefits from near symmetry, but ears and other feline details naturally disrupt that symmetry. Before attaching character pieces, view the stuffed body from the front and decide where the face will sit relative to the pumpkin sections. Positioning everything around one intentional front view generally creates a stronger character than treating each attachment as an isolated decorative addition.
Color Changes Should Support the Character, Not Hide It
The tutorial incorporates pumpkin styling into an animal form, so color placement becomes part of the design language. If you customize the palette, keep enough difference between facial details, pumpkin sections, and cat features for each to remain legible. Very low-contrast substitutions may look attractive close up but make the hybrid concept harder to recognize from across a shelf.
Extra Appendages Mean Extra Attachment Checkpoints
Ears, paws, or other protruding details create more seams and potential stress points than a simple stuffed pumpkin. Inspect those areas after assembly, particularly if the finished character will be handled rather than displayed. Small plastic features or loosely secured embellishments require additional consideration when gifting to children or placing the item around pets.
Original Tutorial and Creator Credit
Creator: ComplicatedKnots
5. Crochet Pumpkin Costume Bear
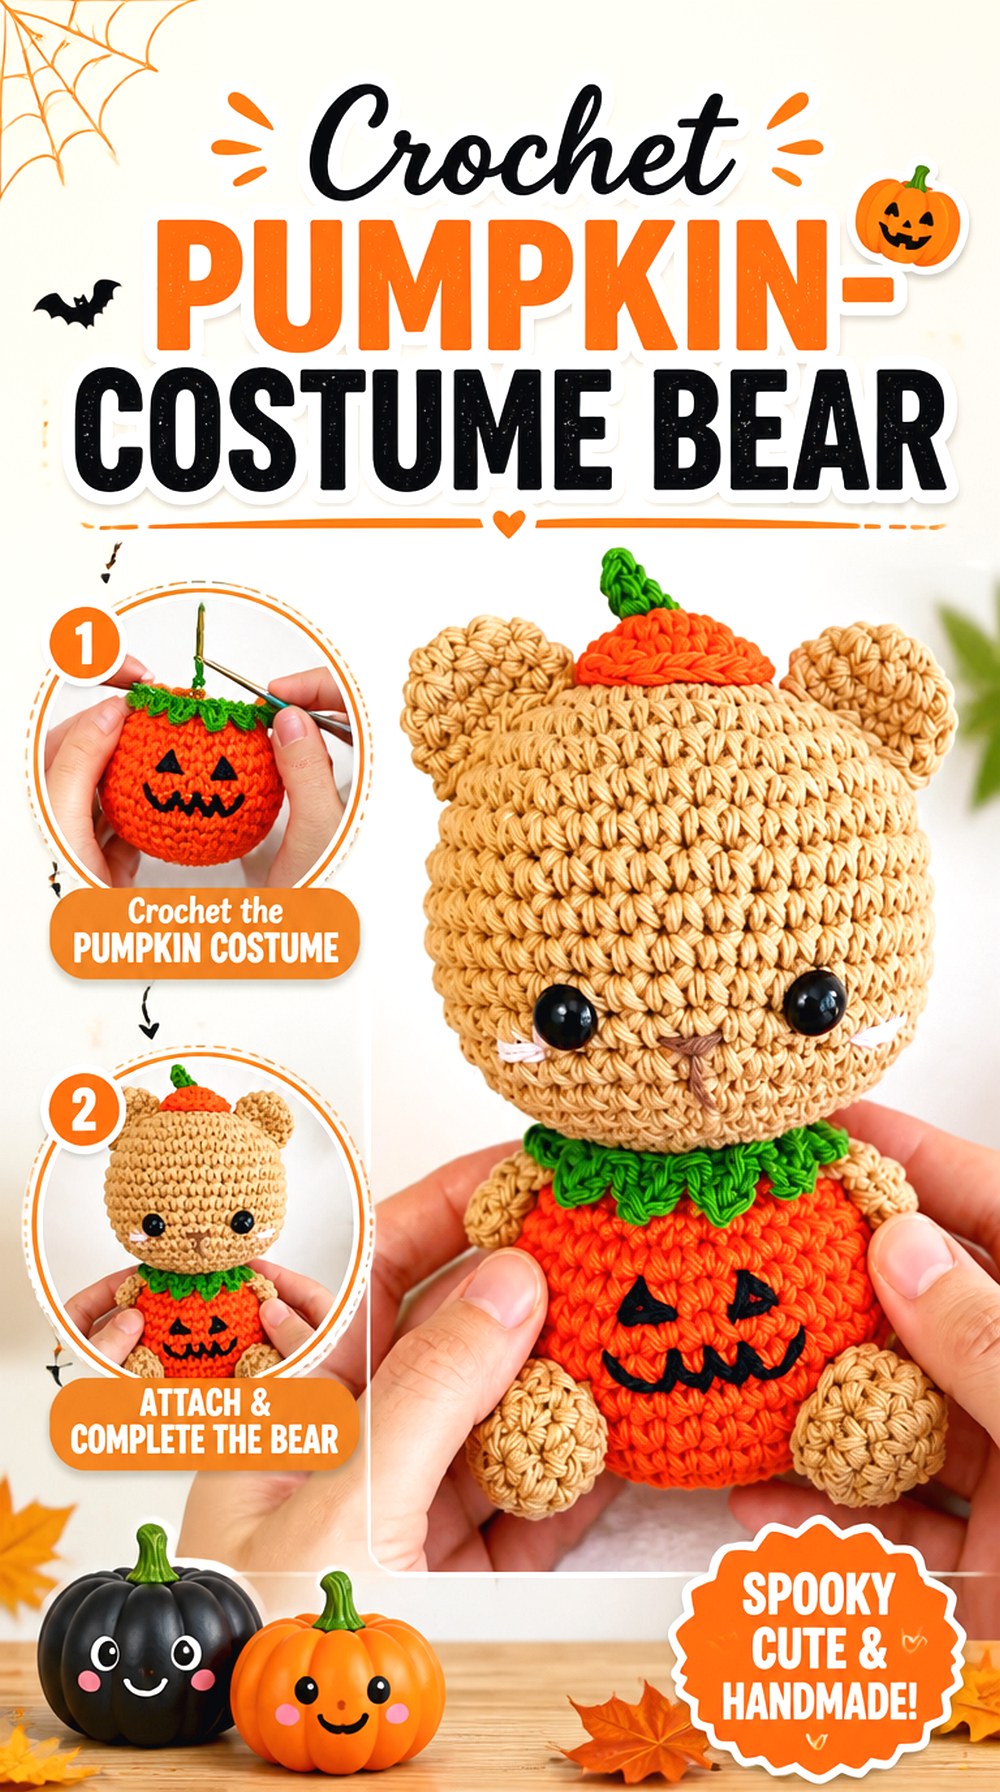
The Crochet Pumpkin-Costume Bear takes a different character route by blending a teddy-bear form with pumpkin-themed styling. HiSheepOK’s tutorial includes the bear figure along with pumpkin facial details and a pumpkin hat, giving the finished project more of a dressed-character look than the cat-pumpkin hybrid above. It can stand out well in a shelf scene where one larger character is surrounded by simpler pumpkins.
This type of amigurumi involves more visual layers: the bear needs to remain recognizable, the pumpkin elements need to read clearly, and the costume pieces should not overwhelm the face. Choose it when you enjoy assembly and character finishing as much as the basic stuffed form itself.
Keep the Bear Face Clear Beneath the Pumpkin Theme
Costume details are most effective when they frame rather than hide the character underneath. Before permanently placing the pumpkin-themed head detail, check the face from straight ahead and make sure the eyes, muzzle area, and expression remain the natural focal point. If you substitute thicker yarn, remember that hats and collars may occupy more visual space relative to the head.
Costume Pieces Create Useful Color Boundaries
Instead of treating orange as the only way to communicate “pumpkin,” use the separate costume components to organize the palette. A bear body, pumpkin hat, stem, collar, and facial accents can each have a distinct role. Keeping those boundaries readable can produce a clearer finished character than adding many similar autumn shades without enough contrast between adjacent pieces.
More Components Require More Finishing Time
A character with a hat, collar, limbs, and facial details has more finishing decisions than a one-piece pumpkin. That does not automatically make it a poor choice for a newer crocheter, but it does mean assembly preference matters. If sewing small parts is the part of amigurumi you enjoy least, compare this idea with the no-sew pumpkin later in the list before choosing.
Original Tutorial and Creator Credit
Creator: HiSheepOK
6. Crochet Pumpkin Keychain Charm
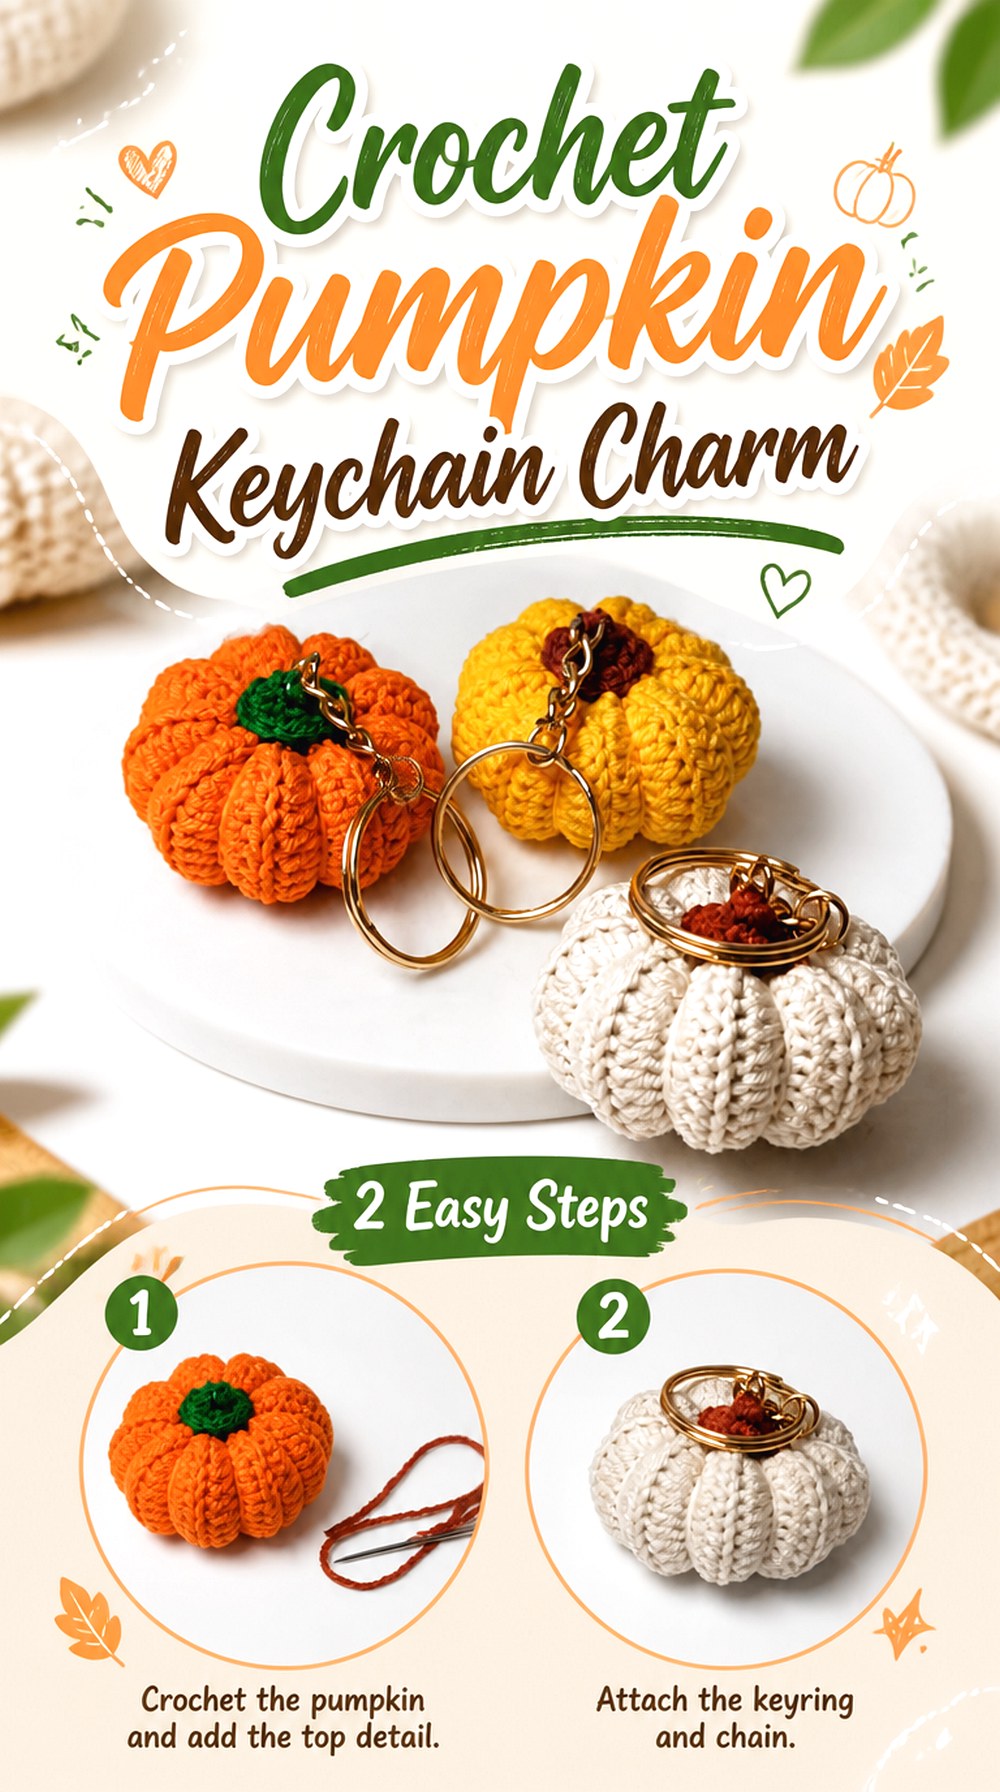
A Crochet Pumpkin Keychain Charm puts the amigurumi idea into a much more portable format. Crochet Craftsman’s tutorial combines a small stuffed pumpkin with keychain hardware, making the finished object suitable as a seasonal bag charm or decorative key accessory rather than purely tabletop decor. Its purpose is what separates it from the other mini pumpkins in this collection.
Reducing a stuffed design for everyday carry changes what matters most. Shape still counts, but attachment strength, snagging, and how the pumpkin sits beside keys or a bag become just as important. Choose this format when you want a small project with a functional hanging point rather than a pumpkin designed to stand independently.
The Hardware Connection Is the Critical Stress Point
A shelf pumpkin rarely experiences repeated pulling, but a keychain can. Inspect the point where the crochet connects to the ring or chain and consider how the item will actually be carried. Decorative attachment methods that are perfectly adequate for display may not suit constant movement. The tutorial shows the creator’s method; if you substitute hardware, make sure the new components are compatible with the scale and attachment area.
Smaller Scale Makes Stuffing Control More Important
A small amigurumi body can become distorted quickly if stuffing collects unevenly. Check the pumpkin profile before closing, paying attention to whether the sides remain balanced around the attachment point. Overstuffing can also make final shaping more difficult. The useful target is a clearly recognizable little pumpkin that remains compact enough for the way you intend to use the charm.
Original Tutorial and Creator Credit
Creator: Crochet Craftsman
7. Crochet Jack O’ Lantern Pumpkin Figure
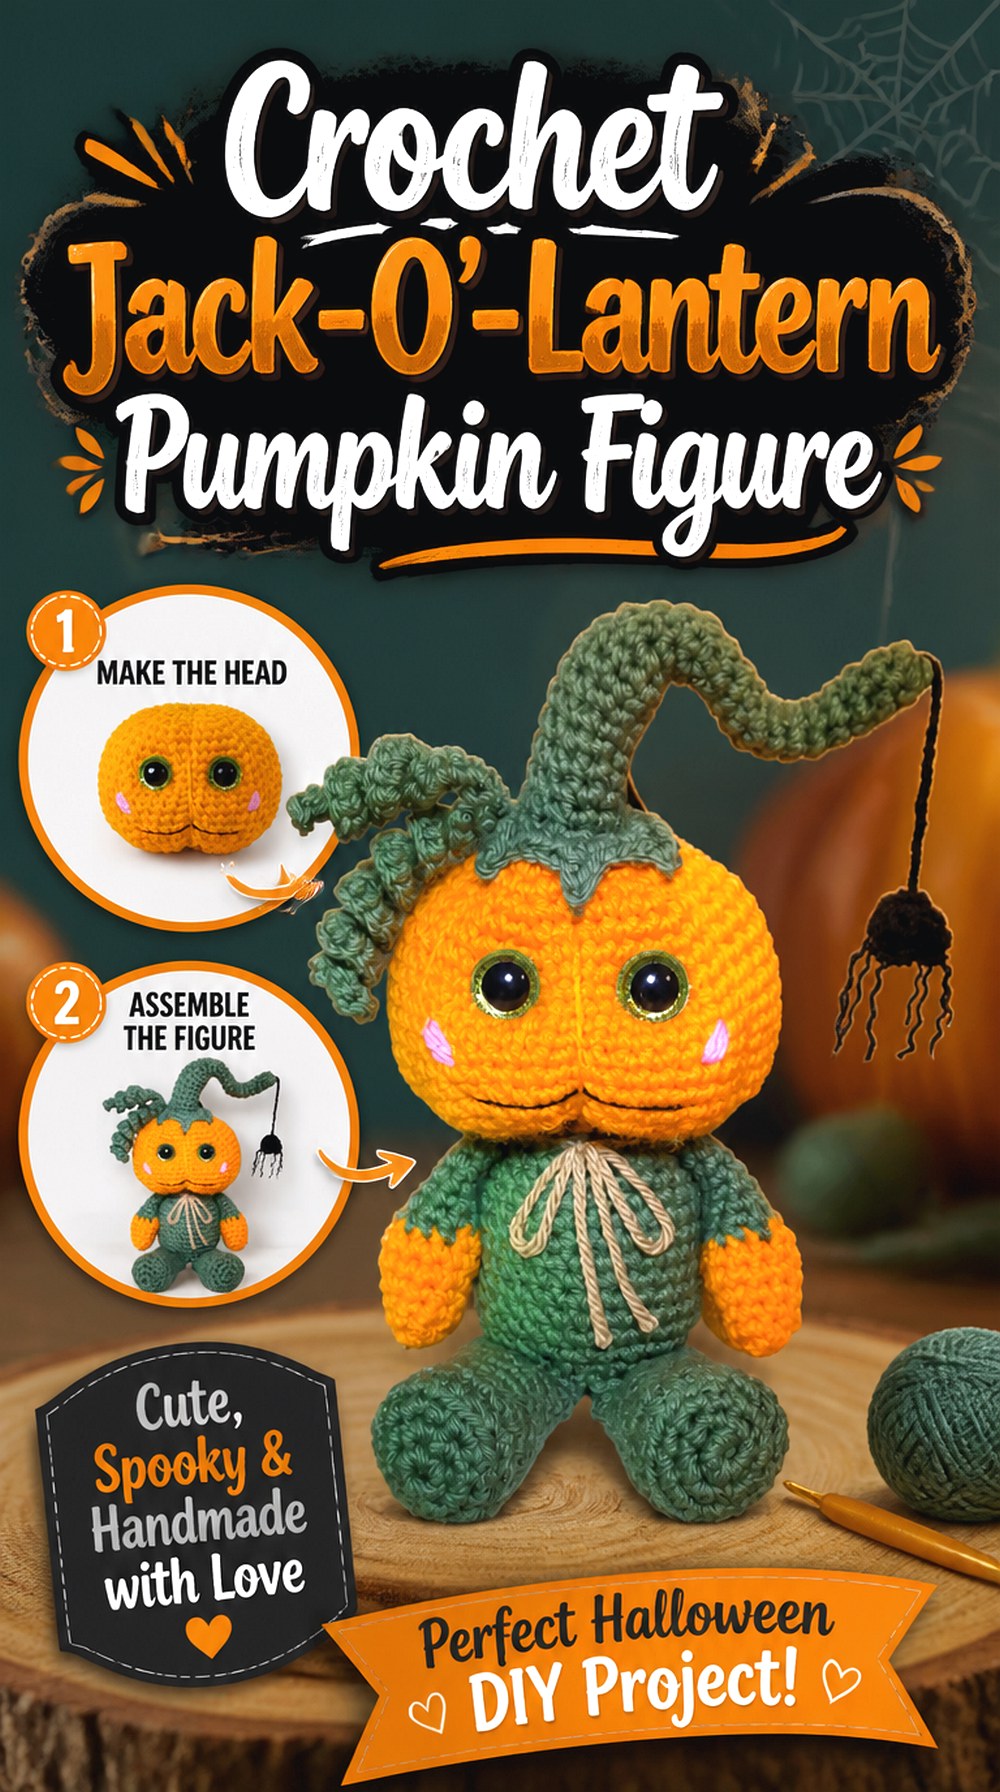
This Crochet Jack-O’-Lantern Pumpkin Figure moves beyond a standalone pumpkin by giving the seasonal form a character-like body. Rhonda Butler presents the finished design as a jack-o’-lantern pumpkin man, making it a stronger Halloween statement piece than a general autumn pumpkin. The recognizable carved-pumpkin-style face provides the focal point, while the figure format gives the project a more animated personality.
Choose this idea when you want your pumpkin amigurumi to function as a character in a Halloween display. Compared with a simple round pumpkin, the additional body components create more assembly work and more opportunities to adjust stance, expression, and overall balance.
The Pumpkin Head Should Remain the Dominant Shape
On a pumpkin figure, the head carries most of the seasonal identity. If you change yarn weights or proportions, compare the head visually with the body before final assembly. A body that becomes too large compared with the pumpkin head can make the figure look more like a generic doll in orange, while an intentionally dominant pumpkin head keeps the jack-o’-lantern concept obvious.
A Strong Front View Helps the Figure Read Clearly
Faces, body position, and limbs all contribute to the direction the figure appears to face. Set the assembled pieces together temporarily when practical and view them from eye level before securing final placement. This is especially useful for a display character, since a small rotation in a head or limb may be much more noticeable once the figure is standing among other decorations.
Balance Matters More Here Than With a Round Pumpkin
A ball-shaped pumpkin can sit in almost any orientation, but a character figure benefits from a predictable resting position. Check whether the stuffed body and attached components allow it to sit or stand in the manner you expect. If you adapt the project with heavier yarn or larger accessories, reassess that balance rather than assuming the original stance will remain unchanged.
Original Tutorial and Creator Credit
Creator: Rhonda Butler
8. Crochet No Sew Vine Pumpkin
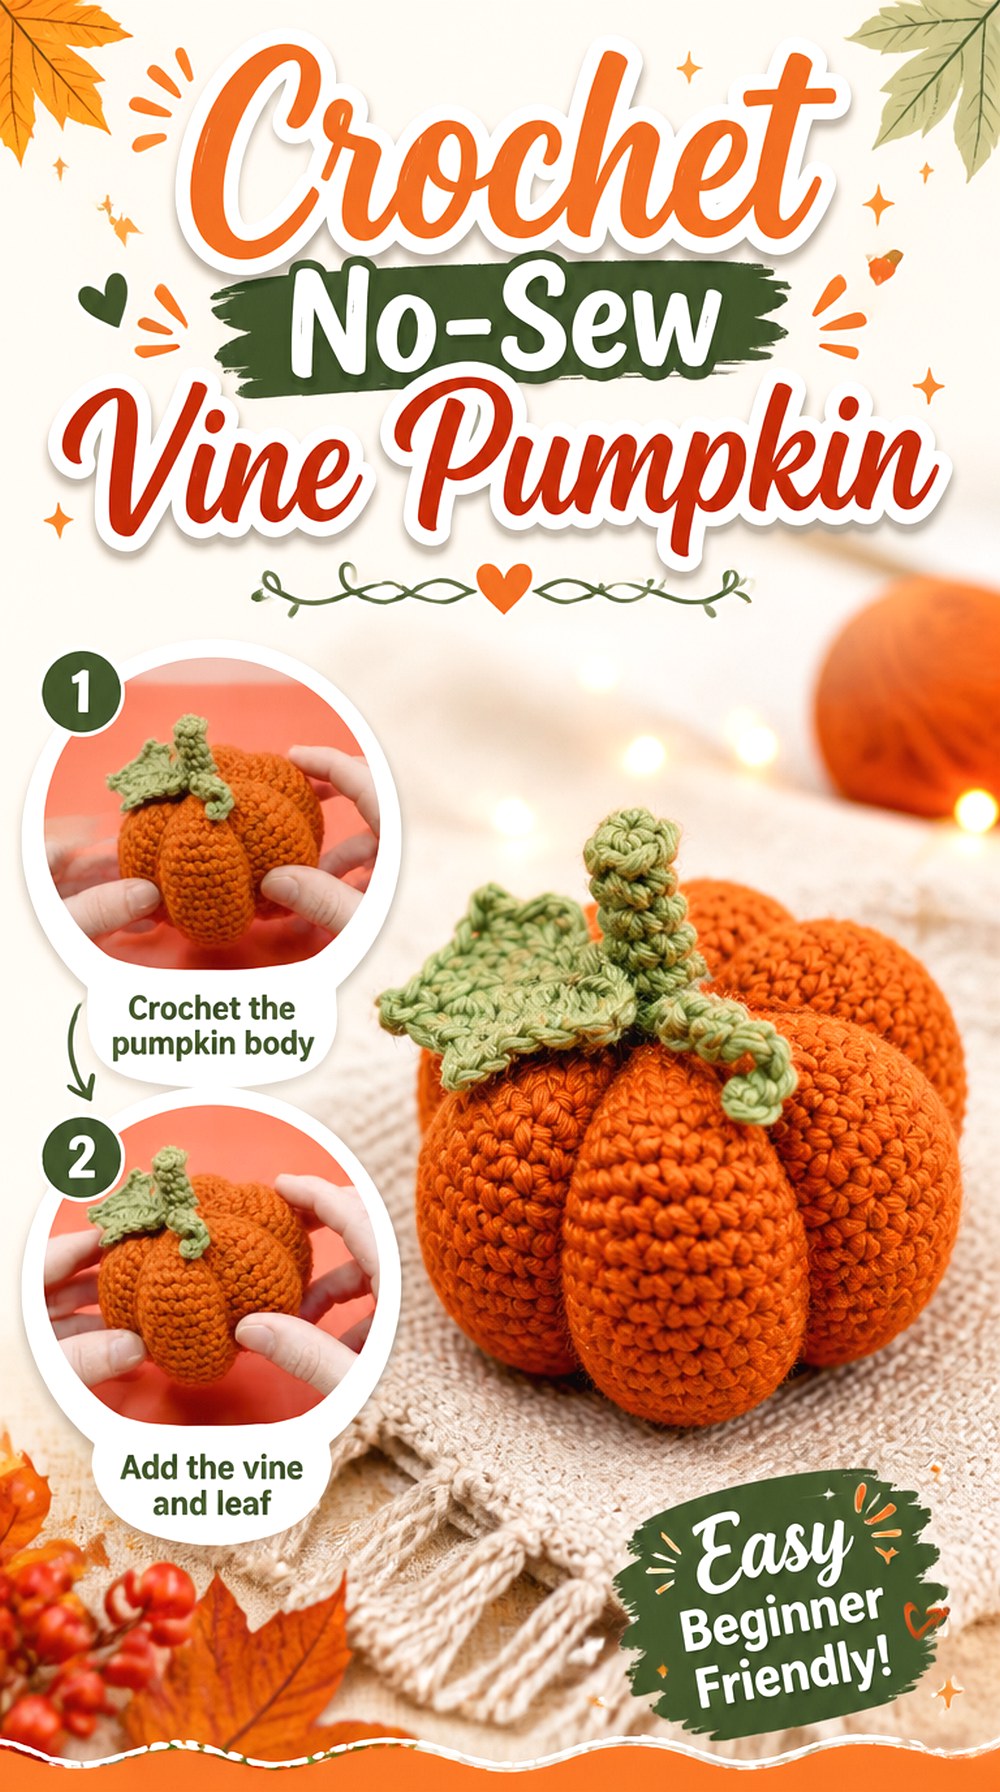
The Crochet No-Sew Vine Pumpkin is a strong alternative for anyone who likes traditional pumpkin decor but wants to minimize assembly. Club Crochet’s tutorial presents a customizable pumpkin made without the usual sewn construction, then adds a stem, vine, and leaf for a more botanical finish. That combination gives it a noticeably different character from the face-based amigurumi projects.
The lack of major sewing does not mean finishing can be ignored. The shape, stuffing distribution, vine, and leaf become the areas that deserve attention. This is a useful choice when you prefer continuous construction and want the seasonal detail to come from sculpting and greenery rather than facial features.
Fewer Seams Shift Attention Toward the Body Shape
When assembly lines are minimized, any irregularity in the pumpkin body can become more noticeable. Use the stuffing stage as a shaping checkpoint and rotate the pumpkin as you work rather than evaluating only the side facing you. The goal is an even foundation before the decorative vine and leaf are added, since those pieces cannot compensate for a body that is noticeably lopsided.
Vines Add Movement but Can Also Catch on Other Objects
A curled or trailing vine gives the pumpkin a more organic silhouette, particularly in tabletop displays. It also introduces a protruding element that can snag during storage. If you expect to pack the pumpkin away with other seasonal decorations, avoid crushing the vine under heavier objects and consider how the finished form will fit into the storage container before enlarging decorative greenery.
Original Tutorial and Creator Credit
Creator: Club Crochet
9. Crochet Deep Rib Sculpted Pumpkin
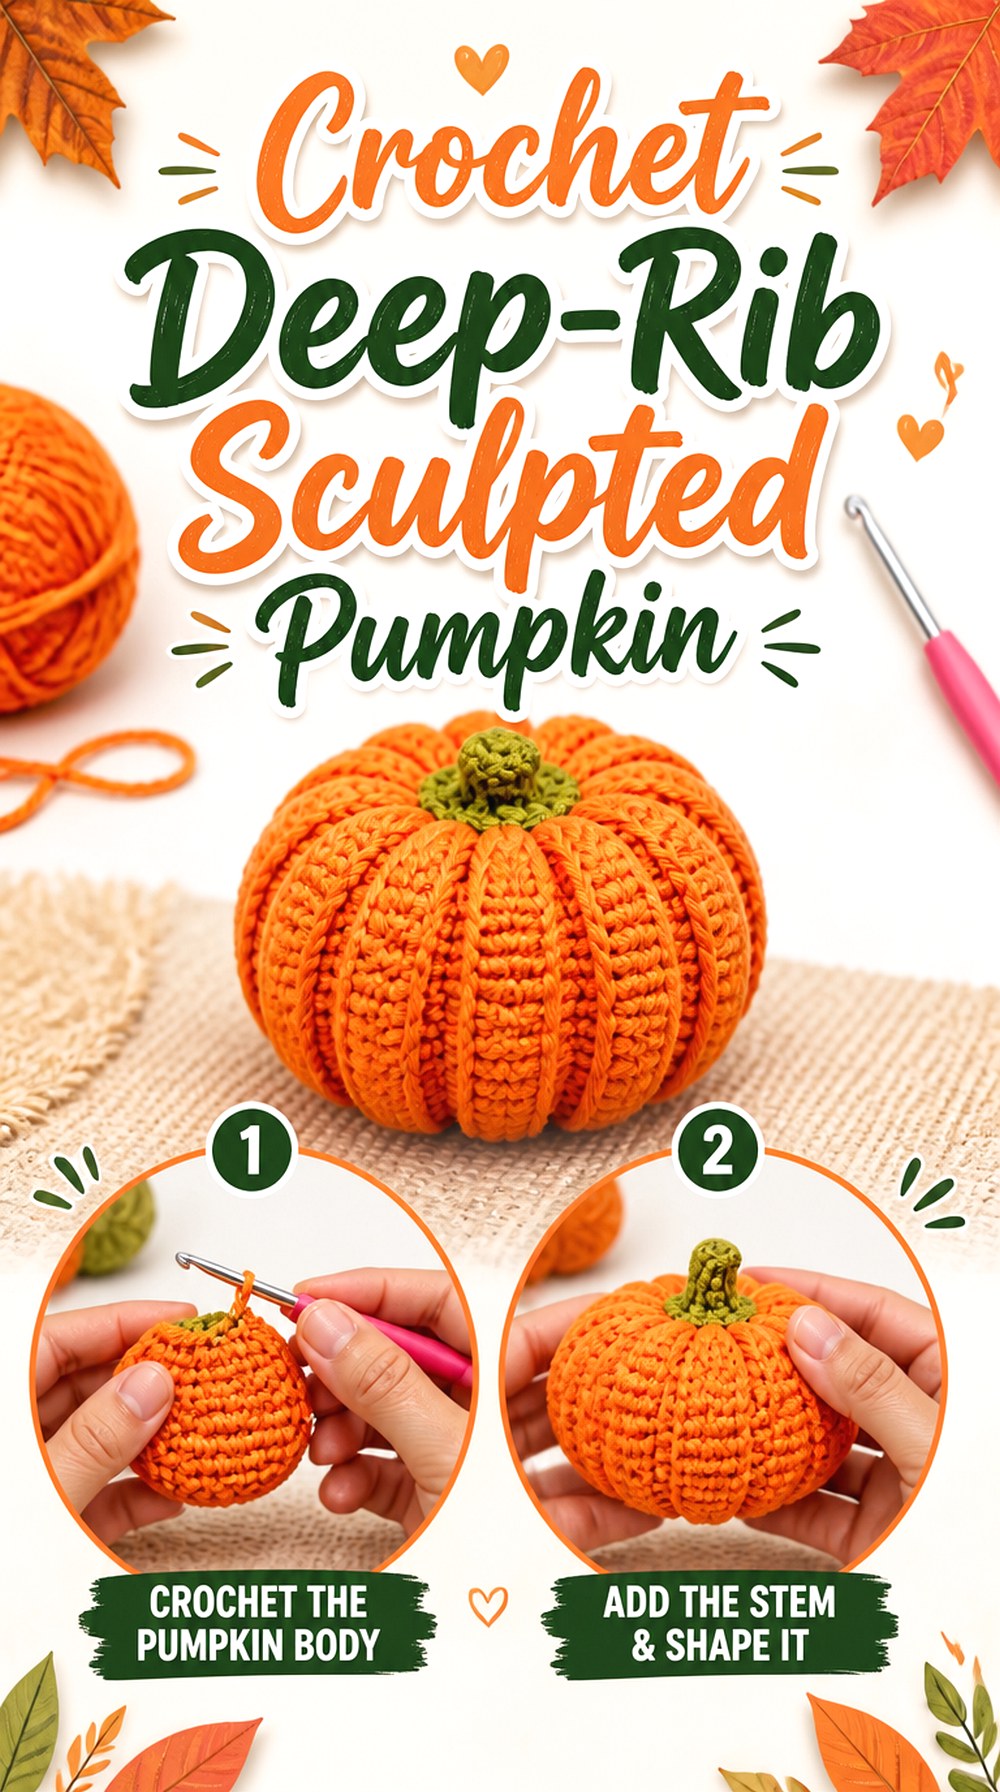
The Crochet Deep-Rib Sculpted Pumpkin is for readers who want the grooves between pumpkin sections to become a major design feature. Little Crochet Farm’s tutorial uses an internal “belt” technique to help create the sculpted form, giving this project a different shaping approach from pumpkins whose ribs are defined mainly by textured fabric or exterior finishing.
That construction detail makes the project particularly interesting for comparing how amigurumi can create the same natural object through different structural methods. Instead of choosing it merely for color, choose it for the pronounced segmented silhouette. Smooth, solid-color yarn can also let that three-dimensional shaping take center stage.
Deep Grooves Need Enough Flexibility in the Stuffed Body
Strong segmentation becomes harder to achieve when a body is packed so tightly that it resists shaping. At the same time, insufficient stuffing can leave the rounded sections without enough support. Check the contour while the project is still adjustable. Each segment should look intentionally rounded rather than alternately overfilled and collapsed.
Internal Shaping Changes the Finishing Priorities
Because the tutorial uses an internal shaping concept, the pumpkin’s structure is doing more of the visual work than surface decoration. If you customize the project, be cautious about adding large appliqués or heavy embellishments that obscure the rib pattern. This style is most distinctive when light and shadow can fall naturally across the pronounced pumpkin sections.
Original Tutorial and Creator Credit
Creator: Little Crochet Farm
10. Crochet Stacked Pumpkin Centerpiece
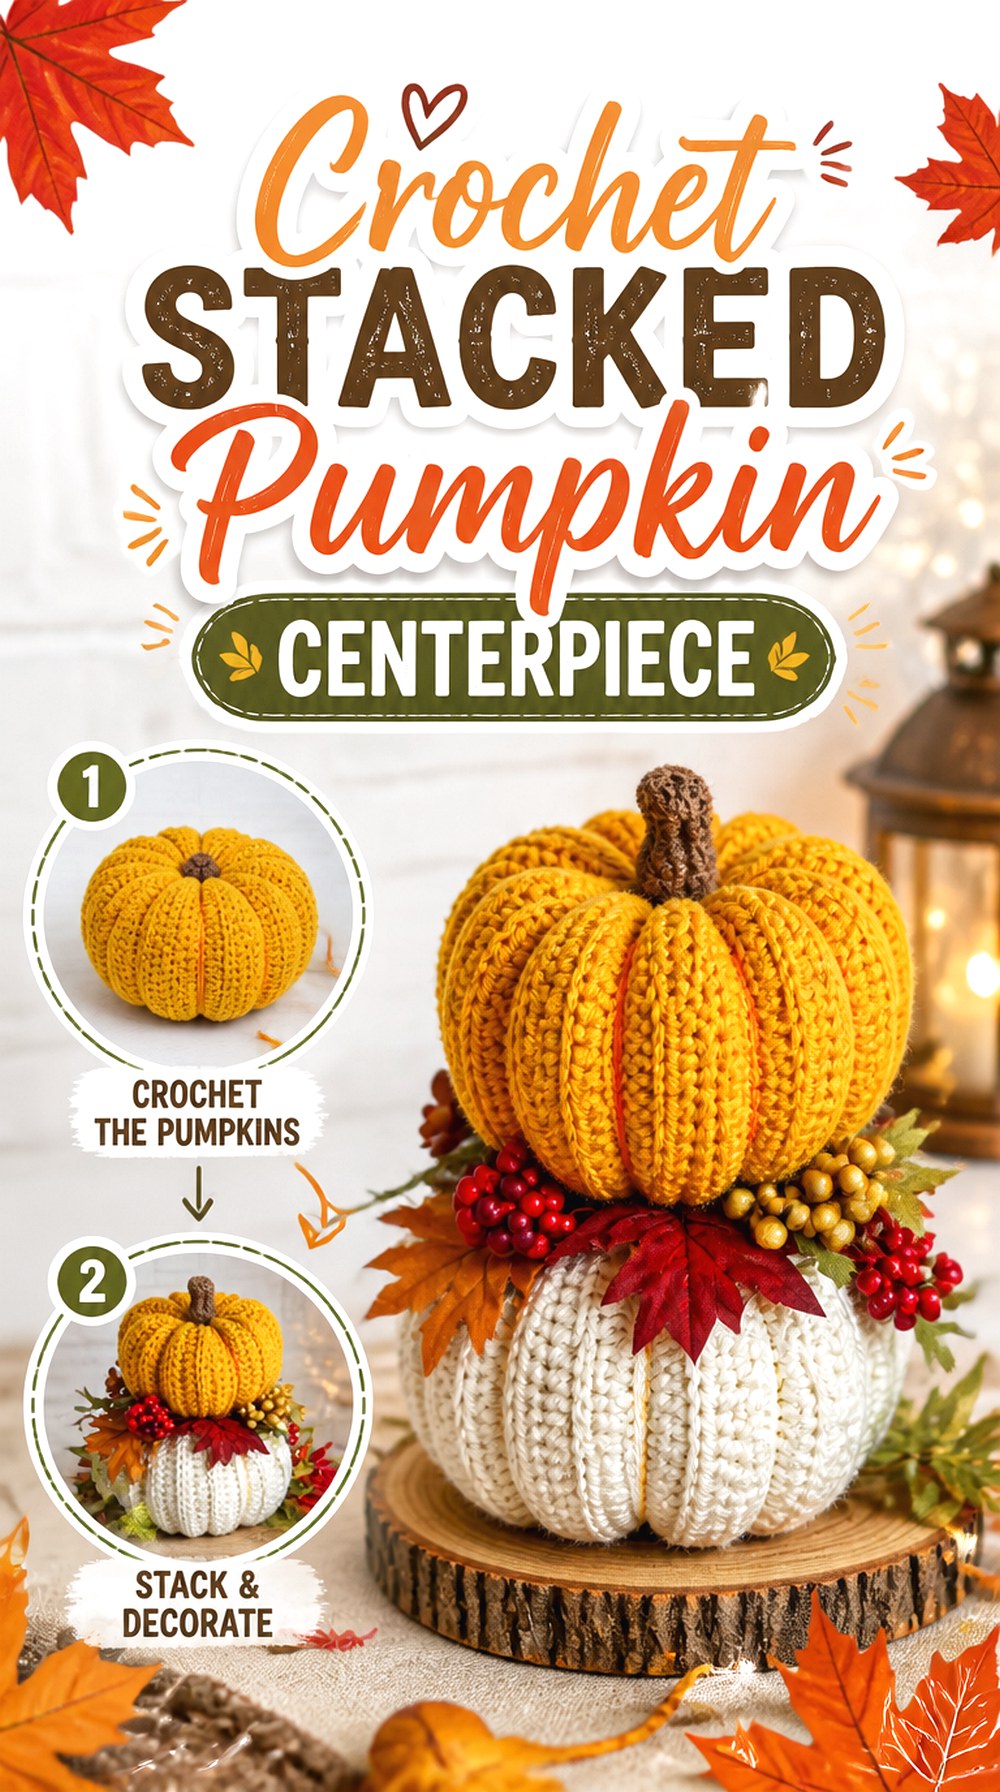
A Crochet Stacked Pumpkin Centerpiece turns several stuffed pumpkins into one vertical decoration. Winding Road Crochet’s tutorial uses three differently sized pumpkins to build a tiered centerpiece, so the final result occupies height rather than spreading several separate pumpkins across a table. That makes it useful for an entryway console, mantel, or fall table where a single coordinated statement piece suits the space better.
The important design issue is not simply making three pumpkins. Their relative scale and the stability of the stack determine whether the final form looks intentionally tapered. This project is therefore better suited to someone who enjoys planning a complete arrangement rather than treating every pumpkin as an independent amigurumi.
A Stack Needs a Clear Size Progression
The eye expects a vertical pumpkin stack to have an intentional relationship between tiers. If you substitute yarn or alter any component, compare all three finished widths before permanent assembly. A middle pumpkin that is nearly the same width as the base can create a column-like look, while a dramatic size jump may make the upper tiers feel disconnected from the foundation.
Stability Comes Before Decorative Height
A taller centerpiece creates leverage that a single low pumpkin does not. Check the base on the actual type of surface where you intend to display it before adding extra decorative height or heavier embellishments. If the stack rocks easily, solve that problem at the structural level rather than relying on nearby objects to hold it upright.
Plan for Off-Season Storage
Three attached pumpkins may use less tabletop space than three separate pieces, but the combined height can make storage less flexible. Before enlarging the project, consider the bin or shelf where seasonal decor will live for the rest of the year. Avoid compressing the stack in a way that permanently distorts the upper pumpkins or decorative finishing.
Original Tutorial and Creator Credit
Creator: Winding Road Crochet
11. Crochet Cabled Cottage Pumpkin
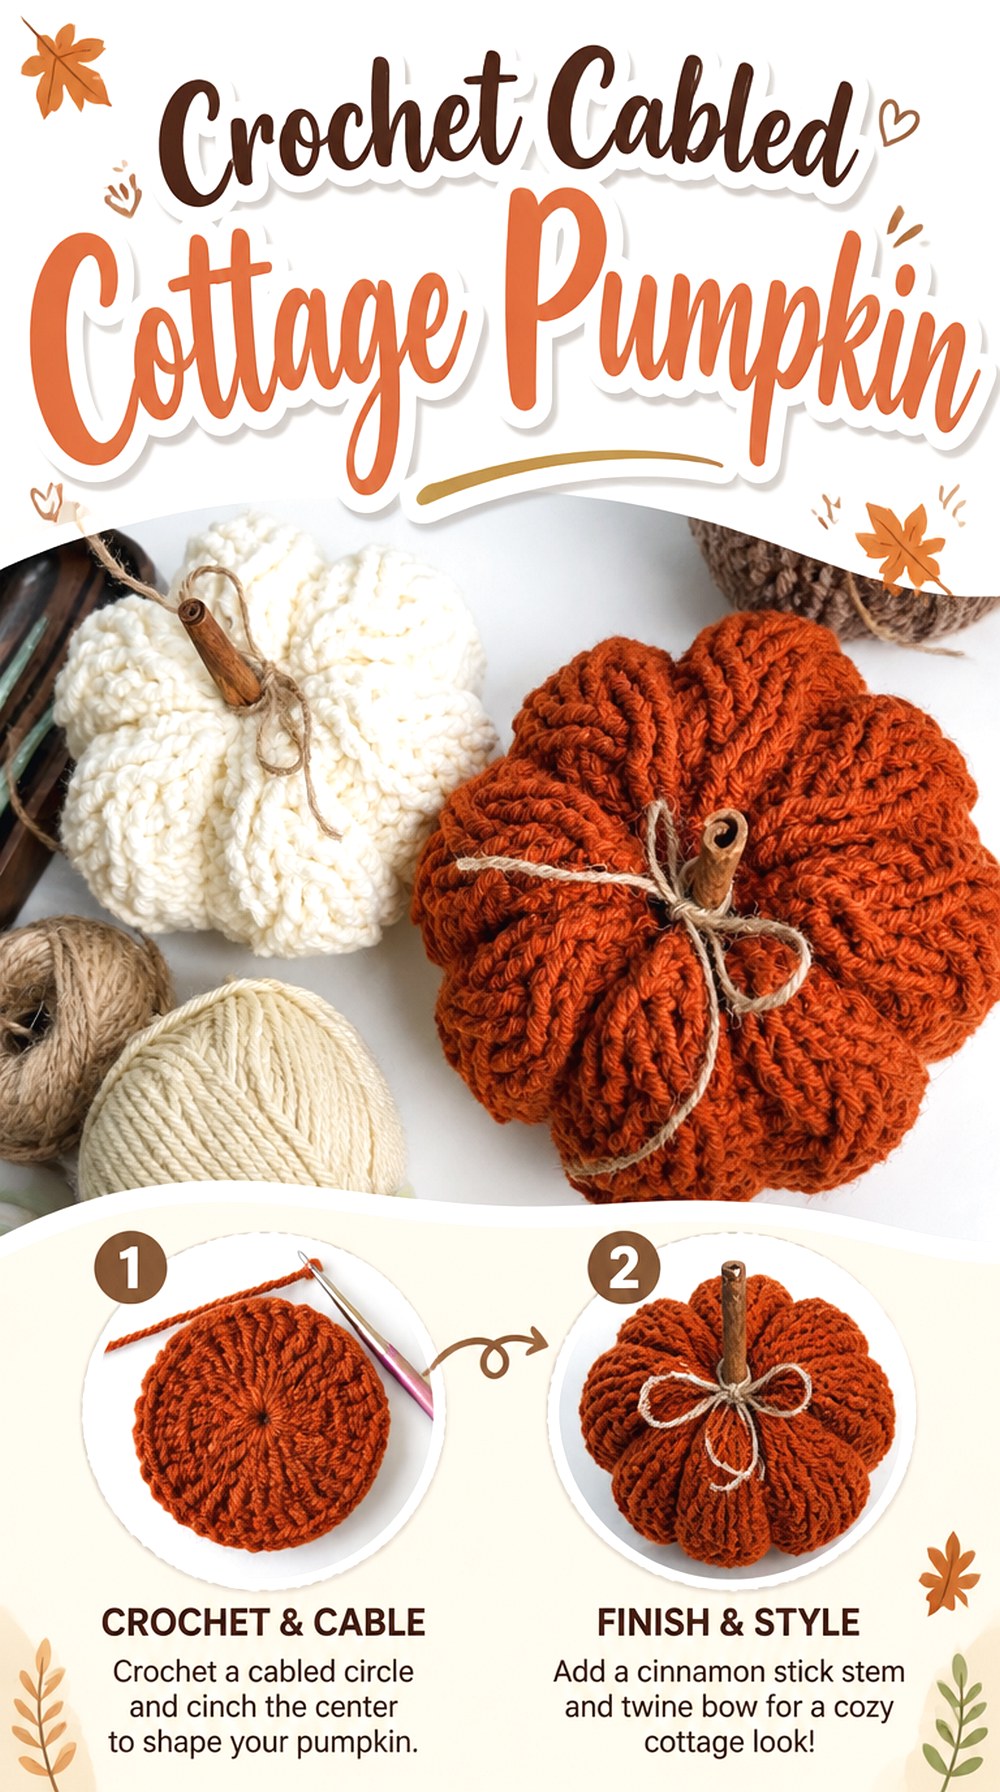
The Crochet Cabled Cottage Pumpkin uses crochet texture itself as the dominant decoration. MJ’s Off The Hook Designs builds the pumpkin with pronounced cable work, producing a more architectural surface than the simple ribs found on many stuffed pumpkins. The result fits particularly well with cozy, neutral, or farmhouse-style fall decor where texture can be more important than a face or novelty accessory.
This design is worth choosing specifically for the cable detail. A yarn substitution that hides those raised stitches could remove much of what distinguishes the project. It is therefore a good example of a pumpkin where material appearance and stitch definition deserve consideration before color.
Cable Texture Needs Space to Stay Visible
Raised cable work creates shadows that help the surface pattern stand out. Very fuzzy yarn can soften those boundaries, while a smooth yarn generally makes textured crossings easier to see. If you want to change fibers, make a small texture sample first when practical and check it under ordinary room lighting rather than relying only on how the yarn looks in the skein.
Stuffing Should Support Instead of Flattening the Surface
A textured pumpkin needs enough internal support to show its overall shape, but overly stiff stuffing can stretch the fabric and reduce the depth of the cable relief. Watch the cable columns as the body fills. If they begin looking flatter than they did before stuffing, reassess fullness before closing the project.
Let the Texture Be the Main Decoration
This pumpkin already has a visually busy surface. Adding numerous appliqués, facial features, or strong color changes can compete with the cable pattern rather than enhance it. If customizing, consider making changes at the stem or overall palette while leaving the body relatively uncluttered. That preserves the reason this design stands apart from smoother pumpkin amigurumi.
Original Tutorial and Creator Credit
Creator: MJ’s Off The Hook Designs
12. Crochet Botanical Fruit Pumpkin
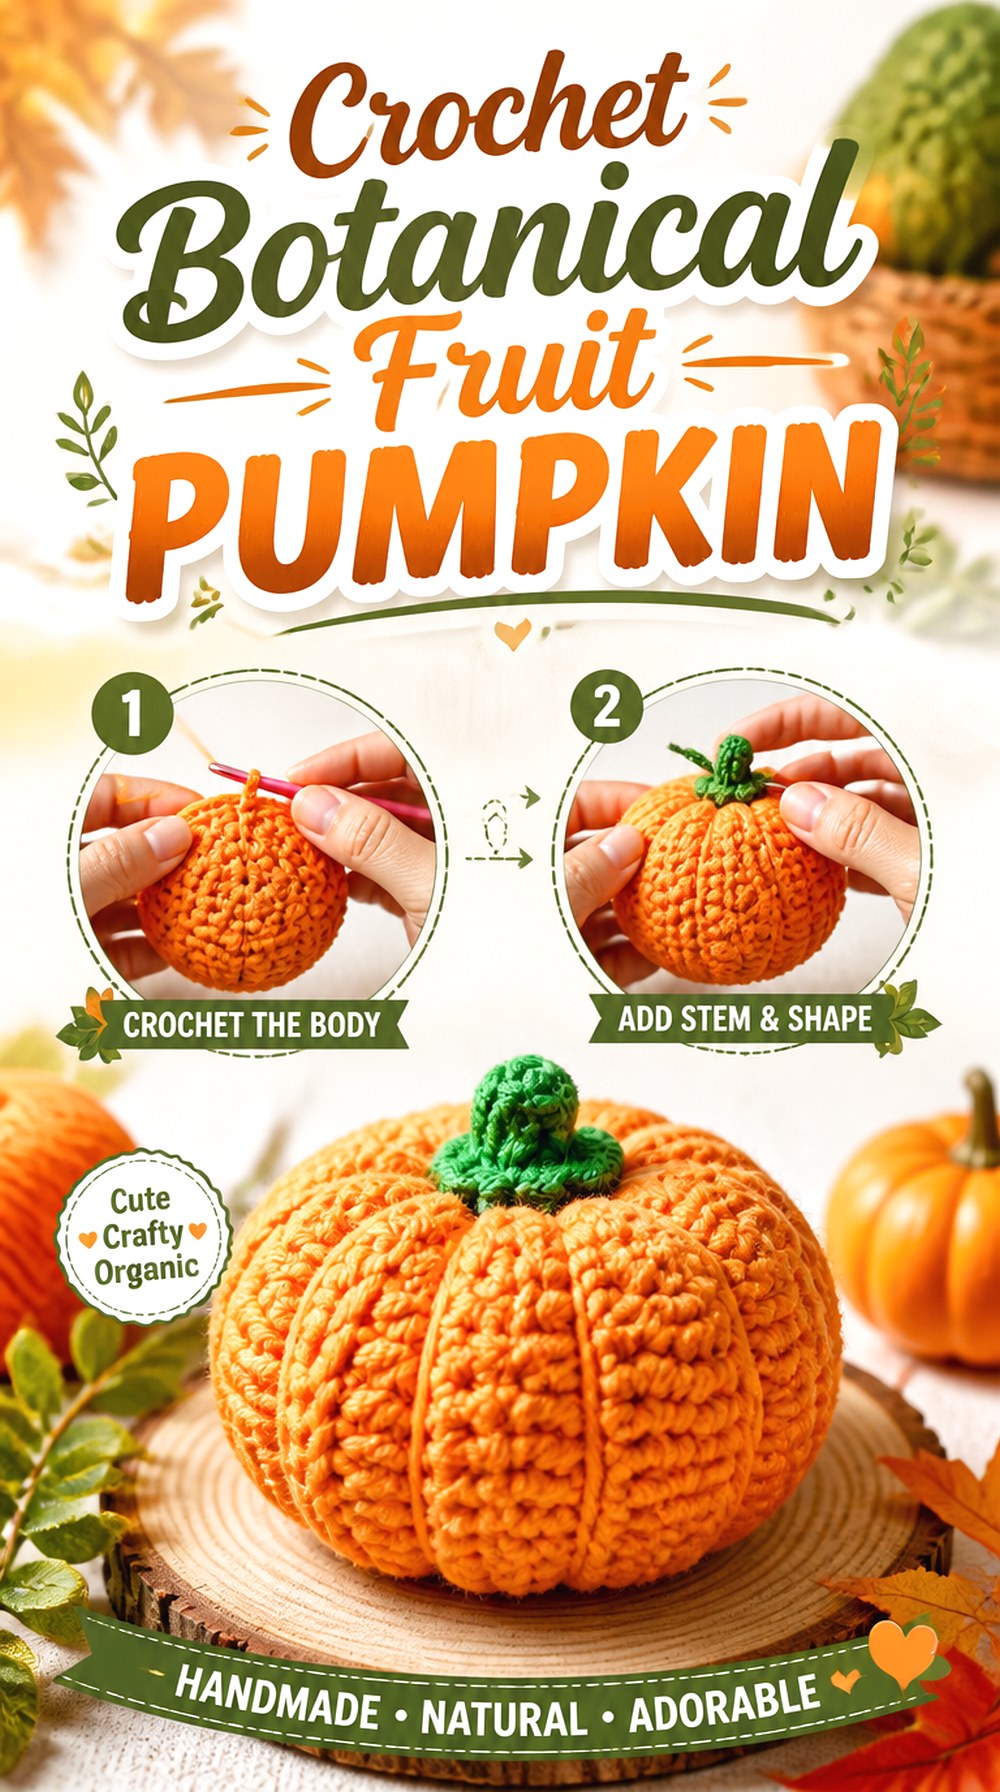
This Crochet Botanical Fruit Pumpkin keeps the concept close to the recognizable shape of the real fruit rather than turning it into an elaborate Halloween character. Amivui Studio’s tutorial is explicitly presented as a pumpkin in its crochet-fruit series, with orange and green yarn used for the seasonal form. That makes it useful when you want simple botanical amigurumi that can mix with other crocheted fruits or vegetables.
Compared with the cable pumpkin or deep-rib design, the appeal here is restraint. The form and color do most of the communicating. It can therefore work well in a harvest-themed grouping where a highly expressive face or character costume would pull too closely toward Halloween kitsch when a more neutral harvest effect is wanted.
Simple Forms Make Proportion More Noticeable
When there are few decorative components, the relationship between the body and stem becomes more visible. After stuffing, look at the pumpkin from several angles before finalizing the top detail. If you substitute a dramatically thicker yarn for the stem, it may visually overpower the fruit body even when the construction itself still works.
A Harvest Palette Does Not Have to Mean Bright Orange
The recognizable silhouette gives room for color adaptation. Cream, muted green, rust, or other pumpkin-inspired shades can shift the object toward a softer fall-decor look while keeping the fruit identity intact. When changing both body and stem colors, maintain enough contrast between them for the top of the pumpkin to remain easy to read.
Original Tutorial and Creator Credit
Creator: Amivui Studio
13. Crochet Sitting Pumpkin Buddy
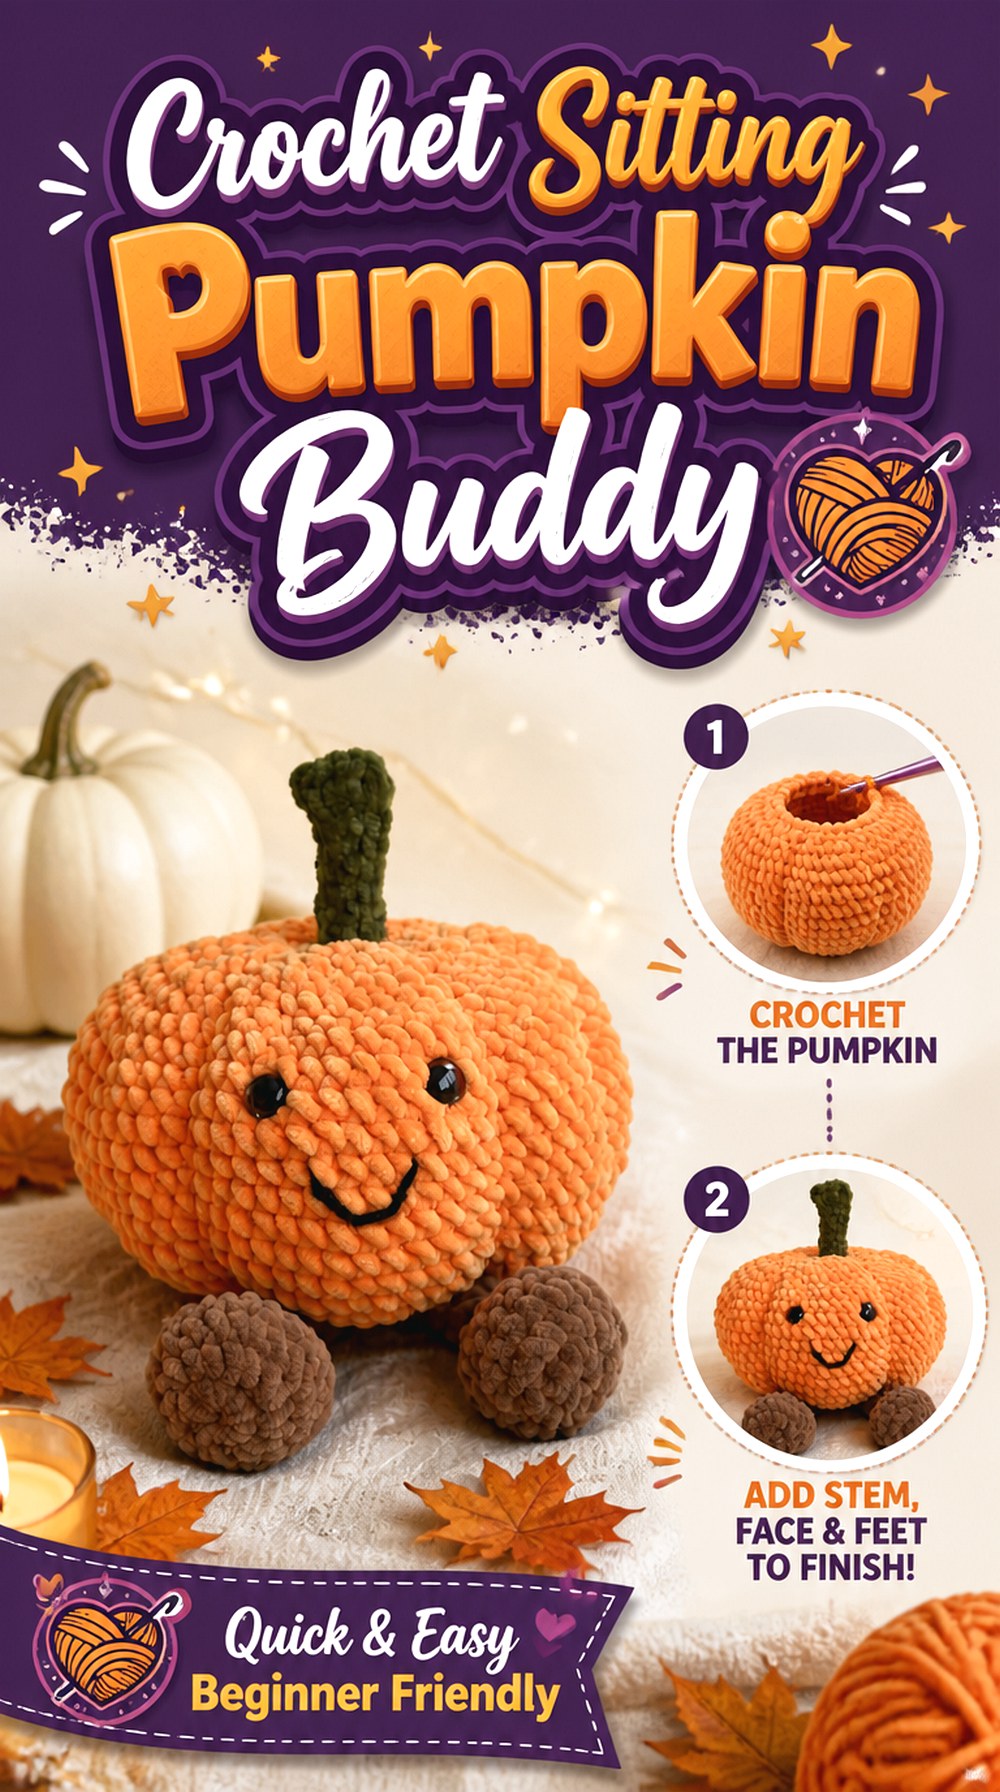
The Crochet Sitting Pumpkin Buddy gives a round pumpkin a plush-character personality through a happy face and small feet. LalaBeCrocheting presents the tutorial as a cozy character-style pumpkin, which separates it from the traditional decor pieces even though the main body remains unmistakably pumpkin shaped. The little seated pose works particularly well on shelves, desks, or in a group of Halloween softies.
This is a useful choice if you like expressive amigurumi but do not want the larger number of separate character components found on the bear or pumpkin man. The body still provides most of the volume, while the feet and face create the personality.
Tiny Feet Establish the Sitting Pose
The feet may be small compared with the pumpkin body, but their position determines whether the character appears naturally seated. Before securing them, set the stuffed pumpkin on a flat surface and check the placement from both the front and side. A position that looks symmetrical while the piece is held in your hand may sit differently once gravity determines its resting angle.
Keep the Expression Visible Above the Base
A squat pumpkin can place the face fairly close to the tabletop. When substituting yarn or altering proportions, make sure the finished expression remains visible from a normal shelf-viewing angle. This matters especially if the softie will sit behind other fall decorations, where a face positioned too deeply on the lower curve can disappear visually.
Plushier Yarn Changes Stitch Visibility
If you choose a fuzzy or plush substitute, expect individual stitch openings and fine shaping cues to become harder to see. That can create a softer character but may also make placement work less precise. Mark important attachment positions before the texture becomes difficult to read, and choose the yarn based on whether you prioritize crisp crochet definition or a softer plush appearance.
Original Tutorial and Creator Credit
Creator: LalaBeCrocheting
14. Crochet Oblong Gourdie Pumpkin
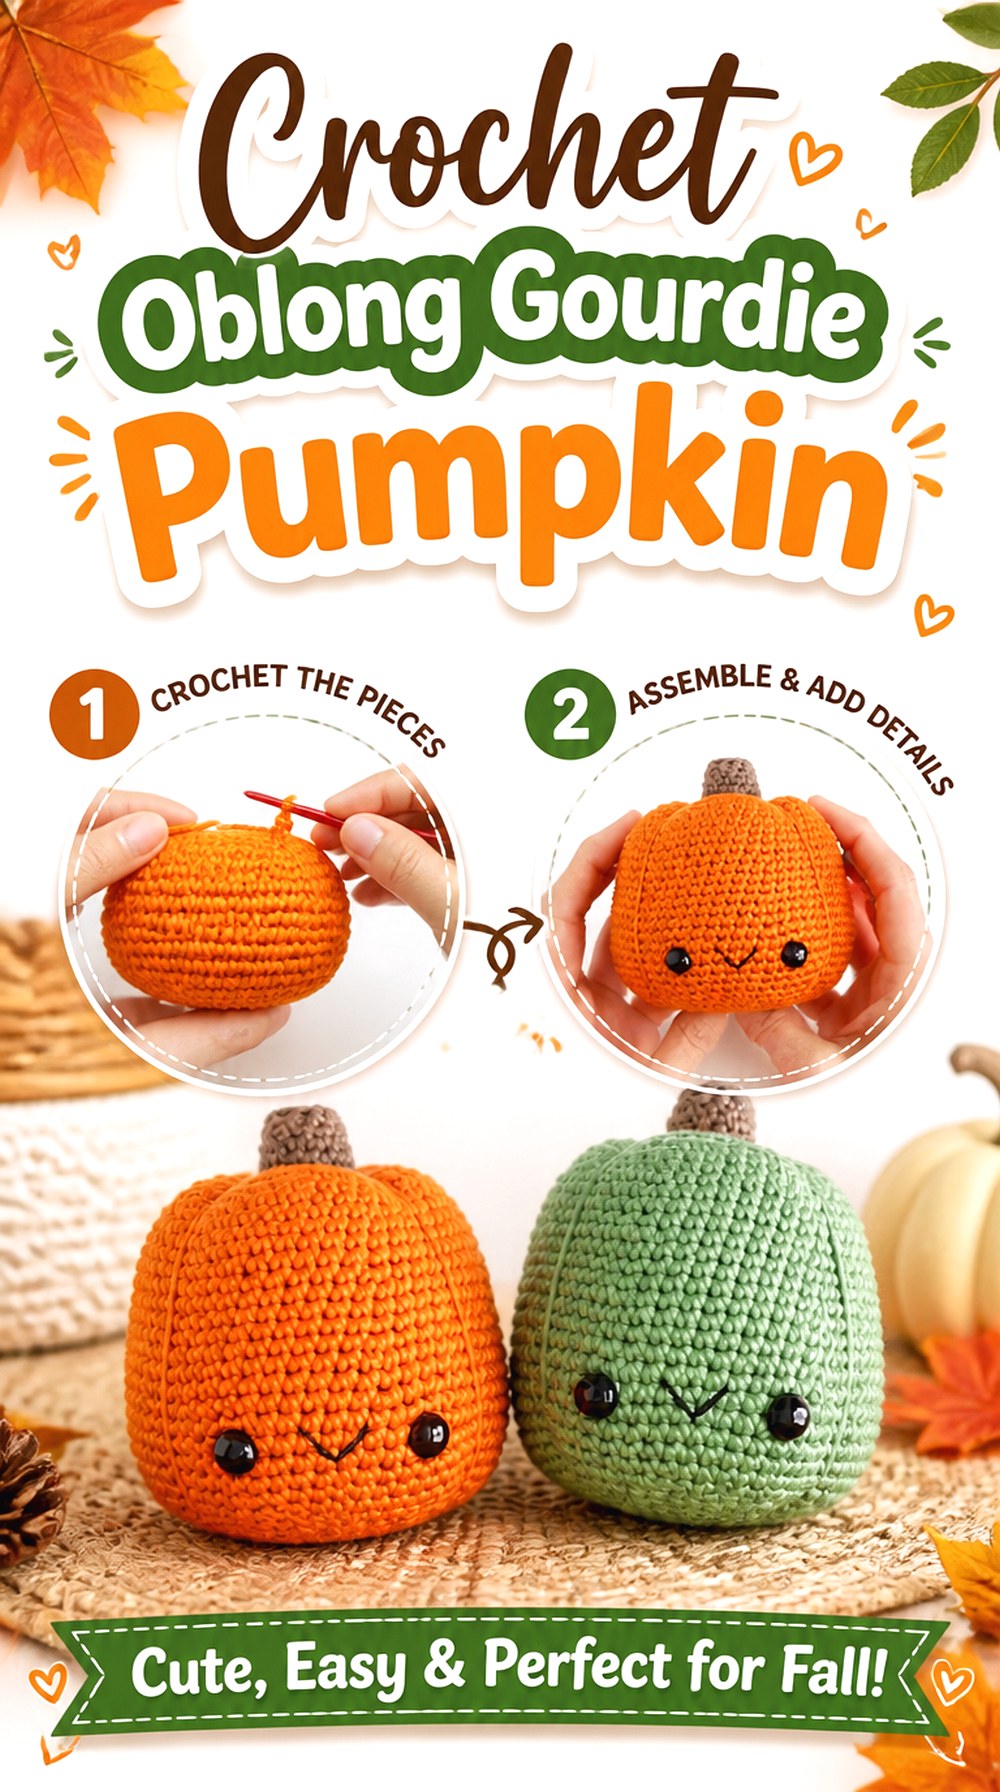
The Crochet Oblong Gourdie Pumpkin is useful when round pumpkins are starting to make a collection feel repetitive. A Menagerie of Stitches describes its “Gourdie” character as having an oblong shape, pumpkin sections, a stem, and a happy face. That taller or elongated profile immediately changes the silhouette while keeping the project firmly recognizable as pumpkin amigurumi.
The tutorial is also presented as a low-sew design, so it offers a different balance between character detail and assembly work. Choose this project when you want a friendly face but prefer a gourd-like body rather than another nearly spherical plush pumpkin.
An Oblong Body Needs Even Vertical Support
With a taller stuffed form, uneven density can create a bend or narrow weak area that is less noticeable on a short round pumpkin. As you stuff, compare the top, center, and base rather than concentrating fullness in the widest section. Rotate the project frequently so the elongation looks intentional instead of appearing as though the pumpkin has been stretched in one direction.
Pumpkin Sections Should Follow the Taller Silhouette
Segment lines that look balanced on a wide pumpkin can feel different on an oblong one. The useful visual checkpoint is whether the sections reinforce the vertical form rather than fighting it. When the body is complete, look from the top as well to make sure the divisions relate evenly around the circumference instead of clustering toward one side.
Low-Sew Does Not Mean No Finishing Decisions
Reducing sewn components can simplify assembly, but the face, stem, shaping, and final resting position still determine the character of the finished piece. Give those finishing stages enough attention rather than treating them as an afterthought. This is especially important on a simple silhouette, where small placement differences remain easy to see.
Original Tutorial and Creator Credit
Creator: A Menagerie of Stitches
15. Crochet Pumpkin Turtle
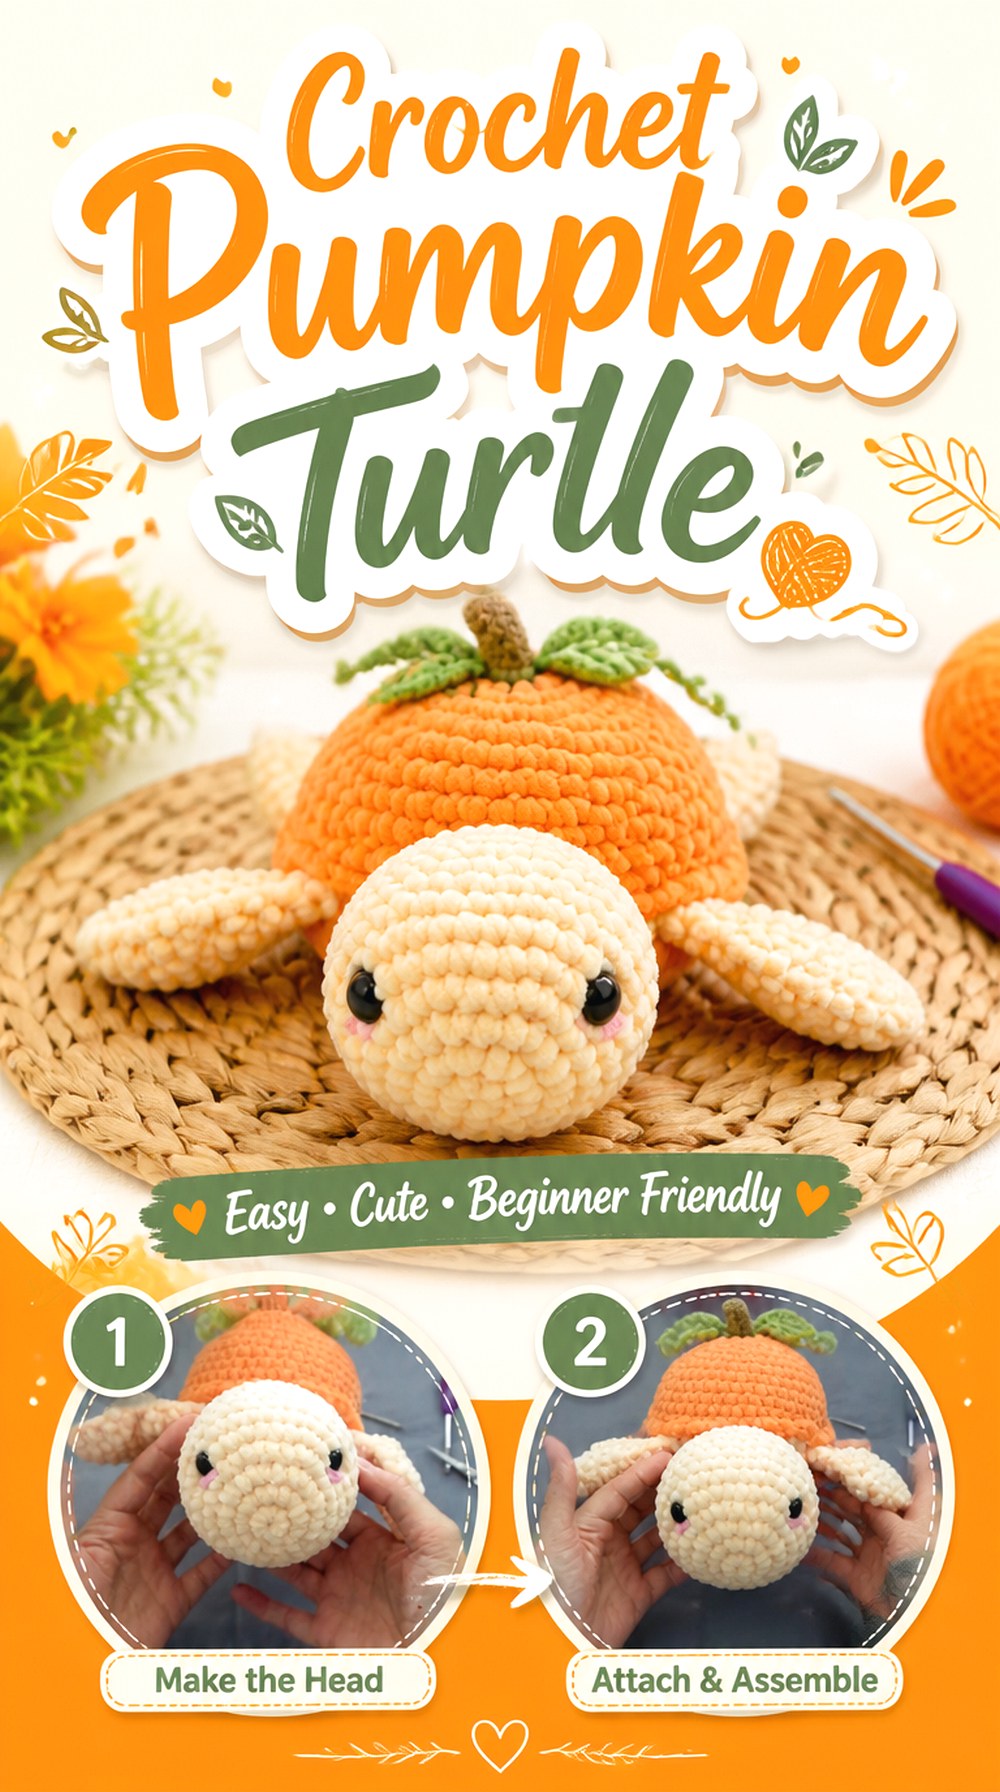
The Crochet Pumpkin Turtle turns the pumpkin into an animal shell, creating one of the strongest silhouette changes in the entire collection. Create Everyday’s tutorial includes a turtle head, flippers, tail, and a shell designed around the pumpkin theme. Instead of placing animal ears on top of a pumpkin, this concept makes the seasonal form part of the animal’s anatomy.
That distinction makes it a good centerpiece for a whimsical fall amigurumi group. It involves multiple components and assembly, so choose it when you enjoy positioning separate pieces and shaping a complete creature rather than when you primarily want a fast batch of small seasonal pumpkins.
The Shell Has to Read as Both Turtle and Pumpkin
The pumpkin shell is doing two visual jobs. Its outline needs to make sense on the turtle body while its color and shaping still communicate the fall theme. If you customize colors, preserve enough contrast between the animal and shell to keep that relationship clear. A very similar color across every component can flatten the visual distinction that makes the hybrid concept work.
Flipper Placement Controls the Turtle’s Resting Pose
Separate flippers, a head, and a tail create a clear orientation. Before final assembly, arrange the pieces around the stuffed shell and view the turtle from above as well as from the front. Symmetry does not require every piece to appear perfectly mirrored, but the animal should look balanced on the surface where it will normally be displayed.
Reconsider Safety Eyes for Some Recipients
The creator’s materials include safety eyes, but the intended recipient should guide your own finishing choice. Small detachable components require particular care for items intended for babies, young children, or pets. If those concerns apply, investigate an appropriate embroidered alternative and make sure all other appendages are attached securely for the planned use.
Original Tutorial and Creator Credit
Creator: Create Everyday
16. Crochet Pumpkin Ghost
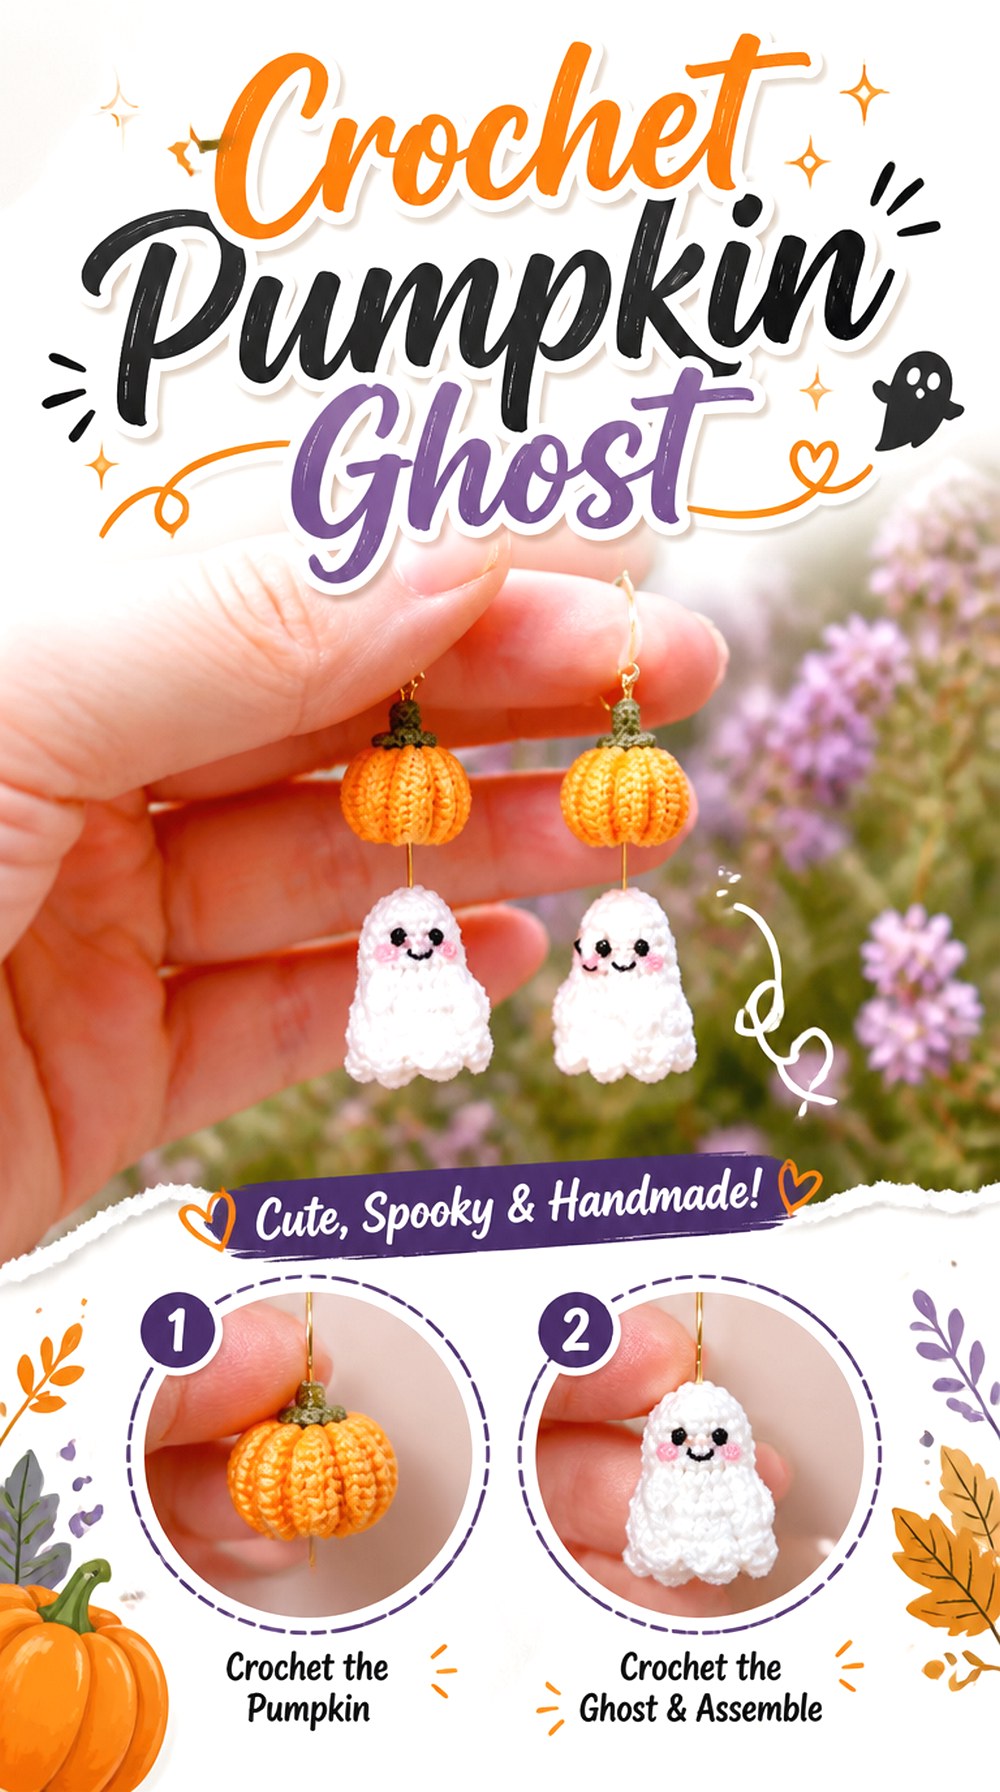
The Crochet Pumpkin Ghost blends two familiar Halloween symbols into one compact amigurumi character. MIMO The Craft Room presents the design as a tiny pumpkin ghost, making it an appealing alternative to a conventional white ghost or orange pumpkin displayed separately. The creator also suggests several possible uses for the small finished piece, including a charm, ornament, garland component, or desk companion.
Its small scale makes proportion and finishing especially important. Choose this idea when you want a Halloween motif that can be adapted to hanging or portable uses, but decide on that use before adding hardware so the attachment point can be planned appropriately.
Make Sure Both Halloween Motifs Remain Recognizable
A hybrid works best when neither half of the idea disappears. If you change the palette, preserve the contrast or visual cues that allow the viewer to recognize both “pumpkin” and “ghost.” Using unconventional colors can still work, but check the finished silhouette from a distance. Tiny amigurumi often relies on a few strong features rather than numerous subtle details.
Tiny Projects Magnify Attachment Decisions
An ornament loop, earring fitting, keychain ring, or bag-charm attachment can be large relative to a miniature crocheted body. Choose hardware only after considering the finished scale. The same design used purely as desk decor does not need that added bulk. For wearable or carried adaptations, also consider how much movement the attachment point will experience.
Original Tutorial and Creator Credit
Creator: MIMO The Craft Room
17. Crochet Pumpkin Bat
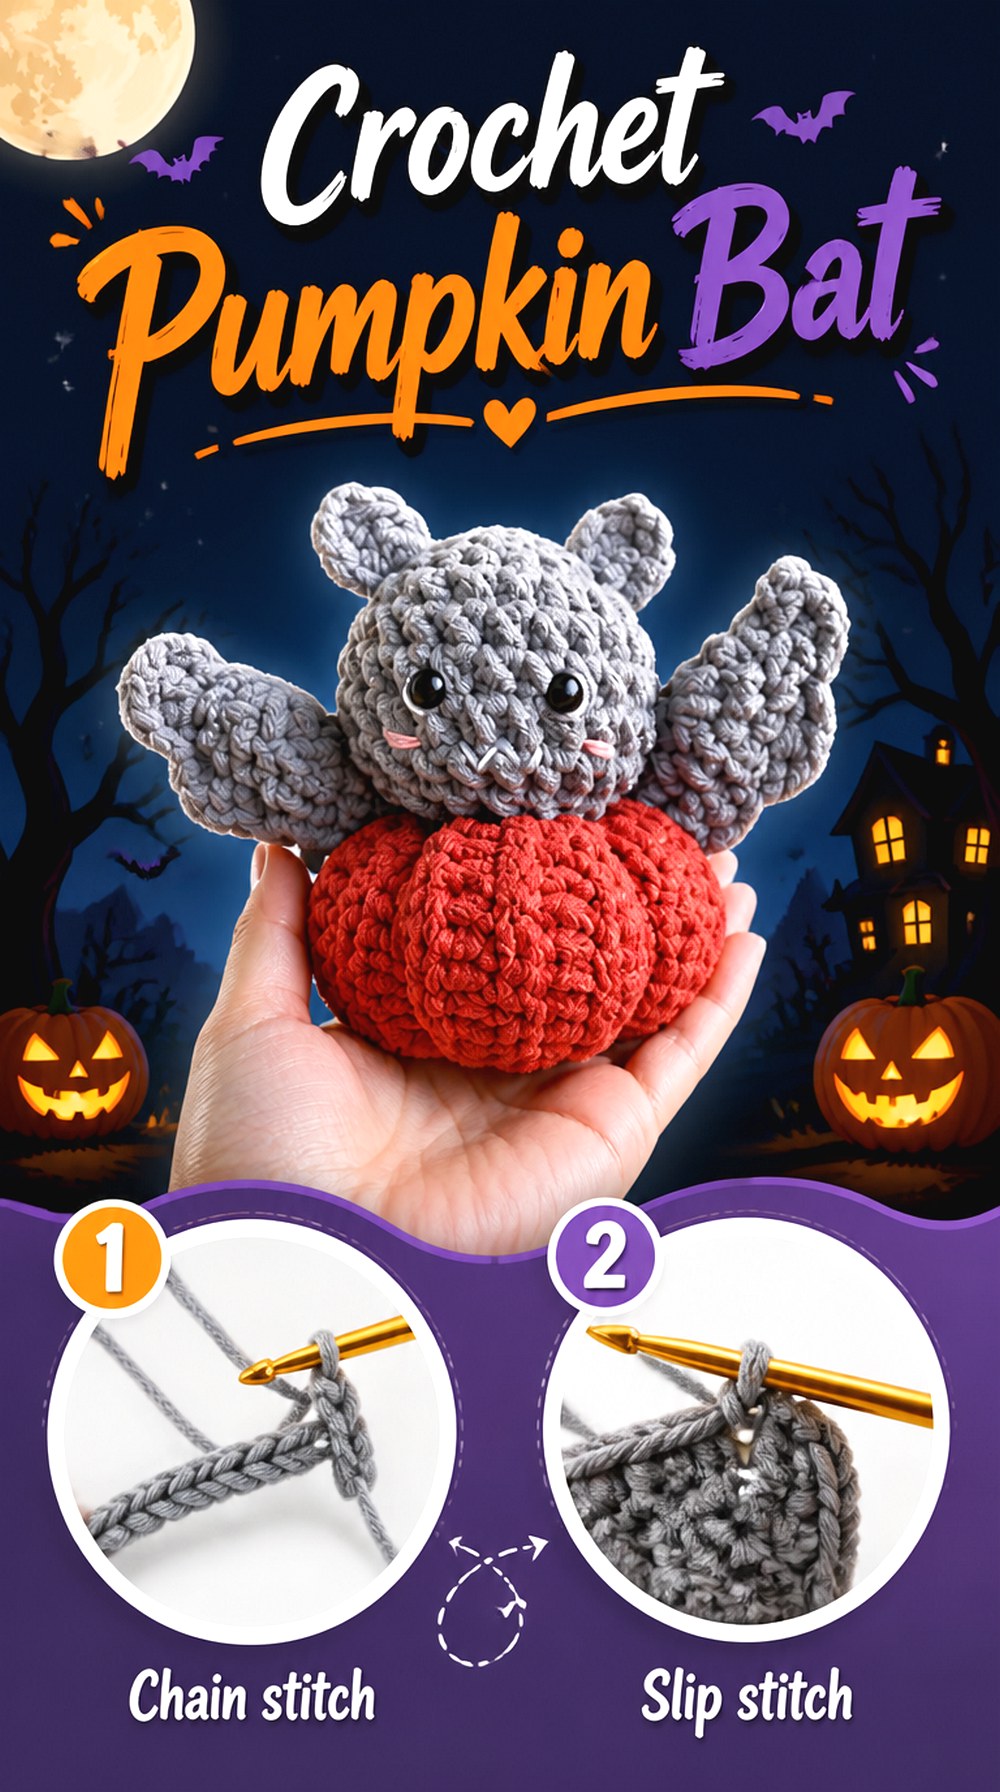
The Crochet Pumpkin Bat closes the collection with another Halloween hybrid, this time combining the rounded seasonal theme with bat characteristics. Moonlight’s tutorial is specifically presented as a Halloween Pumpkin-Bat, making it useful when you want a darker or more creature-focused alternative to smiling pumpkins and harvest decor.
The most important difference here is silhouette. Bat details extend beyond the compact pumpkin body, so the finished object occupies space differently from a round softie. It can work well as an individual Halloween character or as a contrasting shape among plainer pumpkins. When customizing, prioritize the features that make the bat identity readable instead of adding unrelated embellishments simply because there is room.
Wings Change the Space the Amigurumi Occupies
A pumpkin is naturally compact; a bat silhouette spreads outward. Keep that in mind if the project is intended for a narrow shelf or crowded display. Before final placement of projecting parts, compare the full width with the space available. If you alter yarn thickness, those side elements may become proportionally more prominent and can affect both balance and storage.
Symmetry Is Most Visible Across the Bat Details
Paired features draw immediate attention to uneven placement. Before making permanent attachments, compare their height and angle from the front rather than measuring from only one stitch reference point. Stuffed crochet can shift slightly as it is handled, so visual alignment on the completed body is an important final check even when the construction itself has been followed accurately.
Decide Before Turning It Into Hanging Decor
A bat theme naturally suggests hanging display, but do not assume a decorative amigurumi attachment is designed to support suspension unless the tutorial addresses it. If you adapt the project into an ornament, plan a secure hanging point that does not distort the pumpkin body or pull directly on a delicate decorative component.
How to Compare These Pumpkin Amigurumi Styles
For the most traditional fall display, start with the Mini Ribbed Pumpkin, No-Sew Vine Pumpkin, Deep-Rib Sculpted Pumpkin, Cabled Cottage Pumpkin, Botanical Fruit Pumpkin, or Stacked Pumpkin Centerpiece. Their interest comes mainly from shape, texture, or arrangement rather than character features.
For a playful shelf collection, the Smiling Round Pumpkin, Pumpkin Kitty Cat, Pumpkin-Costume Bear, Jack-O’-Lantern Figure, Sitting Pumpkin Buddy, Pumpkin Turtle, Pumpkin Ghost, and Pumpkin Bat create much stronger personalities. They also involve more decisions about facial placement and small attachments.
The Pumpkin Keychain is the clearest choice for portable use, while the Pumpkin Pie Slice is useful when you want the fall theme without another whole-pumpkin silhouette. The Oblong Gourdie Pumpkin sits comfortably between the two groups: recognizable seasonal decor with enough expression to work as a character.
Conclusion
The most useful way to choose among these 17 crochet pumpkin amigurumi ideas is by deciding what the finished piece needs to do. For understated fall decor, focus on ribbed, sculpted, cabled, botanical, or stacked pumpkins. For Halloween character displays, the kitty, bear, pumpkin figure, turtle, ghost, bat, and seated buddy offer much stronger personalities. A keychain works when portability matters, while the pie slice breaks up a collection full of round shapes.
After choosing the silhouette, compare assembly, stuffing, exposed attachments, and the amount of texture you want the yarn to show. Use the credited original tutorials for exact construction details and creator-specific instructions.
Frequently Asked Questions
How can I make crochet pumpkin ribs look more defined?
Start by choosing a project whose construction already emphasizes segmentation, because surface ribbing, cable texture, and sculpted grooves produce different results. Stuffing also matters: a body that is extremely rigid can resist later shaping, while too repeated included rigid material can leave the sections unsupported. Check the pumpkin as you fill it and preserve enough flexibility for the tutorial’s shaping method to remain visible.
Can I use plush yarn for any pumpkin amigurumi tutorial?
Not automatically. Plush or fuzzy yarn can change the finished scale, hide fine stitch definition, and make attachment points harder to locate. That may suit a soft character pumpkin but work against a design chosen specifically for crisp cable texture or small decorative details. If substituting yarn, follow a compatible hook choice for that yarn and expect the finished dimensions to differ from the creator’s original unless verified otherwise.
What should I check before turning a pumpkin amigurumi into a keychain?
Consider the size, weight, protruding decorations, and especially the connection between the crochet and the hardware. A keychain is likely to experience repeated movement that shelf decor does not. Avoid attaching a ring through a fragile decorative feature merely because it is conveniently located. If following a tutorial specifically designed as a keychain, use its construction as the reference rather than assuming every mini pumpkin can be converted identically.
Are safety eyes appropriate for every pumpkin amigurumi?
No single eye style suits every intended use. Safety eyes are common in amigurumi, but small detachable components require special consideration for pieces intended for babies, young children, or pets. Embroidered features may be an alternative in some situations. Also inspect stems, buttons, keychain hardware, wings, limbs, and other small components; changing the eyes alone does not address every possible attachment concern.
How do I choose between a round pumpkin and an oblong pumpkin?
Choose based on the silhouette you want in the finished display. Round pumpkins create the familiar compact shape and group naturally in bowls or tabletop arrangements. An oblong design introduces vertical variation and can keep a collection from looking like repeated versions of the same object. If several pumpkins will be displayed together, mixing profiles can create variety without relying on completely different color schemes.
Should I stuff a crochet pumpkin very firmly?
Firmness should support the chosen shape, not become a goal by itself. Heavy stuffing can stretch the fabric, expose gaps, flatten raised texture, or make deep shaping more difficult. Too long to bring full-bodied structure all down below that, adding less may leave a pumpkin collapsed. Watch the contour during filling and stop when the body supports its intended shape while still allowing any rib-forming or sculpting method in the tutorial to work.
How can I make several crochet pumpkins look coordinated without making them identical?
Repeat one or two design elements while changing the silhouettes. For example, use a related autumn palette across a ribbed pumpkin, an oblong pumpkin, and a cabled pumpkin, or repeat the same stem color on several differently shaped pieces. Keeping a shared visual cue makes the collection cohesive, while differences in height, texture, character details, and construction prevent the arrangement from looking like simple color variations of one design.