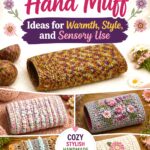
Crochet arm warmers can mean very different things depending on how much coverage you want. Some stop around the wrist, others extend over the hand with a thumb opening, and longer versions can cover much of the forearm. There are even connected designs that behave more like detachable sleeves than traditional fingerless gloves.
This collection focuses on those meaningful differences instead of treating every pair as the same basic project in another color. You’ll find streamlined ribbing, moss stitch, cables, shells, granny squares, ruffles, flowers, dragon-scale texture, bows, bold stripes, and a full shoulder-spanning option. The planning notes emphasize practical decisions such as fit, coverage, yarn behavior, stretch, construction, and what to verify before adapting a tutorial.
Quick List
- Crochet Connected Shoulder Arm-Warmer Sweater
- Crochet Two-Tone Fingerless Gauntlet Arm Warmers
- Crochet Bow-Trim Fingerless Arm Warmers
- Crochet Minimal Thumb-Hole Arm Warmers
- Crochet Ribbed-Cuff Even-Moss Arm Warmers
- Crochet Striped Ribbed Fingerless Arm Warmers
- Crochet One-Seam Moss-Stitch Hand Warmers
- Crochet Feather-Texture Wrist Warmers
- Crochet Super-Bulky Tube Wrist Warmers
- Crochet Elbow-Length Tapered Arm Warmers
- Crochet Cable-Panel Wrist Warmers
- Crochet Two-Stripe Bulky Wrist Warmers
- Crochet Flat-Rectangle Ribbed Wrist Warmers
- Crochet Ruffle-Cuff Wrist Warmers
- Crochet Dragon-Scale Fingerless Arm Warmers
- Crochet Granny-Square Fingerless Arm Warmers
- Crochet Shell-Stitch Fingerless Wrist Warmers
- Crochet Flower-Detail Fingerless Arm Warmers
- Crochet Victorian-Lace Fingerless Arm Warmers
Choose the Amount of Coverage Before Choosing the Texture
Start by deciding where you want the crochet to end. Short wrist warmers interfere least with sleeves and keep decorative bulk close to the hand. Fingerless styles extend farther over the hand and normally use a thumb opening to stabilize that extra coverage. Long forearm versions become much more visible as part of an outfit, while connected arm-warmer sweaters span the shoulders and behave more like a small layering garment.
That choice affects more than appearance. Extra length increases the importance of forearm circumference, taper, stretch, garment weight, and how the warmer interacts with jacket or sweater sleeves. A highly textured design may look appealing on its own but feel bulky under fitted outerwear. Choose the basic silhouette first, then decide how much texture you want to add to it.
Fit, Stretch, and Thumb Placement Need to Work Together
Arm warmers need enough room for movement without becoming loose tubes that rotate around the hand. Before adapting a tutorial, compare the creator’s sizing method with your wrist, hand, and—on longer designs—forearm. Pay particular attention to whether measurements are intended for relaxed fabric or stretched fabric.
Thumb placement deserves its own check. An opening that sits comfortably when the hand is flat can behave differently once the thumb moves, so notice where the tutorial positions it in relation to the palm and wrist. With flat constructions, you often have a useful opportunity to compare the panel against your hand before final seaming. With connected sleeves, shoulder-to-wrist proportions matter as well, because changing only sleeve length can affect where the entire garment sits.
Yarn Choice Changes Bulk, Drape, and Stitch Definition
Using a different yarn can change an arm warmer more dramatically than it changes a simple scarf. Thick yarn increases volume around the hand and can make seams, thumb openings, and decorative edges more prominent. Finer yarn usually creates a lower-profile accessory but may not produce the same dimensions without adjustment.
Texture also affects the decision. Cables, shells, dragon scales, and feather-like stitches benefit from enough stitch definition for the surface pattern to remain visible. Ribbing depends on flexibility, while a connected sleeve layer needs enough drape to move naturally across the shoulders. When substituting yarn, compare weight, fiber behavior, and the creator’s sizing information rather than assuming that matching color alone will preserve the original fit.
1. Crochet Connected Shoulder Arm Warmer Sweater

This design stretches the idea of an arm warmer into a true layering piece. Instead of making two independent hand or forearm covers, the sleeves connect across the upper body, creating the look of a sweater with the torso removed. Zx Crochets presents the project specifically as an arm-warmer sweater and shows a finished garment intended to cover the arms while leaving the main body open.
Choose this style when the arm warmers are meant to become a visible part of an outfit rather than disappear beneath a coat. It has more fit variables than a simple wrist warmer, especially through the sleeve length and shoulder span.
Shoulder Width Becomes Part of the Fit
With separate warmers, each arm can be assessed almost independently. A connected piece has to travel from one wrist through the shoulder area to the other side, so the relationship between arm length and upper-body width becomes important. Compare the tutorial’s sizing approach with how you want the piece to sit across your back rather than focusing on sleeve length alone.
Layering Changes the Amount of Ease You Need
Think about what will sit underneath the warmer. Wearing it over a fitted tank creates different space requirements from pulling it over a substantial sweater. If you plan to change the intended layering combination, evaluate the upper-arm and shoulder areas before making large adjustments elsewhere.
Sleeve Weight Can Affect the Center Section
Long sleeves place more crochet fabric on either side of the connecting section. A heavier or substantially thicker yarn may therefore change not only the sleeve feel but also how the center portion hangs. When substituting materials, preserve the intended drape as closely as practical instead of treating this like two ordinary tubes.
2. Crochet Two Tone Fingerless Gauntlet Arm Warmers
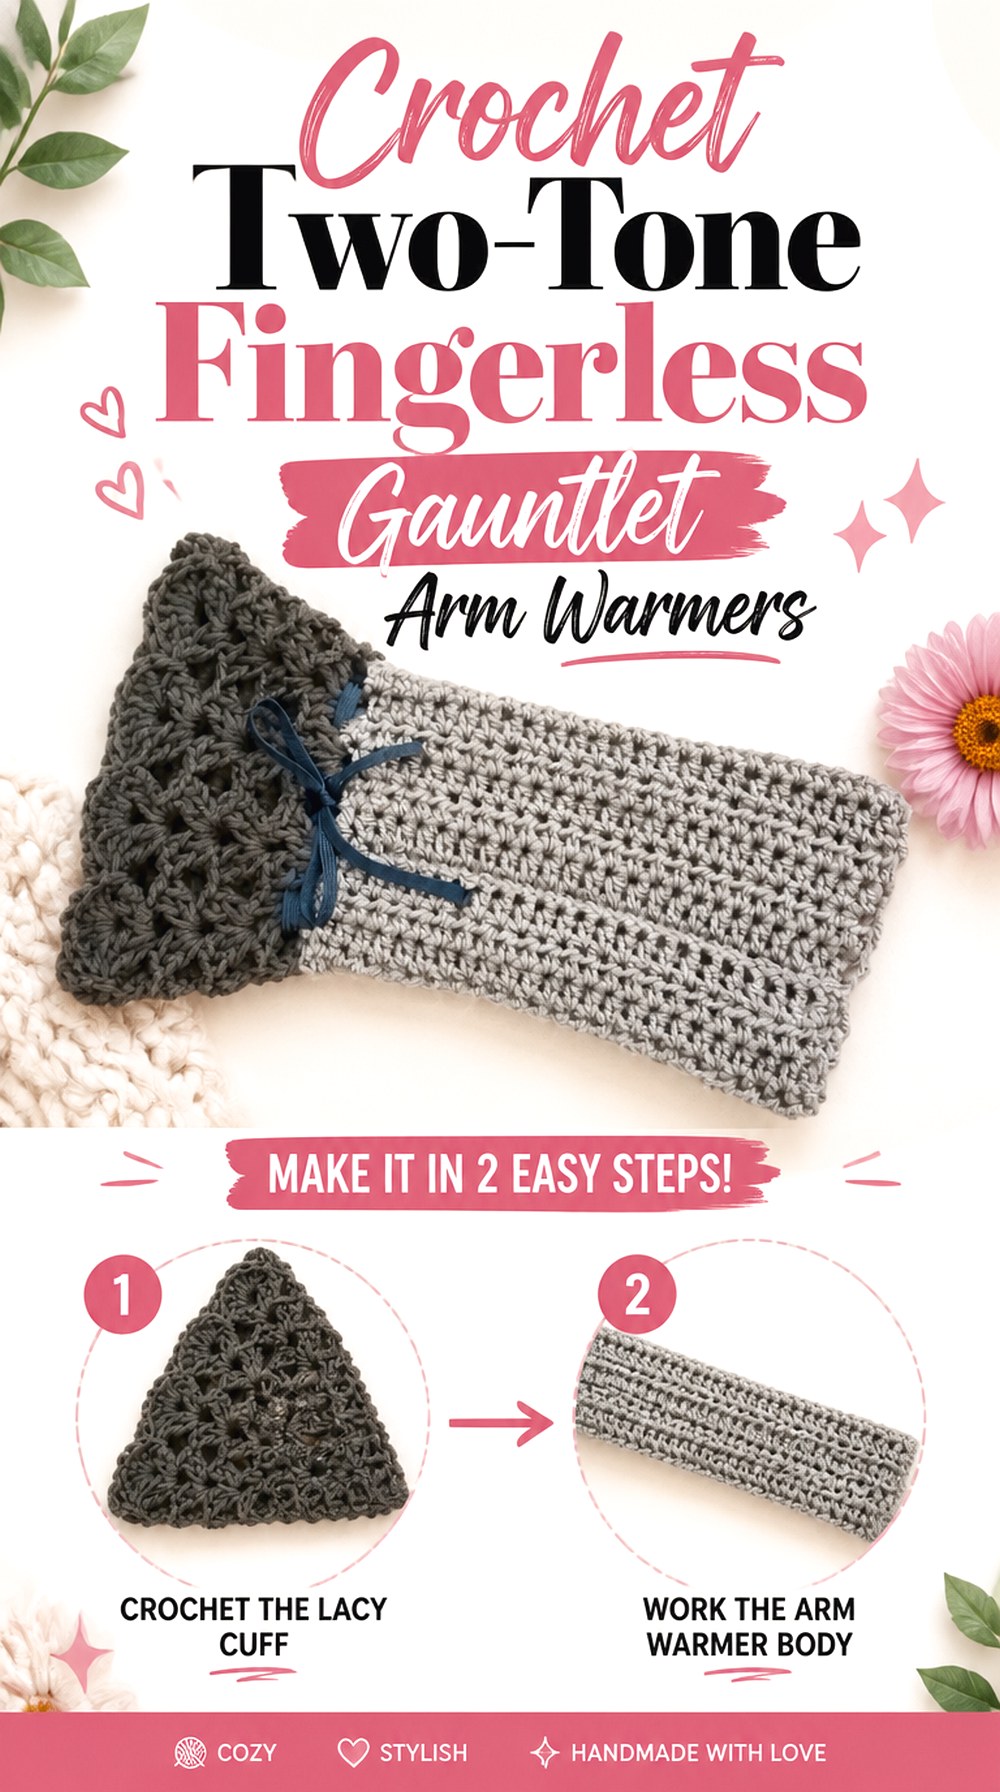
These gauntlet-style warmers use two colors to give a straightforward fingerless shape more visual structure. Smart Hand Fashion describes the project as fingerless gloves, wrist warmers, hand cuffs, sleeves, and gauntlets, which makes it a useful bridge between short gloves and longer decorative arm accessories. The tutorial uses half double and double crochet in its demonstrated design.
This option works well when you want color contrast to carry the design instead of relying on motifs or elaborate edging. Because the pair remains relatively streamlined, the color boundary and the proportions of the hand and wrist sections are more noticeable than they would be on a heavily textured warmer.
Decide Where the Color Break Should Draw the Eye
Two-tone crochet can visually divide the hand and wrist. A high-contrast pairing makes that division pronounced, while related shades give a softer transition. Before selecting colors, look at the finished warmer and decide whether you want the hand section, cuff, or overall silhouette to be the strongest feature.
Treat “Gauntlet” Length as a Styling Choice
The same general family can range from compact fingerless gloves to longer cuffs. Think about whether the pair will be worn beneath sleeves or displayed over them. Extra forearm length makes the accessory more noticeable and also increases the need to compare upper and lower circumference rather than assuming the wrist measurement will work everywhere.
Original Tutorial and Creator Credit
Creator: Smart Hand Fashion
3. Crochet Bow Trim Fingerless Arm Warmers

A small bow changes the character of a basic fingerless warmer without covering the whole surface in decoration. Mahum’s tutorial combines fingerless gloves with added crochet bows, giving this project a playful finish while retaining a recognizable hand-and-wrist shape. The video also separates the glove construction and bow-making portions so the embellishment is easy to identify as its own design element.
This is a strong choice when you like decorative accessories but still want the underlying warmer to stay relatively simple. It also offers an obvious customization point: the bow can blend with the main yarn or become a deliberately contrasting feature.
Bow Placement Should Stay Out of the Way
Before attaching a decorative bow, consider what the warmer will touch during normal wear. A bow sitting on the back or side of the hand behaves differently from one near the palm or wrist crease. The most attractive position is not automatically the most comfortable position for typing, carrying objects, or pulling on a jacket.
Ribbing and Decoration Need Visual Balance
The tutorial includes a ribbed portion as part of the glove construction. If you introduce several additional colors or larger embellishments, the surface can become visually busy. Decide whether the ribbed texture or the bow should dominate and keep the rest of the palette restrained enough for that feature to read clearly.
Make Both Bows Look Deliberate as a Pair
Small embellishments make asymmetry easier to notice. Before securing the second bow, place both finished warmers side by side and compare orientation and position. They do not need to be mechanically identical, but an intentional relationship usually looks cleaner than two bows attached at visibly different heights.
Original Tutorial and Creator Credit
Creator: mahum 🎀
4. Crochet Minimal Thumb Hole Arm Warmers
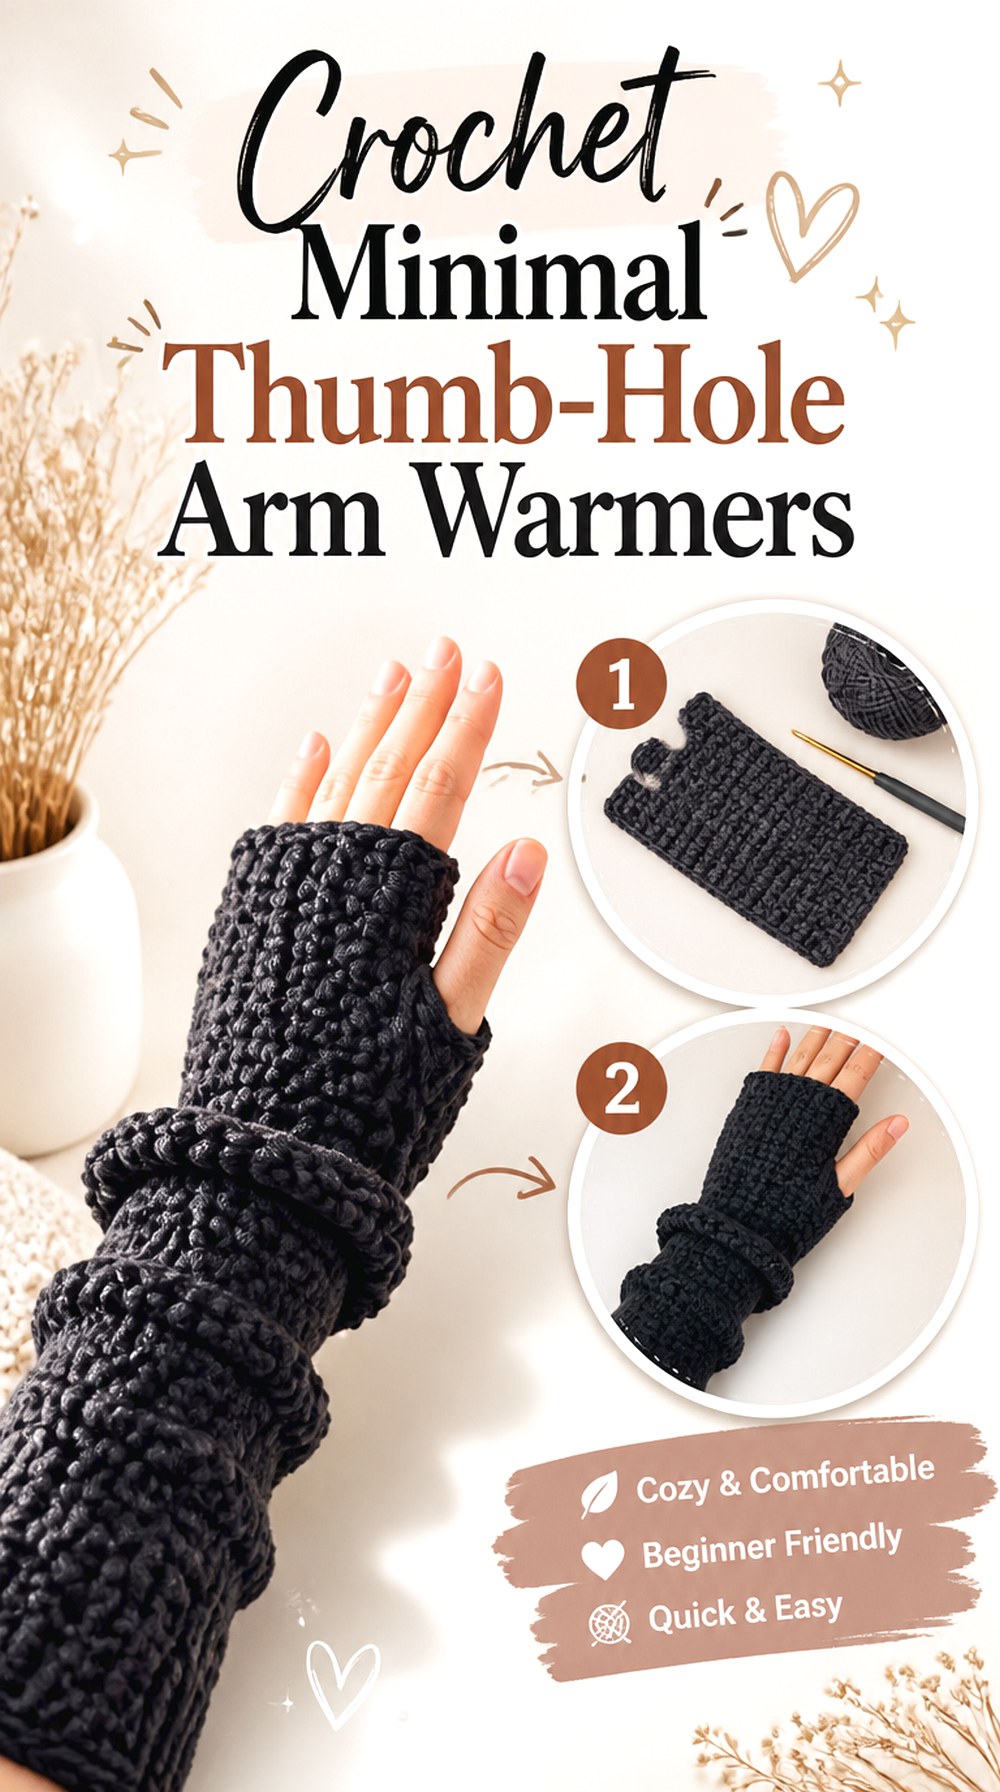
Ariel Tong’s fingerless-glove tutorial offers a cleaner option for readers who want the thumb opening and wearable silhouette to do most of the work. There is no need for a large motif or dimensional trim to make this concept useful; its appeal comes from an uncomplicated hand-and-wrist shape that can fit easily into casual cold-weather styling.
Compared with granny squares, ruffles, or cables, a restrained surface puts greater attention on fit. That makes this a useful direction if you prefer a quieter accessory or want a base shape where yarn color can change the overall look without competing against decorative stitchwork.
Thumb Position Is the Main Wearing Checkpoint
Try to judge the opening in relation to where your thumb naturally leaves the palm rather than judging it only by appearance when the warmer lies flat. If you adapt the dimensions, the location of that opening may need consideration along with the width; changing one without the other can shift the warmer around the hand.
Minimal Surfaces Show Uneven Fit More Clearly
A plain or understated design has fewer decorative elements to distract from twisting, excess width, or uneven edges. Compare both warmers before finishing and make sure they sit at similar heights on the hands. Simple styling benefits from especially tidy proportions.
Original Tutorial and Creator Credit
Creator: Ariel Tong
5. Crochet Ribbed Cuff Even Moss Arm Warmers

HayHay Crochet’s fingerless gloves combine an even-moss texture with a defined ribbed area, creating more surface interest than a plain tube while keeping the overall form uncomplicated. The source specifically identifies even moss stitch in the project information and uses back-loop ribbing for the cuff.
This makes the design a useful middle ground between basic warmers and heavily dimensional patterns. The repeated texture can carry a solid color on its own, while the ribbed cuff visually anchors the lower edge. Although the video title includes a completion-time claim, treat that as the creator’s description rather than a guaranteed making time for every crocheter.
The Cuff and Hand Fabric Behave Differently
Ribbing is intended to create a different visual and structural effect from the main textured section. When evaluating fit, do not assume the hand area and cuff will stretch identically. Notice how the sample transitions between them and compare both areas with where they sit on your own wrist and hand.
Even Moss Benefits From Visible Stitch Definition
A strongly variegated yarn can compete with small repeated texture. If the stitch pattern is the reason you chose the project, a calmer color treatment may let it show more clearly. If color is more important, accept that the surface pattern may read as subtle texture rather than the dominant feature.
Original Tutorial and Creator Credit
Creator: HayHay Crochet
6. Crochet Striped Ribbed Fingerless Arm Warmers
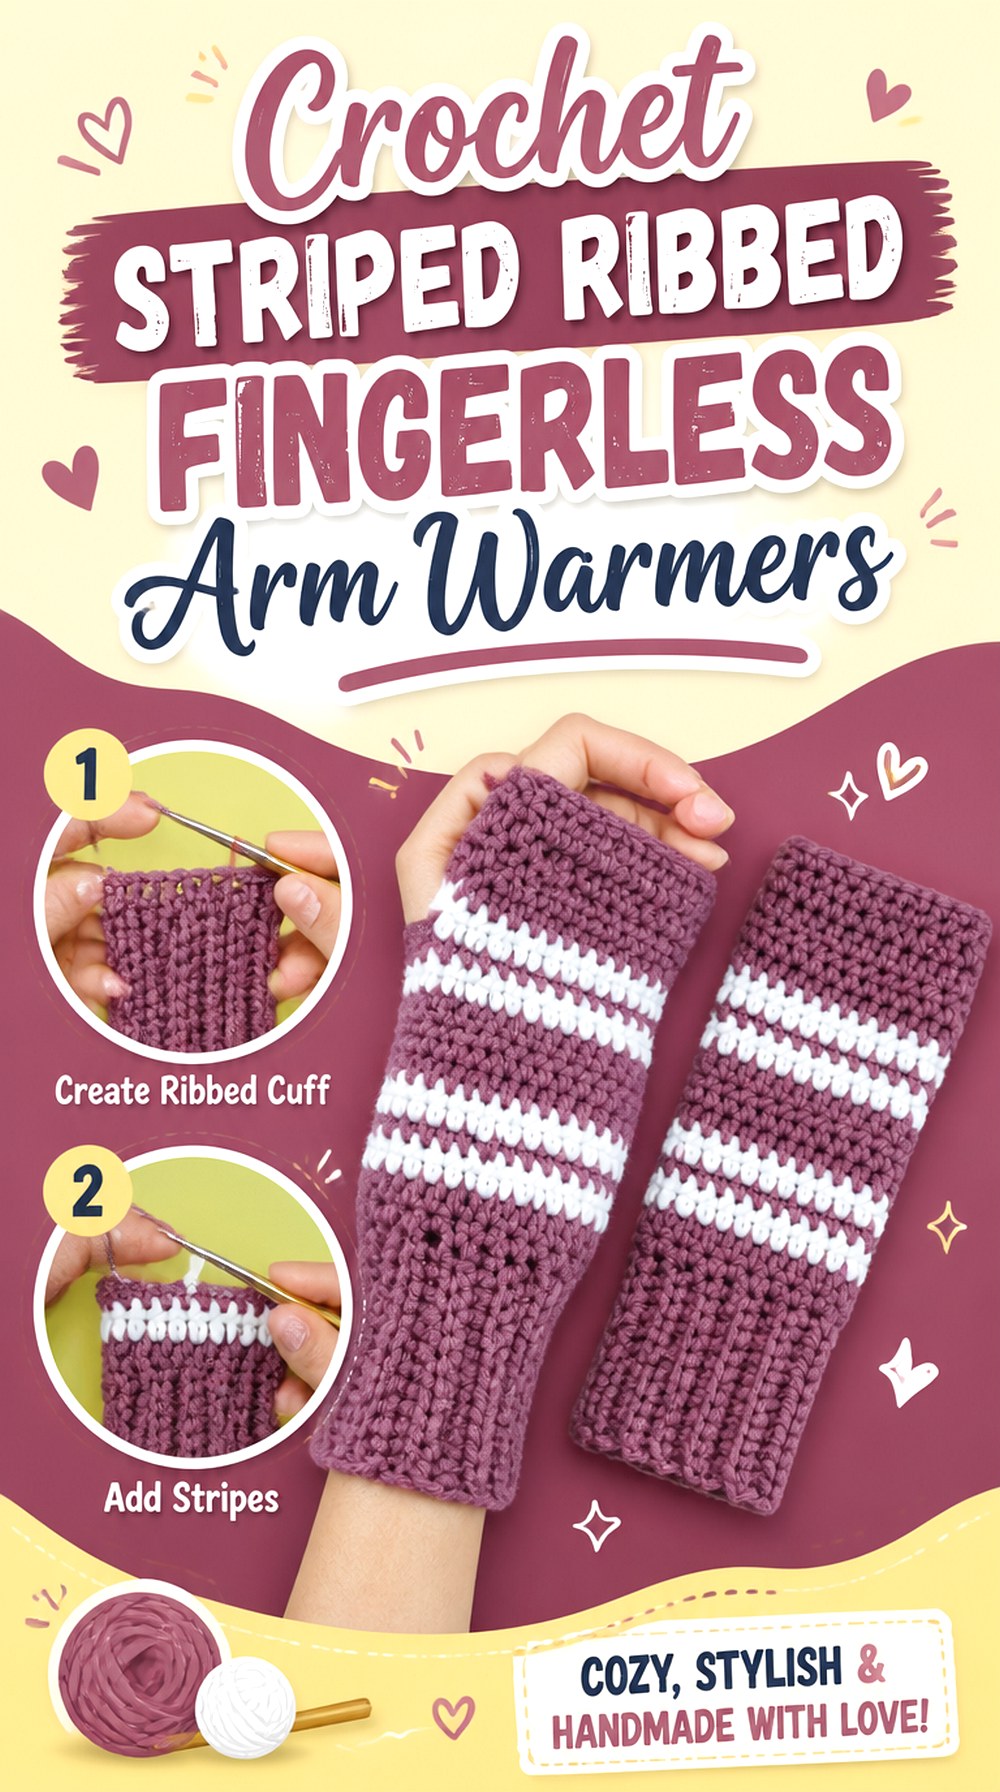
Stripes give these Chenda DIY fingerless gloves a graphic look without requiring separate motifs. The tutorial clearly presents right- and left-glove construction, and the finished pair combines color changes with ribbed detailing.
This design makes sense when you want color to repeat across the full accessory instead of appearing only at the cuff. Narrow or contrasting stripes can make the warmers visually energetic, while a lower-contrast palette will keep the same construction quieter. Because color changes create more yarn ends and more opportunities for the second glove to drift from the first, pair planning matters more here than it does with a one-color version.
Plan Stripe Rhythm Before Starting the Second Warmer
You can make the pair symmetrical or deliberately reverse the color order, but decide which approach you want. An accidental shift can look like a mistake, while an obvious mirror or matching sequence looks intentional. Keep the completed first warmer available as the reference for the second.
Ribbing Can Calm a Busy Color Scheme
If the stripe section is high contrast, a simpler cuff color can frame the design and prevent every part of the warmer from competing equally. Conversely, repeating one stripe color at the ribbing can visually connect the sections. Think about the whole pair rather than choosing each color change independently.
Original Tutorial and Creator Credit
Creator: Chenda DIY
7. Crochet One Seam Moss Stitch Hand Warmers

Naztazia’s wrist-warmer approach is useful for readers who prefer to understand the fabric as a flat piece before it becomes a wearable shape. Supporting information for the project describes moss stitch and a flat construction that is joined while leaving the thumb area open.
That construction gives you a valuable visual checkpoint before final assembly: the panel can be evaluated for width and general hand coverage while it is still easy to handle. Compared with a warmer worked as a tube from the start, this can make the relationship between flat fabric and finished circumference easier to understand.
Use the Flat Stage as a Fit Check
Before permanently joining the panel, bring the edges around the hand without overstretching them. The goal is not to invent a new stitch count but to make sure the creator’s demonstrated size and your own hand are reasonably compatible. This is also the moment to notice whether your yarn behaves more loosely or firmly than expected.
The Side Join Should Not Become the Bulkiest Feature
A seam is part of this construction, but it should not overwhelm the moss-stitch surface. Watch where the tutorial positions it and consider how that placement feels against your hand. Changing yarn thickness can make a previously subtle join more noticeable, so substitutions deserve extra attention here.
Original Tutorial and Creator Credit
Creator: naztazia
8. Crochet Feather Texture Wrist Warmers

Bella Coco’s Maplewood wrist warmers add a raised feather-style texture above a ribbed cuff, giving a compact accessory more surface detail without turning it into a motif project. The tutorial is presented in multiple sizes and its project information identifies the textured main section as a key part of the design.
This option suits readers who want the warmth and visibility of texture but prefer something more continuous than cables or granny squares. Because the stitch pattern is directional and visually distinctive, the yarn should support that detail rather than obscure it.
Raised Texture Needs Enough Visual Clarity
Highly speckled or rapidly changing yarn can soften the feather effect from a distance. If the texture is your priority, compare yarn choices by looking at a small sample under normal lighting. A yarn that looks beautiful in the skein is not automatically the clearest choice for a structured surface.
The Ribbed Cuff Has a Different Job
The cuff visually contains the textured body and helps the warmer transition cleanly to the wrist. When adjusting the project, consider cuff fit separately from the main fabric instead of assuming one section’s width tells you everything about the other.
Multiple Sizes Give You a Better Starting Comparison
Since the source provides more than one sizing option, use that information rather than automatically copying the displayed sample. Compare the creator’s sizing guidance with the intended wearer and remember that a substantially different yarn can alter the relationship between size and finished stretch.
Original Tutorial and Creator Credit
Creator: Bella Coco
9. Crochet Super Bulky Tube Wrist Warmers
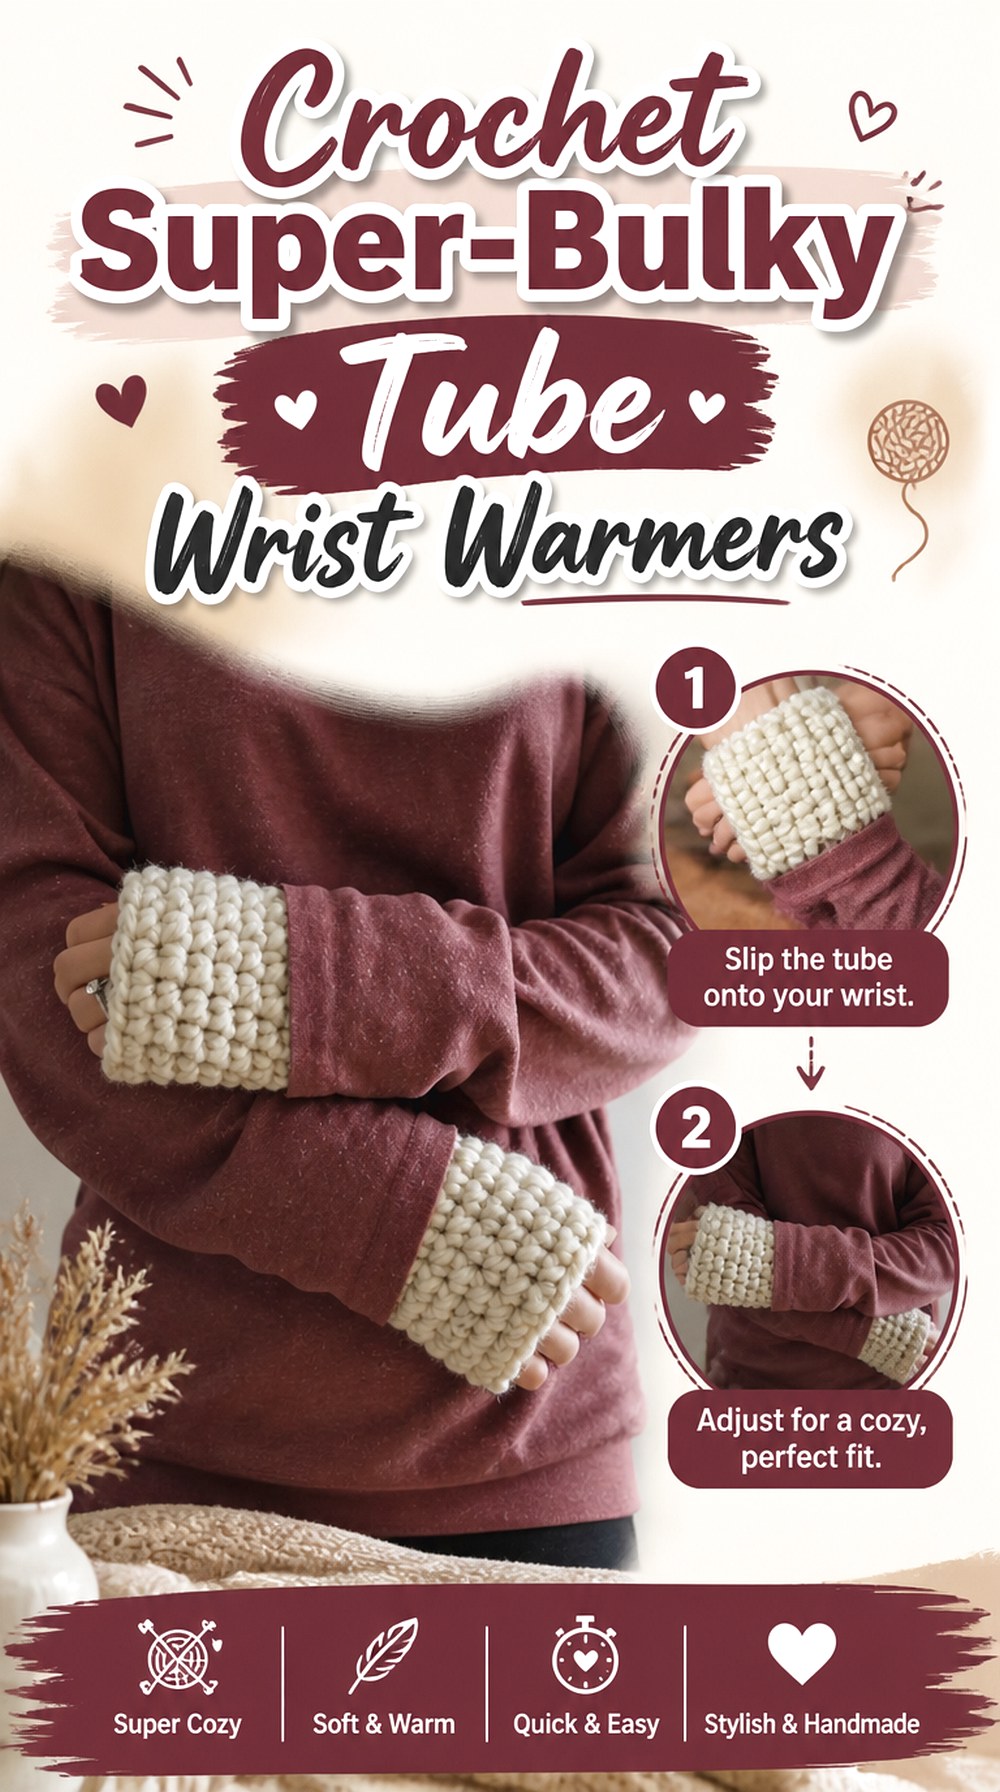
B.Hooked Crochet demonstrates wrist warmers using super-bulky yarn, which gives this project a very different scale from the finer lace, shell, and motif options in the collection. The source shows a tube-style fingerless warmer with a thumb opening and uses a substantially larger hook than many of the lighter projects here.
The attraction is the bold, substantial fabric rather than intricate surface detail. That same thickness means proportions deserve attention. A bulky edge or seam takes up more physical and visual space around the hand than the same construction made in a finer yarn.
Bulk Changes How the Hand Opening Feels
With thick fabric, the upper edge occupies more space around the base of the fingers. Compare the finished sample with the kind of hand movement you expect from the warmer. If low-profile layering matters more than substantial texture, one of the finer projects may suit you better.
Do Not Substitute Finer Yarn by Appearance Alone
Changing from super-bulky material to a much lighter yarn will not simply create a thinner version with identical proportions. Width, height, opening size, and fabric density can all change. Use the creator’s project information as the construction reference instead of assuming the same setup transfers automatically.
Original Tutorial and Creator Credit
Creator: B.Hooked Crochet
10. Crochet Elbow Length Tapered Arm Warmers

Winding Road Crochet takes the fingerless-mitt concept considerably farther up the arm. The tutorial is specifically for long wrist warmers and its supporting pattern information describes an elbow-length style with options for adjusting length and width.
This is the project to consider when forearm coverage matters as much as hand coverage. The added length gives the warmers more visual impact with short sleeves and makes them suitable as an intentional layering accessory. It also means fit cannot be judged only at the wrist: the circumference farther up the arm becomes part of the project.
A Long Warmer Needs More Than One Fit Check
Wrist, hand, and upper forearm are different circumferences. When the fabric extends toward the elbow, check where the tutorial handles that changing shape and compare it with your own arm. Simply extending a short straight tube may not create the same result.
Sleeve Interaction Matters at This Length
Decide whether these will sit under a loose jacket, peek out from a coat, or be worn with shorter sleeves. An elbow-length warmer can bunch if pushed under a narrow sleeve, while wearing it openly makes its texture and color much more prominent.
Extra Length Makes Yarn Behavior More Visible
A yarn with considerable stretch or weight has more fabric over which to show that behavior. If substituting materials, notice whether the warmer begins to sag or lose its intended taper as length increases. Make adjustments based on fit information from the tutorial rather than only the appearance of the original yarn.
Original Tutorial and Creator Credit
Creator: Winding Road Crochet
11. Crochet Cable Panel Wrist Warmers
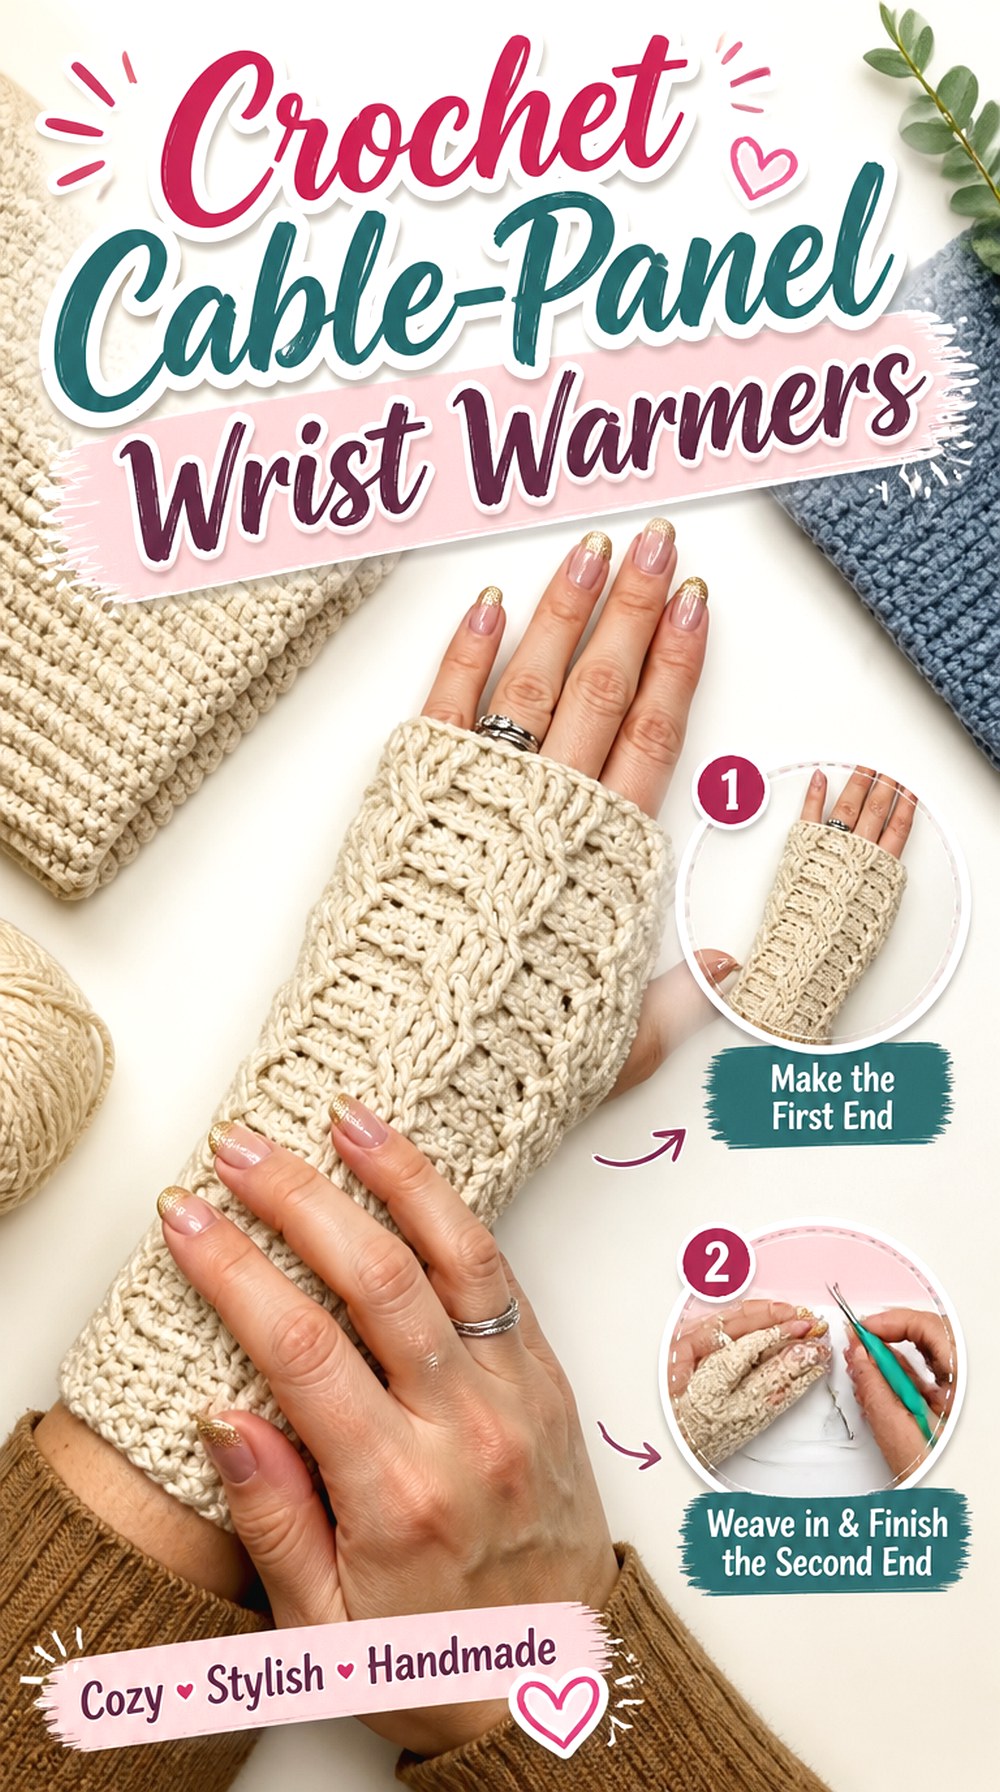
HanJan Crochet’s Neo Cable Wrist Warmers place modern raised cable texture at the center of the design. The source describes a seamless bottom-up construction worked in the round, using front-post techniques to form the cables, with sizing that spans child through adult categories.
Choose this project when texture should look structured and intentional rather than soft or lacy. Cables naturally create a front-facing focal area, so orientation becomes more important than it is on a uniform ribbed tube.
Keep the Cable Centered Where It Can Be Seen
The raised panel has the most impact when it sits deliberately on the visible side of the wrist or hand. Before finishing, confirm that your work has not rotated in a way that puts the primary texture toward the palm or side.
Yarn Should Reveal the Relief
A cable needs contrast between raised and recessed areas. Extremely fuzzy yarn or very busy color changes can make those shadows harder to see. If the cable is your reason for choosing this idea, prioritize stitch visibility when comparing suitable yarns.
Use the Size Range Instead of Guessing From the Sample
The source provides several sizing categories, so choose from the creator’s guidance rather than estimating solely from the video thumbnail or displayed hands. This is particularly useful when making pairs for different ages because simply changing hook size may affect fabric quality as well as circumference.
Original Tutorial and Creator Credit
Creator: HanJan Crochet
12. Crochet Two Stripe Bulky Wrist Warmers

Fiber Flux uses a bulky-yarn wrist-warmer format with contrasting stripe rounds, creating a simple shape where a small amount of color change becomes the main visual accent. The source identifies bulky yarn for the demonstrated pair and includes a thumb opening in the finished construction.
This project is less elaborate than the cable, granny-square, and Victorian options, making it useful when you want color variation without a complicated surface. Compared with the super-bulky B.Hooked pair, the emphasis here is more clearly on the contrast stripes and how they divide the otherwise straightforward warmer.
Small Stripes Can Have a Large Visual Effect
Because most of the warmer remains in the main color, the contrast sections attract immediate attention. Choose a strong contrast for a graphic result or related shades for a subtler break. You do not need numerous colors for this concept to read clearly.
Match the Stripe Positions Across the Pair
Place the completed first warmer nearby while making the second so the colored sections land at comparable heights. This is especially worthwhile when the stripes are narrow, because even a small shift can be more visible than it would be across a large color-blocked section.
Original Tutorial and Creator Credit
Creator: Fiber Flux
13. Crochet Flat Rectangle Ribbed Wrist Warmers

VivCrochets approaches the wrist warmer through a flat rectangular piece that is later joined into the wearable shape. The source project information uses medium-weight yarn and a back-loop half-double-crochet style of ribbing, with guidance for adjusting the width.
This makes the design especially useful for readers who like seeing the complete fabric dimensions before seaming. The repeated ribbing creates a clean, uniform surface rather than a separate decorative panel. Compared with the one-seam moss-stitch option, this version is primarily about strong linear ribbing and the way that texture wraps around the hand.
Flat Construction Makes Width Easy to Visualize
Before the seam closes the warmer, you can wrap the rectangle around the intended area to understand how much the fabric stretches. Follow the tutorial’s adjustment logic rather than inventing arbitrary changes, particularly if the ribbing stretches more than you expected.
Seam Alignment Matters Against Vertical Ribbing
When a repeated linear texture meets at a join, mismatched edges can draw attention. Take time to line up the fabric before finishing. If you change yarn thickness, check that the seam does not become disproportionately bulky compared with the rest of the ribbed surface.
Original Tutorial and Creator Credit
Creator: VivCrochets
14. Crochet Ruffle Cuff Wrist Warmers
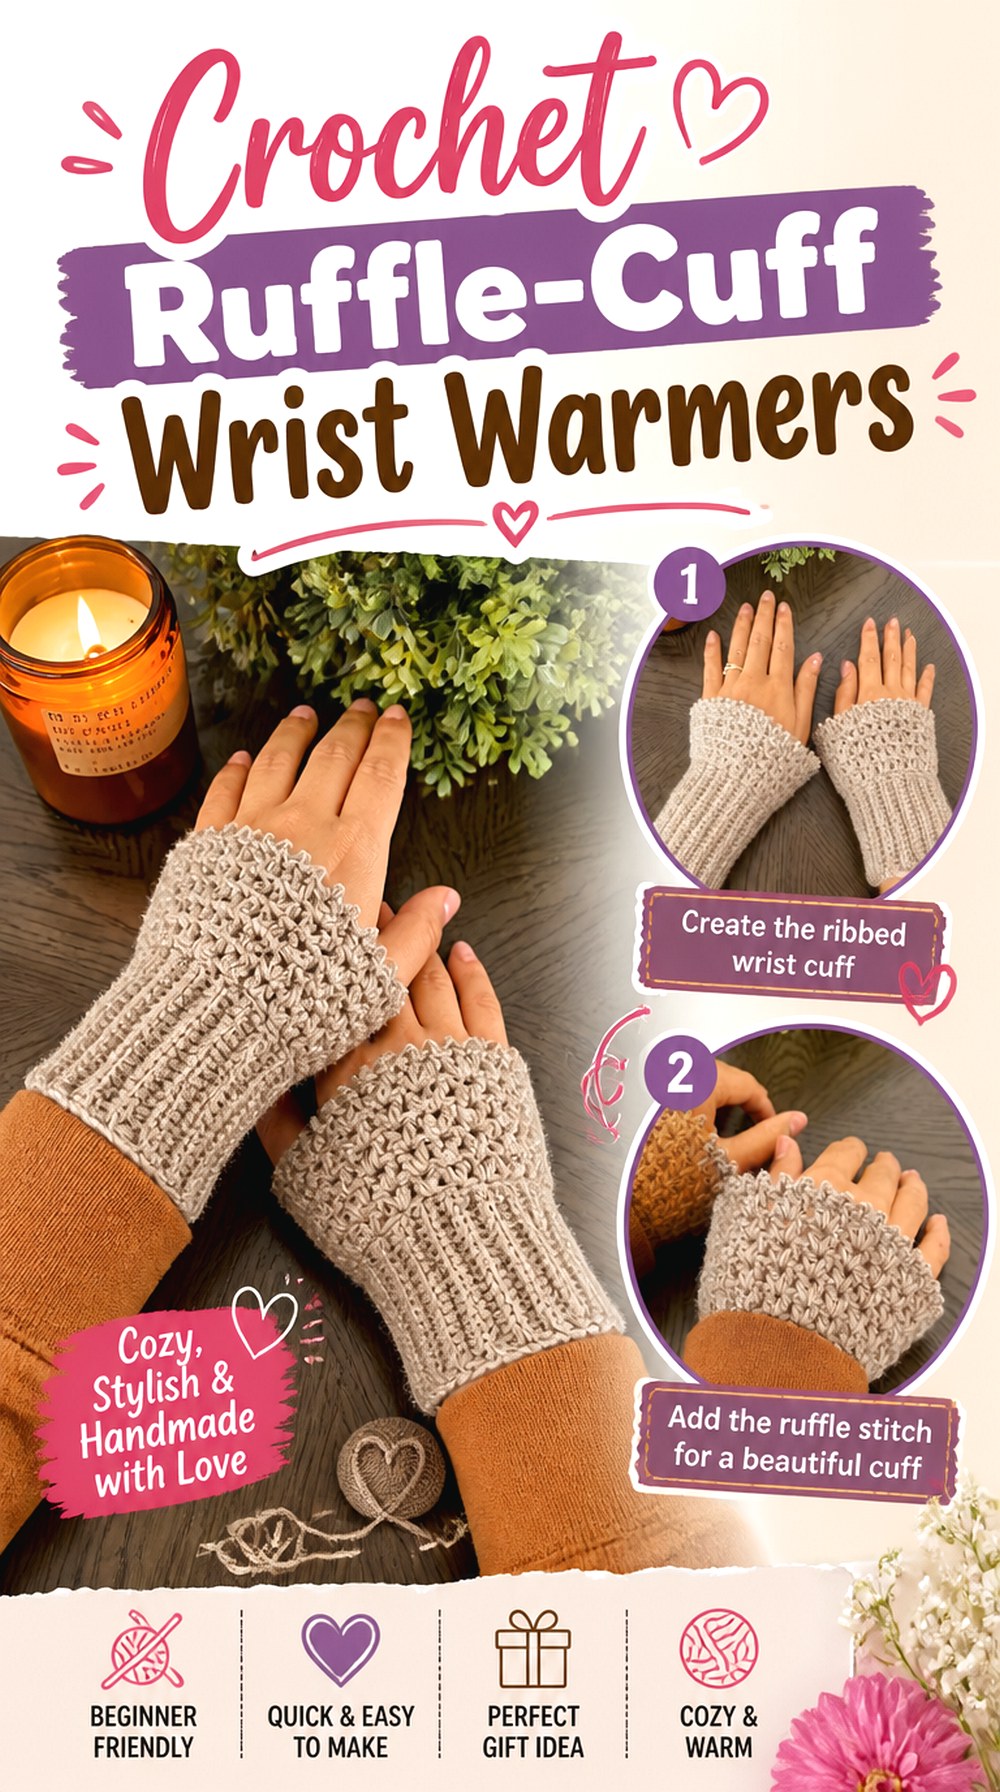
KnitcroAddict’s design places a decorative ruffle around a ribbed wrist cuff, making the lower edge the focal point rather than the back of the hand. The creator describes the project as ruffle-cuff wrist warmers or ruffled sleeve cuffs and demonstrates a ribbed base finished with the flared edging.
This is a particularly good direction when you want the crochet to peek out from a sweater or jacket sleeve. Unlike an elbow-length warmer, it creates visual impact without covering a large section of the forearm.
The Ruffle Needs Space to Be Seen
A decorative cuff can disappear beneath a tight sleeve or become compressed by a coat. Think about the clothing you intend to pair with it. The design makes the most visual sense when the lower edge remains visible rather than being hidden completely.
Keep the Ribbed Base More Controlled Than the Flare
The contrast between a fitted-looking cuff and a spreading ruffle is what gives this project its shape. When assessing fit, focus on the base rather than judging the accessory by the widest edge of the ruffle. The decorative section is not meant to represent the wrist circumference.
Original Tutorial and Creator Credit
Creator: KnitcroAddict
15. Crochet Dragon Scale Fingerless Arm Warmers
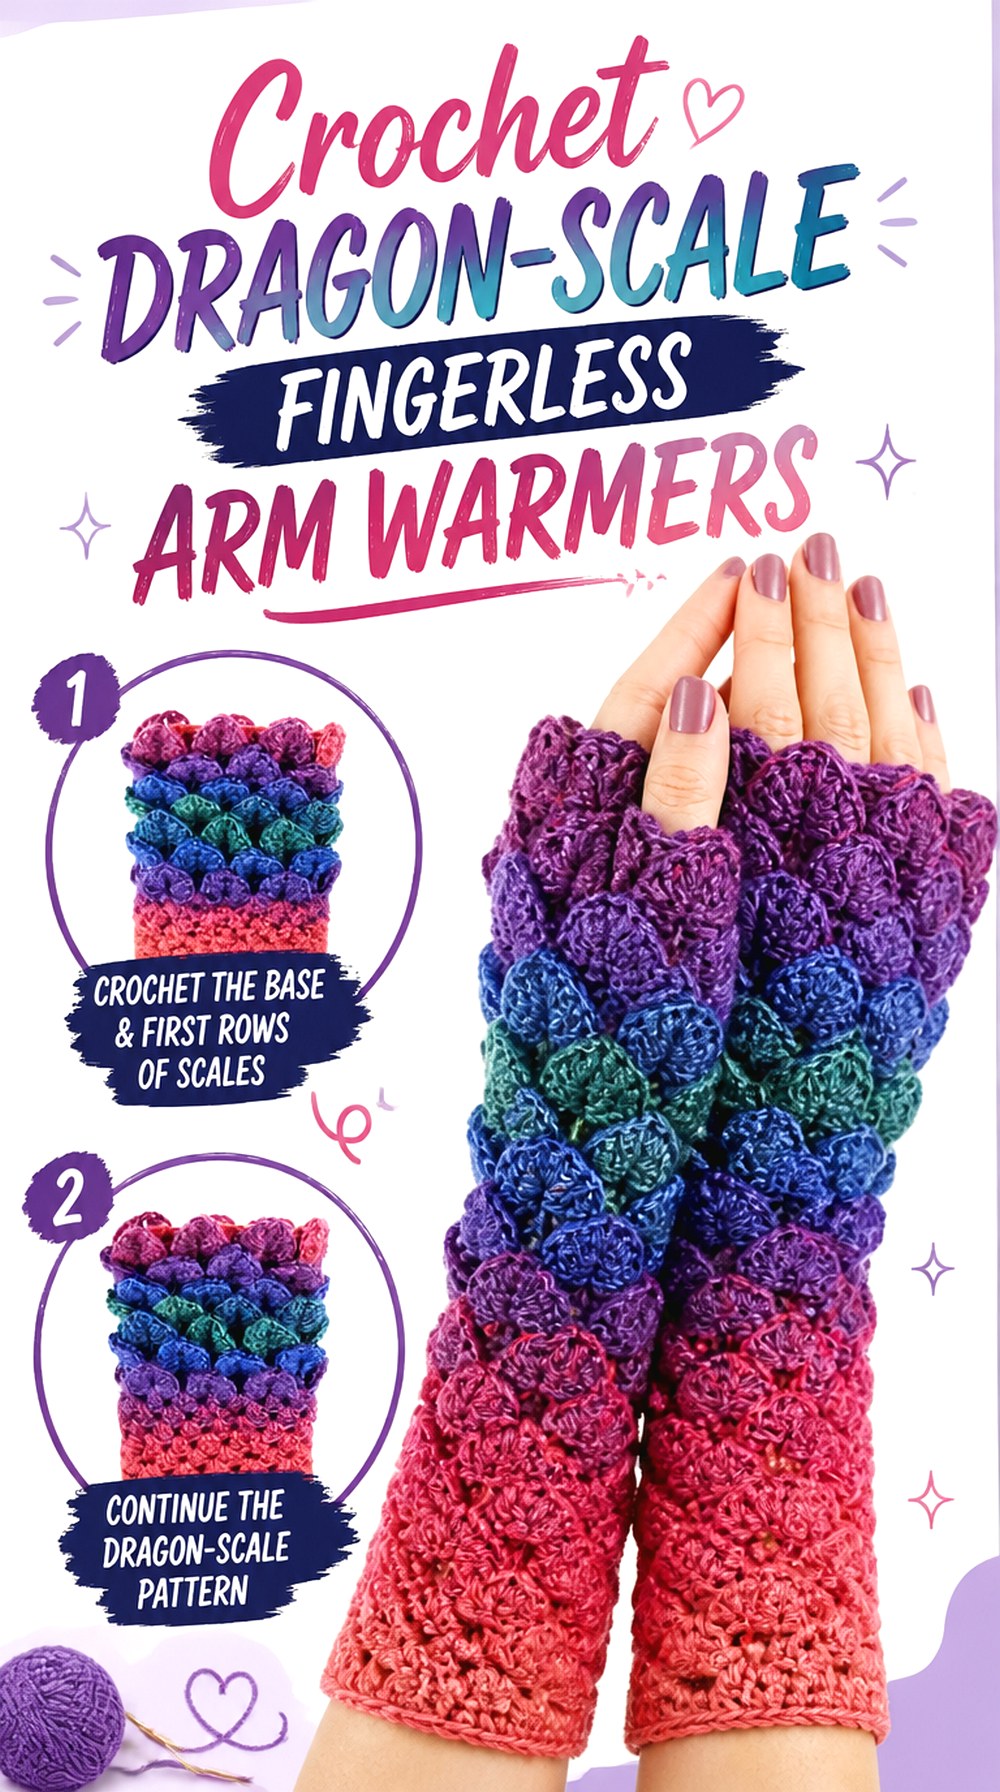
Flo’s Crafty Crochet uses a raised dragon-scale effect to turn fingerless gloves into a strongly textured statement accessory. The video is specifically a dragon-scale fingerless-glove tutorial and is presented using UK crochet terminology.
This project differs sharply from ribbed and moss-stitch options because the texture projects outward instead of remaining close to the hand. It is a good choice when the surface pattern is meant to be noticed. That dimension can also affect layering, so think of these as visible accessories rather than assuming they will slide as easily beneath a fitted sleeve as a flatter glove.
Scale Texture Adds Real Surface Volume
Raised scales create overlapping crochet fabric, so they occupy more space than a smooth panel. If you regularly wear slim coat sleeves, compare the finished thickness with your available room before committing to this style.
UK Terminology Requires Attention
The creator explicitly identifies the tutorial as using UK terms. If you normally crochet from US terminology, make sure you follow the demonstrated stitch meanings rather than relying on familiar abbreviations from another system. This is a learning-format consideration, not a reason to avoid the project.
Color Can Strengthen or Soften the Scale Effect
Gradients and changing colors can emphasize the fantasy-inspired look, while a single shade makes the shadows of the raised texture do more of the visual work. Decide whether you want the yarn color or the physical scale structure to be the strongest feature.
Original Tutorial and Creator Credit
Creator: Flo’s Crafty Crochet
16. Crochet Granny Square Fingerless Arm Warmers

Lullaby Lodge turns granny squares into a wearable hand accessory, making motif placement part of the actual structure rather than adding motifs as an afterthought. The tutorial covers the granny-square portions, joining, and ribbing that convert the pieces into finished fingerless gloves.
This design stands apart from continuously worked warmers because each square has to relate to the others in both size and orientation. It is well suited to deliberate color blocking, but successful adaptation depends on motif dimensions—not simply choosing more or fewer colors.
Compare Motifs After They Have Settled
Squares that look similar while freshly crocheted can differ once their stitches relax or after appropriate blocking. Compare their finished dimensions before joining. For a fitted accessory, small differences are more noticeable than they might be in a large blanket.
Decide Which Part of the Square Faces Outward
A granny-square motif has a center and often a clear visual direction created by color placement. Lay out the pieces as a pair before joining and make sure the strongest motif areas will appear where you want them on each hand.
Ribbing Helps Turn Motifs Into a Wearable Shape
The square sections provide the decorative identity, while the ribbed areas make the design read more clearly as a glove or warmer. When adapting color, consider keeping some relationship between the ribbing and motif borders so the sections feel intentionally connected.
Original Tutorial and Creator Credit
Creator: Lullaby Lodge
17. Crochet Shell Stitch Fingerless Wrist Warmers
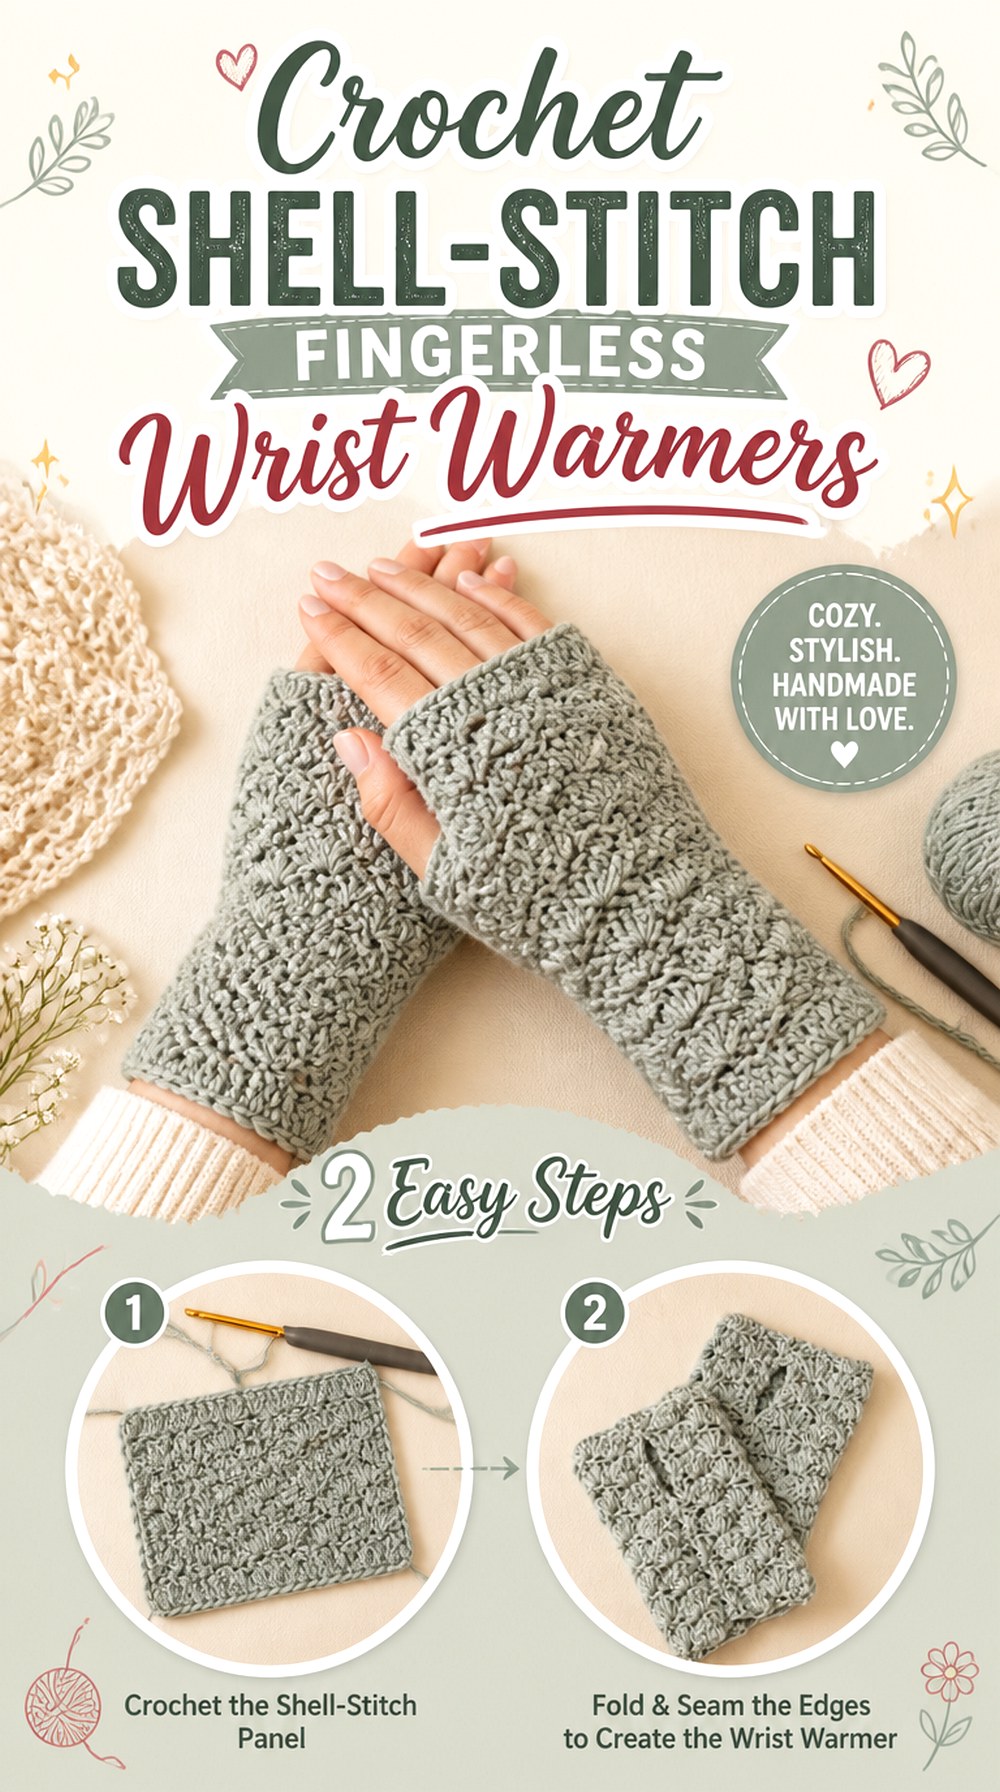
WoolyWondersCrochet’s wrist warmers use shell stitch to create an open, decorative surface that feels very different from dense ribbing or bulky tubes. The creator presents the project as wrist warmers or fingerless gloves and notes that the demonstrated concept can be adjusted for size.
Shell texture gives the pair a softer visual rhythm, making it a good option when you want more open detail without moving all the way into Victorian-style lace. The stitch pattern itself becomes the primary decoration, so color changes are optional rather than necessary.
Open Shells Change the Look of Coverage
A warmer can extend over the same physical area as a dense design while appearing lighter because more space is visible between stitch groups. Decide whether you want visual delicacy or the more solid look of ribbing and moss stitch before choosing between them.
Resize With the Stitch Pattern in Mind
Decorative repeats are not always as freely adjustable as plain rows. If you need a different size, use the creator’s guidance rather than removing or adding arbitrary stitches, because the shell arrangement still needs to remain coherent around the hand.
Original Tutorial and Creator Credit
Creator: WoolyWondersCrochet
18. Crochet Flower Detail Fingerless Arm Warmers

Crafting Wheel’s fingerless-glove tutorial uses a flower feature to give the finished accessory a clear decorative focal point. The source describes making the glove base, shaping it, adding the flower, and finishing the project, with written pattern information appearing through the video subtitles.
This is a different approach from a flower-like stitch repeated across the whole fabric. Here, the floral element reads as an intentional decoration against the glove base. That makes placement, scale, and color contrast important choices when personalizing the project.
Let the Flower Occupy a Deliberate Position
A separate floral detail will attract attention immediately. Before securing it, place the warmer on the hand and check how the flower looks in wearing position rather than evaluating it only while the piece lies on a table.
Contrast Can Separate the Motif From the Base
Using closely related shades creates a tonal effect, while stronger contrast makes the flower unmistakable. Neither approach is inherently better. Base the choice on whether you want the floral detail to lead the design or behave more like subtle texture.
Subtitle-Based Instructions May Suit Visual Learners Differently
The creator notes that the written pattern appears in the video subtitles. If you depend heavily on written guidance, confirm that you are comfortable reading while watching before beginning. If you prefer visual demonstration, the same format may help connect the written information directly with what is happening on screen.
Original Tutorial and Creator Credit
Creator: Crafting Wheel
19. Crochet Victorian Lace Fingerless Arm Warmers
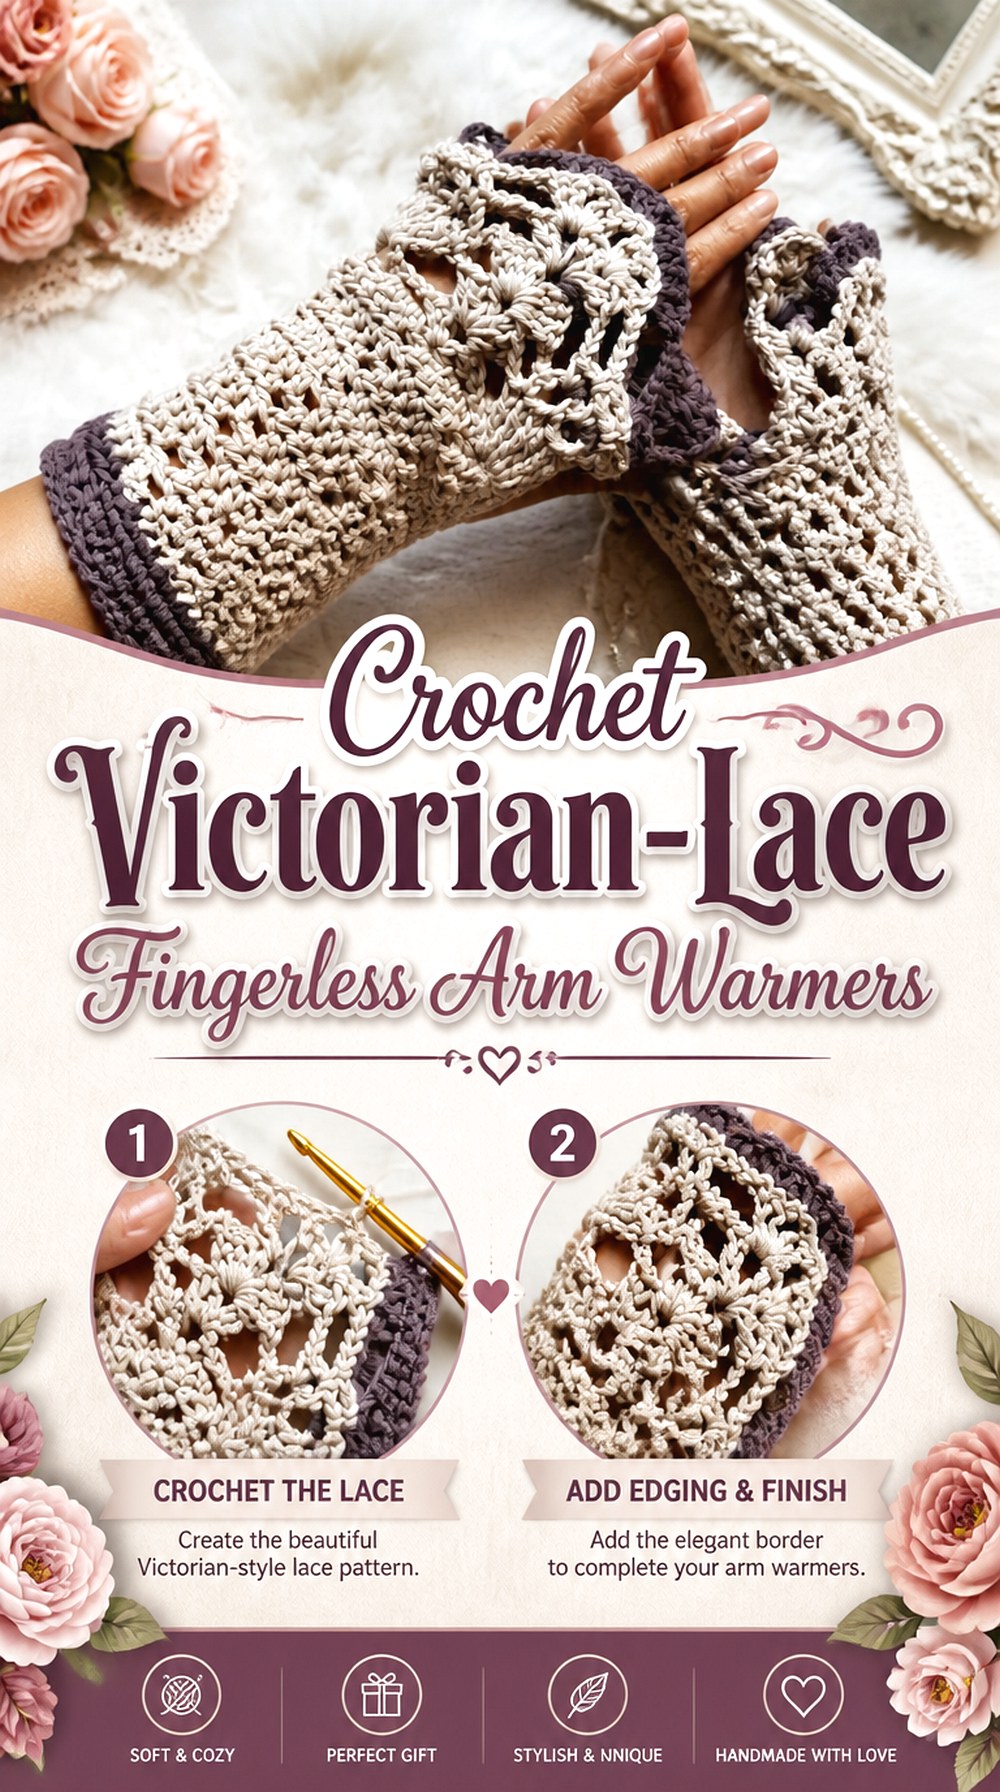
For the most vintage-inspired option in the collection, MayaLunaCorazon combines a wrist-warmer shape with an ornate lace treatment. The creator describes the design as Victorian-style fingerless gloves and presents an adjustable lace accessory rather than a heavy winter tube.
This idea is suited to readers who want the arm warmers to function partly as styling pieces. Compared with the shell-stitch pair, the overall direction is more overtly decorative and costume- or occasion-inspired, though it can still be incorporated into everyday outfits when the surrounding clothing is kept simple.
Lace Makes Edge Quality More Visible
Open fabric exposes the shape of each section more clearly than thick, fuzzy crochet. Pay attention to the finishing edges shown by the creator because uneven tension can be harder to disguise when light passes through the fabric.
Treat Adjustable Sizing as Guidance, Not Universal Fit
The source describes the design as adjustable, but hands and wrists vary. Compare the finished piece with your own measurements and use the creator’s adjustment method rather than interpreting “one size” as a guarantee that every wearer will have the same result.
Pair Ornate Warmers With Enough Visual Space
Detailed lace can disappear against equally detailed sleeves or compete with heavy prints. If you want the crochet to remain the focus, wearing it beside simpler fabrics lets the openwork silhouette show more clearly.
How These 19 Crochet Arm Warmer Styles Compare
For the lowest-profile everyday shapes, start with the minimal thumb-hole, one-seam moss-stitch, flat ribbed, or simple two-tone options. If longer coverage is the priority, the elbow-length warmers provide substantial forearm coverage, while the connected shoulder warmer moves into true garment territory.
Texture changes the choice just as much as length. Cables and feather texture give raised detail without separate motifs. Granny squares create a patchwork structure, dragon scales add much more dimension, and shell or Victorian lace keeps the surface visually lighter. Bows, flowers, ruffles, and contrast stripes work differently because their decoration is localized rather than spread uniformly across the fabric. Consider both how the pair looks by itself and how much room it will need beside your usual sleeves.
Conclusion
These 19 crochet arm warmer ideas cover much more than one basic fingerless glove shape. Choose compact ribbed or moss-stitch designs when you want an understated accessory, longer tapered warmers when forearm coverage matters, or the connected shoulder style when the crochet needs to become part of the whole outfit. Granny squares, cables, dragon scales, shells, flowers, bows, ruffles, and Victorian lace are stronger choices when visible texture is the priority.
Before committing to a project, compare the tutorial’s finished shape with your own measurements, preferred yarn, and normal layering pieces. Use the original tutorials linked above for exact construction, sizing, stitch placement, and finishing details.
Frequently Asked Questions
Are crochet arm warmers the same as fingerless gloves?
The terms overlap, but they do not always describe exactly the same shape. Fingerless gloves normally extend onto the hand and frequently use a thumb opening. Wrist warmers may stop lower, while arm warmers can continue much farther up the forearm. Connected arm-warmer designs can even span the shoulders. When choosing a tutorial, judge the finished coverage shown rather than relying only on the project name.
How should I choose between wrist-length and long crochet arm warmers?
Think about both coverage and clothing compatibility. Short wrist warmers are easier to combine with existing long sleeves because they add less fabric along the forearm. Longer warmers make a stronger visual statement and work well when you deliberately want the crochet to show. They also require more attention to changes in arm circumference and may bunch beneath very fitted jacket or sweater sleeves.
What should I measure before crocheting fingerless arm warmers?
The most relevant measurements depend on the shape. Wrist circumference and hand circumference are useful for most fingerless designs, while long warmers may also require forearm measurements at the point where the project ends. Connected sleeve styles add shoulder and arm-length considerations. Follow the creator’s specific sizing method because some designs depend heavily on stretch and are not intended to match the body measurement exactly.
Can I use a different yarn weight from the crochet tutorial?
Sometimes, but a yarn-weight change can affect much more than appearance. It may alter circumference, length, stretch, fabric thickness, thumb-opening size, and how clearly decorative stitches show. The effect becomes especially noticeable with fitted wrist warmers and connected sleeves. Review the tutorial’s sizing and gauge information before substituting rather than assuming that changing the hook alone will reproduce the same proportions.
Where should the thumb opening sit on crochet arm warmers?
It should correspond comfortably with the point where your thumb leaves the hand while allowing the warmer to sit naturally around the palm and wrist. There is no single universal placement because hand proportions and constructions differ. When a project is worked flat, use the pre-seaming stage as a useful visual checkpoint. For a tutorial with dedicated shaping, follow the creator’s placement rather than moving the opening independently.
Which textured arm warmers are easiest to layer under sleeves?
Flatter textures such as ribbing, moss stitch, and simple striped fabric generally create less surface volume than dragon scales, large ruffles, or strongly raised decorative elements. Cables and feather textures fall somewhere between those extremes. Sleeve width matters too, so compare the finished warmer with the jackets or sweaters you actually intend to wear. Decorative bulk is not a problem when the crochet is meant to remain outside and visible.