Crochet Santa dolls can range from tiny tree ornaments to substantial holiday figures, and those differences affect much more than the finished size. A compact Santa may suit a tree or small gift, while a chunky plush version emphasizes softness and simplified shaping. Taller dolls bring more attention to leg proportions and balance, while detailed display Santas leave room for glasses, layered beards, clothing trim, and other character features.
The 12 ideas below cover noticeably different scales, construction styles, yarn textures, assembly demands, and display uses. Use the comparisons to decide whether you want minimal sewing, a traditional amigurumi structure, a soft plush finish, or a more elaborate seasonal centerpiece. For exact construction, follow the linked original tutorials from each creator.
Quick List
- Crochet Pocket-Size No-Sew Santa Doll
- Crochet Christmas Ornament Santa Doll
- Crochet Tiny Sleigh-Scene Santa Doll
- Crochet Blanket-Yarn Santa Plush Doll
- Crochet Minimum-Sew Chunky Santa Doll
- Crochet Jointed Plush Santa Doll
- Crochet Long-Legged Santa Doll
- Crochet Oversized Display Santa Doll with Glasses
- Crochet Classic Cotton Santa Doll
- Crochet Fine-Yarn Classic Santa Doll
- Crochet Santa Girl Doll in a Festive Dress
- Crochet Separate-Piece Classic Santa Doll
Choose the Santa’s Scale Before Choosing the Details
Scale changes the role of a Santa doll. A small ornament needs a tidy silhouette that remains recognizable from a distance, so an oversized beard or hat can dominate more quickly. A pocket-size plush can use exaggerated proportions successfully because it will usually be viewed close up. Larger display dolls have more visual room for glasses, clothing trim, separate hands, boots, and dimensional facial features.
Think about the intended location before committing to a tutorial. A tree branch, small shelf, mantel, tabletop centerpiece, and floor-level Christmas display all place different demands on the finished piece. When a creator gives a finished measurement, compare it with the actual display space rather than judging scale only from the video thumbnail.
Yarn Texture Changes Both Shape and Character
Smooth cotton and cotton-blend yarns make individual stitches and small facial details easier to see. That can suit traditional amigurumi Santas where the beard, belt, boots, and face all need to read clearly. Chunky and chenille-style yarns create a softer, rounder look, but they can make tiny details less distinct and increase the visual weight of the body.
Changing yarn thickness can also change proportions even when the same general construction idea is followed. If you adapt a tutorial with a different yarn, make a small sample first and check whether the fabric is dense enough to contain stuffing. For a display doll that needs to stand neatly, pay particular attention to the base, legs, and how firmly the body holds its shape.
Plan Facial Features and Toy Safety Before Assembly
Santa’s beard often covers a surprising amount of the lower face, so place the eyes, nose, mustache, hat brim, and beard as one visual group rather than treating each feature independently. Pinning removable pieces temporarily can help you judge expression and symmetry before permanent attachment.
Recipient matters too. Several tutorials use safety eyes, and one of the projects below lists jewelry wire among its materials. If the finished Santa is intended as a young child’s toy rather than seasonal display decor, choose construction and facial details appropriate for that use. Embroidered features may be preferable to detachable components, and wire or loose embellishments should be avoided where they could create a hazard. Always check the creator’s materials before beginning.
1. Crochet Pocket Size No Sew Santa Doll
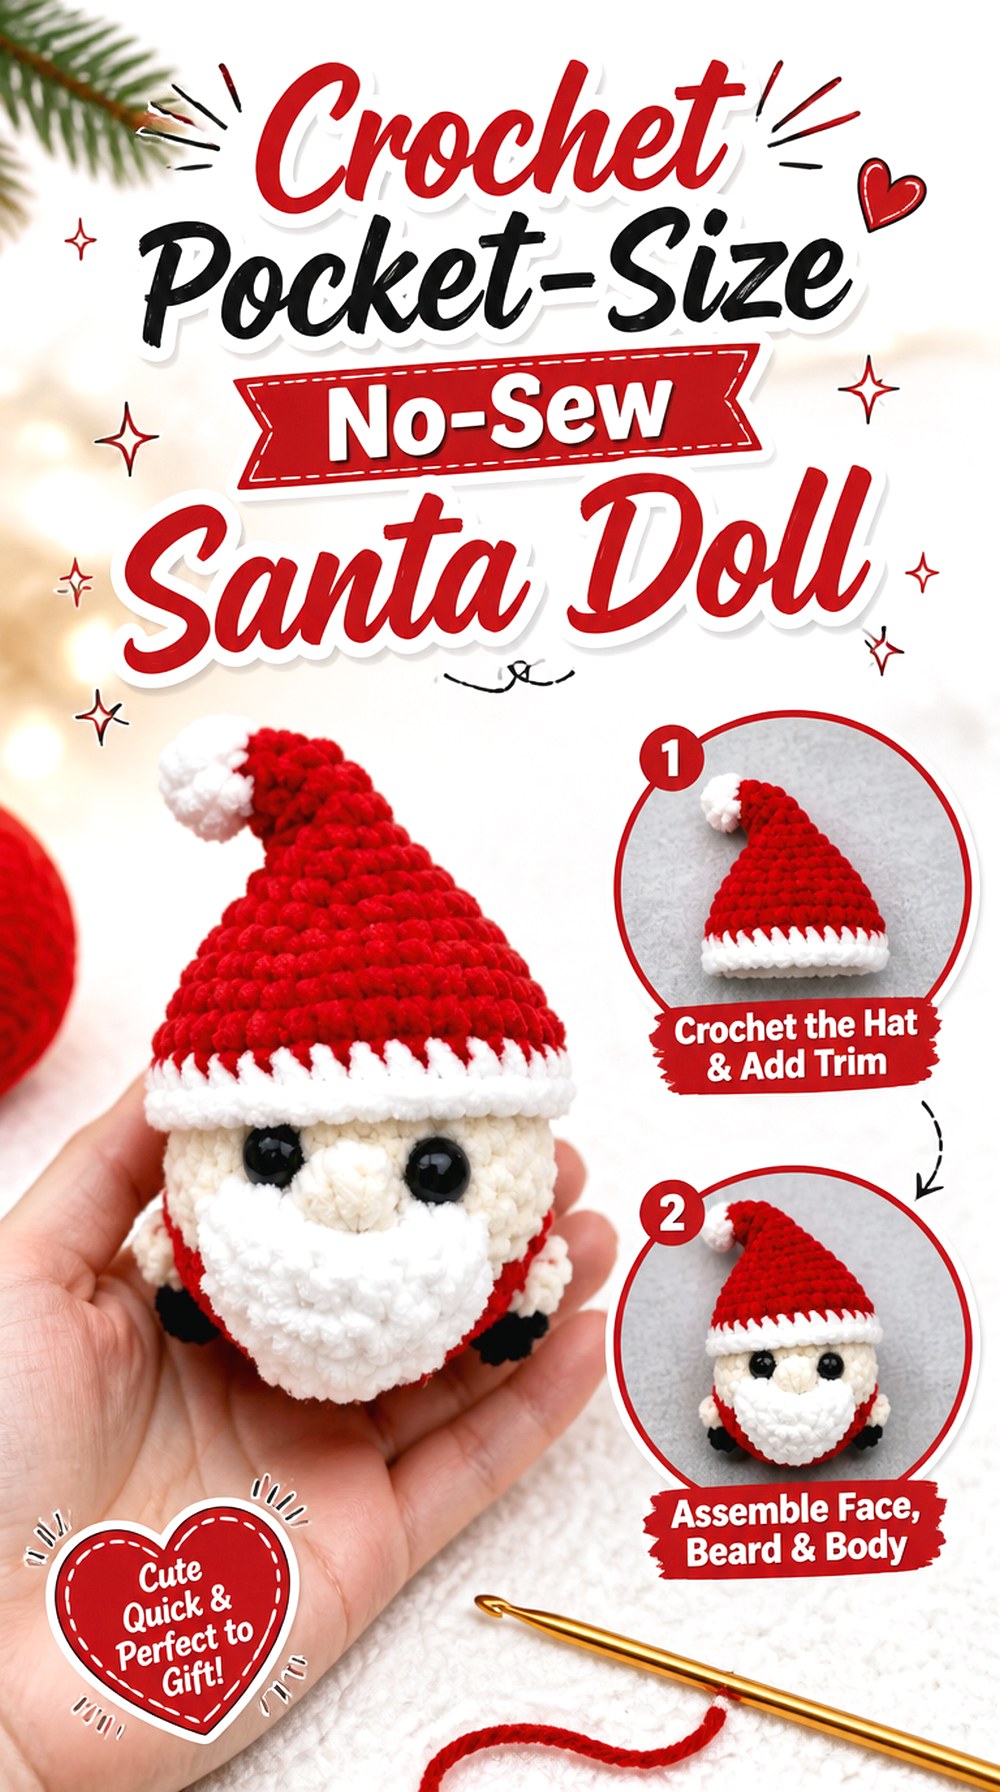
This compact Santa from Yarn Society takes the classic red suit, white beard, and hat and compresses them into a small, rounded plush form. The source specifically presents it as a no-sew Pocket Santa and uses super-bulky chenille, so the finished character emphasizes softness and bold features rather than delicate stitch definition.
It is a useful direction when you want a Santa that feels more like a small plush character than a formal display doll. The simplified silhouette also makes it noticeably different from the long-legged and realistically proportioned Santas farther down this list.
Chunky Yarn Makes Small Features Visually Bigger
With thick plush yarn, the nose, beard, hat trim, and eyes occupy more visual space relative to the head. That can create an appealing cartoon proportion, but substitutions need care. If you switch to a dramatically thinner yarn, the same design concept may look much less plump. If you substitute another plush yarn, compare thickness and stitch density before assuming the finished proportions will remain similar.
No-Sew Construction Reduces One Kind of Finishing
A no-sew body can reduce the number of separate pieces that must be positioned after crocheting. That is useful if attaching symmetrical arms or legs is a part of amigurumi you prefer to minimize. It does not eliminate finishing altogether, however: facial placement and the final shape still affect whether the small figure reads clearly as Santa.
2. Crochet Christmas Ornament Santa Doll

Little Crochet Farm’s Santa is designed specifically as a Christmas ornament, giving this idea a much smaller display role than a shelf-size doll. The linked first installment covers the beginning of the figure, with the project continuing in another part. It is also presented as the first design in a collection of amigurumi Christmas ornaments.
That ornament format is useful when you want a recognizable three-dimensional Santa without committing to a large stuffed figure. Because it will often hang rather than stand, visual balance, attachment security, and overall weight matter more than creating a broad standing base.
Hanging Changes the Way the Doll Is Viewed
A tree ornament can rotate and be seen from several angles. Check the back and side profile as carefully as the face, especially where the hat, arms, or finishing ends meet the body. Before adding a hanging loop of your own, identify a structurally secure point rather than relying on a decorative section that could stretch.
Keep the Silhouette Clear at Tree-Viewing Distance
Fine facial details may disappear once a small Santa is surrounded by branches, lights, and other ornaments. Strong color blocking—a red body, white beard and trim, and contrasting boots or belt—does more visual work at this scale. If you customize the palette, preserve enough contrast for the hat, face, and beard to remain distinct.
Original Tutorial and Creator Credit
Creator: Little Crochet Farm
3. Crochet Tiny Sleigh Scene Santa Doll
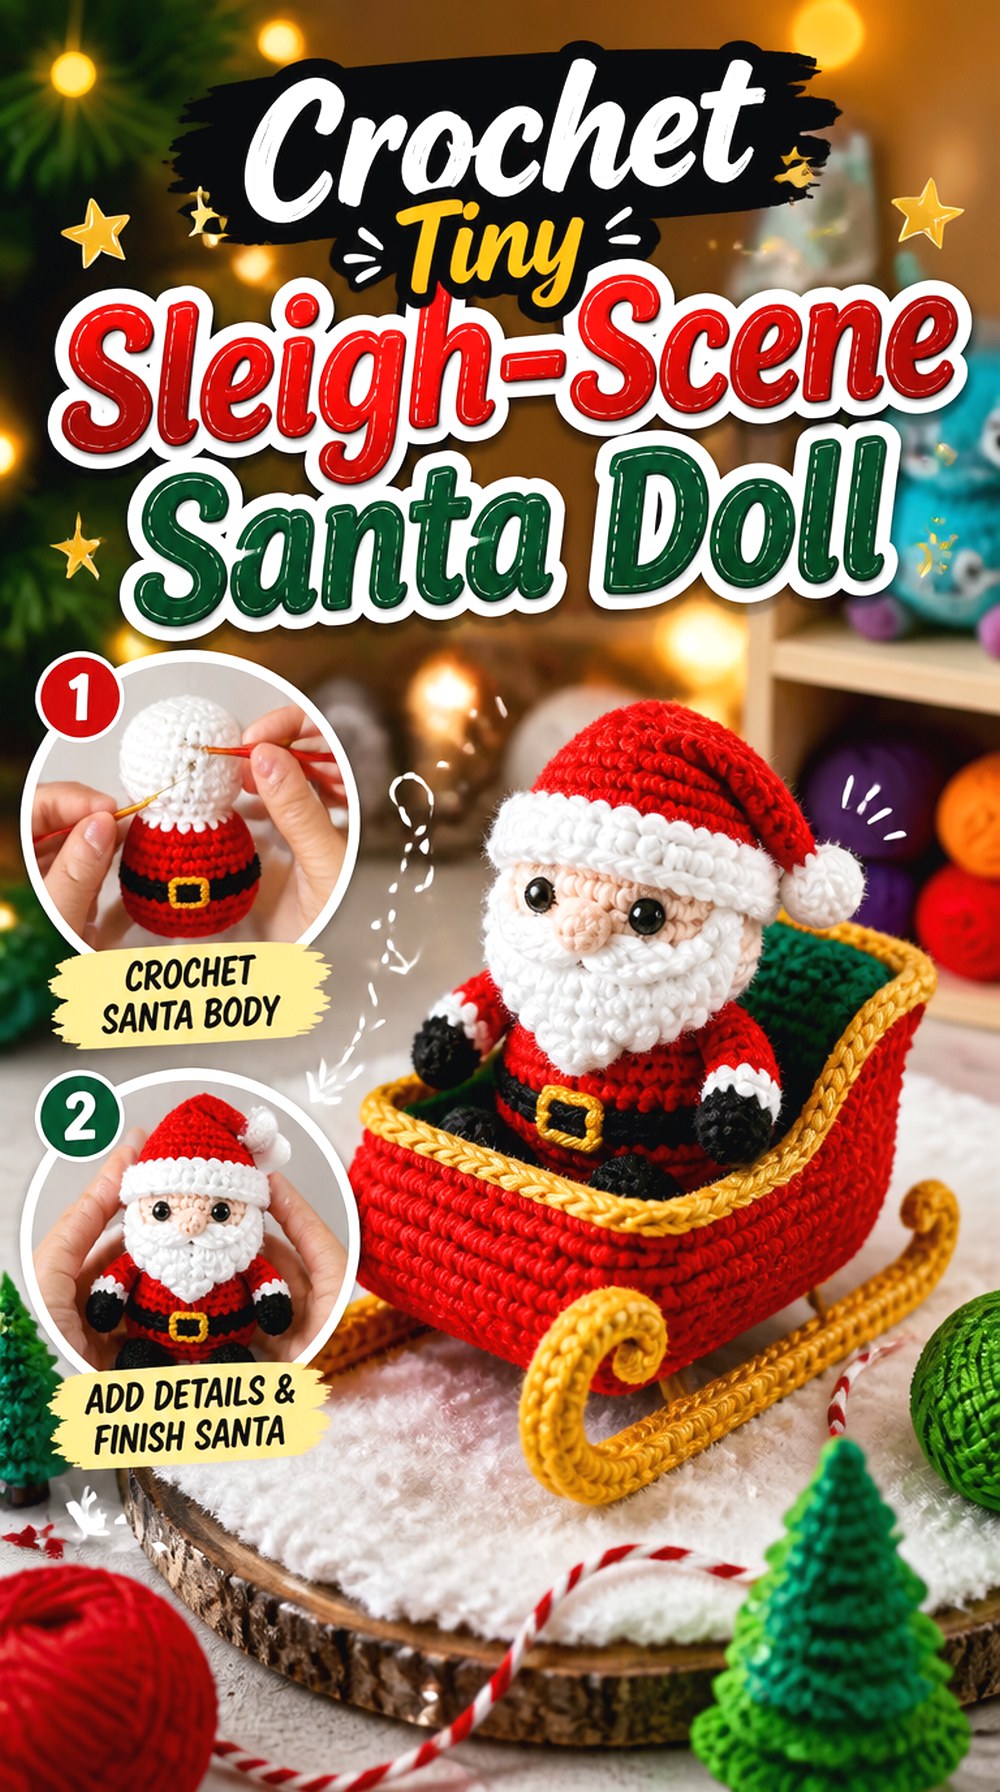
ComplicatedKnots takes a different approach by designing Santa as part of a larger Christmas scene that also includes a sleigh, sack, and tiny reindeer. The Santa installment itself is labeled no-sew, making it a strong option when the finished figure needs to work at a smaller scene scale rather than dominate a display on its own.
This concept works especially well for a tabletop arrangement, miniature holiday setup, or grouped mantel display. Because Santa belongs visually with other crocheted objects, maintaining a compatible scale across the whole scene matters more than maximizing detail on any single component.
Scene Scale Needs Consistency
If you plan to combine Santa with a sleigh, reindeer, gifts, or trees, avoid changing yarn thickness for only one element without considering the result. A small change can make Santa look oversized beside the sleigh or too tiny next to the reindeer. Compare finished components as you work instead of waiting until the entire scene is complete.
Position Matters More in a Grouped Display
A tiny Santa does not need to communicate every detail from every direction when he has a defined role within a scene. Decide whether he will sit near the sleigh, stand beside it, or appear with the sack, then orient the strongest facial and clothing details toward the normal viewing angle.
Original Tutorial and Creator Credit
Creator: ComplicatedKnots
4. Crochet Blanket Yarn Santa Plush Doll

Maria’s Blue Crayon uses super-bulky blanket yarn for this rounded Santa plushie, producing a much more substantial result than the ornament-scale projects above. The creator states that the finished Santa stands about 11.5 inches tall with the hat, making this one of the tutorials where scale is clearly documented.
The body and head are largely integrated, while the arms and hat are handled separately. That combination gives the doll a simple, solid center with fewer major seams than a traditional fully assembled amigurumi figure. It can work well as a soft shelf or sofa-side Christmas decoration.
Blanket Yarn Favors Bold, Uncomplicated Details
Very thick yarn creates a soft surface but leaves less room for tiny decorative elements. A clean belt, nose, beard area, and hat usually read more clearly than numerous miniature embellishments. If you want to personalize this style, larger-scale changes such as hat color, belt contrast, or beard texture will generally be more visible than intricate embroidery.
Watch the Base as You Stuff the Body
A rounded plush Santa can become top-heavy if the upper body and head are packed much more firmly than the lower section. Check how the doll rests on a flat surface while stuffing rather than evaluating the balance only after closure. This is particularly useful if the finished Santa will be displayed upright instead of used mainly as a soft plush.
Match Replacement Yarn by More Than Label Number
Two yarns sold in the same broad weight category can still differ in loft, density, and surface texture. When substituting blanket yarn, compare the actual strand and the resulting fabric. A much denser substitute can make the doll firmer and smaller-looking, while an especially lofty yarn can blur facial and clothing details.
Original Tutorial and Creator Credit
Creator: Maria’s Blue Crayon
5. Crochet Minimum Sew Chunky Santa Doll

Keep Calm and Crochet offers another chunky Santa, but its construction emphasis is different: the creator describes the design as having a no-sew body with minimal sewing overall and uses Flutterby chunky yarn with a 5.5 mm hook.
That makes this idea worth comparing directly with both the tiny no-sew Pocket Santa and the larger blanket-yarn plush. The appeal here is the combination of chunky texture and reduced assembly. It suits crocheters who want the soft proportions of plush amigurumi without making a collection of separately stuffed body parts that all need to be positioned later.
Reduced Sewing Makes Alignment Easier to Control
When more of the body is developed continuously, fewer major attachments need to be matched after stuffing. That can help keep the centerline of the doll visually consistent. Still check color-change boundaries and facial placement carefully; a body with fewer seams can make an off-center belt or face more noticeable because there are fewer other construction lines competing for attention.
Plush Fabric Can Hide Stitch Placement
Fuzzy or velvety yarn makes a soft Santa but can make individual stitches harder to identify than smooth cotton. Good lighting and a reliable stitch marker become particularly useful. If you have not worked with the chosen yarn before, test a small round section first to see whether you can comfortably locate increases, decreases, and color transitions.
Original Tutorial and Creator Credit
Creator: Keep Calm and Crochet
6. Crochet Jointed Plush Santa Doll
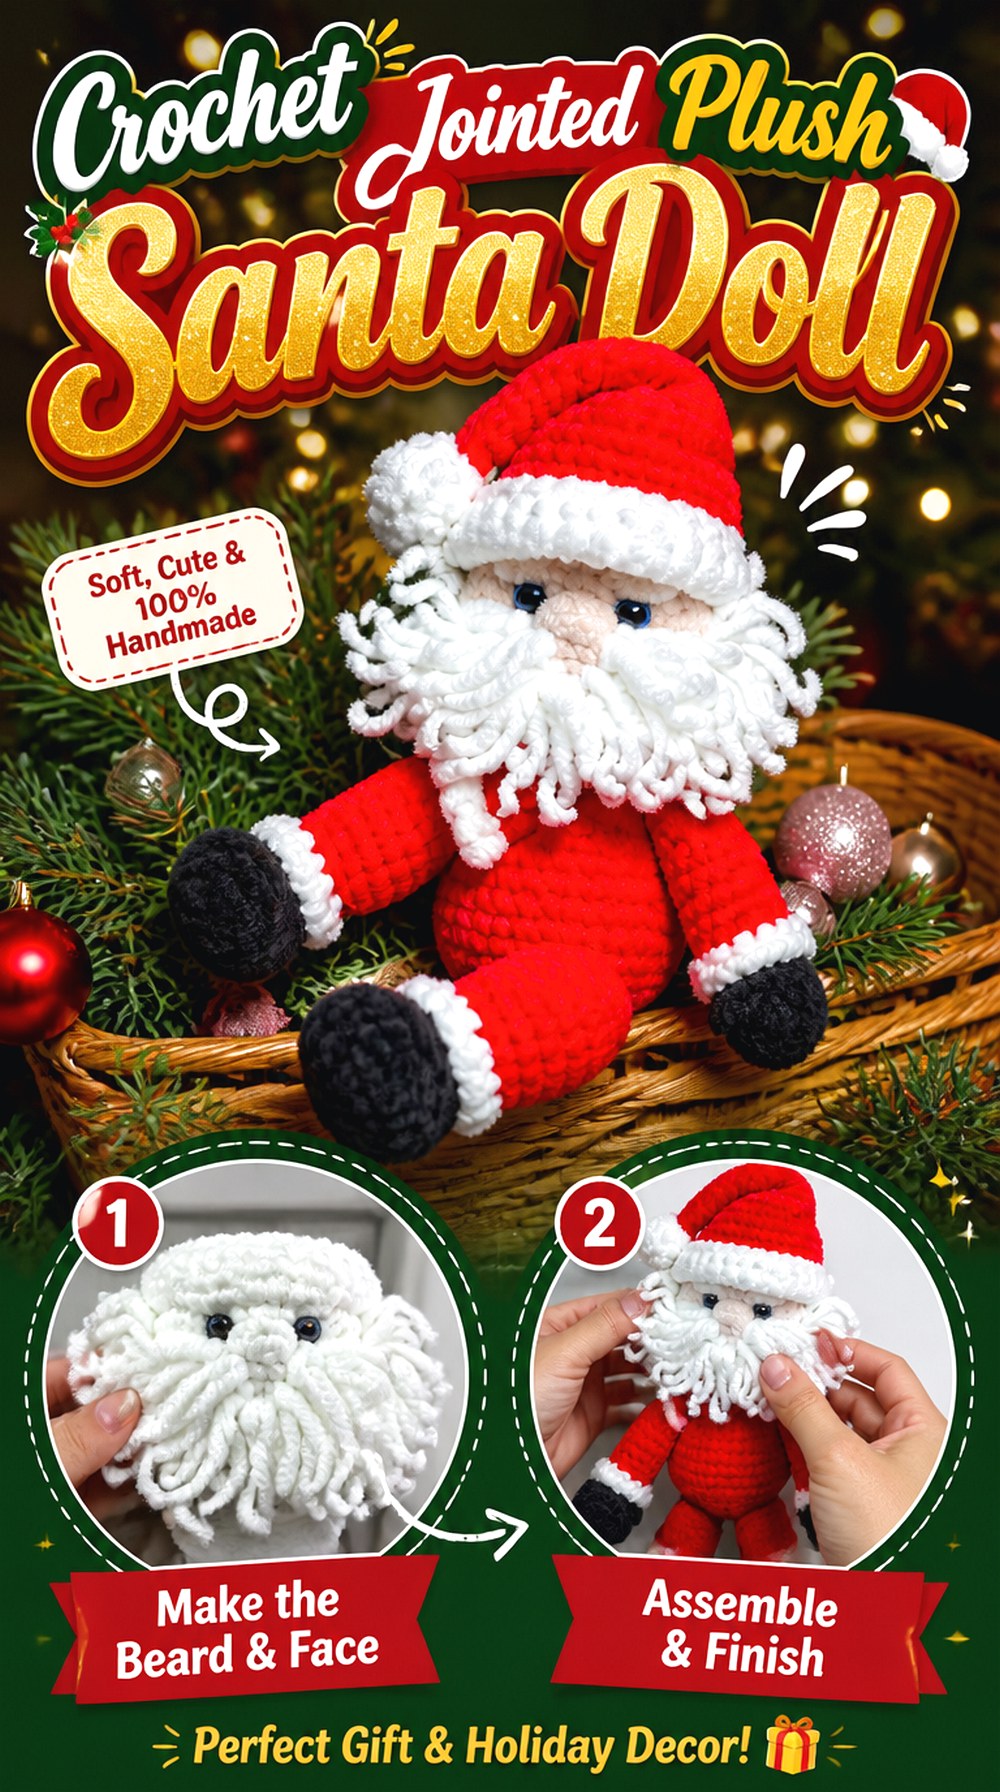
Medintseva toys approaches plush Santa construction with separate body development and joints. The tutorial is divided into three parts, and the first installment specifically demonstrates the arms and legs while showing joint insertion. That makes this project structurally different from the no-sew and continuous-body Santas in the earlier ideas.
A jointed plush can offer more control over limb positioning, but it also adds decisions that do not arise with fixed limbs. Think about whether your Santa is primarily a poseable display piece or a soft decorative toy before choosing this route, because the internal construction matters as much as the outer yarn texture.
Joint Placement Affects the Finished Pose
A small alignment difference at a joint can change whether both feet rest evenly or whether the arms appear symmetrical. Compare left and right positions before closing surrounding sections. For a display doll, test the intended sitting or standing pose during assembly rather than assuming the limbs will naturally settle into place afterward.
Plush Yarn and Mechanical Parts Need Compatible Openings
Dense fabric helps keep stuffing contained, while any inserted joint system also needs a secure connection through that fabric. If you substitute yarn or change hook size, check that the material still supports the hardware used by the creator. A very loose fabric can behave differently around an attachment point than the denser fabric shown in the tutorial.
Decide Whether Poseability Is Actually Useful
Jointed construction adds value when you want the arms or legs to contribute to the display pose. If your Santa will remain permanently seated on a shelf, a simpler fixed-limb design may meet the same visual goal with less assembly. Choose the jointed version because the movement or positioning matters, not merely because it is an extra feature.
Original Tutorial and Creator Credit
Creator: Medintseva toys
7. Crochet Long Legged Santa Doll
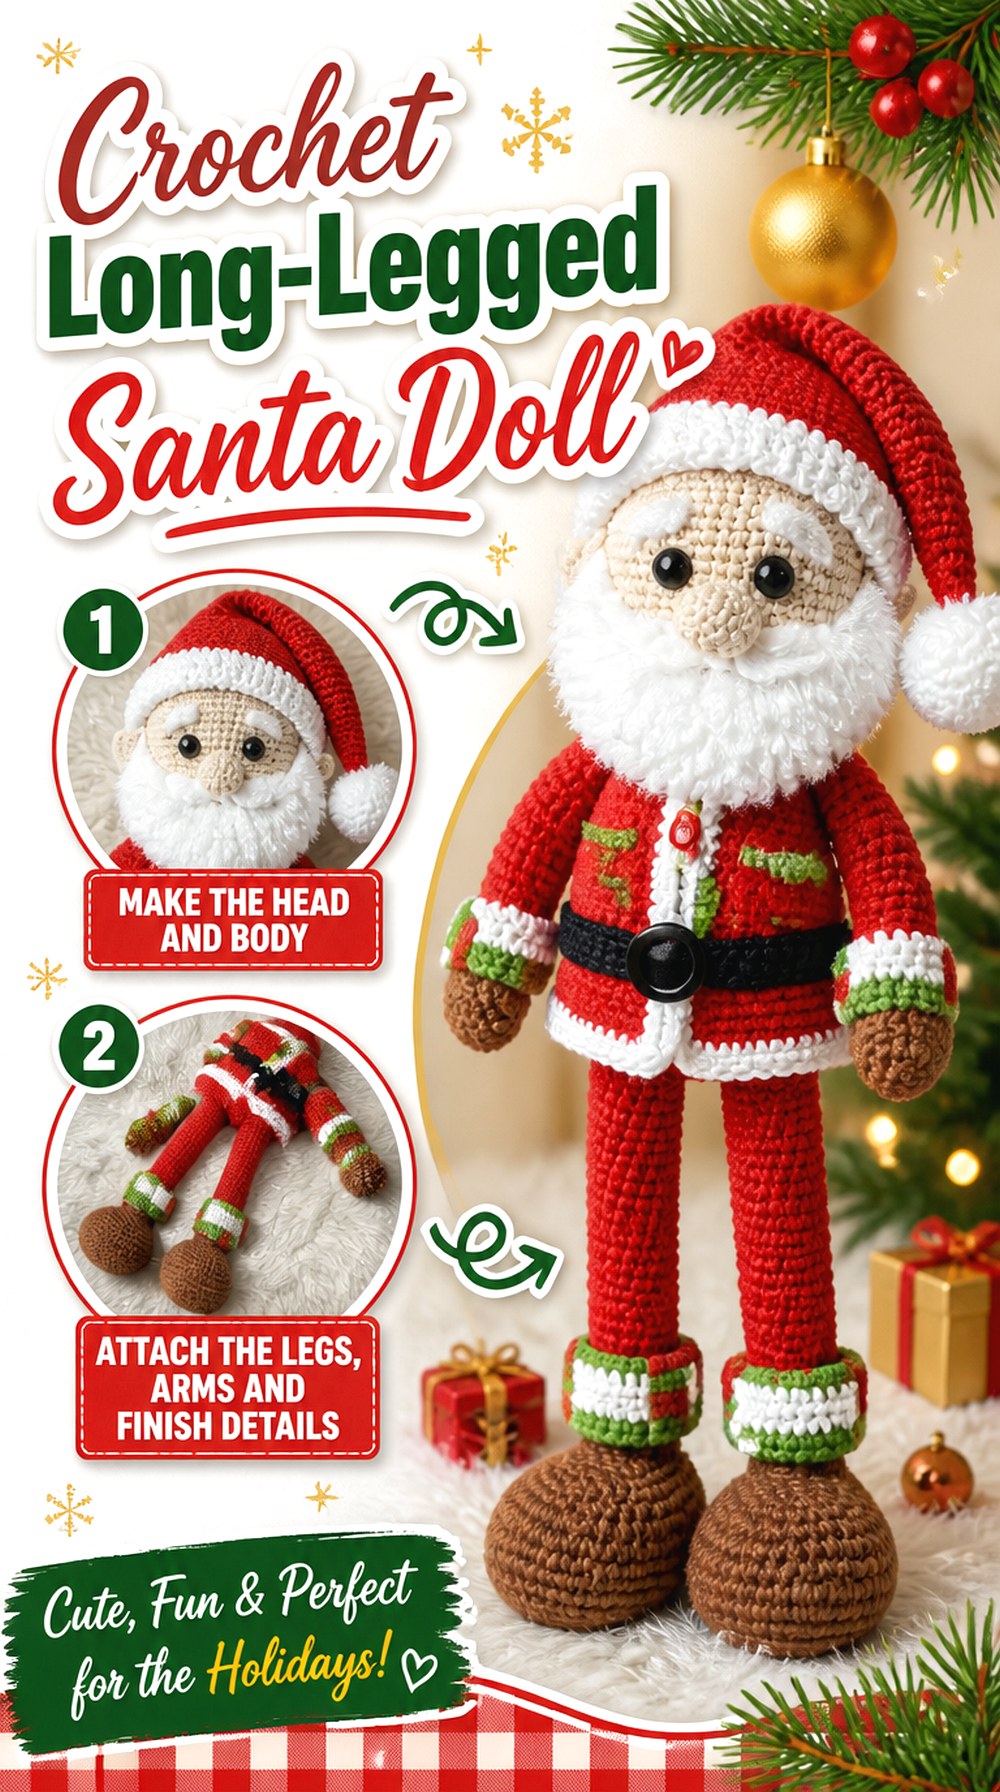
Cometa Crochet’s Santa belongs to a long-legged Christmas character collection, immediately giving it a taller, narrower silhouette than the round plush Santas. The extended legs turn the lower body into a major design feature instead of simply a small support beneath Santa’s coat.
That proportion works well when you want a figure with more visual height and a doll-like profile. It also means balance deserves extra attention. Long legs can exaggerate small differences in stuffing, attachment angle, or foot position, so this project benefits from checking the full silhouette repeatedly rather than concentrating only on the face and beard.
Longer Legs Make Symmetry More Noticeable
Place the two legs beside each other before final assembly and compare their apparent length and firmness. Even when the crochet itself matches, uneven stuffing can make one look shorter or thicker. The same check applies to the feet, since a small difference at the base can make a tall figure lean once it is displayed.
Vertical Proportions Change the Clothing Balance
On a long-legged Santa, the visual relationship between coat, belt, legs, and boots is very different from a round-bodied plush. If you customize colors or trim, step back and view the whole figure. A very wide band of contrasting trim can shorten the apparent torso or legs even though the underlying crochet dimensions have not changed.
Plan the Display Surface Early
A tall narrow doll may need more deliberate positioning than a squat plush with a broad base. Test the figure on the actual shelf, mantel, or tabletop before all decorative details are permanent. If the tutorial’s intended pose does not suit your space, choose a different Santa construction rather than relying on hidden supports that the original design did not require.
Original Tutorial and Creator Credit
Creator: Cometa Crochet
8. Crochet Oversized Display Santa Doll with Glasses

Ideas by Lita offers the largest specifically measured Santa in this collection. The creator states that the finished figure is approximately 50 cm tall, and the multipart tutorial includes facial components, a beard and mustache, glasses, clothing details, boots, and final assembly.
At that scale, Santa becomes a statement decoration rather than a small accent. The larger surface gives individual accessories more presence, so this is a good option when you enjoy detail work and want viewers to notice features such as spectacles and layered facial hair rather than simply recognize a red-and-white Santa silhouette.
Large Scale Magnifies Placement Errors
On a substantial doll, a slightly crooked nose, uneven glasses, or off-center beard can be visible from across a room. Temporary positioning becomes especially valuable. Pin or loosely position major facial pieces, set the head upright, and judge it from normal display distance before committing to permanent attachment.
Glasses Need to Work With the Beard and Hat
The glasses sit within an already busy area containing the eyes, nose, mustache, beard, and hat brim. Treat those elements as one composition. If you enlarge, replace, or omit an accessory, check how much of the face remains visible. A beard that creeps too high can visually crowd the glasses even when each individual piece looks fine in isolation.
Storage Becomes Part of the Project
A roughly 50 cm seasonal figure requires more off-season space than a small ornament or pocket plush. Before choosing a large Santa, consider whether the hat, glasses, and other dimensional details can be stored without crushing. A roomy container that prevents pressure on facial and clothing elements may preserve the display shape better than tightly packing the doll with other Christmas decor.
Original Tutorial and Creator Credit
Creator: Ideas by Lita
9. Crochet Classic Cotton Santa Doll

Club Crochet’s Santa uses worsted-weight cotton in several colors along with fuzzy white yarn for the traditional Santa texture. Unlike a tightly edited step-by-step lesson, the source is presented as a crochet-along, making the learning experience itself different from the segmented tutorials in this collection.
The smooth cotton base gives the colored sections clear stitch definition, while the contrasting fuzzy white material can make the beard and trim feel visually softer. This combination suits a classic amigurumi Santa where the overall shape stays crisp but selected details need a different texture.
Mixing Yarn Textures Creates Visual Separation
Using smooth yarn for the body and a fuzzier yarn for white details lets texture reinforce the color changes. If you substitute materials, think about whether you still want that distinction. Making every section from the same smooth yarn will produce a cleaner, more graphic Santa; adding a fluffy white yarn emphasizes beard and trim but can obscure individual stitches.
A Crochet-Along Suits a Different Working Style
A longer crochet-along can be useful if you prefer seeing the project developed in real time rather than jumping between tightly compressed steps. Before starting, scan the video structure and decide how you will mark stopping points. Keeping your own notes about where you paused can make a lengthy session much easier to resume without recreating any of the creator’s written pattern.
Check Contrast Before Adding Small Details
Traditional Santa colors do much of the visual storytelling, so make sure the belt, buckle, face, beard, and boots remain distinguishable from the body. If you use a muted or nontraditional palette, view the yarns together in the lighting where the doll will be displayed. Similar-value colors can blend even when they appear different in the skein.
Original Tutorial and Creator Credit
Creator: Club Crochet
10. Crochet Fine Yarn Classic Santa Doll

Amis Tejiendo Momentos presents a more finely worked Santa using 2 mm-thick yarn and a 2 mm hook, according to the creator’s materials list. The same source also lists 9 mm safety eyes and jewelry wire among the materials.
Compared with the blanket-yarn and chenille Santas, this direction puts more emphasis on small-scale stitch definition and neatly separated clothing and facial details. It suits readers who prefer the appearance of conventional amigurumi yarn rather than a fuzzy plush surface. Because the materials include wire, the intended use deserves thought before you begin.
Fine Yarn Rewards Careful Facial Alignment
Smaller stitches can make detailed shaping look clean, but they also make tiny changes in placement more visible. Set the eyes, nose, beard, and hat relationship before finishing the face. If a feature looks slightly off when viewed close up, turn the head upright and check again from normal display distance before moving it permanently.
Verify the Role of Any Internal Wire
The creator lists jewelry wire among the required materials, so review the tutorial to understand exactly where and why it is used before deciding whether the construction fits your intended recipient. For purely decorative display, internal structure may serve a useful purpose. For a young child’s toy, avoid assuming a wire-supported design is appropriate without adapting it to relevant toy-safety requirements.
Smooth Yarn Shows Tension Differences Clearly
A finely worked surface tends to reveal inconsistent tension more readily than fuzzy chenille. If your tension changes significantly during long crochet sessions, pause periodically and compare the current fabric with earlier sections. Consistency matters particularly where skin, beard, hat, and suit meet, because abrupt density changes can alter how cleanly those boundaries appear.
Original Tutorial and Creator Credit
Creator: Amis Tejiendo Momentos
11. Crochet Santa Girl Doll in a Festive Dress

For a genuinely different Santa-doll silhouette, amigurumi design by Izabela David offers a Santa Girl with a dress and accessories rather than the conventional belted Santa suit. The creator’s first video begins with the hands and feet, while later episodes continue with the body, head, dress, and accessories. The stated final height is approximately 35 cm.
This idea fits a Christmas doll collection particularly well because the clothing is a major part of the character design. Instead of relying primarily on Santa’s round coat and beard, the finished doll reads through its dress, proportions, hair or facial treatment, hat, and coordinated seasonal details.
The Dress Changes the Doll’s Silhouette
A flared or shaped dress creates a different balance from a cylindrical Santa coat. When displaying the finished doll, make sure the lower garment is arranged evenly and does not twist around the body. If you customize the dress colors, keep enough contrast at the trim so the clothing layers remain visible rather than merging into one large red area.
Mid-Size Dolls Need Proportion Checks During Assembly
At approximately 35 cm, this doll is large enough for small alignment differences to show but still compact enough for shelf or tabletop display. Compare the limbs before they are permanently attached, then check the head-to-body balance with the dress temporarily in place. Clothing can change the apparent proportions after the underlying doll is already assembled.
Fluffy Trim Should Frame Rather Than Overwhelm
The creator lists fluffy yarn for edging alongside smoother yarns for the doll. That contrast can make the outfit feel more seasonal, but thick trim can cover neighboring stitches or details. If you substitute a much fluffier yarn, test a short section first and decide whether the edging still leaves the dress shape and hands clearly visible.
Original Tutorial and Creator Credit
Creator: amigurumi design by Izabela David
12. Crochet Separate Piece Classic Santa Doll
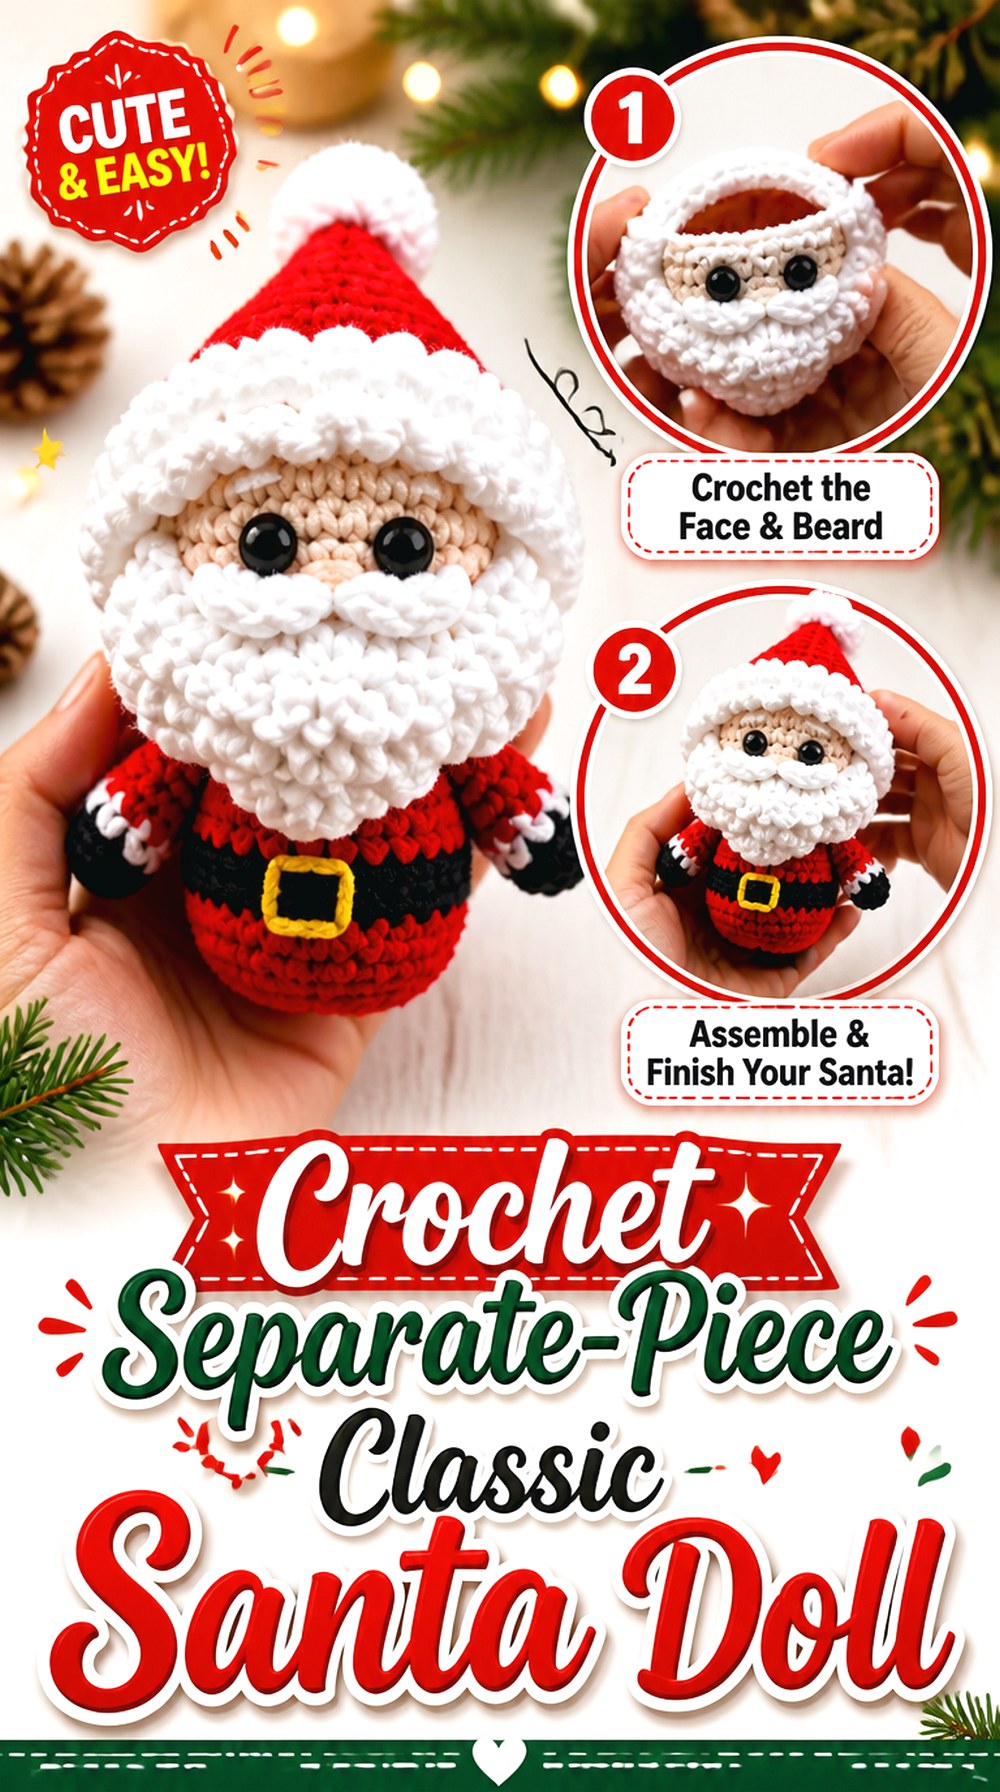
Amigu World’s Santa uses a clearly segmented tutorial series: the linked first part covers the body and arms, later installments address the head and beard, assembly, and a separate Santa hat. That makes this a useful traditional alternative if you prefer working distinct components and assembling them after the main crocheted forms are complete.
The finished concept is classic rather than plush-heavy or highly stylized, with the familiar red, white, dark, and yellow Santa palette. It sits at the opposite end of the construction spectrum from the one-piece and no-sew ideas earlier in the article.
Separate Components Give More Placement Control
When the head, beard, hat, arms, and body are handled as distinct construction stages, you have more opportunities to inspect each piece individually before final assembly. The trade-off is more alignment work. Use temporary positioning to compare both sides of the doll before sewing, particularly where the arms meet the body and the beard meets the face.
The Hat Deserves Its Own Fit Check
Because the Santa hat is treated separately in the tutorial series, do not assume it will automatically sit at the angle you prefer once the head is complete. Test its placement with the beard and facial features already considered. Moving the brim slightly can change how much forehead is visible and can alter the apparent position of the eyes.
A Classic Palette Is Easy to Personalize Carefully
The source uses the familiar Santa color family, making this a straightforward base for restrained customization. Deep burgundy can replace bright red, for example, or a warm cream can soften the trim. Keep strong enough contrast around the belt, beard, and face so the characteristic Santa divisions remain readable after the palette changes.
Original Tutorial and Creator Credit
Creator: Amigu World
How These Crochet Santa Dolls Compare
For the least emphasis on sewing, start with the Crochet Pocket-Size No-Sew Santa Doll, Crochet Tiny Sleigh-Scene Santa Doll, or Crochet Minimum-Sew Chunky Santa Doll. They keep the project visually compact while reducing some of the separate-part assembly common in traditional amigurumi.
For small seasonal decorating, the Crochet Christmas Ornament Santa Doll is the clearest tree-focused choice. At the other end of the scale, the approximately 50 cm Crochet Oversized Display Santa Doll with Glasses is much better suited to becoming a standalone holiday feature.
Choose the Crochet Jointed Plush Santa Doll when poseable construction is important, the Crochet Long-Legged Santa Doll for a tall character silhouette, and the Crochet Santa Girl Doll in a Festive Dress when you want clothing and doll styling to carry more of the visual design.
Conclusion
The strongest choice depends on where the finished Santa will live and how much assembly you want. For a tree, the ornament-scale Santa keeps the project compact. For soft, rounded character styling, the pocket, chunky, and blanket-yarn versions emphasize plush texture. Long-legged and jointed designs offer more distinctive body construction, while the large glasses-wearing Santa makes the clearest statement display. The Santa Girl provides the biggest clothing-based departure from the classic suit-and-beard silhouette.
Once you have chosen the scale and construction style, compare yarn texture, facial-detail requirements, and intended use before buying materials. Use each original tutorial for the creator’s exact construction details and component placement.
Frequently Asked Questions
What yarn works well for a crochet Santa doll?
There is no single yarn that suits every Santa. Smooth cotton or cotton-blend yarn gives crisp stitch definition and works well for detailed amigurumi. Chenille and blanket yarn create a softer plush appearance but can hide individual stitches and make tiny facial features less distinct. Start by deciding whether you want a structured display doll or a soft plush character, then follow the tutorial’s specified yarn closely when predictable proportions matter.
Can I make a Santa doll larger by using thicker yarn?
Thicker yarn will generally increase the finished scale when the rest of the construction remains compatible, but the result is not just a uniformly enlarged copy. The beard, hat, limbs, and facial features may appear proportionally different, and a larger stuffed body can behave differently when standing. Make a sample section first and check fabric density rather than assuming a yarn substitution will preserve the original proportions.
Should I choose a no-sew or separate-piece Santa?
Choose a no-sew or minimum-sew Santa if you want to reduce the number of limbs and body pieces that need final positioning. Separate-piece construction gives more control over individual components and may make complex shaping easier to manage, but alignment becomes an important finishing step. Neither approach is universally better; the useful choice depends on whether you value streamlined assembly or greater control over component placement.
How can I keep a tall crochet Santa from looking uneven?
Compare paired parts before permanent assembly and check the figure upright as you work. Long legs make small differences in stuffing and attachment angle easier to notice. Make sure both feet contact the display surface similarly and check the body’s centerline before adding final accessories. If the Santa is intended to stand, test that behavior before the beard, hat, and other decorative pieces make adjustments harder.
Are safety eyes appropriate for every crochet Santa doll?
No. Safety eyes are commonly used in amigurumi, including several of these tutorials, but the intended recipient matters. For seasonal display pieces used by adults, the considerations are different from those for a young child. When making a child-oriented toy, use components and construction that meet appropriate toy-safety guidance; embroidered facial features can remove detachable eye components from the design.
Should I assemble the beard before positioning Santa’s face?
It is usually more useful to consider the beard, nose, eyes, mustache, and hat brim together, even if the tutorial attaches them in a particular order. A full beard can visually shift where the center of the face appears. Temporarily positioning removable pieces lets you check expression and spacing before permanent finishing, while the linked creator tutorial should remain your guide for the exact construction sequence.