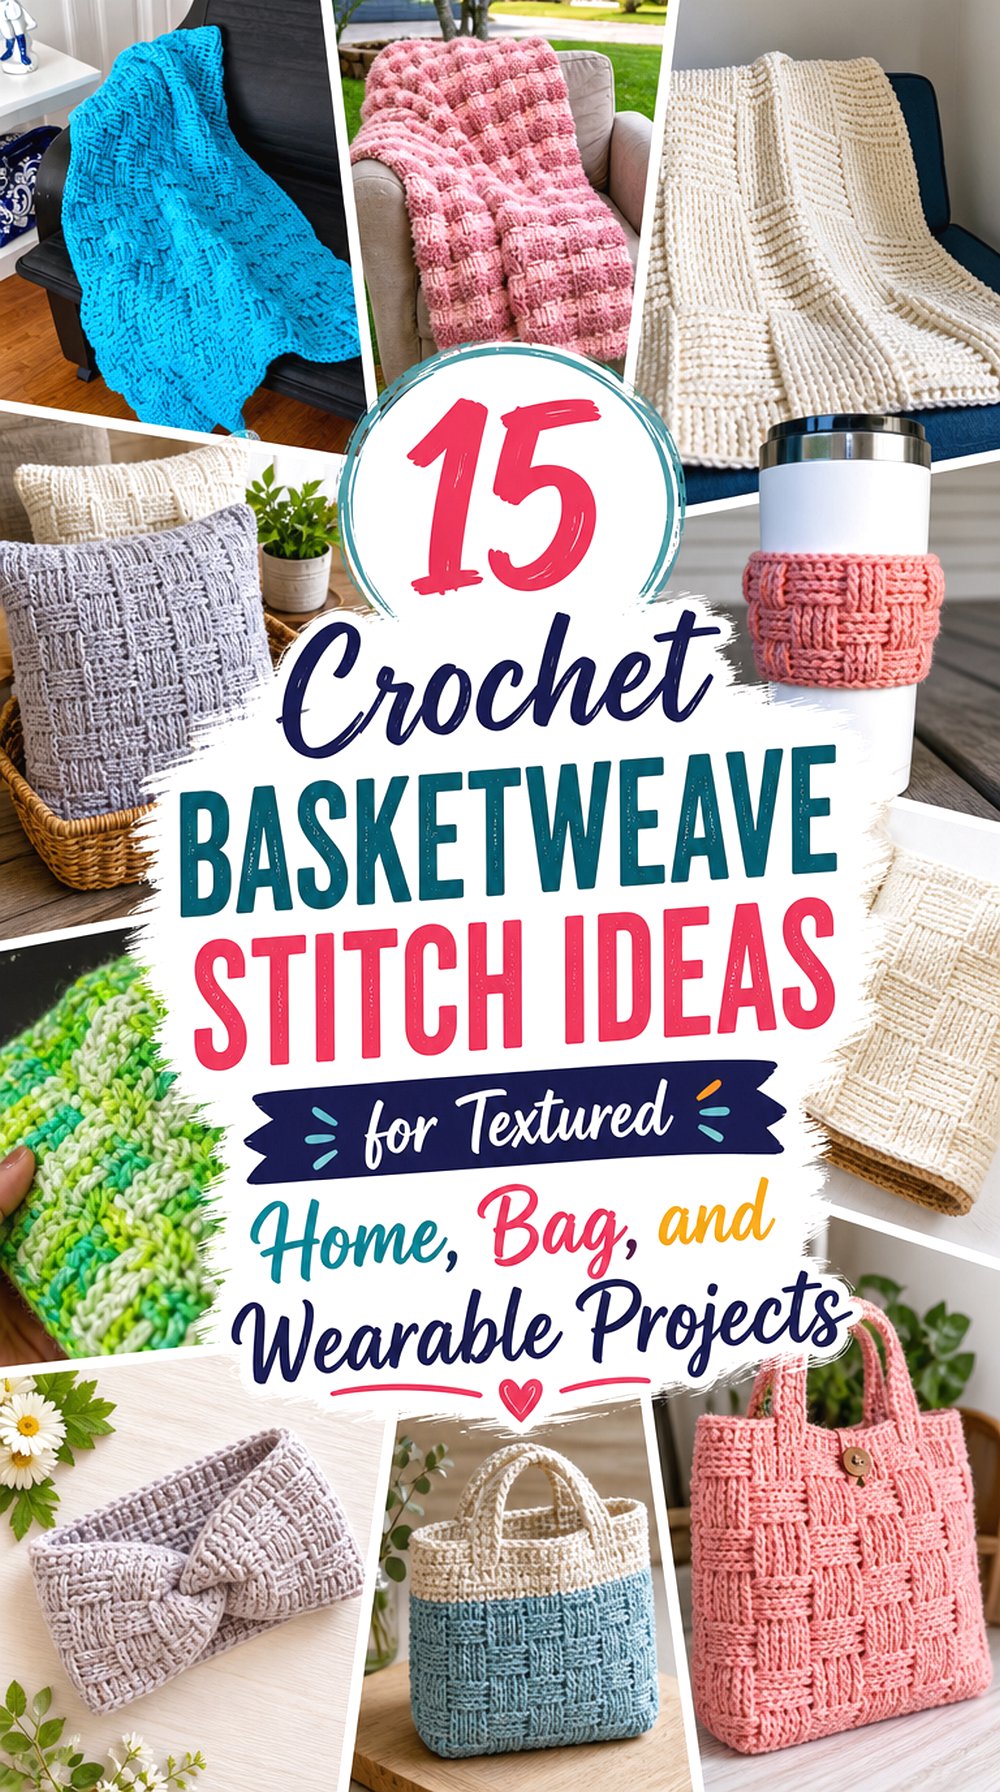

Basketweave crochet has a strong woven look, so it works especially well when the finished item needs visible texture. This list includes large blankets, smaller home pieces, everyday bags, headbands, a scarf, and practical table or kitchen projects.
The main difference between these ideas is how the stitch behaves in each shape. A blanket shows broad blocks of texture, while a phone bag or mug cozy uses the same raised surface in a compact way. Wearables need closer attention to thickness and fit, and home pieces need a clean finished size. Use the original tutorials for the exact stitch counts, shaping, and finishing details.
Quick List
- Crochet Rectangle Basketweave Blanket
- Crochet Square Basketweave Baby Blanket
- Crochet Basketweave Throw Blanket
- Crochet Giant Velvet Basketweave Throw
- Crochet Basketweave Cell Phone Bag
- Crochet Basketweave Tote Bag
- Crochet Basketweave Laptop Bag
- Crochet Bamboo-Handle Basketweave Handbag
- Crochet Basketweave Pillow Cover
- Crochet Classic Basketweave Headband
- Crochet Mini Basketweave Twist Headband
- Crochet Basketweave Dishcloth
- Crochet Basketweave Travel Mug Cozy
- Crochet Tunisian Basketweave Placemat
- Crochet Basketweave Scarf or Muffler
What to Compare Before Choosing a Basketweave Project
Basketweave stitch creates a thicker, raised surface than many flat crochet stitches, so the project shape matters. For blankets and pillows, that texture becomes the main design feature. For bags, it can add a firm-looking surface, but readers should still check the handle, lining, closure, and finished size before planning daily use.
Smaller projects are useful when you want to practice the stitch without committing to a large blanket. Dishcloths, mug cozies, placemats, and headbands let the woven blocks show clearly while keeping the project more controlled. Wearables need the most careful sizing because the stitch can feel dense, especially when worked in a compact band or scarf.
1. Crochet Rectangle Basketweave Blanket
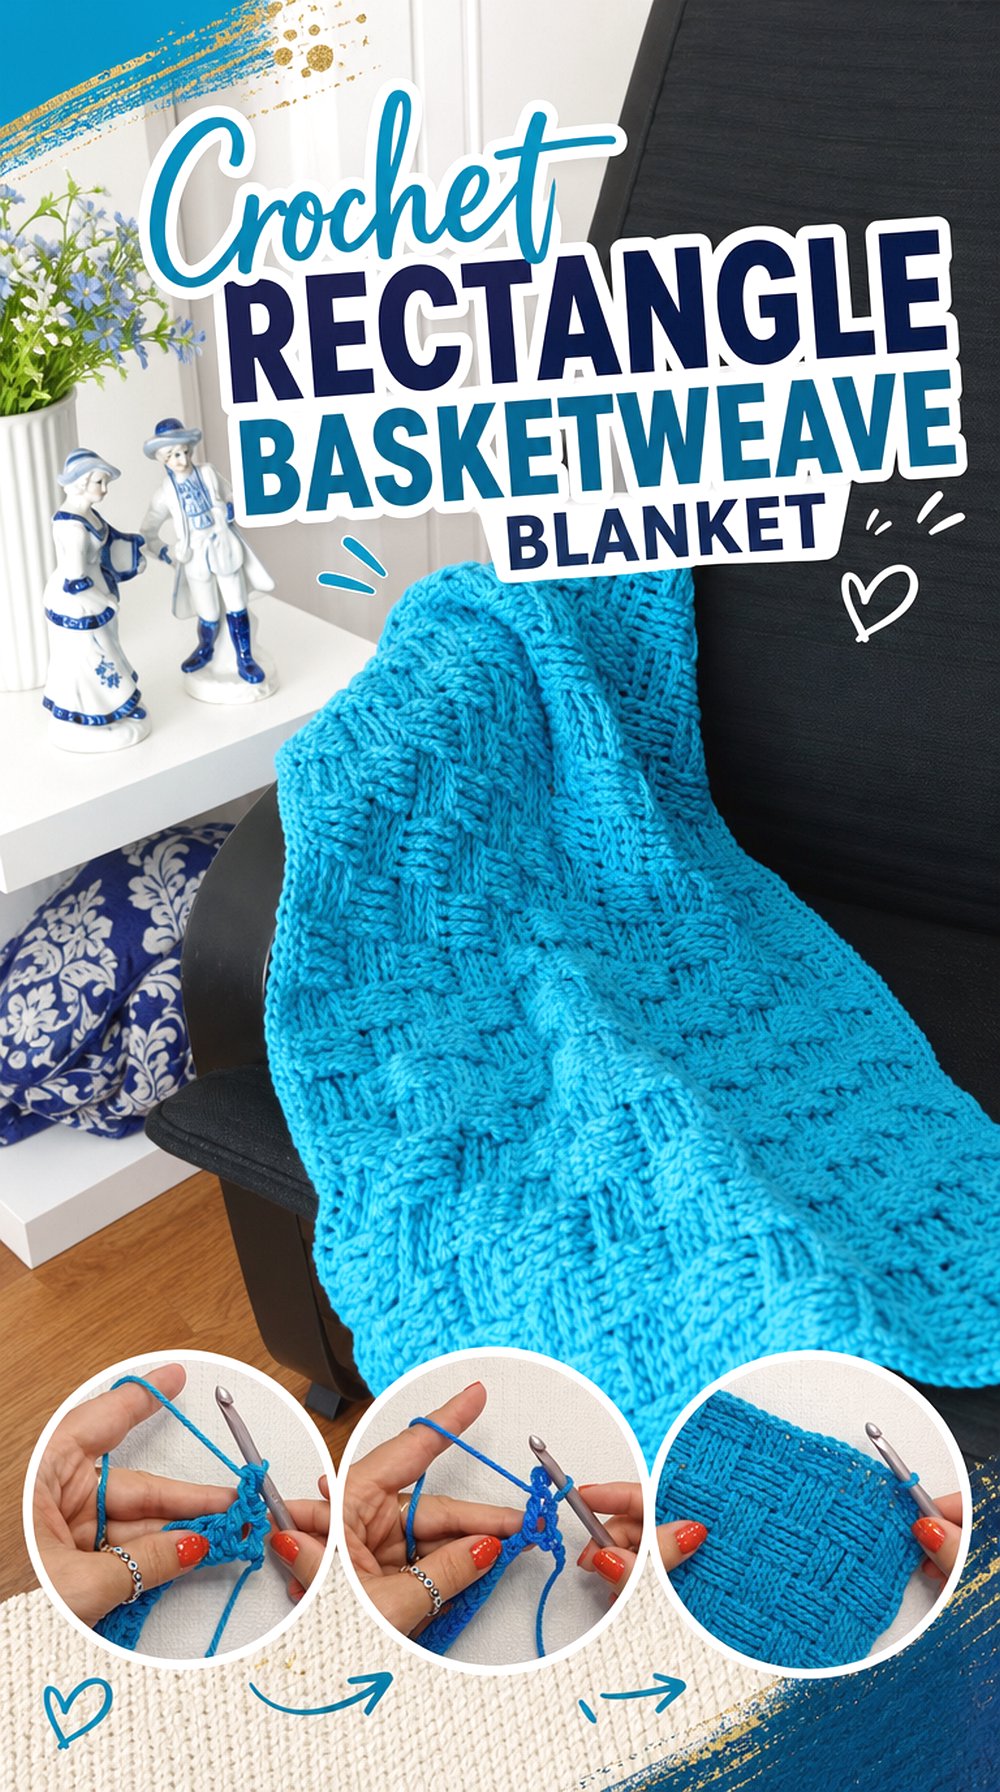
A rectangle blanket is one of the clearest ways to show the basketweave stitch because the repeated blocks have room to spread across the whole surface. This option works as a straightforward blanket idea for readers who want the stitch itself to be the main attraction instead of adding motifs, colorwork, or separate panels.
The rectangular format also makes the finished piece easier to imagine on a couch, chair, or bed. It is different from the baby blanket and velvet throw because the focus is on a simple long blanket shape with a consistent textured surface.
The Long Rectangle Shape Matters
A rectangle blanket gives the basketweave pattern a steady direction, which helps the finished surface look organized rather than busy. Readers planning this type of project should decide where the blanket will be used first, because a lap blanket, sofa throw, and bed accent do not need the same proportions.
The tutorial should be followed for the exact starting size and repeat information. Basketweave texture can look very different when made narrow, wide, short, or oversized.
Texture Will Be the Main Feature
This blanket does not need extra decoration to feel detailed. The raised woven effect is already the visual focus, so color choice can either make the texture easy to see or soften it into a quieter look.
A solid or lightly blended yarn usually lets the blocks stand out more clearly than a very busy color pattern. Readers should view the finished result in the source before choosing yarn so they understand how much texture they want to highlight.
Size Notes to Review in the Source
Blankets use more yarn than many small basketweave projects, and the exact amount depends on the final measurements, yarn weight, and personal tension. The original tutorial is the right place to check the material list and any size guidance before buying supplies.
This is especially important for basketweave because the stitch has depth. A small change in width or length can affect the finished weight and drape.
Creator: My Yarn Loft by Tansy
2. Crochet Square Basketweave Baby Blanket
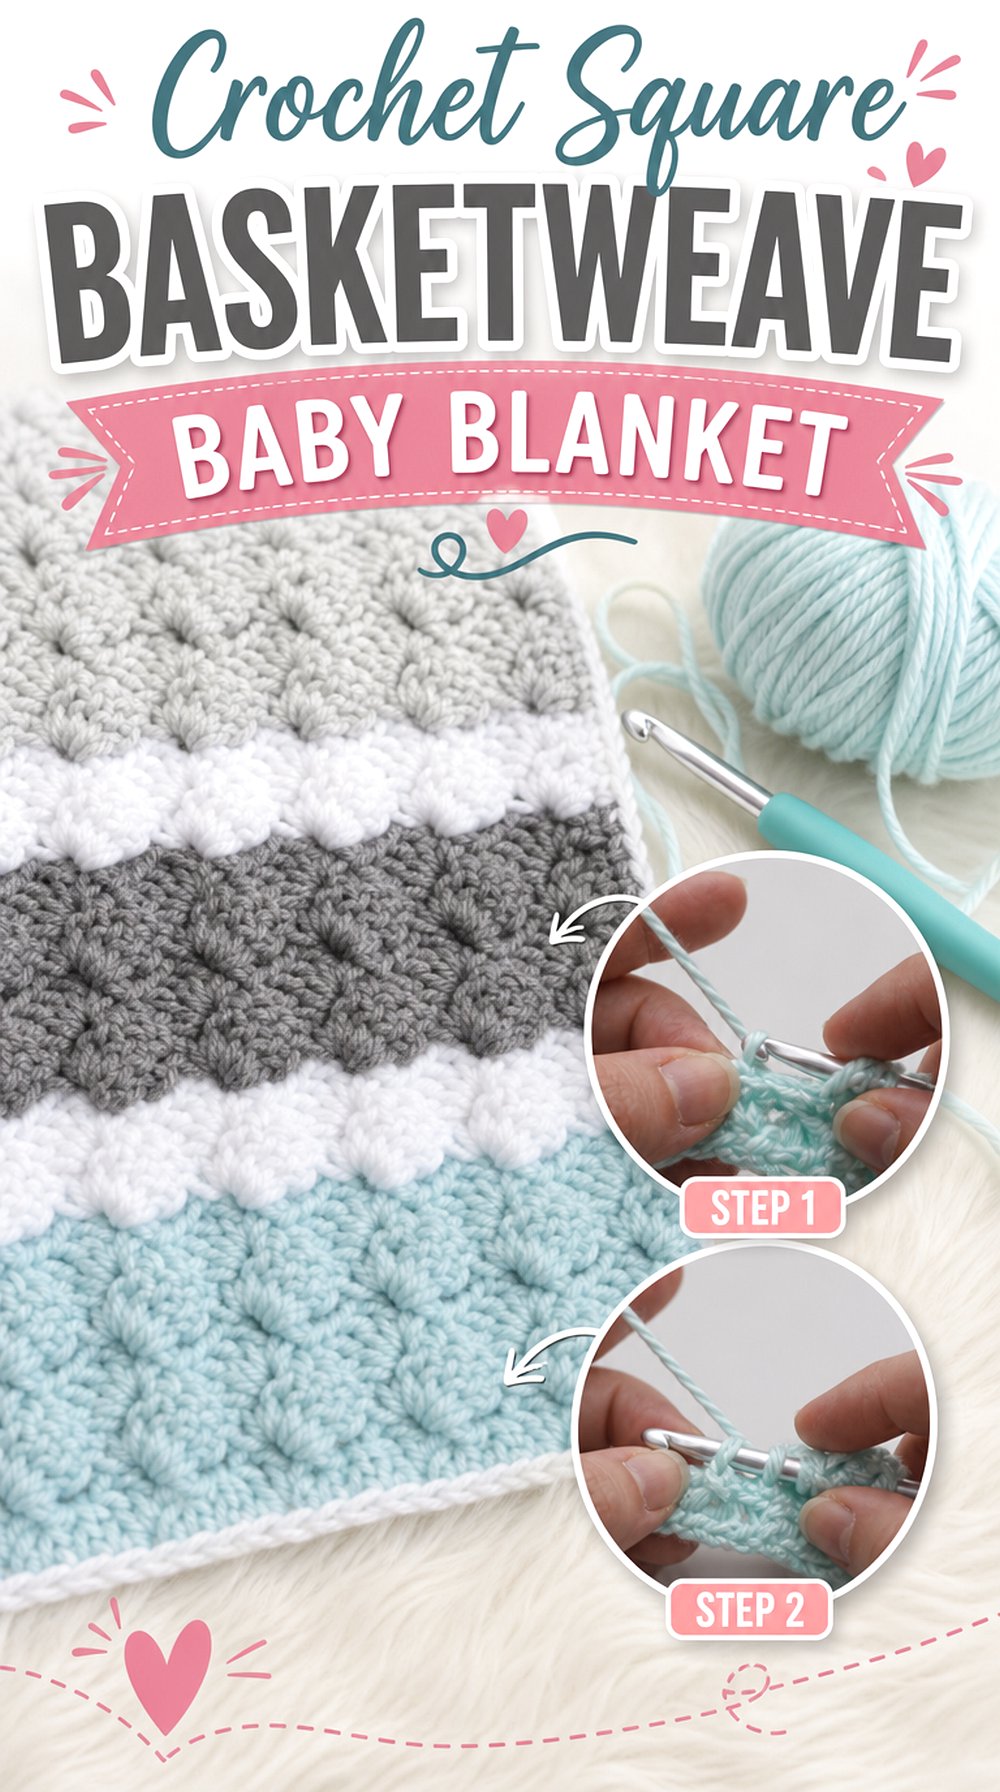
A square baby blanket gives the basketweave stitch a softer, more contained layout. The raised texture fills the center evenly, while the square shape keeps the project visually balanced from every side. This option stands apart from the larger throws because it is planned around a smaller blanket format rather than a broad sofa-size piece.
The source listing gives a finished size, which is helpful for readers comparing blanket options. Use that information as a planning point, then rely on the original tutorial for the exact construction details and any linked written pattern.
Square Format Changes the Use
A square blanket feels different from a long throw because it can be folded, displayed, or laid flat without one direction dominating the design. The basketweave blocks stay easy to read across the surface, and the shape may suit readers who prefer a balanced finished blanket.
Before starting, readers should confirm whether the finished size fits their intended use. A baby blanket, stroller blanket, and decorative nursery layer can call for different dimensions.
Soft Surface Detail Without Extra Motifs
Basketweave gives this blanket built-in surface interest, so it does not need appliqués or complex color placement to look finished. The texture is the design. That can be helpful for readers who want a blanket that feels detailed but still has a clean overall look.
The main decision is how visible the woven effect should be. Smooth yarn and a lighter color may show the raised sections clearly, while darker or highly variegated yarn may make the texture less obvious.
Measurements Are Clearly Provided
The source listing states the baby blanket finished size as 34 x 34, which gives readers a useful starting point for deciding whether this project fits their needs. Finished measurements are especially helpful for blankets because photos alone can make a project look larger or smaller than it really is.
Readers should still follow the creator’s exact notes for yarn, hook, and construction details rather than estimating from the image.
Creator: Amanda Crochets
3. Crochet Basketweave Throw Blanket
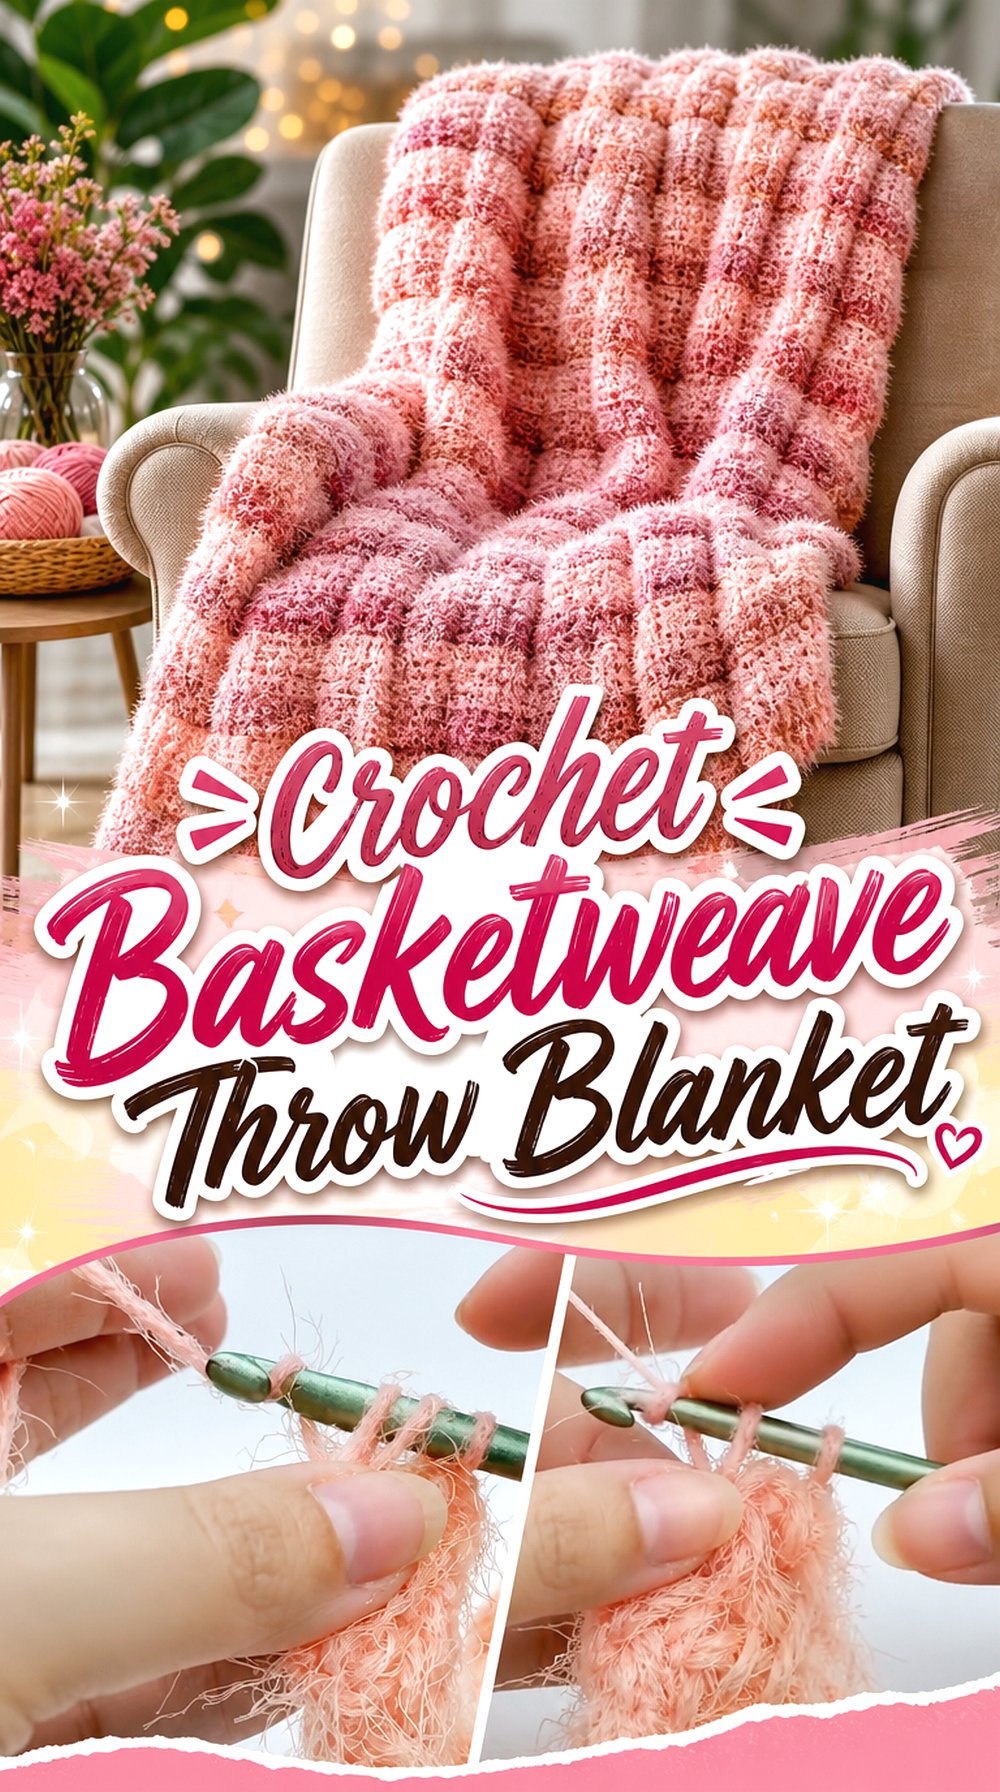
A throw blanket lets the basketweave stitch look bold without becoming as specialized as a baby blanket or tech bag. The finished piece is meant to be seen in a living space, so the raised blocks, border, and overall drape all matter.
This idea is a good comparison point for readers who want a home project larger than a dishcloth or pillow but still more focused than a full bed blanket. The tutorial listing connects the stitch to a throw blanket format and includes a source for the written pattern.
A Throw Lets the Stitch Stand Alone
A basketweave throw works best when the repeated texture is allowed to carry the design. The large surface makes every change in stitch direction more visible, so the blanket can look structured even without stripes or motifs.
Readers who like simple home pieces should notice how the texture fills the whole project. This is a strong option when the goal is a blanket with a woven look rather than a lacy or open fabric.
Yarn Choice Affects Drape
The creator’s listing mentions a specific yarn used for the throw, but readers should use the source information rather than guessing substitutions. Basketweave stitch can become heavier or softer depending on yarn weight and fiber.
Before buying supplies, it is worth checking whether the yarn creates the kind of blanket you want: firm and textured, soft and drapey, or somewhere between those two. That decision will affect the final feel more than color alone.
Written Pattern Link May Help
This type of project can benefit from having both video guidance and a written reference. A throw blanket includes many repeated sections, so readers who like to track progress may want to use the linked written pattern alongside the video.
The article should not replace those exact instructions. Use the original source for counts, row order, and finishing so the basketweave blocks stay aligned across the full blanket.
Creator: Bag-O-Day Crochet
4. Crochet Giant Velvet Basketweave Throw
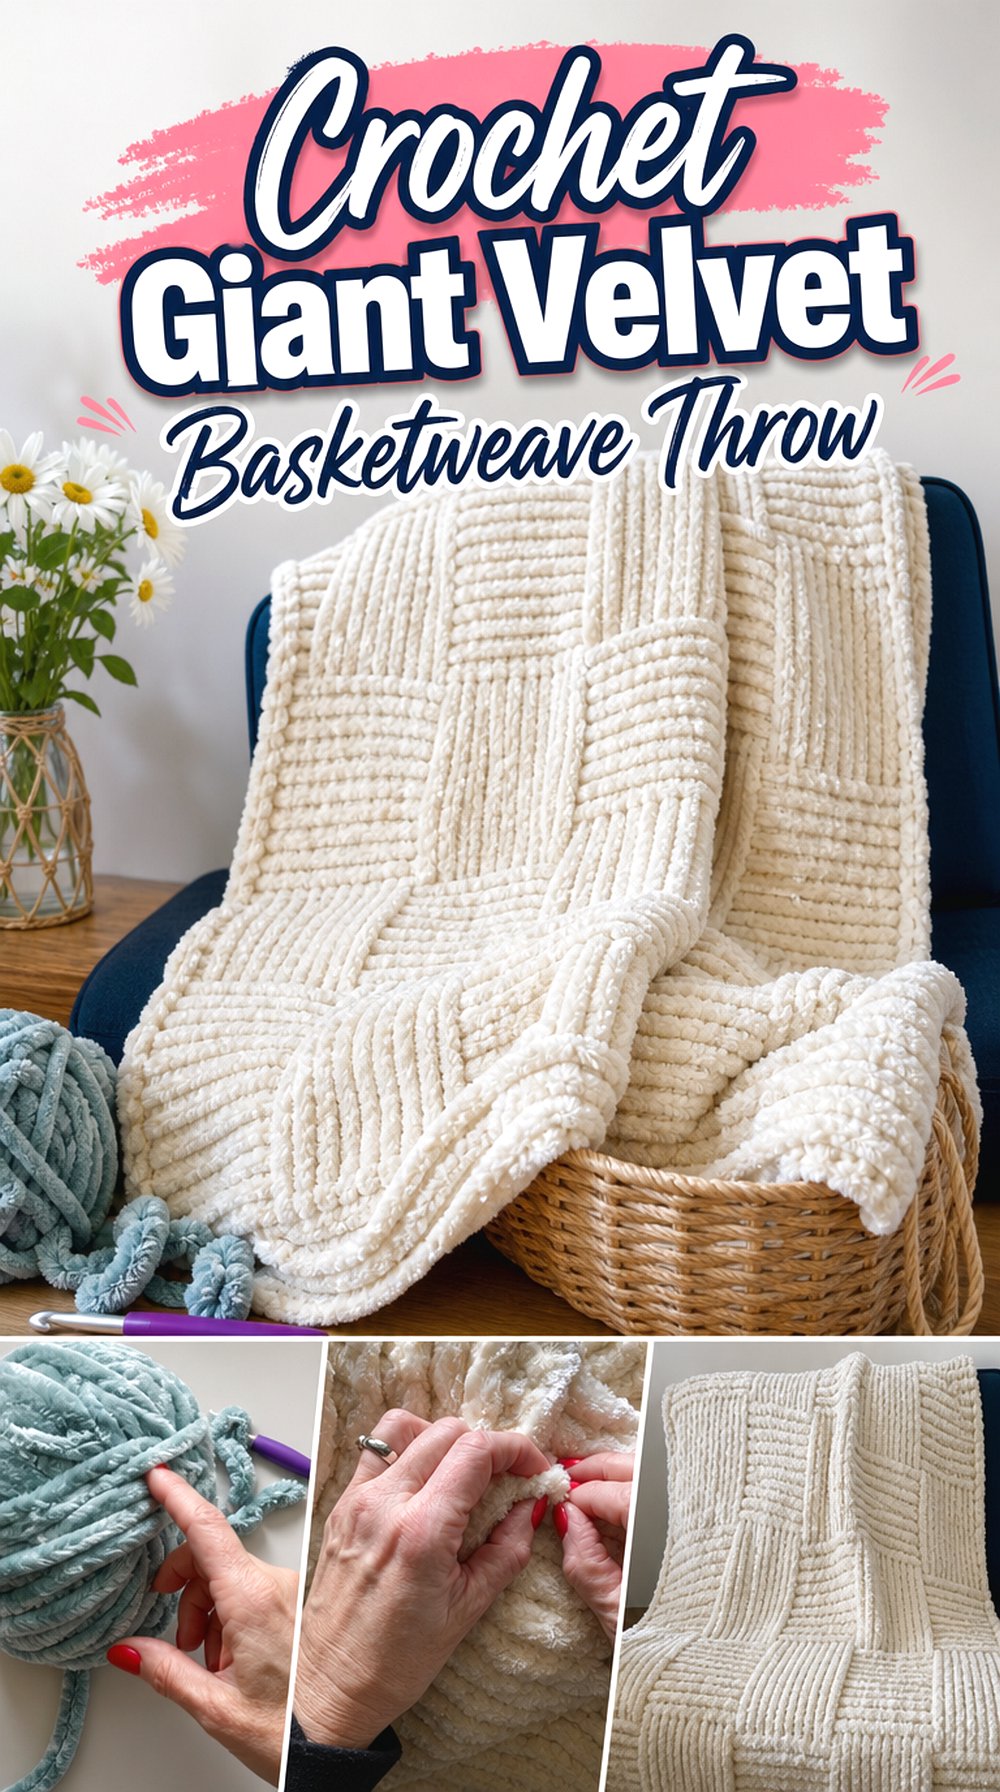
The giant velvet throw takes the basketweave look in a plusher direction. The scale, yarn texture, and finished surface make this project feel different from the standard throw and the square baby blanket. Instead of a crisp small block effect, the main appeal is the larger, softer-looking woven texture.
This tutorial listing features Bernat Velvet Plus yarn and describes the throw as soft with drape, so it is best for readers who want a blanket where the basketweave stitch looks big and cushioned. Follow the original source for the exact pattern details.
Large Scale Makes the Blocks Bolder
A giant throw gives the basketweave stitch a more dramatic presence. The raised sections appear broader, so the woven pattern can be seen from farther away than on a dishcloth or headband.
Readers choosing this option should think about display space. A large textured throw can become a main couch or chair accent, so the finished color and scale should match the room where it will be used.
Velvet Yarn Needs Extra Attention
The source listing uses Bernat Velvet Plus, which changes the look of the basketweave texture compared with smoother yarns. Velvet-style yarn can make stitches appear plush and soft, but readers should follow the creator’s guidance closely because stitch definition may look different than it does with ordinary acrylic or cotton.
A careful review of the material list is useful here. This project is more dependent on the yarn’s surface than several other ideas in the list.
Drape Is Part of the Finished Look
The tutorial description notes that the throw has a soft, cozy result with drape. That means readers should not judge this project only by the raised stitch blocks. The way the blanket folds and rests is also part of the finished design.
This makes it a different choice from a more structured item like a laptop bag. The same basketweave idea is used, but the finished purpose is comfort and display rather than firm utility.
Creator: Yarnspiration
5. Crochet Basketweave Cell Phone Bag
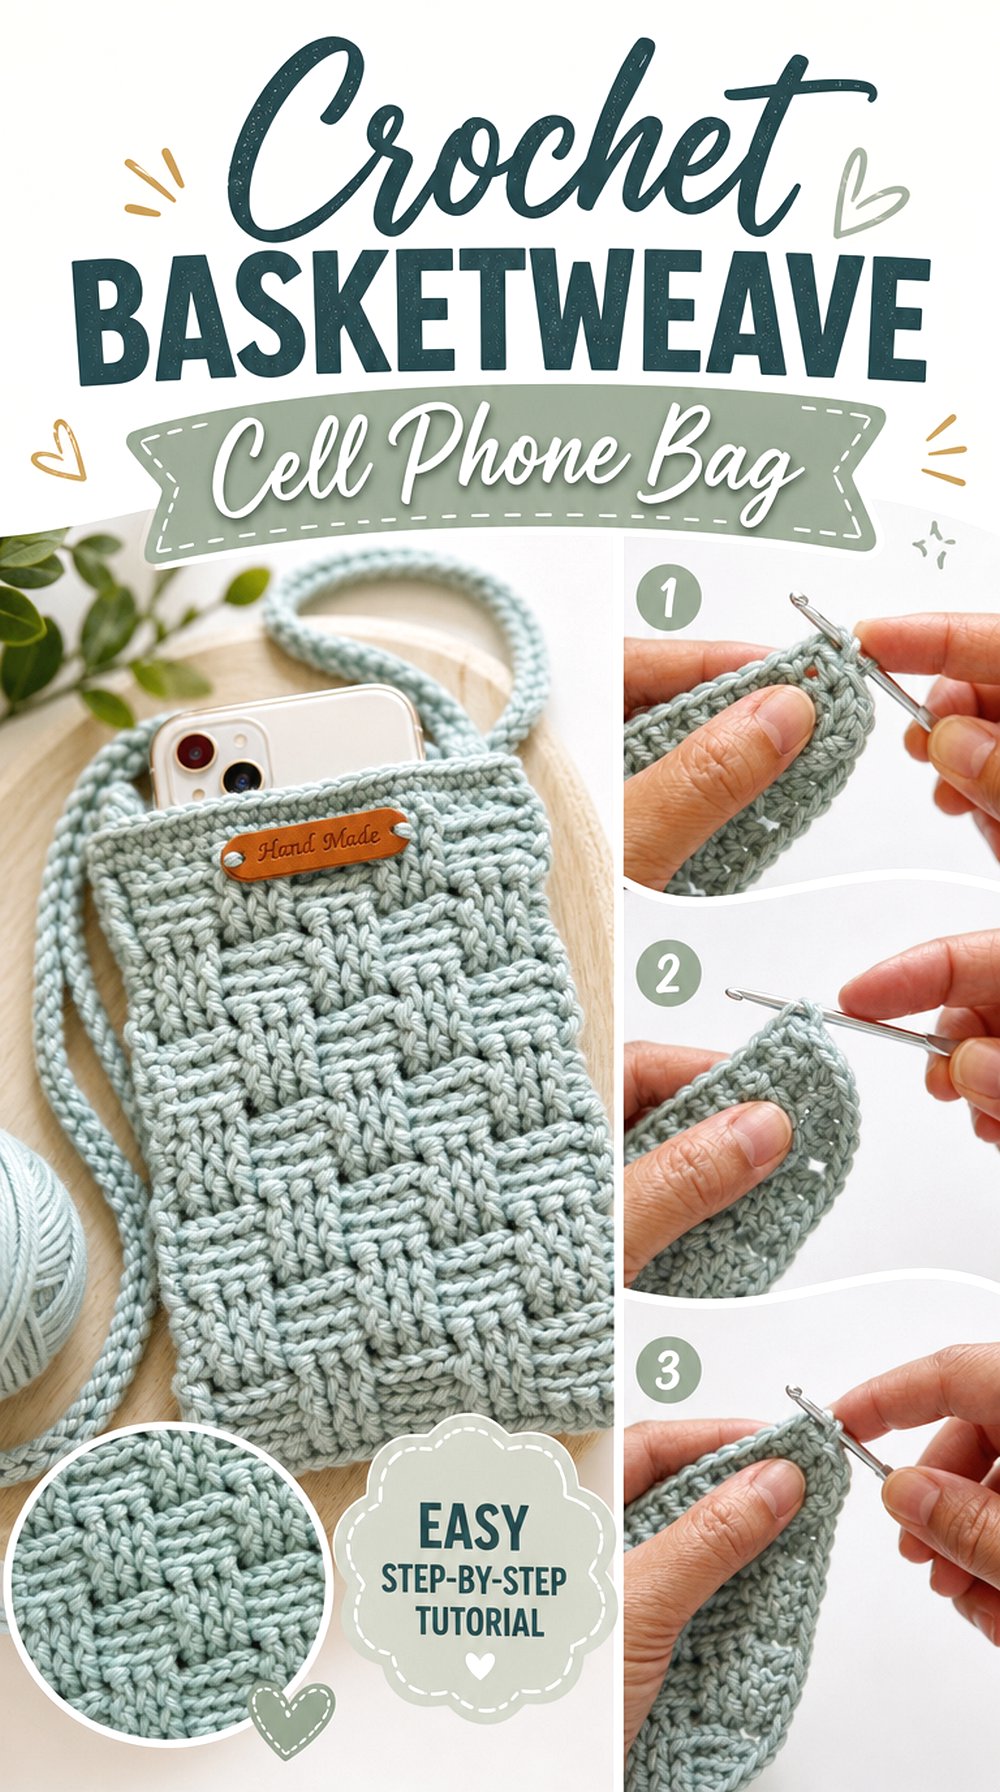
A cell phone bag is a compact way to use basketweave texture on something wearable and practical. The small body keeps the raised stitch pattern visible without needing a large amount of fabric, while the strap changes it from a pouch into a carryable accessory.
This idea is different from the tote and laptop bag because the intended contents are much smaller. Readers should focus on phone fit, opening style, strap placement, and whether the finished bag has enough structure for how they plan to use it.
Small Capacity Keeps the Texture Practical
The narrow shape gives the basketweave stitch enough space to show without making the project bulky. Because the bag is meant for a phone, capacity matters more than decorative size.
Readers should compare their own phone and case to any measurements or finished views shown by the creator. A phone bag that looks roomy in the video may still be too tight for a larger device, thick case, or small extra items.
Strap Placement Deserves a Close Look
A phone bag depends heavily on its strap. The strap affects how the bag hangs, whether it feels balanced, and how easy it may be to reach the opening.
Before starting, readers should watch how the strap is attached and where it sits on the finished body. It is also worth checking whether the tutorial discusses strap length or shows the bag being worn, because photos alone do not always show scale.
Opening Security Is Worth Checking
A basketweave phone bag may look sturdy, but the opening still determines how secure the contents may feel. The tutorial listing describes shaping and finishing the bag, but readers should look closely at the top edge before deciding how they would use it.
For everyday carrying, it is useful to know whether the opening is open, gathered, covered, buttoned, or otherwise closed. Do not assume the bag protects a phone from slipping out unless the source clearly shows that detail.
Creator: Tasty Dumpling Living
6. Crochet Basketweave Tote Bag
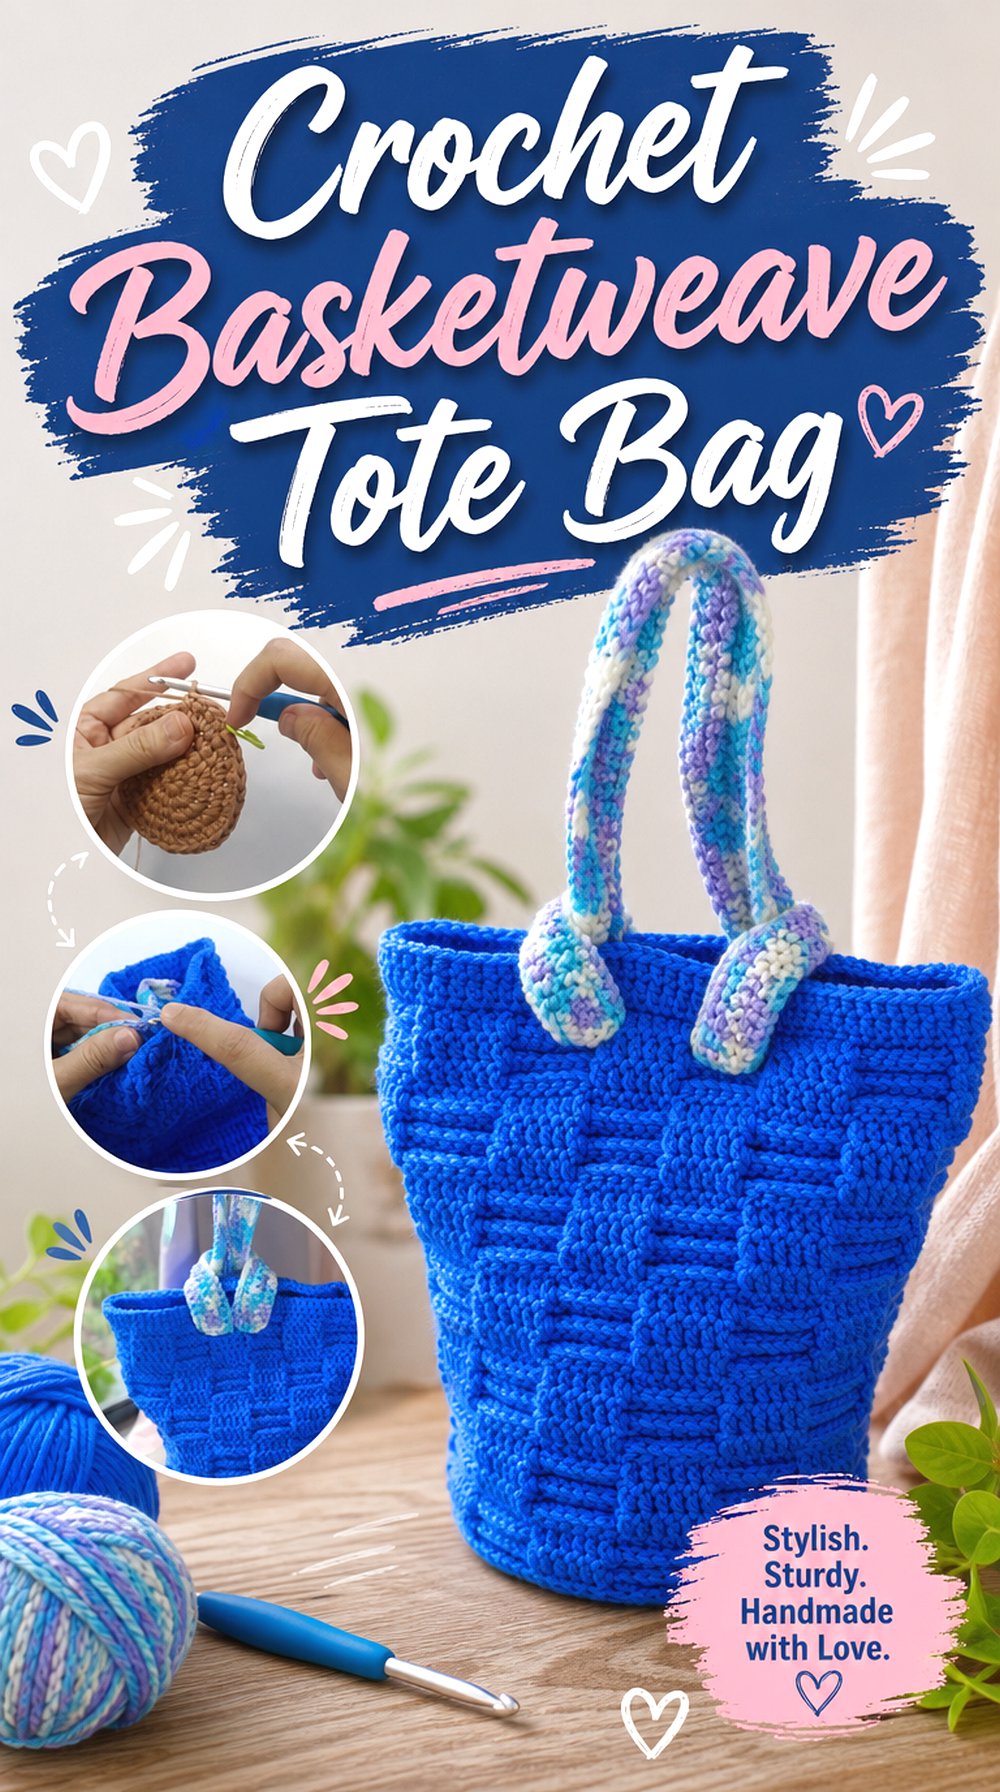
A tote bag gives the basketweave stitch a broader everyday shape than the cell phone bag. The wider body provides more surface area for the texture, and the handles make it feel closer to a casual carry bag than a small pouch.
This project is useful for readers comparing different basketweave bags because it sits between small accessory and larger utility item. The tutorial listing identifies it as a tote bag, so readers should focus on handle shape, body depth, and whether the inside finish is shown clearly enough for their use.
The Wider Body Separates It From Phone Bags
The tote format gives the basketweave stitch a larger field, which helps the woven blocks become part of the bag’s overall style. It is not just a small textured panel; the surface helps define the whole finished item.
Readers should think about what they would actually carry. A tote can look roomy, but the final usefulness depends on size, stretch, handle attachment, and how much the bag opens at the top.
Handle Shape Sets the Carrying Style
The handle area is one of the most important details on a crochet tote. Short handles, shoulder handles, and soft crocheted handles all change how the finished bag may be carried.
Before choosing this project, readers should review the finished views and check whether the handles are shown from the front and side. Handle placement matters because basketweave fabric can have visible texture, and a handle that pulls unevenly may affect the look of the top edge.
Interior Details May Need Reviewing
Some crochet bag tutorials focus mainly on the outside shape and texture, while others include lining or inside finishing. Readers who want to use a tote often should check whether the inside is shown and whether any lining is included.
This is not only about neatness. An interior view can help readers decide whether the bag suits loose items, books, yarn, or occasional light carry.
Creator: Pink’s Cozy Corner
7. Crochet Basketweave Laptop Bag
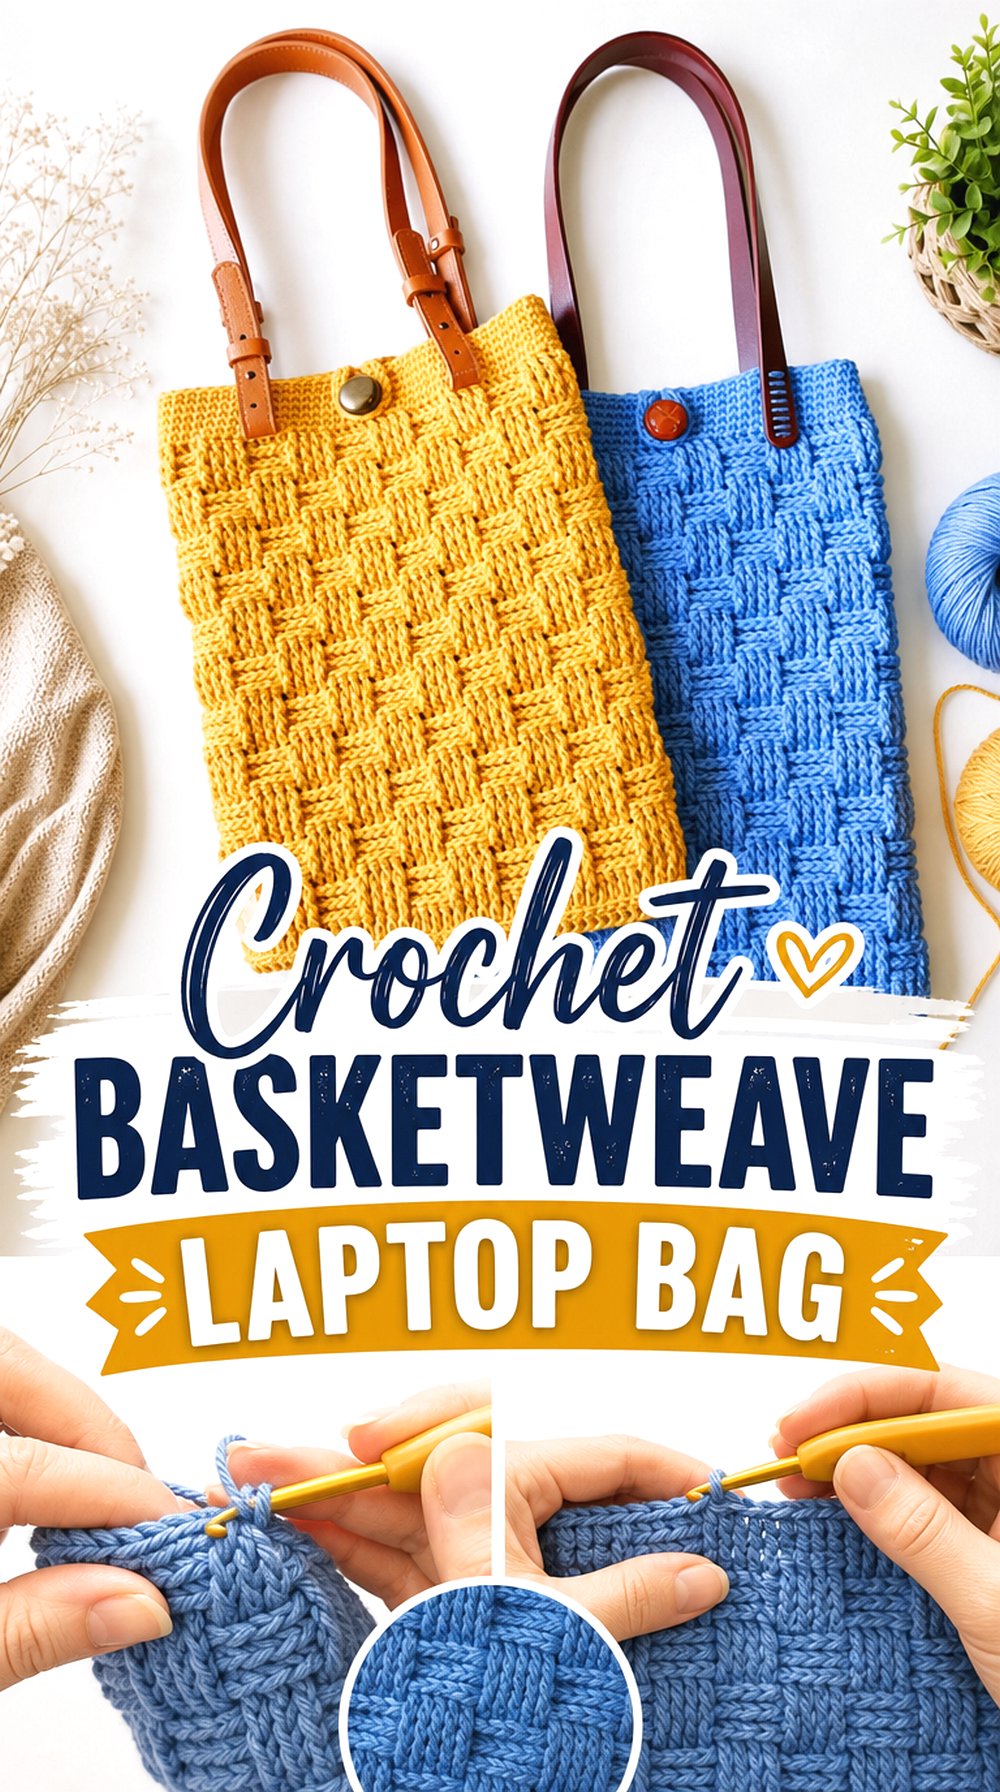
A laptop bag uses basketweave texture in a more structured direction. The finished item needs to relate to a real device, so measurements, handles, lining, and closure details matter more than they would for a decorative pillow or blanket.
This project stands apart from the tote because it is planned around laptop carry. The source information describes a basketweave laptop bag, mentions a lining option, and notes that the bag is meant for a 14-inch laptop. Readers should use the original source for all exact sizing and finishing decisions.
Device Fit Is the First Check
The most important question is whether the finished bag fits the intended laptop. The source notes that the design is meant for a 14-inch laptop, but readers should compare their own device dimensions instead of relying only on the screen size label.
Laptop thickness, case shape, and charger storage can all affect practical fit. Check the creator’s measurements and finished views before treating this as a protective or daily carry option.
Lining Is a Real Project Decision
Unlike simpler bags, this project includes discussion of lining. That changes the planning because lining affects structure, inside finish, and how the bag may handle use.
Readers should decide whether they want a plain crochet interior or a lined version before buying supplies. The original tutorial and source notes are the right places to confirm fabric type, placement, and whether sewing tools or extra materials are needed.
Handle Options Change the Finished Use
The source information describes more than one handle approach, which makes this project more customizable than a plain pouch. Handle type changes the look and how the bag may be carried.
A laptop bag should be reviewed carefully at the handle points. Readers should check how the handles are attached and whether the finished view matches their preferred use, especially if the bag will hold more than just the laptop sleeve itself.
Specialty Lining Notes Should Be Followed
The source discusses a special lining material and includes safety-related handling information. Readers should not substitute or handle specialty materials casually.
For this reason, this project needs more source review than a simple blanket. Use the original tutorial and written notes for the exact lining instructions, warnings, and material choices rather than guessing from the finished photos.
Creator: HandmadebyRaine
8. Crochet Bamboo Handle Basketweave Handbag
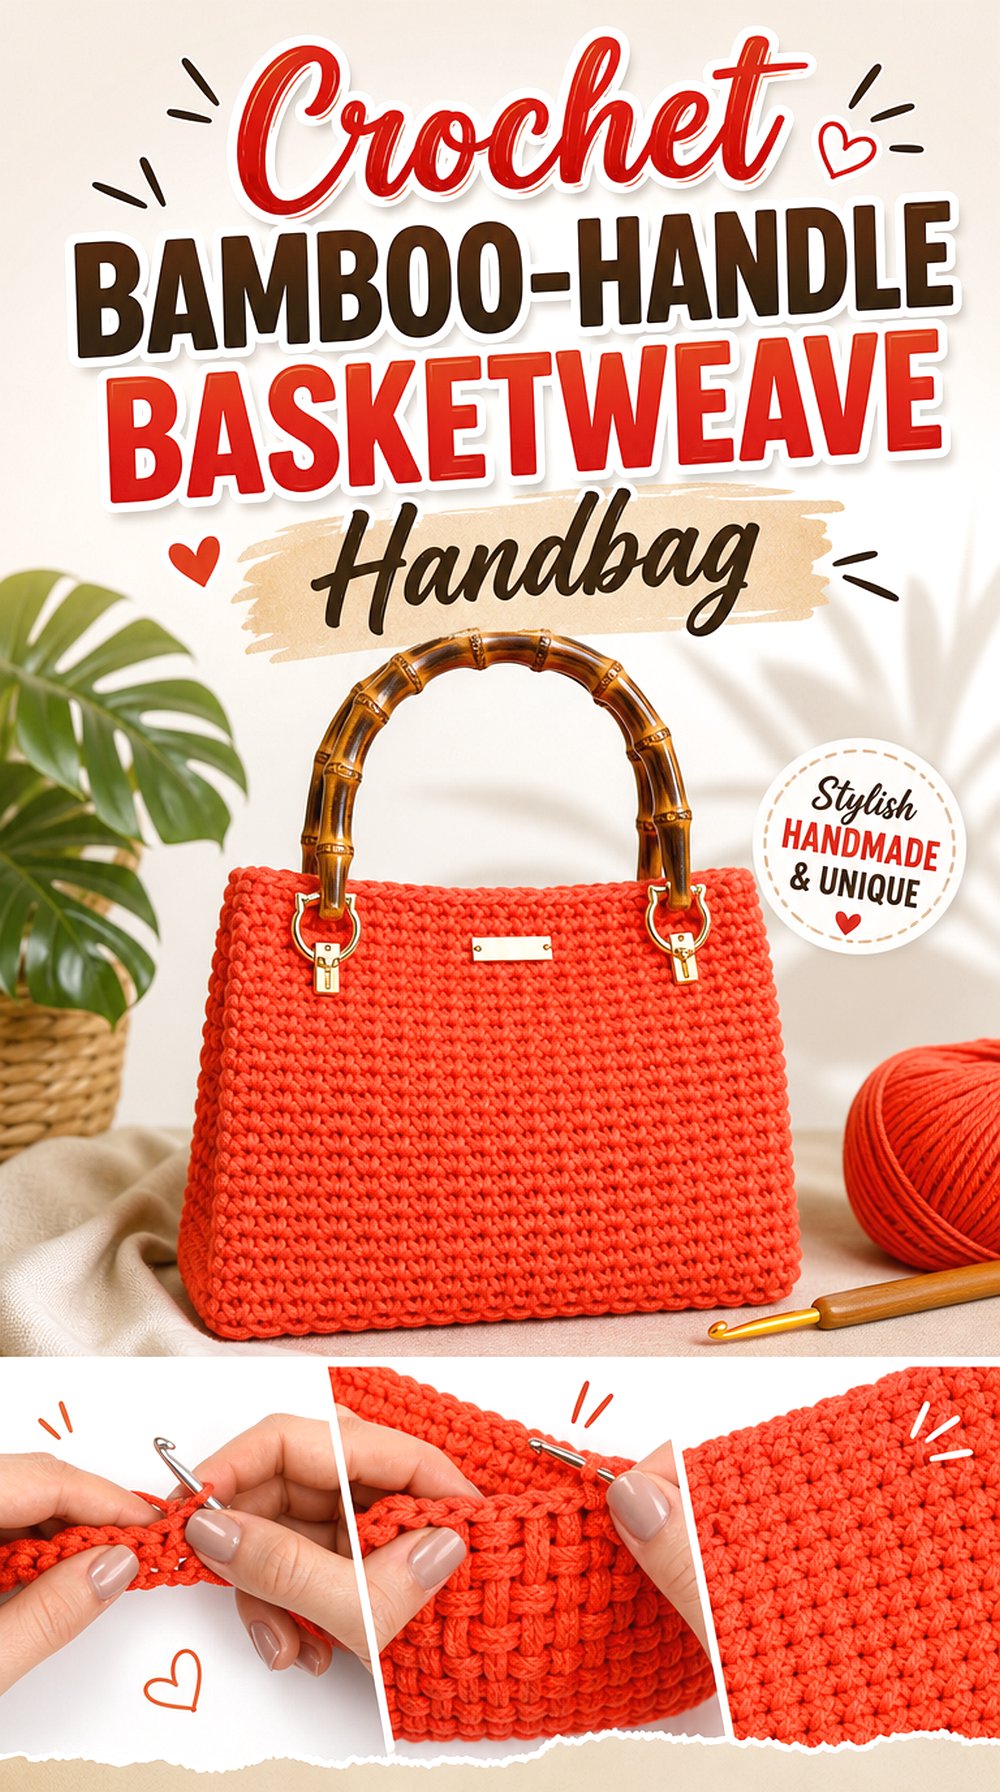
This handbag uses basketweave texture with a more polished accessory shape. The bamboo handles are a major visual feature, so the finished result feels different from the soft tote and the small phone bag. It is more of a handbag-style project than a simple carry pouch.
The tutorial listing includes bamboo handles and additional hardware in the materials. That makes this a project where readers should review supply details before starting, because the final look depends on more than yarn and hook alone.
Bamboo Handles Define the Look
The handles are not just functional; they shape the character of the whole bag. Bamboo handles give the finished item a framed, handbag-style top that separates it from soft crocheted-handle projects.
Readers should check the handle size and attachment method in the original source. If the handles are changed, the proportions of the bag may also change, especially around the top edge where the basketweave body meets the hardware.
Hardware Appears Part of the Plan
The source listing mentions extra components along with the yarn and handles. That means readers should not treat this as a yarn-only project.
Before buying supplies, it is useful to make a complete materials list from the creator’s information. Hardware can affect assembly, finished weight, and the way the bag opens or hangs. It may also limit easy substitution if the replacement pieces are a different size.
Structure and Size Need Reviewing
A handbag needs a clear shape, especially when the surface stitch is already textured. The basketweave body, handle placement, and upper edge all work together to create the final silhouette.
Readers should watch for front, side, and top views of the finished bag. If they want to carry daily items, they should also confirm capacity and opening style rather than assuming the handbag will fit everything a tote might hold.
Creator: Uncinetto D’Argento – Silvia Lampo
9. Crochet Basketweave Pillow Cover
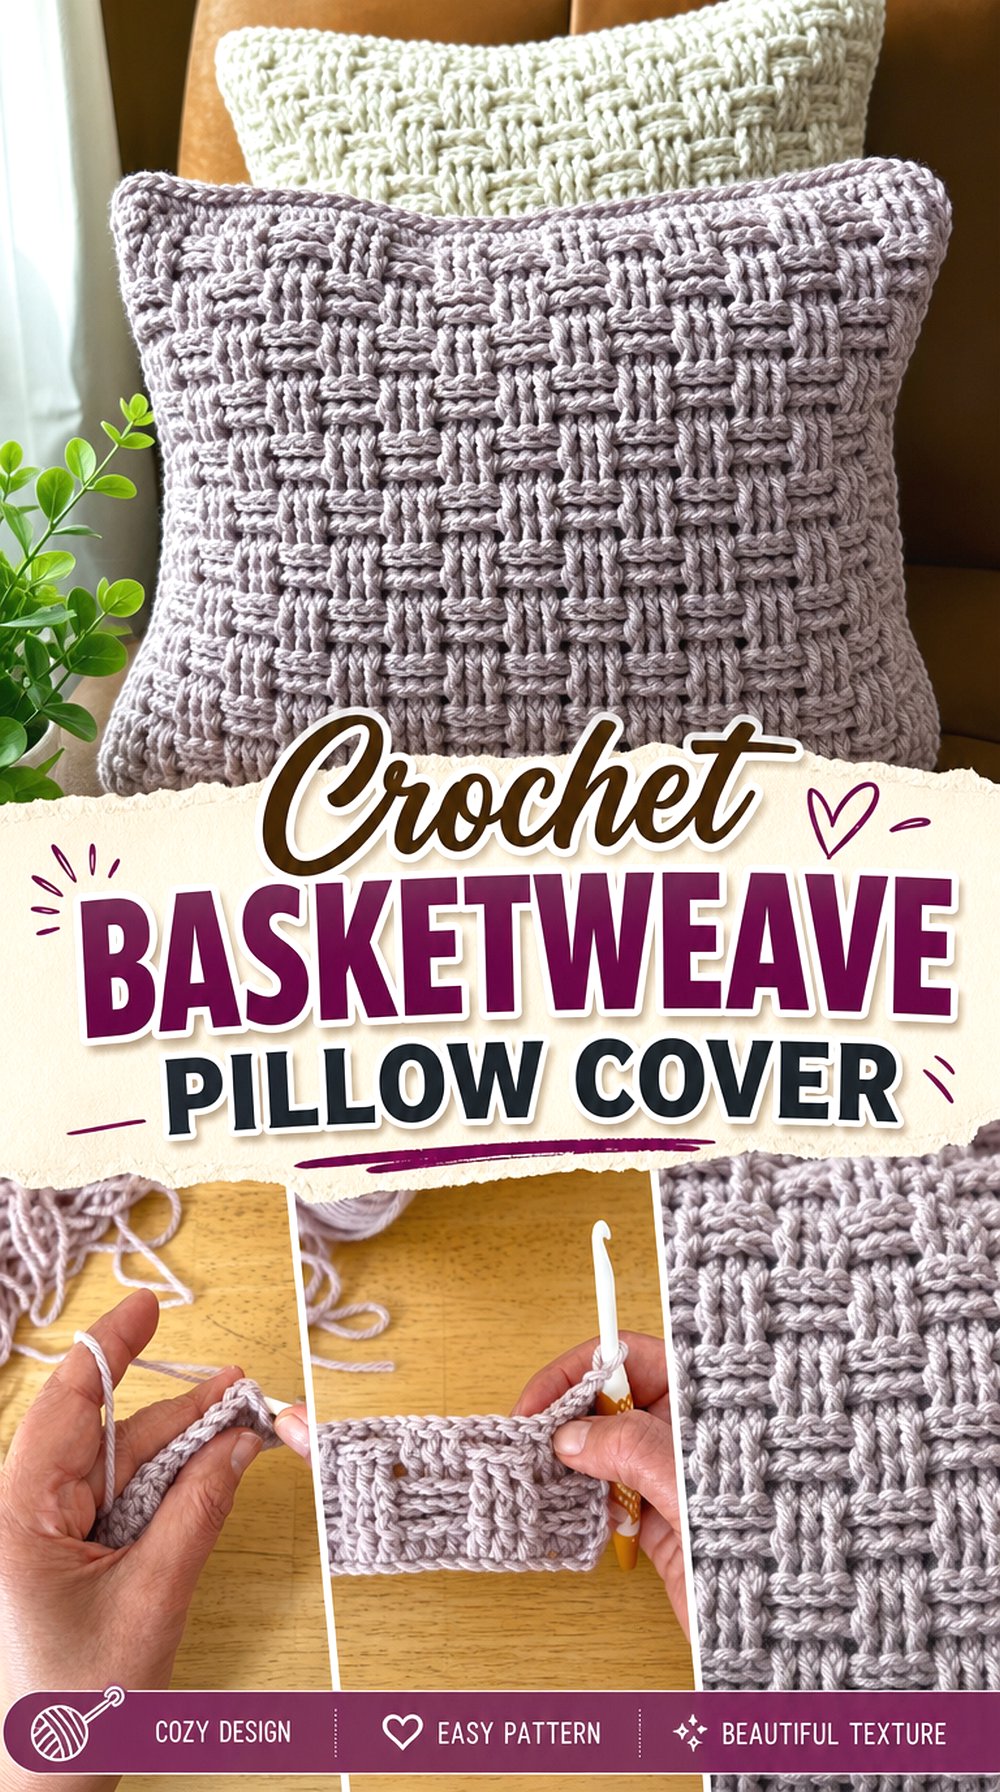
A pillow cover is a strong home decor use for basketweave stitch because the raised texture sits on display instead of being folded away. The square or rectangular front becomes a textured panel, which can make a plain sofa, chair, or bed feel more layered without using many colors.
This project is different from the blankets because fit depends on a pillow insert. Readers should think about the insert size, the front texture, the back finish, and how the cover closes before choosing it for a room.
A Pillow Cover Shows Texture From Across the Room
Basketweave stitch has enough depth to be visible as a decor texture, not just a close-up crochet detail. On a pillow cover, the woven blocks can stand out from a chair or sofa without needing fringe, appliqué, or color changes.
Readers who want a quieter look may choose a neutral yarn, while readers who want the texture to stand out may prefer a color that clearly shows shadows between the raised sections.
Insert Size Controls the Finished Fit
A pillow cover has to match its insert more closely than a blanket has to match a bed. If the cover is too loose, the texture may look saggy; if it is too tight, the stitches may stretch differently than expected.
The tutorial listing mentions a pillow insert in the materials. Readers should check the creator’s exact sizing notes and compare them with the insert they plan to use before starting.
Back Closure Details Should Be Checked
The front texture is only part of the project. A pillow cover also needs a back or opening that allows the insert to go in cleanly.
Before committing, readers should look for how the back is handled and whether the cover is removable. This matters for practical use, cleaning decisions, and how polished the pillow looks from different angles.
Creator: Cozy Loop Crochet
10. Crochet Classic Basketweave Headband
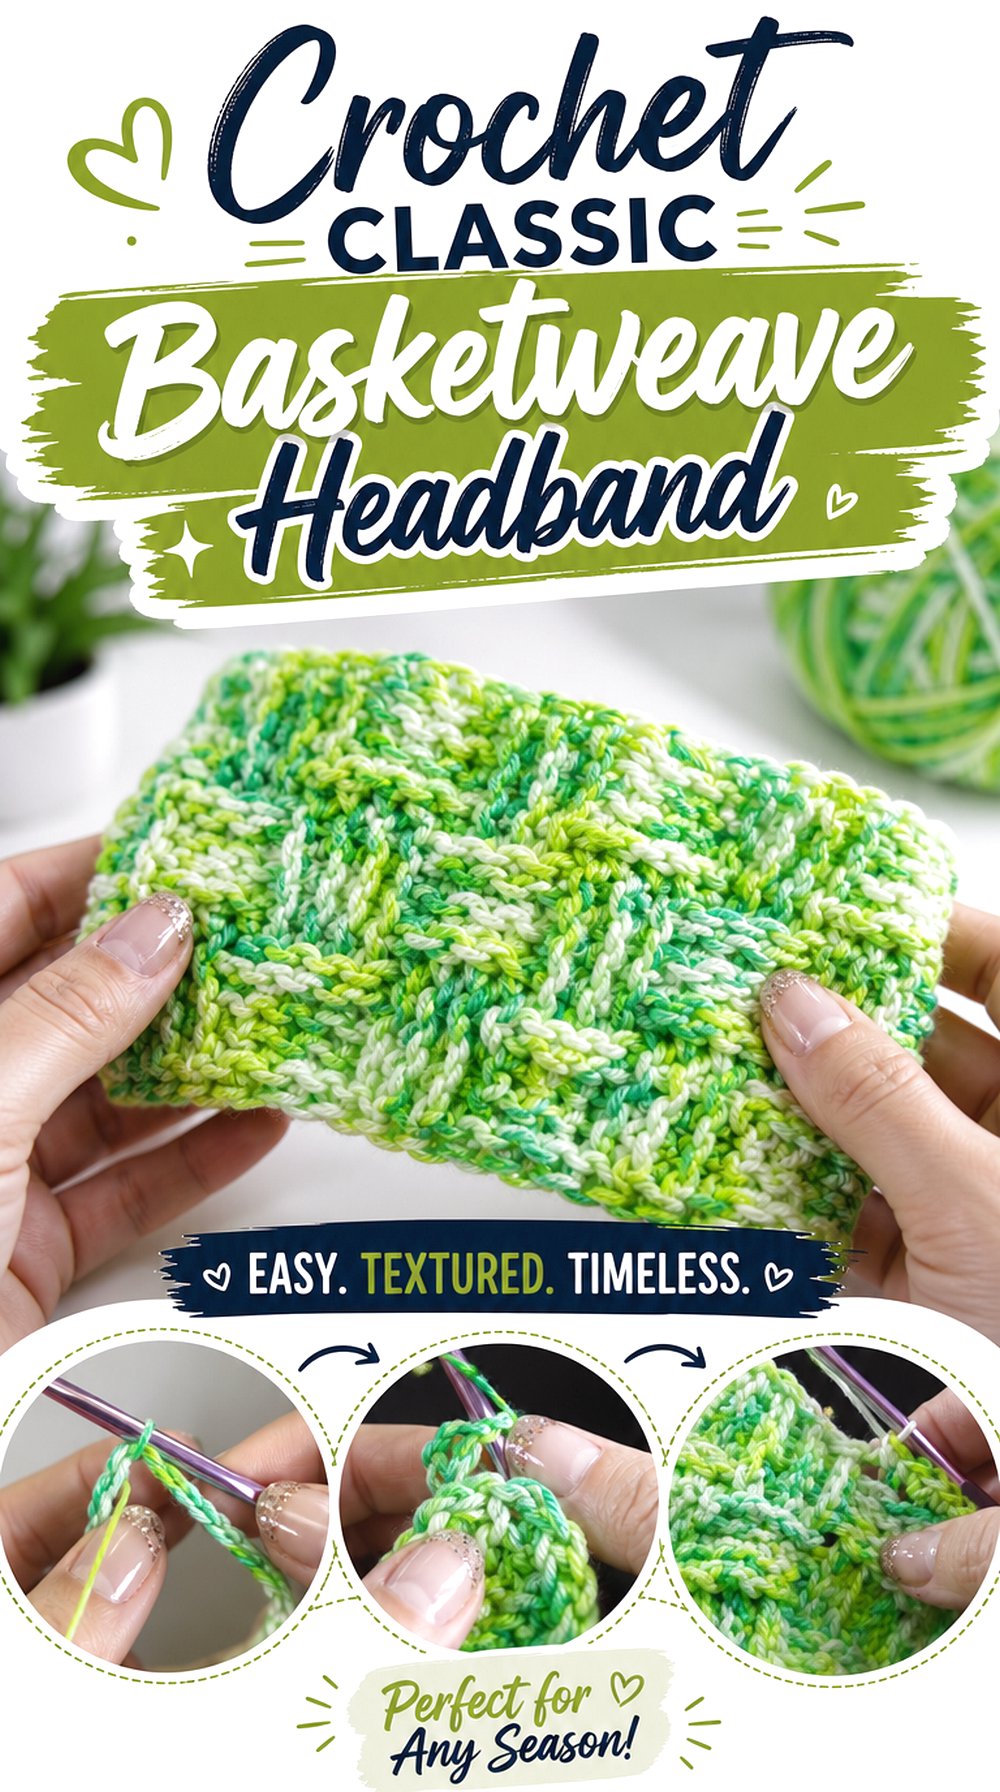
A classic headband gives the basketweave stitch a narrow wearable format. The texture is close to the face, so neat edges, stitch definition, and fit all become important. Unlike a scarf, a headband has less room to hide sizing issues.
This option is different from the twist headband because the focus is on a cleaner band shape rather than a gathered front detail. Readers should use the tutorial for the exact fit, joining method, and post-stitch guidance.
A Flat Band Keeps the Woven Texture Clear
The simpler band shape lets the basketweave pattern show across the surface without competing with a twist or heavy shaping. That makes it useful for readers who mainly want to practice the stitch in a wearable item.
A flat headband also makes it easier to see whether the basketweave blocks are lining up neatly. Small mistakes can be more visible on a narrow accessory than on a large blanket.
Post-Stitch Texture Also Affects Thickness
Basketweave texture is raised, so a headband made with this stitch may feel thicker than one made with a flatter stitch. Readers should think about when and how they want to wear it before choosing yarn.
The tutorial listing mentions learning front and back post stitches. Those stitches create the woven look, but they also influence the density of the finished fabric.
Seamed Fit Needs Attention
The source description refers to slip stitching fabric together, so the join is part of the finished headband. That seam area should be watched carefully because it affects both fit and appearance.
Readers should check how the finished headband sits and whether the seam is placed where they expect it. For wearables, even a small sizing difference can change comfort and use.
Creator: BonnieBayCrochet
11. Crochet Mini Basketweave Twist Headband
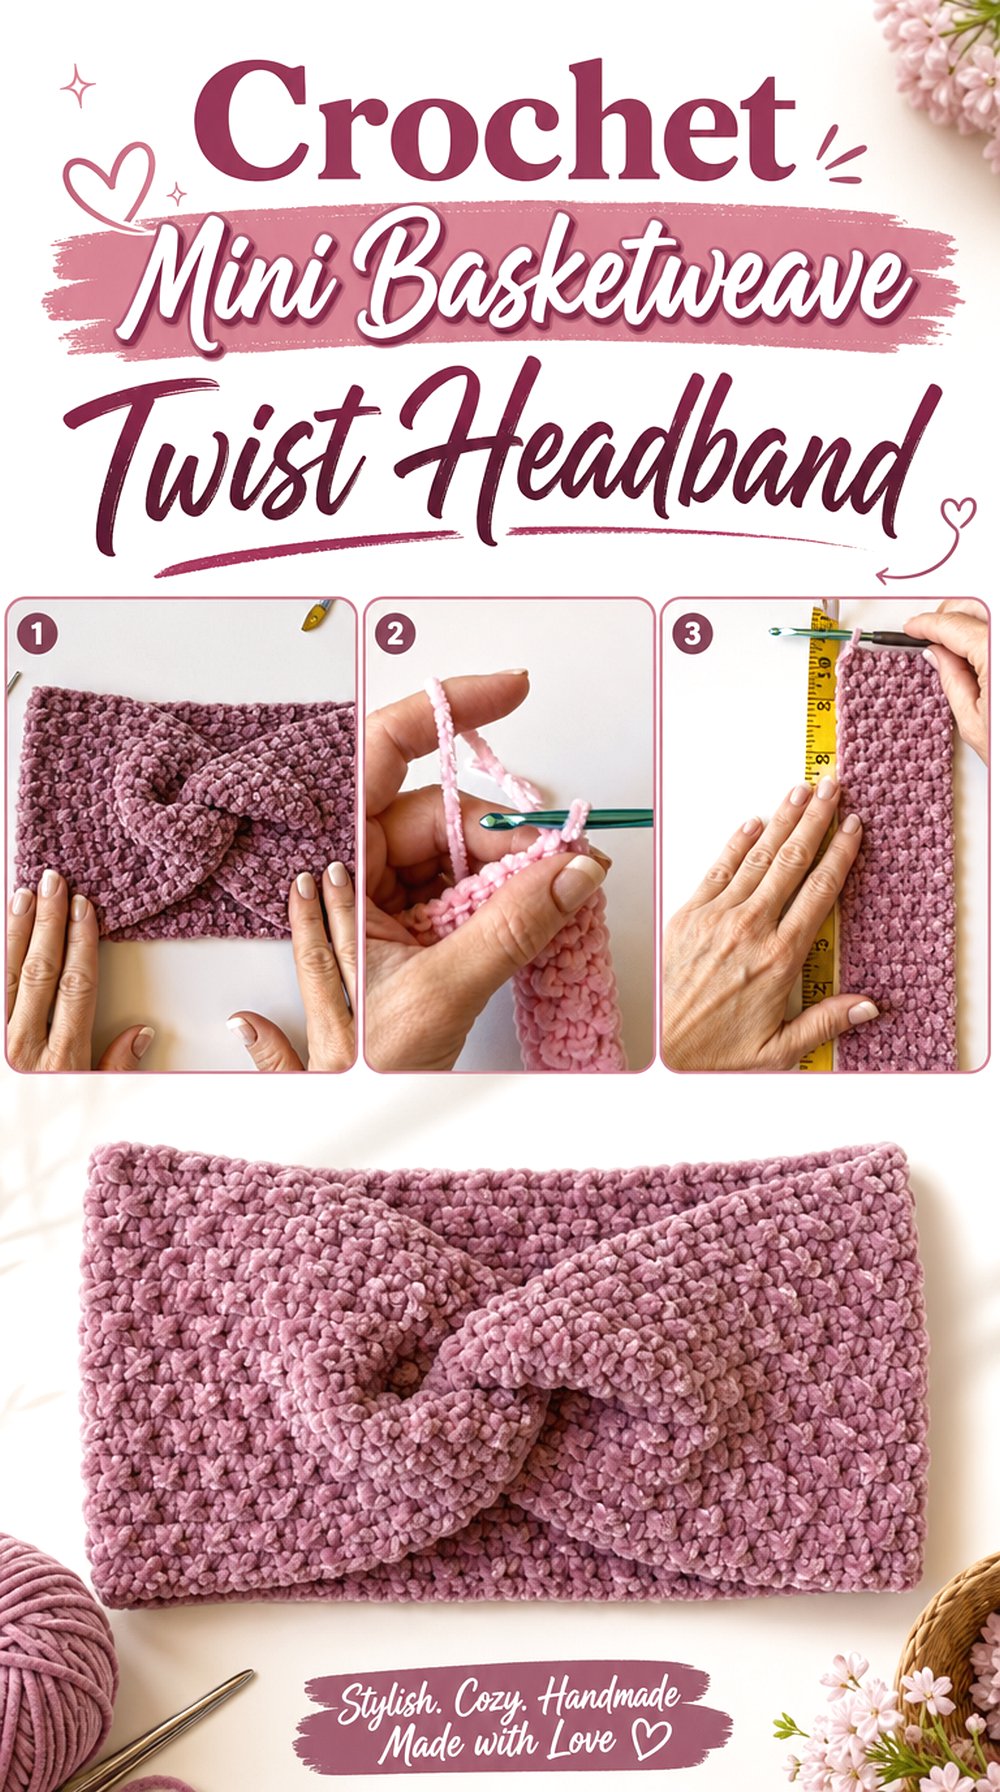
The twist headband uses basketweave texture in a more styled front shape. Instead of a plain band, the twist changes how the accessory sits at the forehead and gives the finished piece a distinct center feature.
This project is separate from the classic headband because the visual focus is not only the stitch texture but also the folded or twisted front. The source listing identifies it as a mini-basketweave twist headband, so readers should pay attention to both the stitch and the final shaping.
The Twist Changes the Front View
The twist creates a gathered-looking focal point, so the basketweave texture will not appear the same across the entire headband. Some sections may fold or overlap, which can make the front look fuller.
Readers should decide whether they want a clean flat band or a more styled front before choosing between this and the classic headband. The two projects use the same general texture idea in different wearable shapes.
Velvet-Like Texture Can Hide Details
The listing refers to a velvet twist headband, and plush yarns can make stitch definition look softer. That can be attractive, but it also means the basketweave blocks may not appear as crisp as they would in smoother yarn.
Readers should view the finished sample closely before choosing yarn. If the goal is sharp basketweave definition, yarn surface matters.
Fit Depends on Length
A twist headband needs enough length to sit comfortably while still holding its shape. Because the front is folded or twisted, the finished fit is not only about the flat measurement.
12. Crochet Basketweave Dishcloth
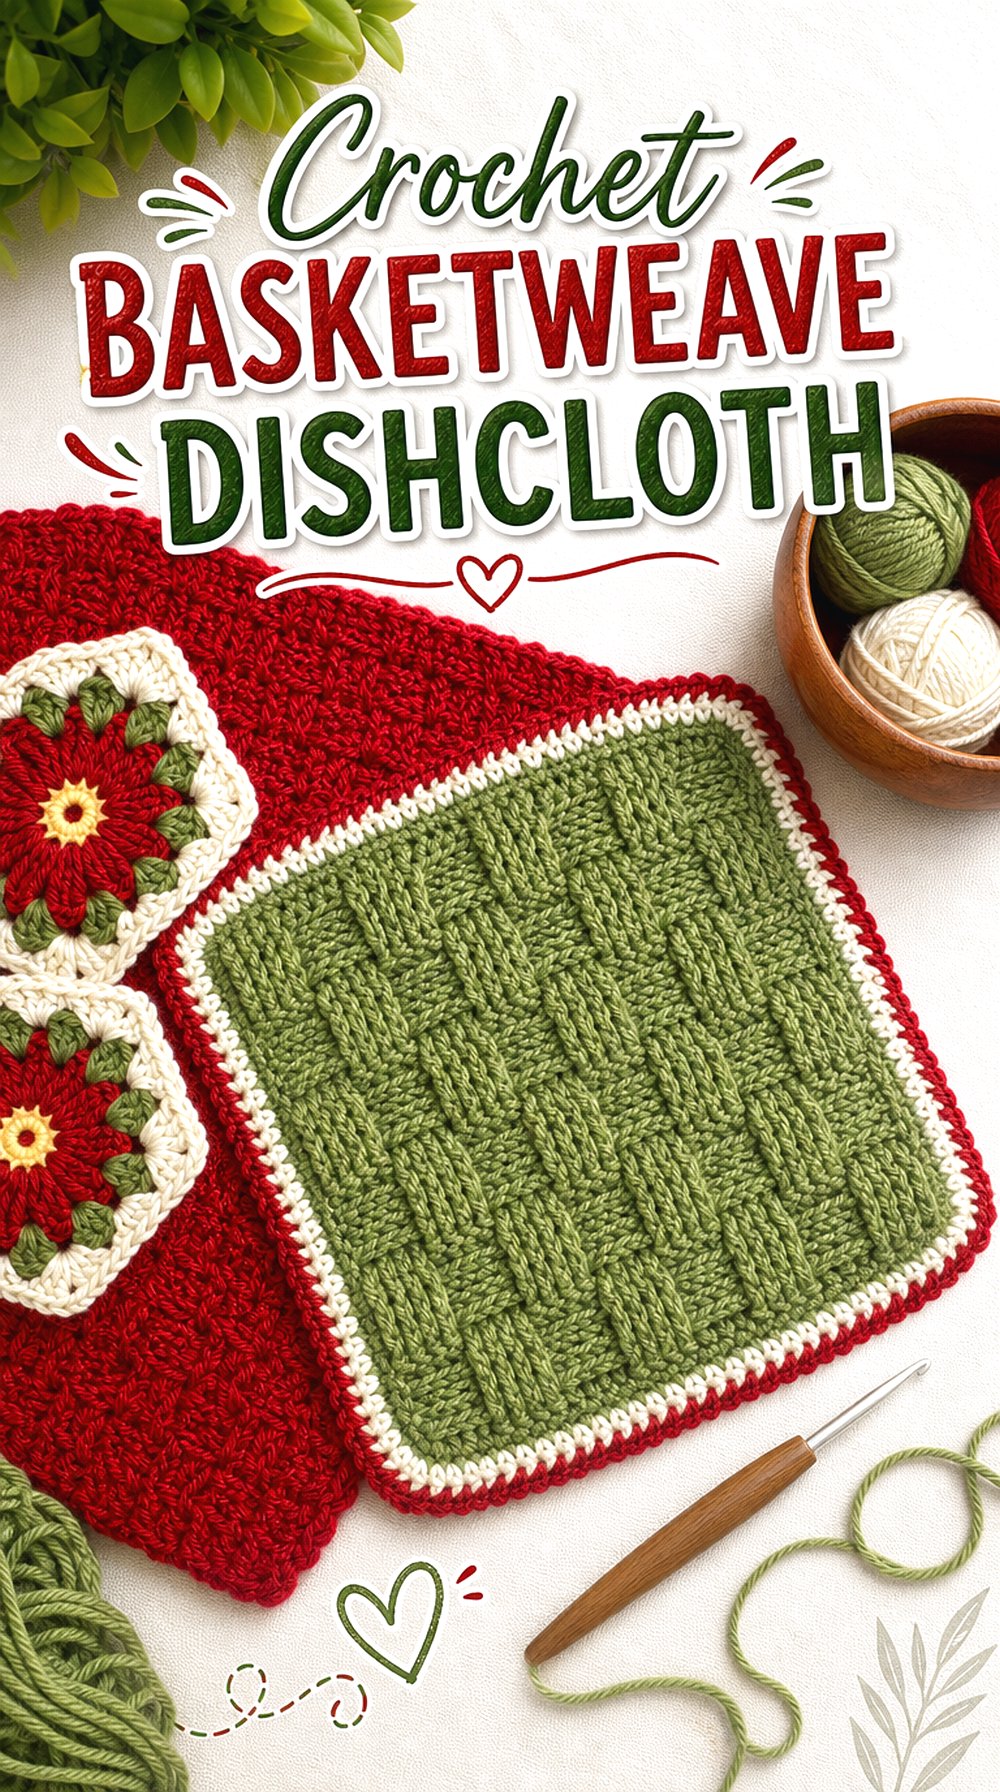
A dishcloth is one of the most practical small ways to try basketweave stitch. The compact shape makes the raised texture easy to see, and the project is small enough for readers who want to focus on stitch neatness before moving to a blanket, bag, or pillow.
This option differs from the placemat and mug cozy because it is a flat kitchen cloth. The tutorial listing includes a border, which is useful because the edge can make a textured cloth look more finished.
A Small Square Is Useful for Practice
A dishcloth gives readers a manageable surface for learning how the basketweave blocks behave. The project is small, but it still shows the core texture clearly.
This makes it useful before attempting a larger blanket or wearable. If the stitch alignment looks uneven on a dishcloth, readers can notice and correct their technique before using more yarn on a bigger project.
Border Treatment Finishes the Edges
The source listing mentions a border to finish the dishcloth. This matters because basketweave texture can make edges look more active than a plain stitch would.
A border can help frame the woven center and make the cloth look complete. Readers should follow the original tutorial for the exact border method rather than adding an unsupported edge from memory.
Kitchen Use Needs Fiber Awareness
A dishcloth is used differently from a scarf or pillow. Readers should check the creator’s material list and also keep the yarn label for care information.
The source lists cotton yarn options, but any substitutions should be made carefully. Kitchen items may be handled, rinsed, and dried often, so fiber content and care instructions matter more than they would for a decorative swatch.
Creator: Kelly Rene Everyday
13. Crochet Basketweave Travel Mug Cozy
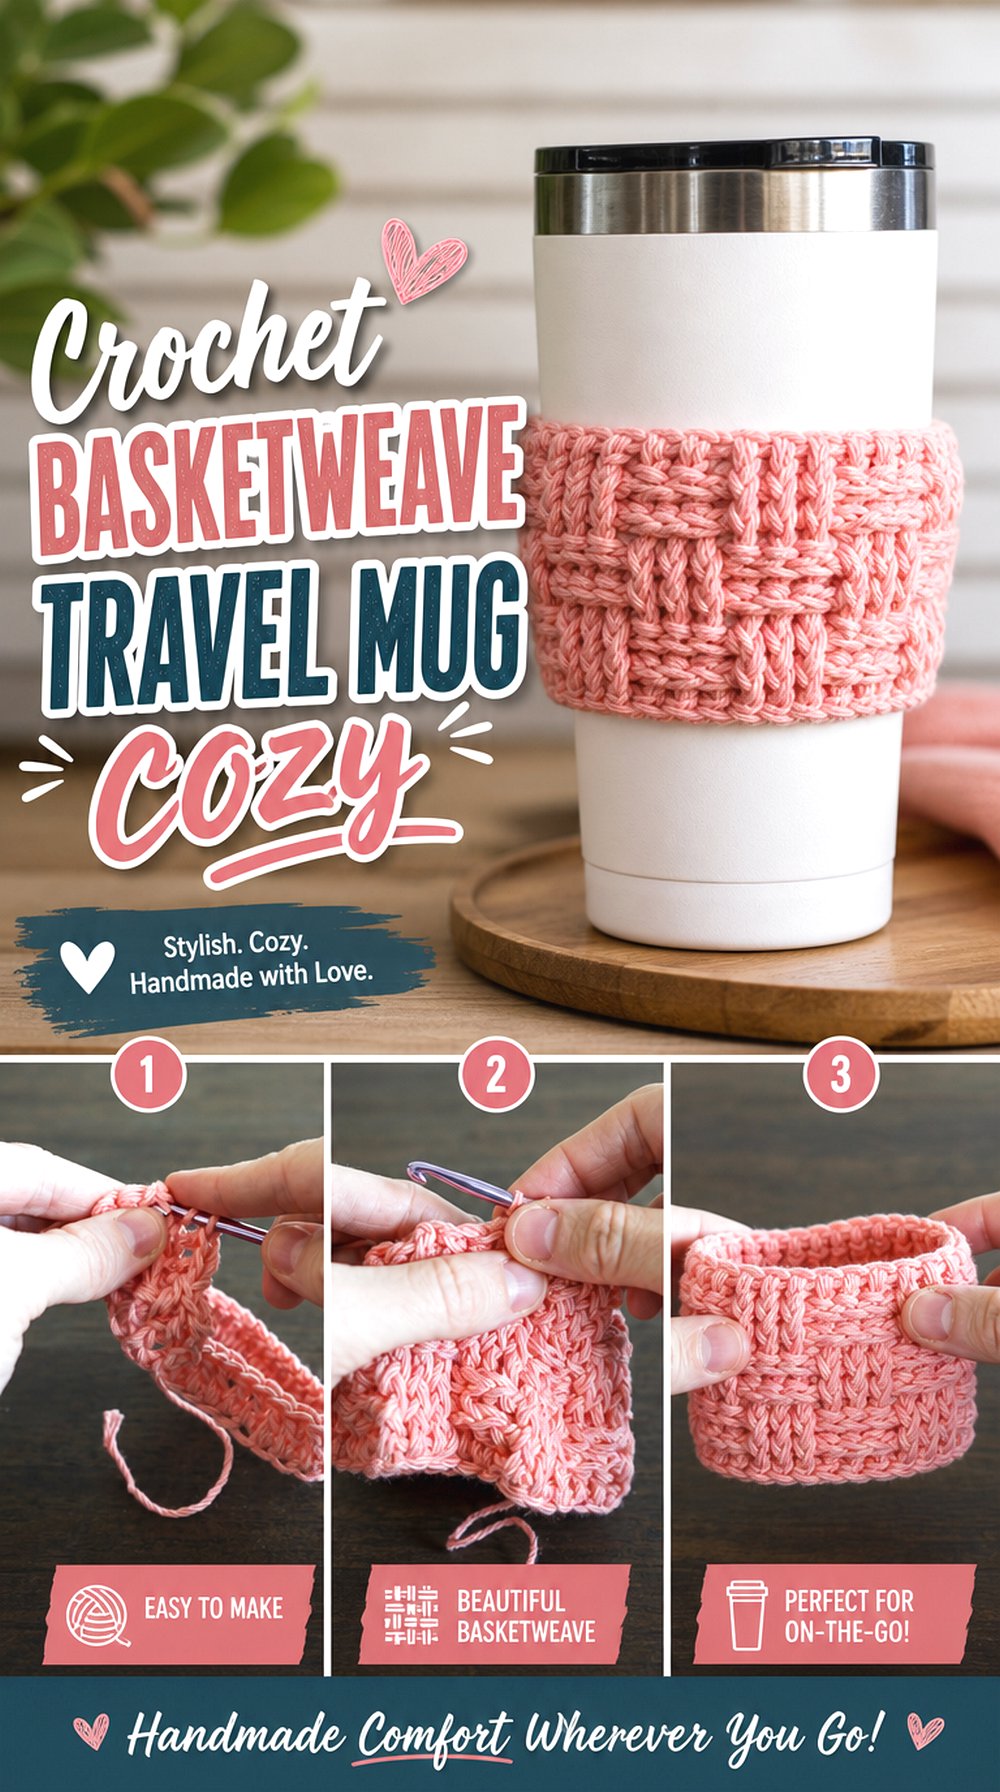
A travel mug cozy uses basketweave texture on a small cylinder, giving the stitch a different look from flat projects. The raised woven pattern wraps around the mug, so height, circumference, and stretch are the main points to review.
This idea is useful for readers who want a small project with a finished purpose. It is also more size-sensitive than a dishcloth because cups and travel mugs vary widely, so the original source should be checked before choosing a mug or yarn.
Height Is the Main Sizing Choice
The source description discusses adjusting the height by rounds, which makes height an important planning detail. A shorter cozy may leave more of the cup exposed, while a taller one changes the look and grip area.
Readers should decide whether they want the cozy to cover just the center of a travel mug or a larger vertical section. The original tutorial should be used for exact sizing choices.
Cup Fit Is Not Universal
Travel mugs are not all the same width, so one cozy will not automatically fit every cup. The creator’s notes include guidance for changing width, which readers should review before starting.
This is especially important if the cozy is intended for a favorite mug. Measure or compare the cup first, then use the source guidance to avoid making a cozy that is too loose or too tight.
Texture Adds Grip Without a Handle
The raised basketweave surface gives the cozy a more tactile finish than a smooth band. That can make the finished piece feel more substantial in the hand, although it should not be treated as heat protection unless the source clearly states and supports that use.
Readers should focus on fit, height, and material choice. The cozy’s purpose depends on the cup and how it will actually be handled.
Creator: The Up North Home
14. Crochet Tunisian Basketweave Placemat
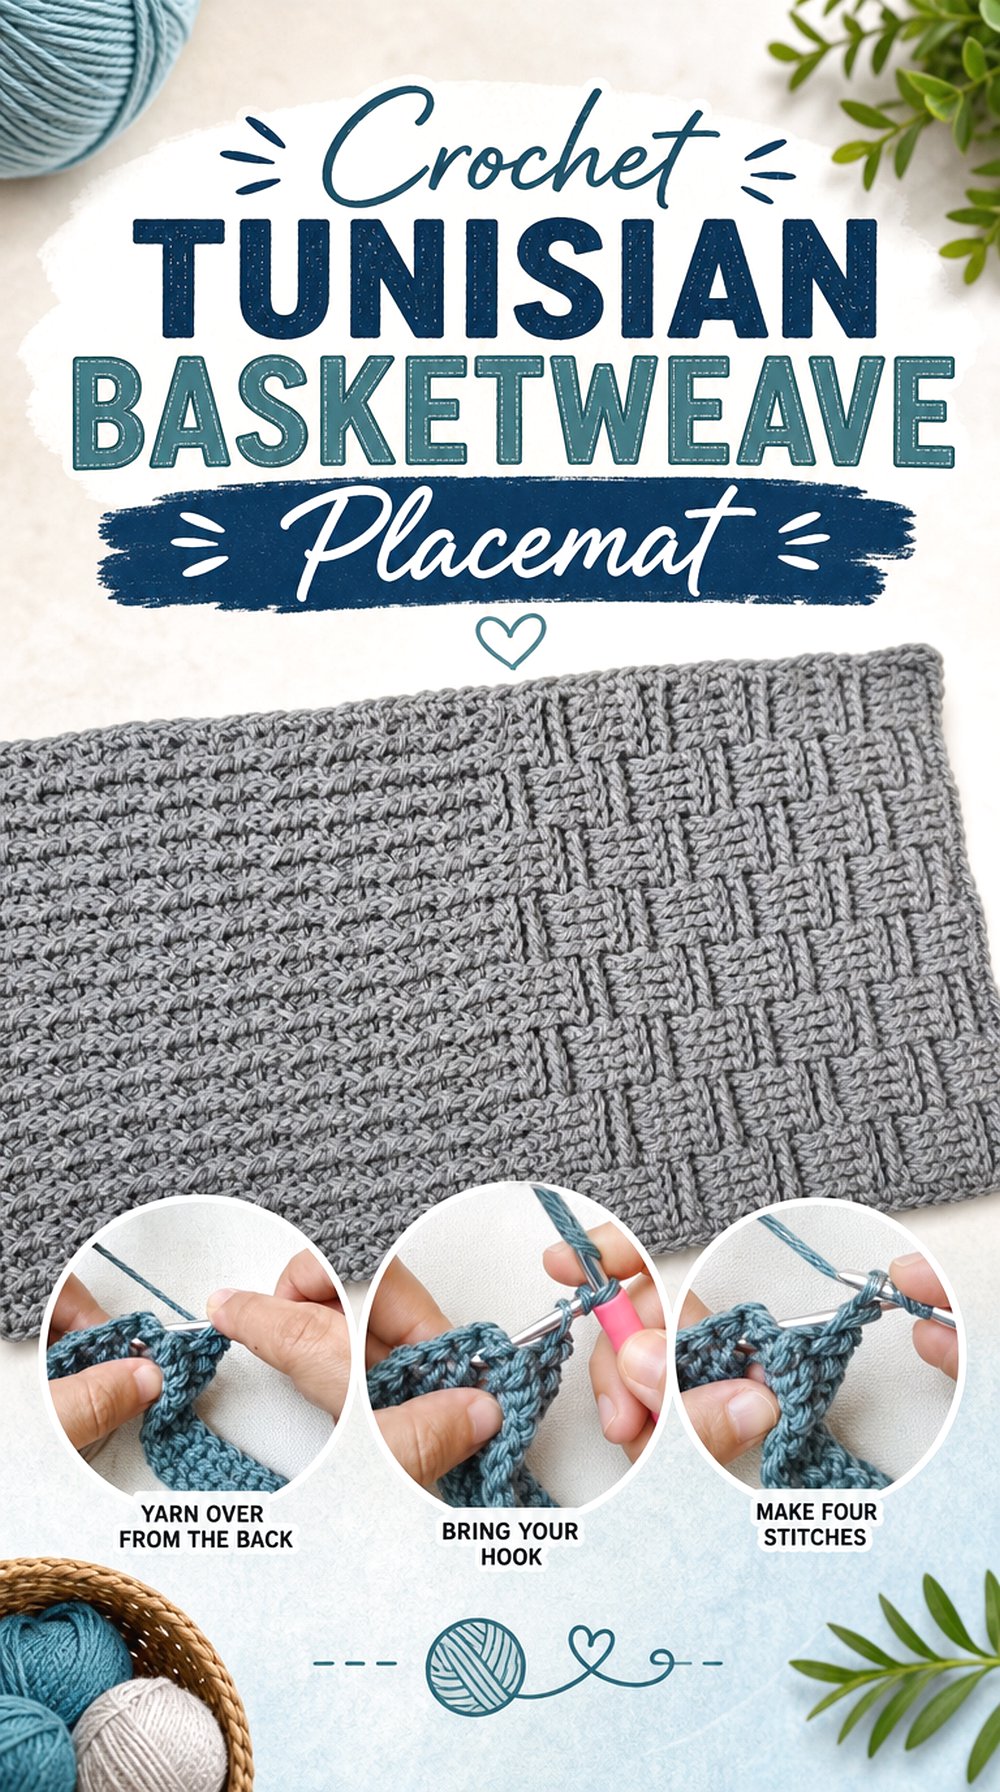
A Tunisian basketweave placemat gives the woven look a different stitch structure from the standard front-post and back-post crochet projects in this list. The finished item is flat, rectangular, and meant for table use, so size and surface finish matter most.
The source listing describes a rectangular placemat and gives finished measurements after blocking. This makes it a useful option for readers who want a home project that is smaller than a blanket but more display-focused than a dishcloth.
Tunisian Fabric Gives a Different Basketweave Look
This project uses Tunisian crochet techniques to create a basketweave-like texture, so the finished surface will not look exactly like the post-stitch blankets or headbands. That difference is part of its appeal.
Readers interested in texture variety should compare this placemat with the standard basketweave projects before choosing. It offers a different learning format and a different finished fabric style.
Table Size Is the Practical Measure
The source listing gives the blocked final placemat measurements as 17.5 x 12.5 inches. That helps readers decide whether the finished piece fits their table setting, tray, or display area.
A placemat needs to work with plates, utensils, and available surface space. Readers should check the finished measurements before assuming it will match their current table setup.
Blocking Is Part of the Finished Result
The listing describes the measurements as blocked, so finishing affects the final size and appearance. That makes blocking information more important here than it might be for a soft throw or simple practice swatch.
Readers should review the creator’s notes before skipping the finishing stage. A placemat usually needs a flatter, cleaner surface than a scarf or headband.
Creator: Exquisite Crochet UK
15. Crochet Basketweave Scarf or Muffler
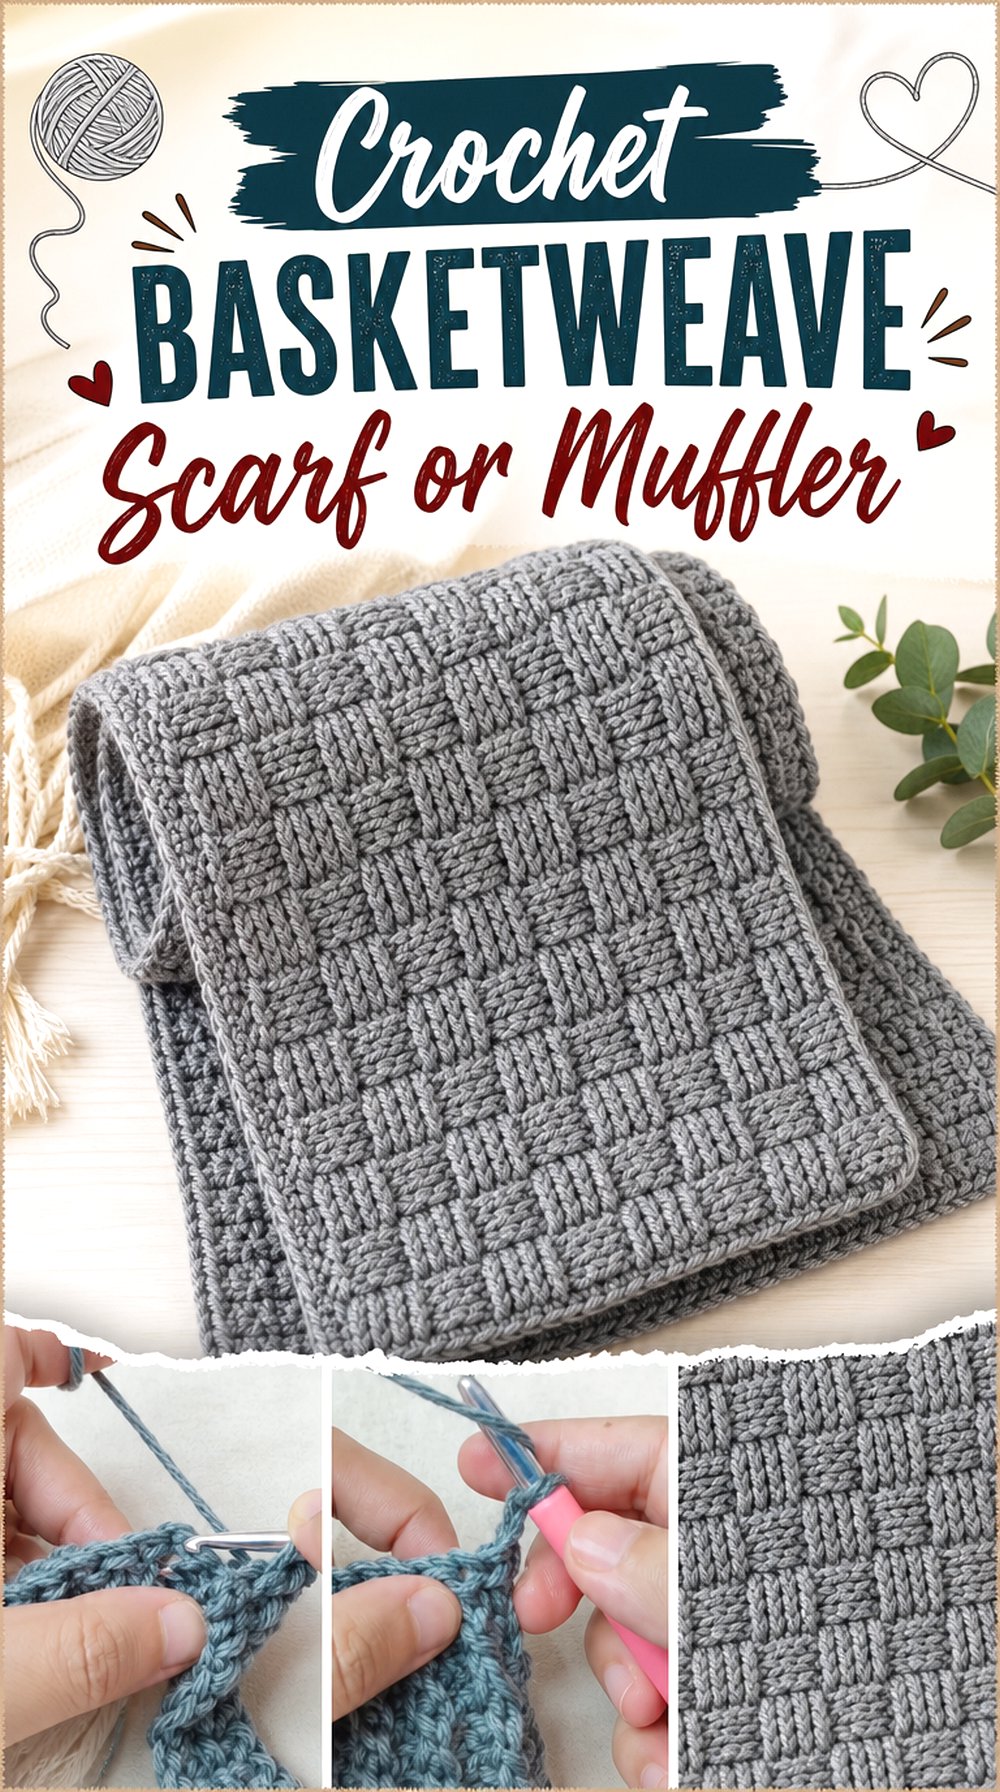
A scarf or muffler turns basketweave texture into a long wearable strip. This project is different from the headbands because length, drape, and how the scarf wraps are just as important as the stitch pattern.
The tutorial listing describes a men’s and women’s scarf or muffler using basketweave stitch and ribbing. That combination gives the finished accessory more texture variation than a scarf made entirely in one uninterrupted surface.
A Narrow Wearable Shows Both Sides
Scarves move, fold, and twist while worn, so both sides of the fabric may be visible. Basketweave stitch often has strong texture on the surface, and readers should check the finished views to see whether they like the look from different angles.
This matters more for a scarf than for a pillow, where one side may stay against an insert or sofa.
Ribbed Sections Change the Texture Balance
The source listing mentions both basketweave stitch and ribbing stitch. That means the finished scarf is not only one texture from end to end.
Readers should look at how the ribbed sections and basketweave sections relate to each other. A mixed-texture scarf can feel more structured, but the exact placement and proportions should come from the original tutorial.
Length Should Match How It Will Be Worn
A scarf can be short, long, wrapped once, or worn hanging straight. The best length depends on the wearer and the styling preference.
Readers should review the creator’s sizing details and finished view before starting. Basketweave texture can add weight and thickness, so length should be chosen with the finished fabric in mind rather than copied from a flat, lightweight scarf.
Creator: Let’s All Crochet
Which Basketweave Project Should You Choose First?
Choose a small flat project if you mainly want to understand the stitch. The dishcloth and placemat keep the texture visible without the commitment of a blanket. For home decor, the pillow cover is useful when you want a finished item that displays the stitch every day, while the rectangle, baby, throw, and velvet blankets give the stitch more space.
For bags, pick by purpose first: phone carry, tote use, laptop fit, or handbag styling. For wearables, the classic headband is cleaner, the twist headband has more front detail, and the scarf gives the basketweave stitch the most length and movement.
Conclusion
These crochet basketweave stitch ideas show how much the same woven texture can change from one project type to another. Blankets and pillows make the stitch broad and decorative, while dishcloths, mug cozies, and placemats keep it practical and compact. Bags need closer attention to handles, lining, openings, and size. Wearables need careful fit because the raised texture can affect thickness and drape.
Start with the project that matches the way you want to use the finished item, then open the original tutorial for the exact counts, materials, shaping, and finishing details.
FAQs
What is the best small crochet basketweave project to start with?
A dishcloth, mug cozy, or headband is usually easier to manage than a large blanket because the project is smaller and the stitch repeat is easier to observe. The dishcloth is especially useful because it stays flat, so readers can focus on the raised basketweave blocks and edge finish before moving to shaped items.
Does basketweave crochet work better for blankets or bags?
It can work for both, but the decision depends on the finished use. Blankets let the stitch show across a wide surface and are mainly about texture and drape. Bags need more practical checking, including handle placement, opening style, lining, structure, and finished capacity. Use the tutorial details before choosing a bag for regular carrying.
Should I choose a standard or Tunisian basketweave project?
Choose standard basketweave if you want the familiar raised post-stitch look used in many blankets, dishcloths, headbands, and bags. Choose Tunisian basketweave if you want a different fabric style and are comfortable following Tunisian crochet instructions. The placemat in this list is a useful example of a Tunisian basketweave-like texture.
Why do basketweave projects need size checking?
Basketweave texture can make fabric thicker and more structured than flatter stitches. That affects blankets, scarves, headbands, bags, and mug cozies in different ways. A size that looks fine in a photo may not match your device, cup, pillow insert, table setting, or preferred fit. Always review the creator’s measurements when they are provided.
Can I change the yarn in a basketweave tutorial?
Yarn changes can affect stitch definition, thickness, drape, and finished size. Smooth yarn may show the woven blocks more clearly, while plush or textured yarn can soften the detail. Before substituting, check the creator’s material list, make a small sample if needed, and compare the result with the finished look you want.
Can I sell finished items made from these YouTube tutorials?
Do not assume selling is allowed just because a tutorial is public. Each creator may have different terms for finished items, pattern use, credit, photos, and commercial sales. Check the video description, linked written pattern, website terms, or creator policy before selling anything made from a tutorial.


