A crochet button-front cardigan can range from a lightweight summer layer to a substantial textured sweater, and the closure changes more than the finished look. Neckline depth, front overlap, button-band tension, garment weight, sleeve volume, and construction method all affect how comfortably a cardigan sits once the buttons are actually fastened.
These 22 ideas cover rounded yokes, V-necks, cropped shapes, oversized layers, raglans, granny squares, stripes, pockets, balloon sleeves, cable panels, and made-to-measure approaches. The goal is to help you compare the finished shapes before committing to a project. Pay particular attention to how each tutorial handles the center front, because a cardigan that hangs nicely while open can behave very differently once its two front edges are brought together.
Quick List
- Crochet Rounded-Yoke Button-Front Cardigan
- Crochet Structured Button-Band Cardigan
- Crochet Soft Panel Button-Down Cardigan
- Crochet Made-to-Measure Classic Button Cardigan
- Crochet Wide V-Neck Cropped Button Cardigan
- Crochet Sideways Knit-Look Statement-Button Cardigan
- Crochet Two-Tone Balloon-Sleeve Button Cardigan
- Crochet Suzette Raglan Button Cardigan
- Crochet Grandpa-Style Cuffed Button Cardigan
- Crochet Relaxed Summer Cotton Button Cardigan
- Crochet V-Shaped Four-Button Cardigan
- Crochet Five-Panel Edge-Space Button Cardigan
- Crochet Chunky Knit-Look Cropped Button Cardigan
- Crochet Oversized Striped Moss-Stitch Button Cardigan
- Crochet Granny-Square Button-Band Cardigan
- Crochet Ribbed Pocket Button Cardigan
- Crochet Drapey Alpine-Stitch Button Cardigan with Inner Pockets
- Crochet Cropped Grandpa V-Neck Button Cardigan
- Crochet Seamless Top-Down Button Cardigan
- Crochet Cable-Panel Made-to-Measure Button Cardigan
- Crochet Unisex Striped Button Cardigan
- Crochet Two-Tone V-Neck Button Top Cardigan
Check the Cardigan Fit While the Front Is Closed
An open cardigan can hide a surprising number of fit issues. Once the fronts are aligned, insufficient width may show as pulling around the bust or waist, while excess length in the button band can create rippling. Before treating the closure as a final decorative detail, consider how much front overlap the design intends and where the neckline should sit when fastened.
For a fixed-size tutorial, compare your body measurements with the creator’s sizing information and intended garment fit. With made-to-measure designs, record the actual dimensions of your crocheted panels rather than depending only on stitch totals. A useful checkpoint is to hold or temporarily clip the two fronts in their intended closed position before the permanent buttons go on. That gives you a clearer view of shoulder balance, center-front alignment, and whether the garment still has the amount of ease you expected.
Match Yarn Behavior to the Button Band
The same button treatment can behave differently on a light cotton cardigan, a chunky ribbed sweater, or a soft fuzzy garment. A heavier fabric can put more downward force on the center front, while a highly elastic ribbing may draw the opening inward. Very drapey fabric may need a carefully finished edge so the buttons do not visually dominate it.
Follow the yarn weight, gauge, and fiber guidance supplied with the individual tutorial rather than assuming a substitution will produce the same garment. If you do substitute, make a fabric sample and judge more than stitch size. Let it hang vertically and notice drape, recovery, thickness, and how easily a prospective button passes through the intended opening. The button band is part of the fit system, so a yarn change that seems harmless in the body can become much more noticeable along the closure.
Plan Buttons Before the Final Finish
Button diameter, weight, spacing, and the type of opening all need to work together. Some cardigans use dedicated buttonholes, while others can use spaces already present in a crocheted edge. Those approaches are not interchangeable without checking the tutorial. A button that looks proportional on the table can still feel too heavy for a soft band or too small for an open fabric.
Whenever possible, have your intended buttons available before finishing the closure. Test one through a sample or completed opening and make sure it passes without excessive stretching yet does not slip back through too easily. Then lay the cardigan flat with the fronts correctly aligned and mark corresponding button positions. If changing cardigan length, revisit the closure plan too; simply adding body length without reconsidering button placement can leave the front looking visually unbalanced.
1. Crochet Rounded Yoke Button Front Cardigan
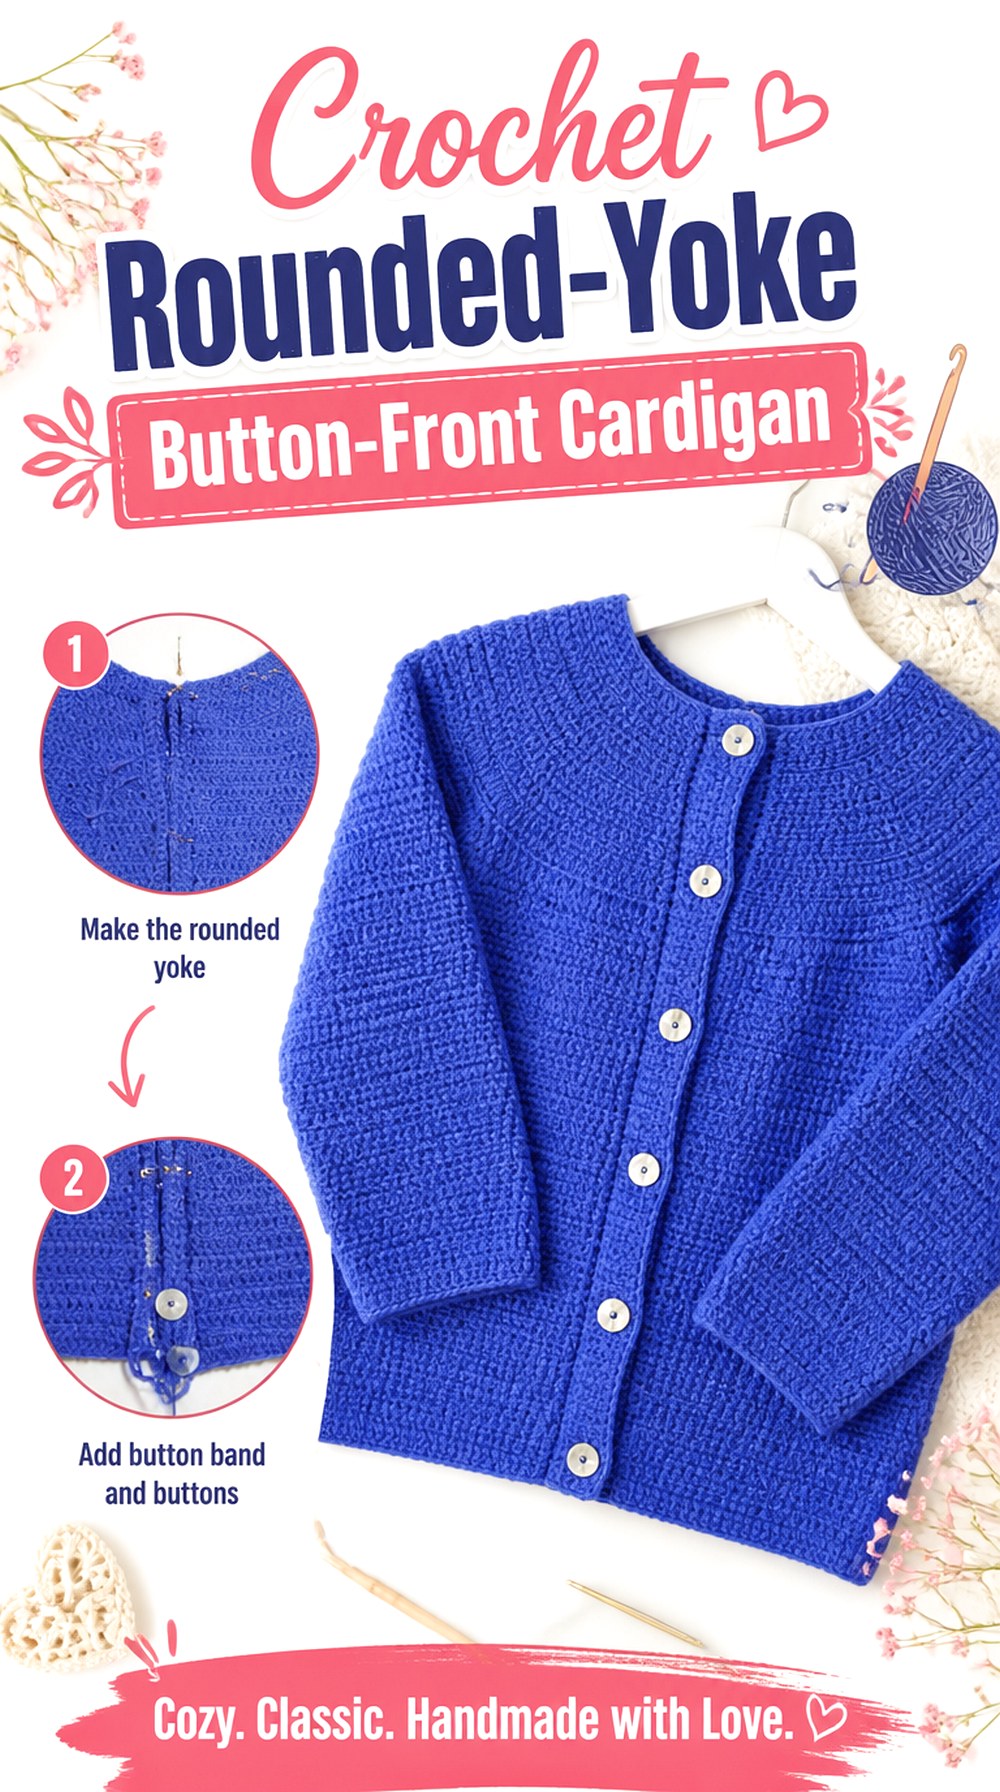
A rounded-yoke button cardigan gives the upper body a continuous appearance before the fabric separates into the torso and sleeves. Anna Greene’s tutorial includes a complete button-up cardigan rather than an open-front sweater with an afterthought closure, making this direction useful if you like a clean neckline and relatively uninterrupted shoulder area. The visual emphasis sits at the yoke and center front instead of on bulky seams or strong motif blocks. Before choosing it, compare the finished neckline and yoke depth with how much coverage you want when the cardigan is fastened. The yoke is also the place to catch fit problems early, before additional garment weight changes how it hangs.
A Rounded Yoke Changes Where Fit Problems Show
With a continuous yoke, shoulder fit is tied closely to neckline circumference, yoke depth, and the point where the sleeves separate. If that upper section feels wrong, adding body length later will not correct it. Compare the developing upper body with the tutorial’s fit guidance before moving too far beyond the sleeve separation, particularly if you normally need adjustments through the shoulders or upper chest.
Close the Neckline Before Judging Front Width
A cardigan may appear roomy while its fronts fall apart naturally. Bring them into the intended buttoned position and check whether the neckline stays smooth rather than being pulled wider. This is especially helpful near the top of a rounded-yoke garment, where center-front tension can influence how the entire neckline appears. Make the assessment with the cardigan positioned as it will actually be worn.
Keep the Front Edge From Twisting
Continuous upper-body construction can still end with an uneven closure if the two front edges do not have comparable tension. Lay the garment flat before button placement and compare both edges from neckline to hem. If one side visibly twists or stretches more, correct the underlying finishing issue before trying to force the fronts into alignment with the buttons.
2. Crochet Structured Button Band Cardigan
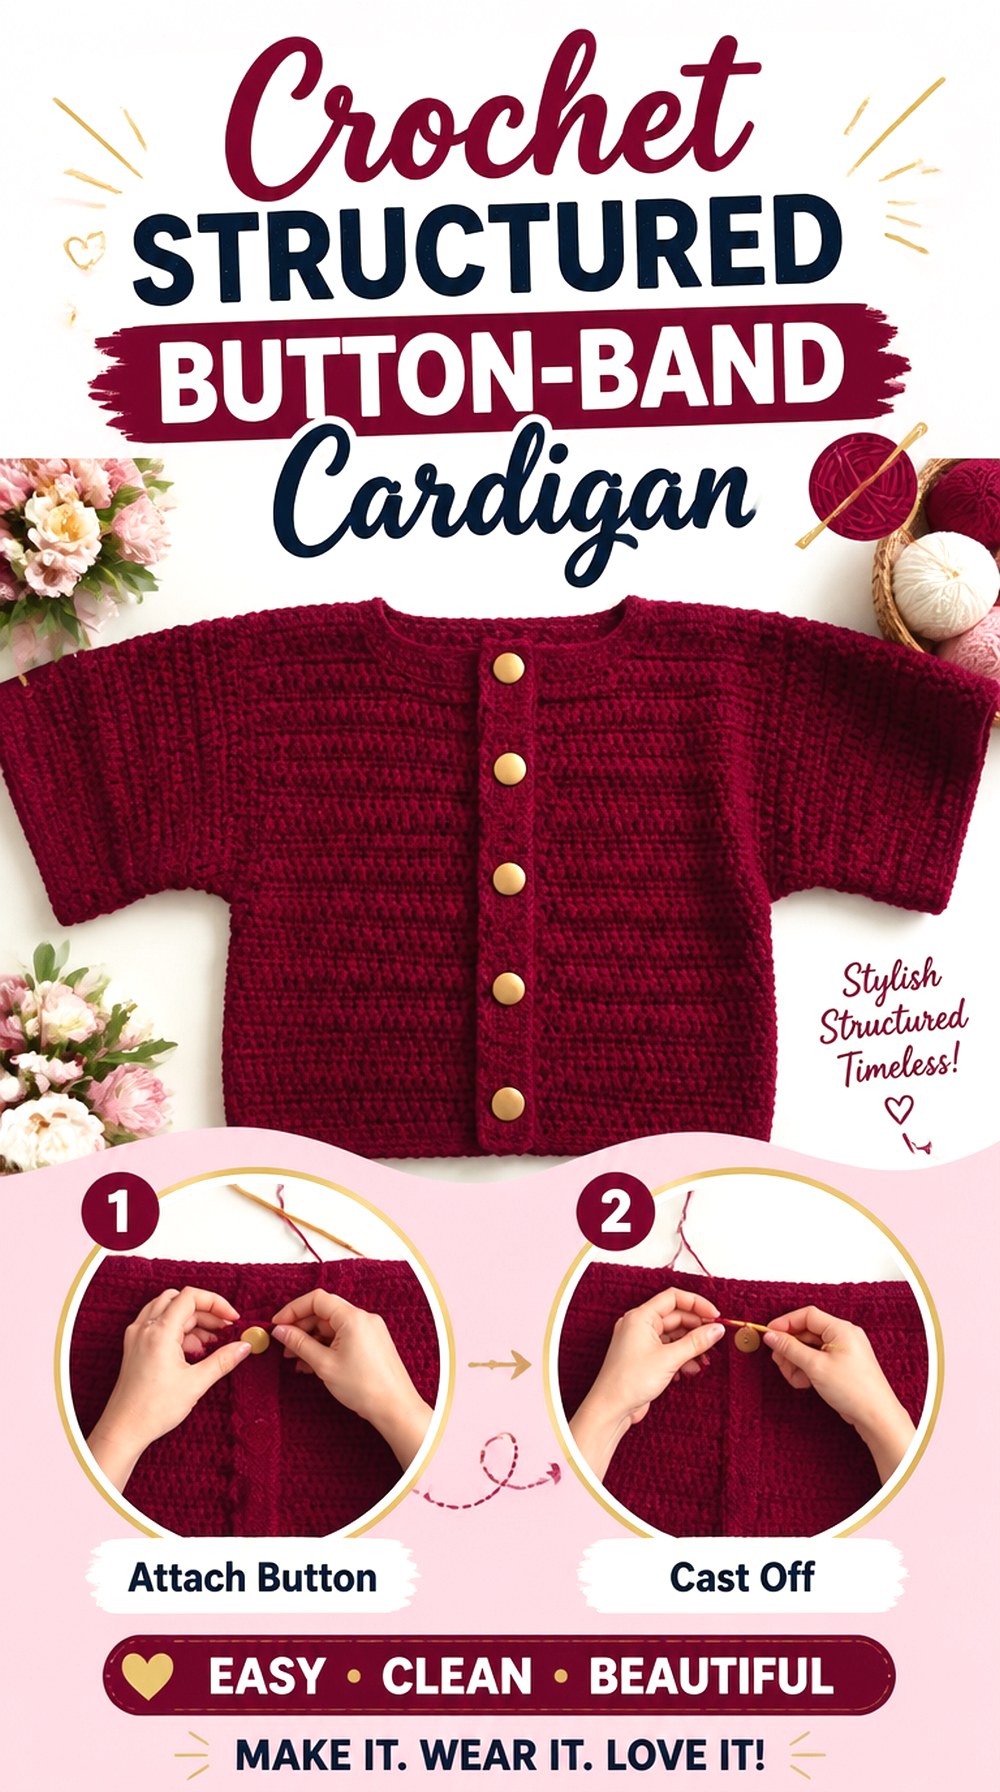
This cardigan direction puts more visual emphasis on defined finishing. Cat Kemble’s tutorial separates the garment into recognizable body, panel, sleeve, cuff, and button-band stages, resulting in a classic sweater shape with a clearly framed center opening. It is a useful contrast to seamless and motif-built options because the polished front comes from assembling and finishing distinct garment sections. The button bands deserve as much attention as the main fabric: their width, tension, and symmetry determine whether the front looks deliberate when closed. This is a good style to consider if you prefer a traditional cardigan silhouette where cuffs and front finishing visibly organize the garment rather than disappearing into the body fabric.
The Button Band Is Part of the Silhouette
A wide or clearly defined band changes how much visual weight sits at the center of the cardigan. Before sewing on buttons, compare the finished width of both sides and make sure the opening remains straight. A band that is tighter than the body can pull upward, while excessive length can ripple. The goal is a closure that supports the sweater rather than fighting its drape.
Cuffs Give the Sleeves a More Tailored Finish
Defined cuffs create a stronger endpoint for the sleeves than a plain edge. Check sleeve length with the cuff included rather than deciding that the unfinished sleeve already reaches the ideal spot. A substantial cuff can change the apparent sleeve proportion and how much fabric gathers near the wrist, especially if the main sleeve has a relaxed shape.
Choose Hardware Before the Final Band
Because the buttons are a visible part of this cardigan’s front treatment, choosing them early makes the finishing stage easier to evaluate. Compare button diameter with the planned openings and the width of the band. If you substitute very heavy or very large buttons, check whether the crocheted edge can support them without sagging before attaching the entire set.
Original Tutorial and Creator Credit
Creator: Cat Kemble
3. Crochet Soft Panel Button Down Cardigan

Hannah Drapinski’s button-down cardigan uses a recognizable panel-based garment structure with front pieces, a back, sleeves, seams, buttonholes, and sewn-on buttons. The finished effect is softer and more casual than a jacket-like cardigan, while still giving you a true front closure. This construction can appeal to crocheters who like being able to lay individual components flat and compare them before assembly. It also creates useful checkpoints: the two front panels can be compared directly, the side seams can be checked for twisting, and the buttonhole edge can be assessed before the final hardware is attached. Compared with a seamless cardigan, more of the final balance depends on accurate panel relationships and careful seaming.
Panel Width Controls Center-Front Ease
The two front panels need enough width to reach the intended center line without being stretched into place. Before assembly, compare them with each other and with the back panel. If you are adjusting the design, remember that extra front width affects more than bust room; it also changes the neckline, shoulder relationship, and the amount of fabric available for the closure.
Straight Seams Help the Opening Hang Cleanly
A twisted side or shoulder seam can make a perfectly crocheted front edge appear crooked once the garment is worn. Lay the assembled body flat before continuing with final closure work. Check that both front hems begin at the same level and that the shoulder seams are not pulling one panel farther upward. Fixing alignment before buttons are attached is much easier.
Mark the Closure Side Before Final Assembly
When two front pieces look similar, it is easy to lose track of the intended buttonhole side while handling or seaming them. Mark the pieces clearly during construction and keep the garment orientation consistent. This simple organization step matters because reversing a shaped front or realizing too late that the buttonhole edge is on the unintended side can complicate otherwise straightforward finishing.
Original Tutorial and Creator Credit
Creator: Hannah Drapinski
4. Crochet Made to Measure Classic Button Cardigan
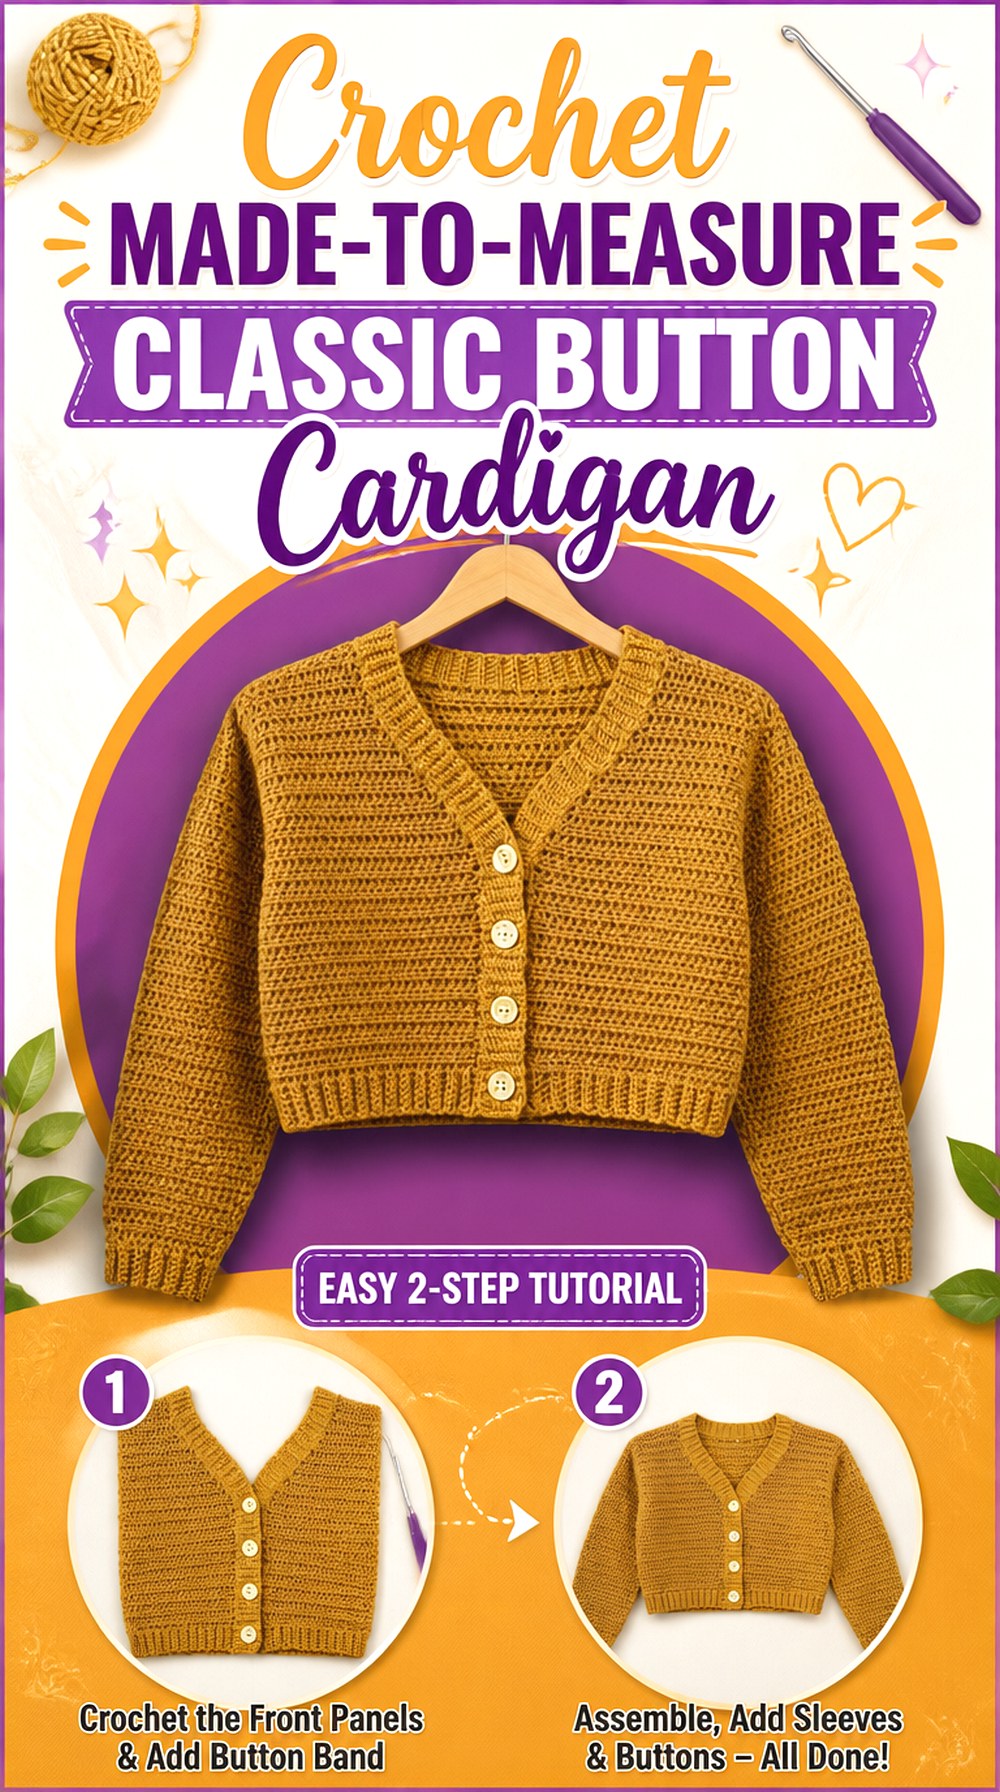
A made-to-measure cardigan shifts the main decision from choosing a labeled size to tracking your own measurements accurately. The Crochet Hermit’s tutorial includes garment alterations, separate cardigan sections, finishing, buttonholes, and buttons, so the closure is part of the construction plan rather than a later styling suggestion. This approach can be especially useful if standard garment proportions often fit one part of your body better than another. The freedom also creates responsibility: measurements should be written down and repeated consistently across matching pieces. Before adapting length or width, consider what else the change affects. A wider front, deeper armhole, or longer body can influence seam placement and where the finished row of buttons makes visual sense.
Write Down Measurements Before Starting Each Panel
Do not rely on memory when repeating a customized front, sleeve, or corresponding section. Record both the intended measurement and the actual measurement of the crocheted piece. Yarn and tension can shift slightly during a long garment project, so periodically comparing the second component with the first can catch differences before they become permanent seams.
Allow Room for the Closure Overlap
Made-to-measure does not mean the two raw front edges should merely touch. The final construction and button treatment may require additional width or a finished band. Follow the tutorial’s closure logic and judge the cardigan in its intended closed position. If you customize the torso width, check that the buttoned cardigan still has the ease you intended instead of becoming unexpectedly snug.
Recheck Armhole Depth Before Seaming
Customized body width can tempt you to focus only on horizontal measurements, but armhole depth affects sleeve movement and the vertical position of the entire upper body. Before permanently joining pieces, compare both arm openings and make sure they sit at the same level. Correct armhole balance helps the center front hang more evenly once the cardigan is buttoned.
Original Tutorial and Creator Credit
Creator: The Crochet Hermit
5. Crochet Wide V Neck Cropped Button Cardigan

A wide V-neck creates a very different wearing experience from a crew-neck or rounded-yoke cardigan. The Aria Cardigan tutorial from forthefrills combines that open neckline with a button-up front and customizable body length; the video sample uses a longer cropped proportion. The result leaves more of the base layer visible and puts the sloping neckline, ribbed edge, and buttons at the center of the design. This option makes sense when you want the cardigan to work with high-waisted bottoms or layered tops rather than provide high neckline coverage. Before starting, decide where you want the hem and how deep a V you are comfortable wearing buttoned, because those two proportions strongly shape the final look.
V-Neck Depth Changes the Best Layer Underneath
A wide V exposes more of whatever is worn beneath the cardigan, particularly when only the lower buttons are closed. Compare the finished sample with tops you already wear and decide whether the neckline will sit where you want it. If neckline coverage is a priority, do not assume that fastening every button will make a deep V behave like a round-neck sweater.
Choose the Hem Point Before You Commit
A long crop, natural-waist crop, and full hip-length cardigan create noticeably different proportions even when the neckline remains identical. The source includes length customization, so use that flexibility deliberately. Hold a measuring tape or an existing cardigan against the body to identify the hem you actually like, then account for the tutorial’s finishing rather than judging from an unfinished panel.
Let the Ribbing Support the Sloped Opening
V-neck edges draw the eye directly toward the closure. Ribbing that stretches unevenly or pulls at one side is therefore more visible than it might be along a straight opening. Before final button placement, lay both slopes flat and compare them. If one edge is longer, correct finishing tension instead of using button spacing to disguise the mismatch.
Original Tutorial and Creator Credit
Creator: forthefrills
6. Crochet Sideways Knit Look Statement Button Cardigan

Hey Carrie’s knit-look cardigan uses strong ribbed texture and prominent buttons to create a style where the closure is deliberately visible rather than trying to disappear into the garment. The related Ériú design is worked with a sideways construction and has a cropped, streamlined appearance, giving this option a different planning logic from bottom-up panel cardigans. Sideways construction changes which dimension grows as you crochet, so length decisions need to be understood before following familiar cardigan instincts. This project is a particularly good reference if you like crochet that visually approaches knitted ribbing while still showing distinct handcrafted structure. The statement buttons also make front-edge stability and accurate button placement more noticeable.
Sideways Construction Changes How Length Is Planned
When the main fabric runs in a different direction from a conventional bottom-up cardigan, the starting dimensions may control garment length more directly than expected. Review the construction overview before altering anything. If you want a longer or shorter body, identify which measurement actually creates that dimension rather than simply adding extra repeats where you would in a traditionally oriented panel.
Knit-Look Ribbing Can Add Density
Dense ribbed crochet can create a substantial fabric even when the stitches look visually sleek. Judge the actual swatch for thickness and flexibility, particularly if you intend to layer the cardigan under another garment. A yarn substitution that makes the ribbing much stiffer can alter both comfort and how cleanly the buttoned front follows the body.
Statement Buttons Need a Firm Landing Zone
Large or contrasting buttons pull attention to every small difference in placement. Arrange them on the cardigan before attaching any permanently, then view the entire front rather than judging one button at close range. Also check the weight of the hardware against the band. A soft edge that droops under a single sample button is unlikely to improve after several are attached.
Original Tutorial and Creator Credit
Creator: Hey Carrie
7. Crochet Two Tone Balloon Sleeve Button Cardigan

This TCDDIY cardigan brings sleeve volume into the button-front category. The tutorial uses a two-tone treatment, balloon sleeves, textured crochet, and a functional buttoned opening, giving the finished garment more shape through the arms than the straighter cardigan ideas in this collection. That volume changes how the cardigan layers: a roomy sleeve can be comfortable over fitted tops but may feel bulky under narrow coat sleeves. Color placement also gives you another planning decision beyond simply choosing yarn shades. Because the sleeves already create a strong silhouette, the center front benefits from controlled finishing so the garment does not become visually overloaded. Compare the sleeve volume, body ease, and button placement as one complete composition before customizing any single feature.
Balloon Sleeves Need a Controlled Wrist Finish
The contrast between a full sleeve and a narrower wrist is what gives a balloon sleeve its recognizable shape. Check the cuff area for comfort before finalizing it; making the wrist too tight simply to exaggerate volume can make the cardigan less practical. Also judge sleeve length with the gathered or finished wrist in place because fullness can change where the fabric appears to end.
Two-Tone Placement Can Clarify the Silhouette
Two colors can help separate body sections, but their placement should support rather than obscure the shape. Decide whether you want the second shade to emphasize sleeves, edges, or another structural area. Lay the developing pieces together before assembly and check the balance. A color break that looks attractive on one panel may feel unexpectedly dominant across the whole garment.
Keep the Center Front Visually Quiet
With statement sleeves and contrasting color already drawing attention, the button line does not necessarily need another competing element. Before choosing highly decorative hardware, place a few candidate buttons against the actual fabric. Quiet buttons can let the sleeve shape lead, while contrast buttons create a third focal point. Either can work, but the choice should be intentional.
Original Tutorial and Creator Credit
Creator: TCDDIY
8. Crochet Suzette Raglan Button Cardigan
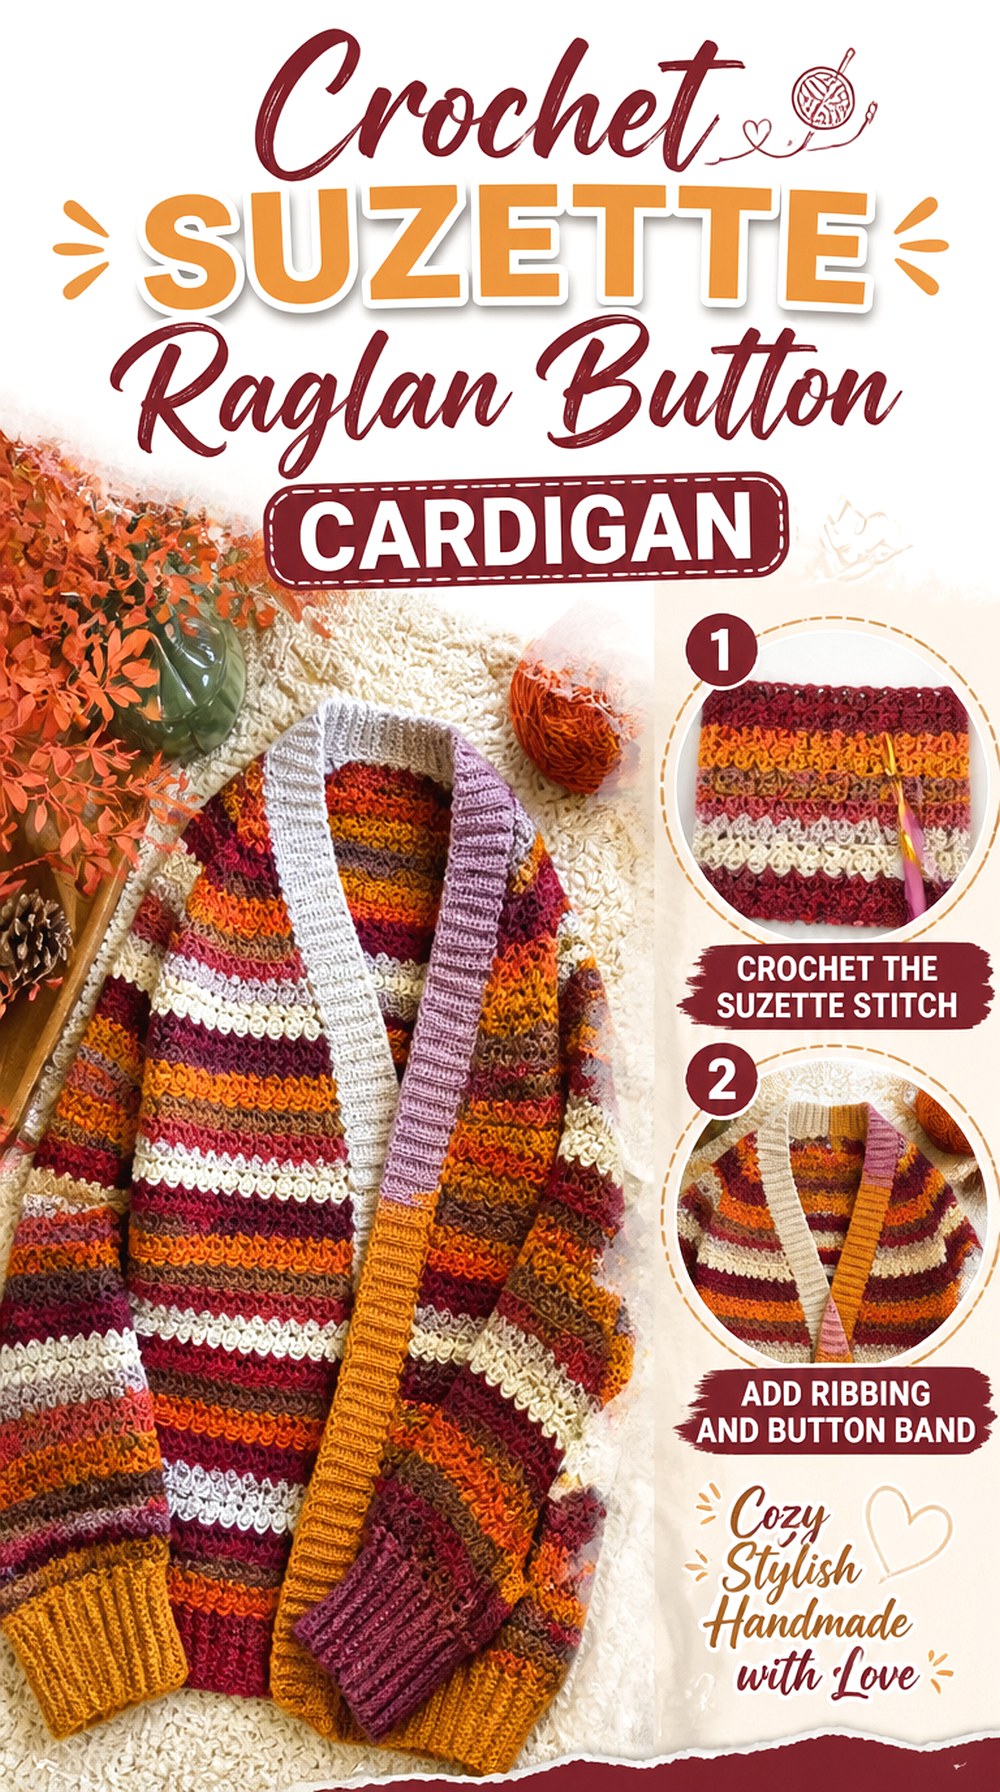
MJ’s Off The Hook Designs uses a top-down raglan construction and Suzette stitch texture in this cardigan tutorial, with a shorter button-up version that includes buttonholes. That gives you a garment that differs from both seamed panel cardigans and smooth yoke designs: the raglan lines organize the upper body while the textured stitch pattern adds surface detail. Top-down construction can make length easier to evaluate as the garment develops, but it does not remove the need to check the upper body carefully. Raglan depth affects where the underarm sits, and textured fabric can react noticeably to gauge differences. This project is a useful choice when you want the construction lines, stitch texture, ribbing, and button closure all to contribute to the finished design.
Raglan Depth Sets the Upper-Body Fit
The point where a top-down raglan separates for the sleeves affects arm movement, body width, and where the shoulder line appears. Do not focus only on torso length while working from the top. Compare the developing yoke with the tutorial’s sizing and gauge information, and check the underarm position before assuming that additional body rows can solve an upper-body fit issue.
Suzette Texture Makes Gauge Worth Checking
A textured stitch pattern can look very different when worked too tightly or too loosely. Besides matching the creator’s gauge where required, look at the fabric itself: it should have the flexibility expected for a wearable rather than feeling board-like or excessively open. Because the front will carry buttons, consistent texture also helps the closure sit more evenly against the body.
Pick the Button-Up Length Before Finishing
The tutorial includes a shorter button-up direction, so decide which finished proportion you are following rather than drifting between versions. A change in body length can influence the ideal number and visual spacing of buttons as well as yarn requirements. If you alter the hem point, reassess the entire center-front line before finishing the closure.
Original Tutorial and Creator Credit
Creator: MJ’s Off The Hook Designs
9. Crochet Grandpa Style Cuffed Button Cardigan

The Cuffed Cardi from TL Yarn Crafts leans into the familiar proportions of a relaxed grandpa cardigan: a visible button band, textured V-stitch fabric, and notably long sleeves finished with cuffs. Compared with a cropped fashion cardigan, this direction feels more like an everyday layering sweater and places more emphasis on relaxed proportions. The longer cuffs are not a minor finishing detail; they influence sleeve length, the visual weight at the wrists, and how the cardigan fits under outerwear. The collar and front band also need to work together cleanly because they create the classic buttoned-cardigan frame. Choose this type when you want softness and familiar sweater proportions rather than dramatic shaping, statement motifs, or an abbreviated body.
Long Cuffs Change the Functional Sleeve Length
Measure sleeve preference to the end of the finished cuff rather than the unfinished sleeve fabric. An elongated cuff can extend farther over the wrist or hand than expected if you add sleeve length casually. If you frequently push sleeves up, also consider whether the cuff circumference and fabric recovery will suit that habit without becoming uncomfortable.
V-Stitch Fabric Benefits From a Stable Collar
An open textured body and a firmer finished edge can complement each other, but only if their tension is compatible. When working the collar and button band, check that the lighter body fabric is not being gathered or stretched. The front should still hang naturally when open while meeting cleanly when the cardigan is closed.
Grandpa Proportions Depend on Balanced Fronts
Relaxed fit does not excuse uneven front pieces. With a classic cardigan shape, the center line is one of the first details the eye notices. Before sewing buttons, align the hems and neckline, then temporarily hold the two fronts closed. This reveals whether one side is longer or whether the body is rotating because of uneven seams or finishing.
Original Tutorial and Creator Credit
Creator: TL Yarn Crafts
10. Crochet Relaxed Summer Cotton Button Cardigan

Ophelia Talks Crochet’s Summer Dreaming Cardigan offers a lighter direction than the chunky and heavily textured options. The tutorial describes a relaxed cotton cardigan for warmer-weather wear and clearly covers the body, sleeve finishing, front ribbing, buttonholes, and button attachment. A warm-weather cardigan still needs thoughtful structure: cotton and cotton-rich yarns can behave differently from highly elastic fibers, so matching the tutorial’s yarn and gauge guidance matters. This option suits readers who want actual front closure without the visual or physical bulk of a cold-weather sweater. Think about what you will layer underneath and how much airflow or coverage you expect; “summer cardigan” can mean anything from an indoor air-conditioning layer to an evening outer layer.
Cotton Makes Front-Band Tension More Visible
A smooth cotton fabric can make ripples and stretched edges easy to see. While following the front ribbing, compare the cardigan on a flat surface periodically rather than waiting until the buttons are installed. If the band is visibly longer or shorter than the body edge, investigate tension before continuing; buttons will not correct a wavy foundation.
Relaxed Summer Fit Still Needs Shoulder Control
A looser warm-weather garment can have comfortable ease without slipping excessively at the shoulders. Check where the shoulder joins sit and whether the sleeves fall from the intended point. If you choose a different size just to gain body width, confirm that the upper-body proportions will still work instead of assuming all extra ease will appear only through the torso.
Check Coverage Over the Tops You Actually Wear
A summer cardigan may be worn over tanks, camisoles, dresses, or short sleeves, all of which expose different parts of the neckline and arm area. Compare the finished sample with your likely base layers. A comfortable V or front opening over a high-neck shirt can feel much more revealing over a low-cut top, even when the cardigan dimensions are identical.
Original Tutorial and Creator Credit
Creator: Ophelia Talks Crochet
11. Crochet V Shaped Four Button Cardigan

LaDenser Crochets presents a V-neck shaped cardigan with buttons and fit guidance, giving this option a clean center-front design without the heavier details of pockets, granny motifs, or cable panels. The finished cardigan uses a small, clearly visible row of buttons, so spacing becomes a significant part of its appearance. With a V neckline, the upper buttons begin below the neck rather than creating full crew-neck coverage. That leaves the base layer visible and gives the cardigan a lighter visual line. Consider this type if your main priorities are a straightforward V shape and a functional closure rather than dramatic texture. Before finishing, judge the garment both completely buttoned and partly open because each arrangement emphasizes a different section of the V.
A Clear V Shape Puts More Focus on Button Spacing
When the neckline already directs the eye toward the center front, uneven button placement is particularly noticeable. Mark every position before sewing the first button and view the arrangement from several feet away. The visual spacing should work with the neckline and hem, not only measure consistently from one button to the next.
Compare the Buttoned Front at Bust and Waist
Two edges that meet easily near the hem can still pull higher on the torso. Before final attachment, temporarily secure the cardigan at the intended button points and check for horizontal strain lines or gaps. If the source provides fit guidance, use it rather than compensating for insufficient garment width by shifting buttons farther toward the edge.
Keep the Lower Edge From Flaring
A front closure can reveal small differences in hem length or band tension because the two sides are forced into direct comparison. Lay the cardigan flat with the fronts aligned and examine the bottom corners. If one edge curves outward or the hem levels differ, correct the finishing issue before sewing buttons permanently.
Original Tutorial and Creator Credit
Creator: LaDenser Crochets
12. Crochet Five Panel Edge Space Button Cardigan
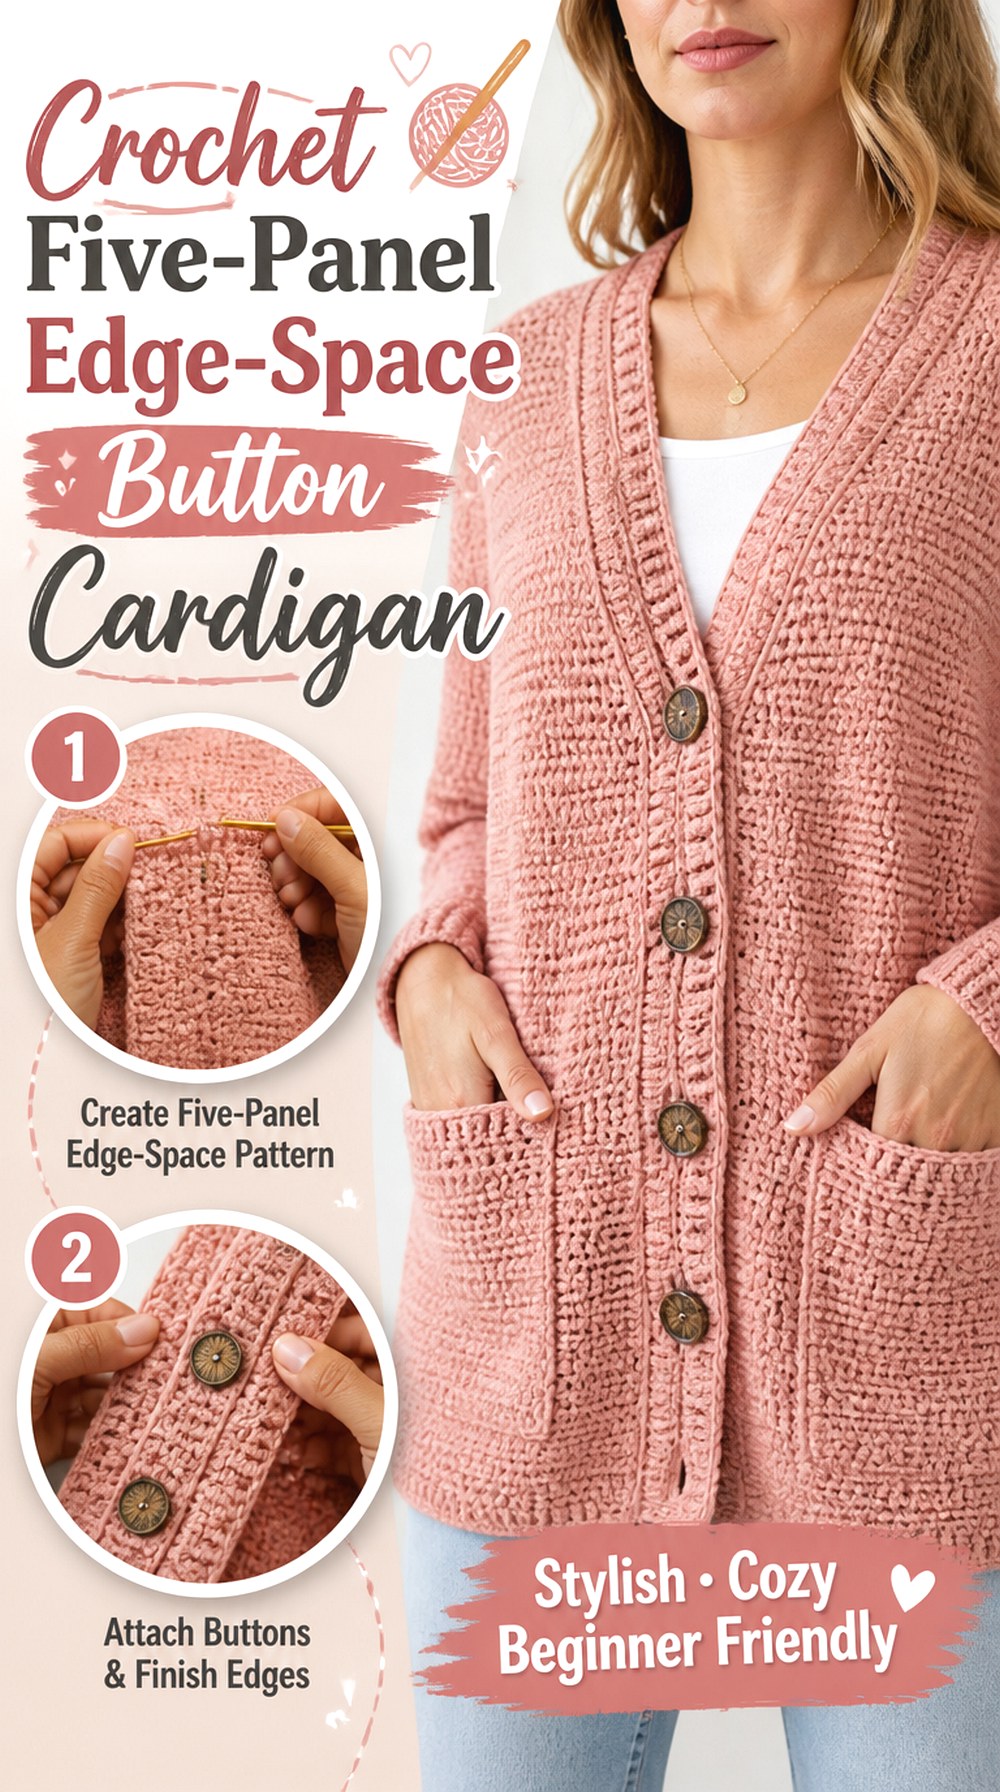
KnitcroAddict’s modern button cardigan is worked flat in five separate pieces before assembly. An important difference is the front treatment: the buttons are optional and the construction can use spaces in the finished collar edge rather than requiring a conventional row of dedicated buttonholes. That makes the project useful for comparing two approaches to closure design. It also means you should not buy buttons based solely on another cardigan’s buttonhole specifications. The edge itself determines what diameter will pass comfortably. Separate pieces make the garment easy to inspect before seaming, while the completed collar edge becomes the critical checkpoint for closure compatibility. Choose this direction if you like modular construction and a relatively understated button treatment.
Existing Edge Spaces Work Differently From Buttonholes
A natural opening in crochet fabric is not automatically compatible with every button size. Once the collar edge is finished, test your intended button through the exact space that will serve as the closure. It should pass without forcing the fabric excessively. If it is clearly incompatible, follow the creator’s guidance rather than stretching the edge until a decorative button fits.
Five Separate Pieces Make Alterations More Modular
Individual back, front, and sleeve pieces let you compare components before assembly, but any alteration should be considered across adjoining seams. A wider front may change the shoulder relationship; a longer sleeve still needs to fit the same armhole. Lay the garment pieces together before seaming so dimensional changes can be evaluated as a system.
Check the Collar Edge Before Sewing Buttons
The final edge determines both the visual frame and where the buttons can function. With the cardigan flat, overlap or align the fronts as intended and identify the actual usable spaces first. Mark the corresponding position on the opposite side only after that check. This is more reliable than deciding button placement independently and hoping the edge accommodates it.
Original Tutorial and Creator Credit
Creator: KnitcroAddict
13. Crochet Chunky Knit Look Cropped Button Cardigan

Stephanie Tashi’s cardigan combines a cropped body, chunky knit-look crochet, ribbed finishing, and a compact row of buttons. The thicker visual texture gives this style more presence than a lightweight summer cardigan even though the body is shorter. A cropped chunky garment can feel very different from an oversized long cardigan: the fabric has weight and density, but the abbreviated hem keeps the overall silhouette contained. This makes hem placement particularly important. If the cardigan ends at an awkward point relative to your usual trousers, skirts, or dresses, simply reproducing the sample length may not give the styling result you want. The tutorial includes adjustable aspects, so use your own wardrobe as the reference when deciding the final crop.
Dense Knit-Look Fabric Can Feel Shorter Visually
Thick ribbing and close texture create a solid block of fabric, which can make a cropped silhouette appear more compact than an airy cardigan of the same measured length. Before finalizing the body, hold the developing piece at your intended wearing height and judge the actual proportion with the clothes you plan to pair with it.
Cropped Length Should Match Your Layering Plan
Decide whether you want the cardigan to meet a waistband, sit above it, or overlap the top of your bottoms. Those are more useful targets than copying a generic “cropped” label. Remember that finishing at the hem and neckline can affect the final appearance, so confirm how the tutorial’s ribbing contributes to the finished dimensions before shortening anything.
A Small Row of Buttons Creates a Strong Center Line
On a compact garment, even a few buttons occupy a noticeable percentage of the body length. Place them against the cardigan before sewing and evaluate their scale from neckline to hem. Large contrast buttons will make the closure dominant, while smaller or tonal choices allow the knit-look texture to carry more of the visual interest.
Original Tutorial and Creator Credit
Creator: Stephanie Tashi
14. Crochet Oversized Striped Moss Stitch Button Cardigan
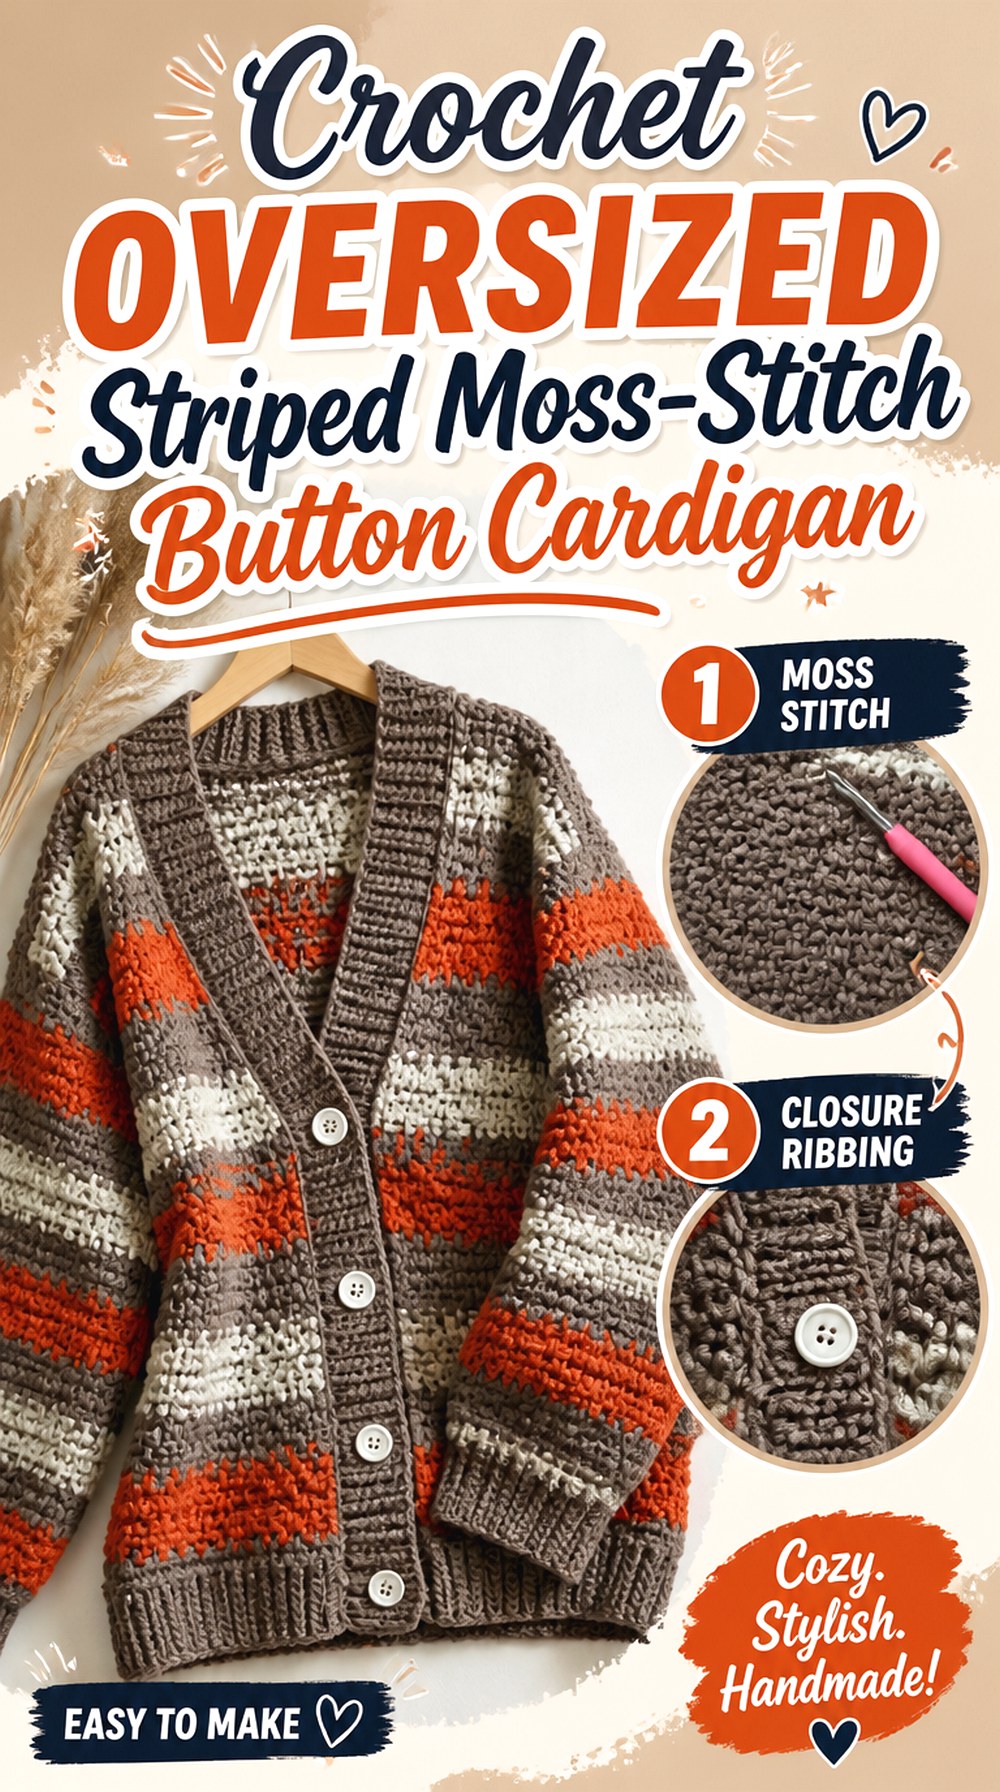
Bloodimaryart Crochet’s striped cardigan brings horizontal color rhythm into a made-to-measure button-front design. The tutorial uses moss-stitch fabric and guides viewers through a cardigan customized to measurements, so color planning and fit planning happen together. Stripes make small alignment differences easier to notice: when the front is buttoned, bands that nearly meet but sit slightly off can draw more attention than intentionally offset color placement. The oversized direction also means you should decide how much ease you actually want instead of treating “oversized” as a universal size. This project is a useful choice when you want color changes to be structural design elements rather than isolated accents, and when you are comfortable recording dimensions carefully during construction.
Stripes Expose Any Front Misalignment
Lay the two front sections next to each other periodically and compare the height of major color changes. Exact matching is not mandatory, but unplanned near-matches can look accidental once the cardigan is closed. If you want continuous stripes across the front, make that decision early enough to track the sequence intentionally rather than trying to correct it at the button stage.
Moss-Stitch Tension Can Shift With Color Changes
Changing yarn colors can subtly alter hand tension, especially when one yarn feels different from another. Measure the actual fabric rather than assuming equal row counts create identical dimensions. If one color section begins narrowing or widening, correct the tension issue while that area is still accessible instead of relying on blocking or seams to hide it later.
Plan the Stripe Breaks Across Both Fronts
The center opening interrupts the horizontal pattern, so decide how much continuity you want when the cardigan is fastened. A strong stripe that meets perfectly can create a single broad visual band, while deliberately offset stripes produce a more patchwork effect. Neither approach is inherently better; the important part is choosing before both fronts are complete.
Original Tutorial and Creator Credit
Creator: Bloodimaryart Crochet
15. Crochet Granny Square Button Band Cardigan

A granny-square cardigan introduces planning issues that continuous-fabric cardigans do not have. Be Ewenique Boutique’s tutorial includes square sizing, layout, placement, alterations, cuffs, and button-band finishing, with buttonholes available as part of that finished edge. Instead of focusing primarily on row length, you need to think in modules: blocked motif dimensions determine how wide and long the garment grid becomes. The button band then has to create a clean continuous edge across a front built from joined squares. This style makes sense when you want color and motif repetition to dominate the cardigan while still having a functional closure. Before joining, treat both front panels as a matched pair and check motif orientation, color balance, and final edge alignment.
Blocked Square Size Controls the Garment Grid
Measure finished, blocked squares rather than relying on their dimensions straight from the hook. Small differences become significant when several motifs are placed side by side. As a non-pattern planning example, four squares measuring 5 inches across would span about 20 inches before joins, edging, and garment ease are considered. Use the creator’s actual construction information for the real cardigan.
Button Bands Need a Clean Motif Edge
A joined-motif edge can contain small variations where square corners and seams meet. Before beginning the front band, inspect the entire opening and correct obvious size differences between adjacent squares. A smooth foundation gives the band a better chance of lying flat; adding a straight band over a noticeably uneven motif edge may simply make the irregularity more visible.
Balance Color at the Center Opening
The two front edges sit directly beside each other when buttoned, so high-contrast motifs near the opening can create an unexpected focal point. Lay the full motif arrangement out before joining and view the center fronts as one composition. You do not need perfect mirror symmetry, but deliberate color distribution usually looks more coherent than accidental clustering.
Original Tutorial and Creator Credit
Creator: Be Ewenique Boutique
16. Crochet Ribbed Pocket Button Cardigan

Chenda DIY’s tutorial combines a ribbed cardigan, functional front buttons, and pockets, adding more physical detail to the front panels than most of the other projects here. Pockets affect both usefulness and how the cardigan hangs, especially once they contain anything. Ribbing adds another directional texture, so the garment benefits from careful alignment at the hem and opening. This option is worth considering if you want the convenience of pockets without moving all the way to a heavy jacket-inspired style. Before attaching or finalizing the pockets, assess their position on your own body rather than judging them only on a flat cardigan. Their height should feel natural for your hands while leaving enough visual separation from the button line.
Ribbing and Pockets Compete for Front Weight
A ribbed body already has a strong vertical or horizontal visual rhythm depending on its construction. Pockets interrupt that rhythm and add another layer of fabric. Pin or temporarily position the pockets before permanent attachment and view the whole cardigan. Moving them slightly can change whether they feel integrated or appear to drag the front panels downward.
Pocket Placement Changes How the Cardigan Hangs
Pockets are most useful when your hands reach them naturally, but their contents can also pull on crocheted fabric. Check the placement with the cardigan worn and closed, not only while it lies flat. If a pocket sits too close to the center front, filling it may distort the button line more noticeably than a position farther toward the side.
Buttons Need Support Above the Pocket Line
The closure and pocket should not fight for the same small area of fabric. Examine the distance between the pocket edge and the row of buttons before final attachment. If they sit very close together after an alteration, the front panel may feel crowded or less flexible. Follow the tutorial’s proportions unless you have a clear reason to change both features.
Original Tutorial and Creator Credit
Creator: Chenda DIY
17. Crochet Drapey Alpine Stitch Button Cardigan with Inner Pockets
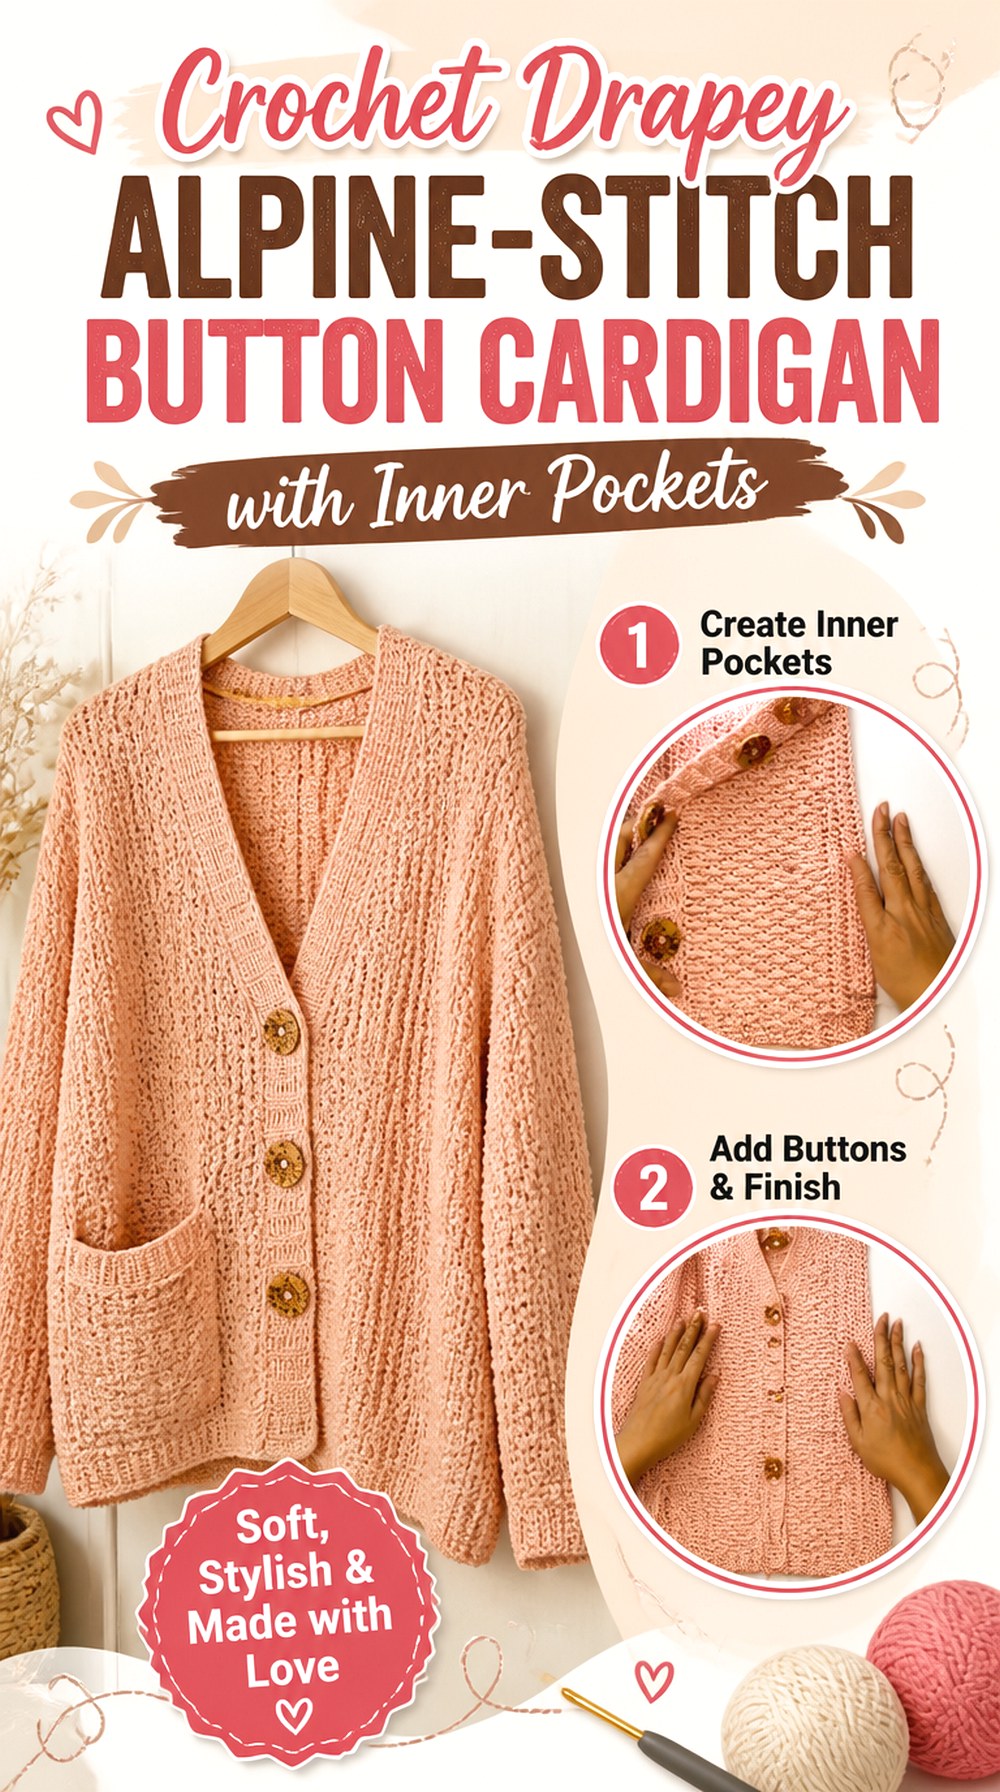
The Knotty Lace takes the button cardigan in a softer, more specialized direction with a drapey textured garment that includes inner pockets and a build-as-you-go construction approach. The Alpine-stitch detail gives the fabric noticeable surface interest without relying on colorwork, while internal pockets preserve a cleaner exterior. Because the garment is designed around softness and drape, material behavior matters: substituting a much stiffer yarn could change the character of both the body and pocket area. The construction also creates different checkpoints from a five-piece cardigan because sections are incorporated as the project grows. This is a useful option if you want texture and storage but prefer pockets that do not interrupt the outside front visually.
Build-As-You-Go Construction Changes the Checkpoints
When garment sections become connected during construction, you have fewer opportunities to treat every piece as an independent rectangle. Pause at natural transitions and verify the measurements that will affect the next section. If something is too wide or short, correcting it before another section is built onto it is usually simpler than trying to compensate later.
Inner Pockets Need Support Without Extra Bulk
An interior pocket keeps the outside visually clean, but it adds a second layer of fabric in a localized area. Consider what you realistically expect to carry and how that added weight affects a soft cardigan. A pocket intended for a light personal item should not automatically be treated as structural storage for anything heavy unless the creator specifically supports that use.
Alpine Texture Should Still Let the Front Drape
Raised texture can make fabric visually rich, but the cardigan still needs enough flexibility to meet comfortably at the buttons. Check your swatch and developing garment vertically rather than only on a table. If the substitute yarn produces a rigid texture, the front may stand away from the body and behave very differently from the softly draped source design.
Original Tutorial and Creator Credit
Creator: TheKnottyLace
18. Crochet Cropped Grandpa V Neck Button Cardigan
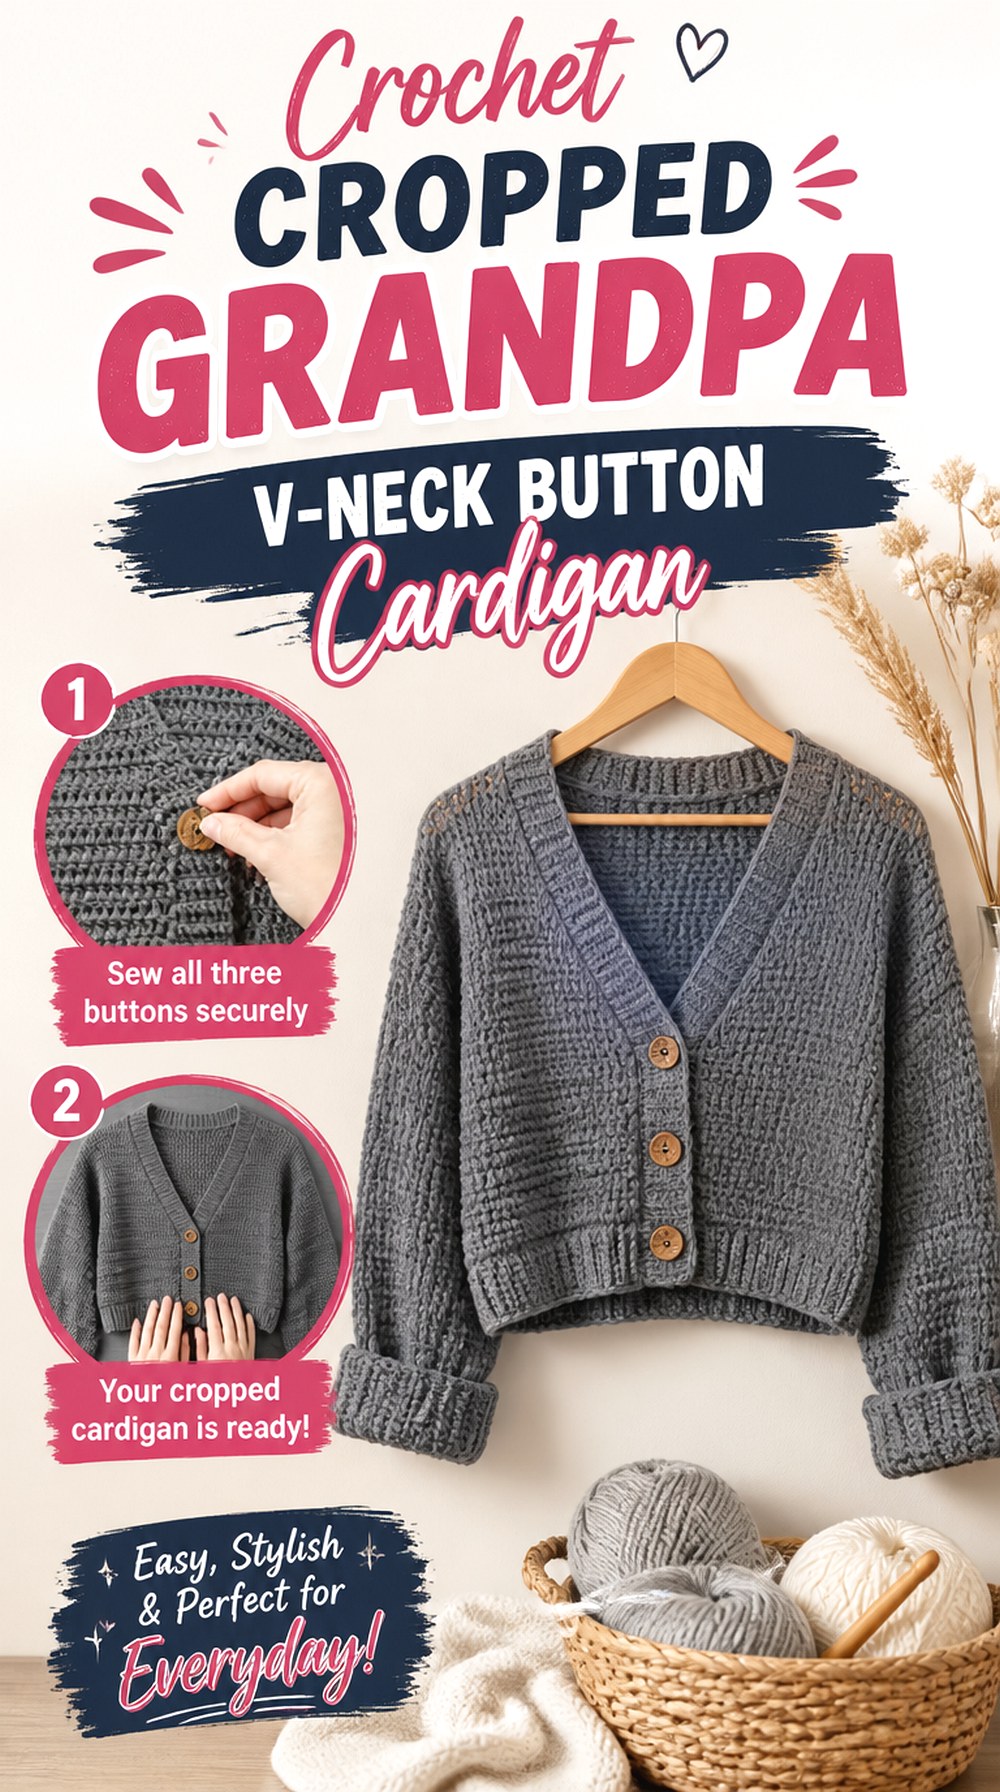
The Carl Cardigan from Evelyn And Peter Crochet combines familiar grandpa-cardigan styling with a cropped V-neck proportion. Unlike longer relaxed cardigans, this version concentrates the body and buttoned area higher on the torso while keeping the recognizable ribbed, button-front character. The bottom-up construction uses separate body components before assembly, and the trim is attached directly to the cardigan. It is a useful alternative if you like vintage-inspired V-neck styling but do not want the longer body and elongated cuffs of a more traditional grandpa cardigan. Because the body is cropped, changes to length also move the visual relationship between the hem and buttons. Decide where the lower edge should fall before treating button spacing as an isolated finishing choice.
Direct-Attach Ribbing Keeps the Front Integrated
Ribbing worked directly onto the garment can create a close relationship between the front edge and body fabric. Monitor attachment tension as you go. If too many or too few attachment points are forced into the same length, the trim can flare or pull. Lay the front flat periodically so a tension problem does not travel around the entire neckline.
Cropped Grandpa Proportions Need Enough Body Ease
Shortening a cardigan does not necessarily mean making it narrower. A grandpa-style silhouette still needs the intended room through the torso to sit comfortably over a base layer. Judge width independently from length, especially if you are customizing. A cardigan that reaches the ideal waistband but strains between buttons will not produce the relaxed vintage-inspired effect.
Length Changes Move the Button Zone
If you extend or shorten the body, the original button arrangement may no longer look equally balanced. Once your preferred hem is established, place the intended buttons temporarily from the lower front upward and examine the spacing relative to the V neckline. Follow creator-specific construction where required rather than blindly preserving spacing from a different length.
Original Tutorial and Creator Credit
Creator: Evelyn And Peter Crochet
19. Crochet Seamless Top Down Button Cardigan
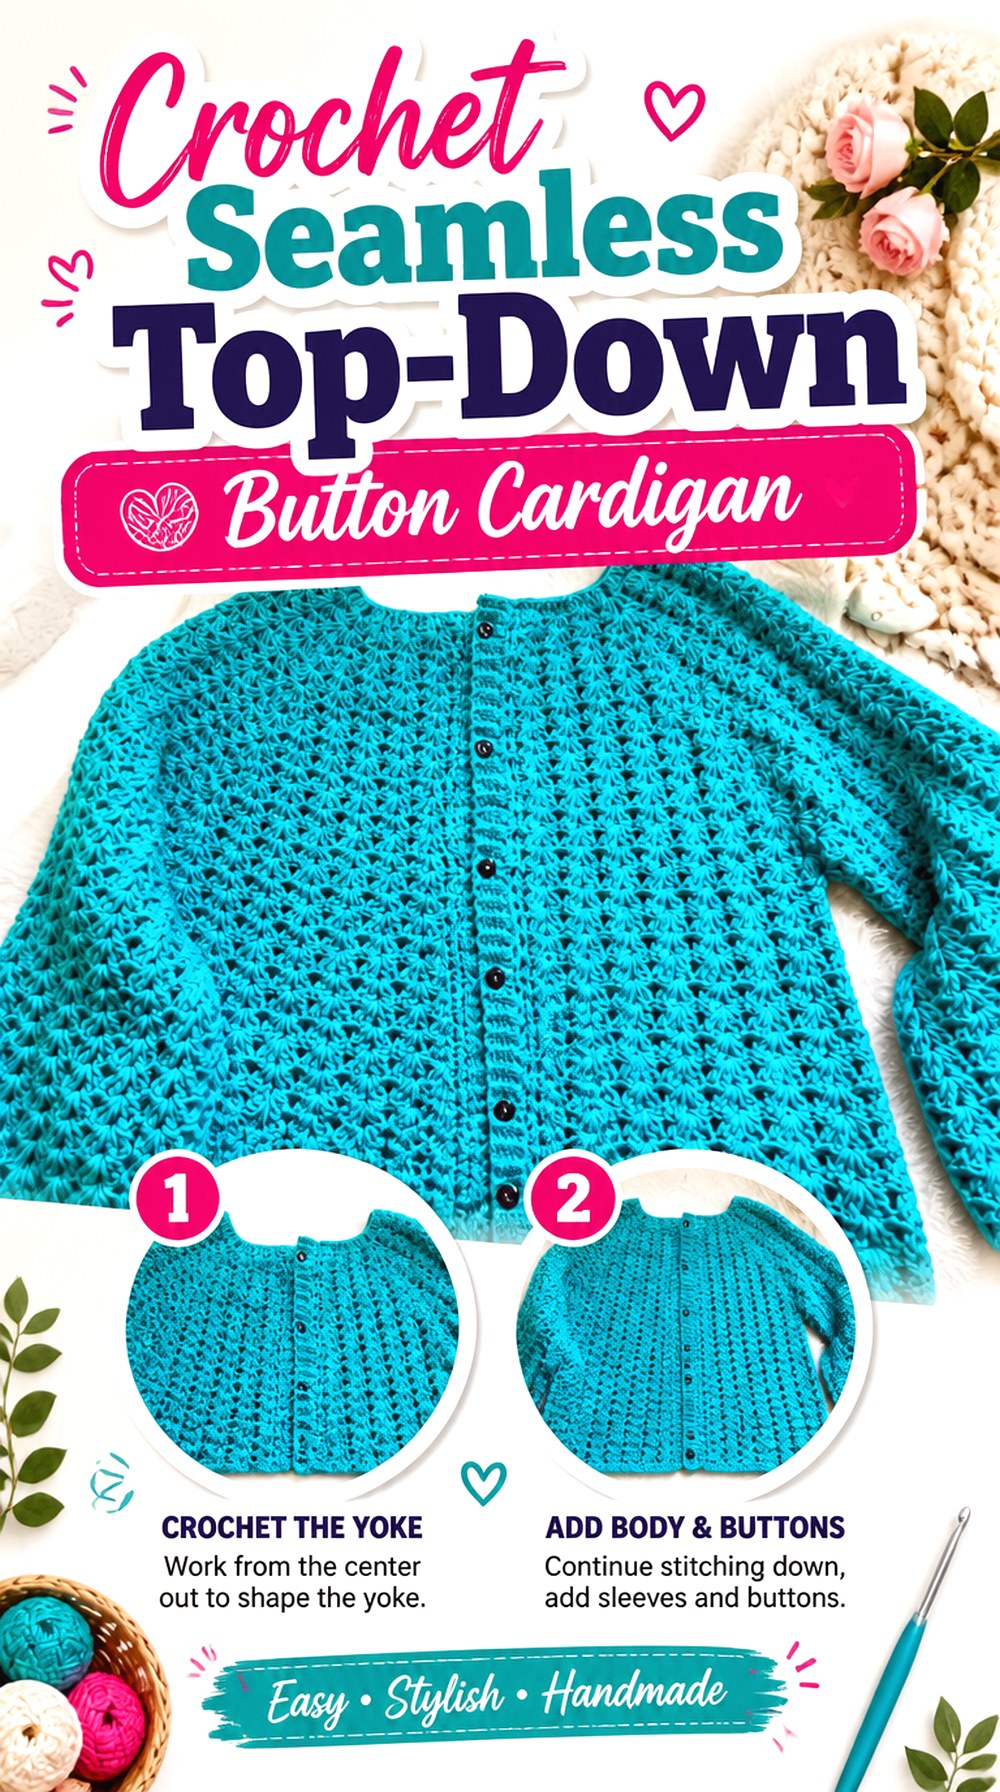
Juliana Crochet’s top-down tutorial provides another route to a true button-front garment, covering the yoke, front opening, buttonholes, buttons, cuffs, and hem while allowing size adaptation. Unlike a cardigan assembled from multiple flat pieces, the body develops from the upper section downward, so you can monitor the relationship between neckline, yoke depth, and body length in sequence. The buttonholes are planned as part of the garment rather than suggested after completion. This style is useful if you prefer reducing assembly seams and want the option to evaluate length while the main body is already connected. Do not let “top-down” encourage you to postpone every fit decision, though; errors in the yoke can affect the entire cardigan below it.
Upper-Body Fit Comes Before Hem Customization
One advantage of top-down work is that body length remains adjustable later, but that flexibility cannot fix a poor yoke. Check neckline position, upper chest width, and the point where sleeves separate before extending the torso. If the underarm sits incorrectly, continuing farther down simply adds more fabric to a problem that began above.
Buttonholes Need to Follow the Growing Front
Because the cardigan develops vertically after the upper section, the closure should remain consistent with the actual front length you create. If you customize the body, pay attention to how the tutorial integrates buttonholes rather than treating them as a copied set of positions. The finished spacing should make sense from neckline to your chosen hem.
Seamless Does Not Mean Structure-Free
Removing side or shoulder seams changes the construction, but the center front still needs enough stability for repeated fastening. Watch whether the developing edges stretch differently under their own weight. A consistent border and correctly sized buttons are particularly important when there are fewer seams elsewhere to help control the garment’s shape.
Original Tutorial and Creator Credit
Creator: Juliana Crochet
20. Crochet Cable Panel Made to Measure Button Cardigan

Katie Joslin’s cable cardigan shifts the focus toward pronounced texture. The design uses multiple panel types, including crochet cable and ribbed sections, and is made to measure rather than tied to standard garment sizing. The cardigan also includes a button front with ribbed finishing. This construction is useful if you want the sweater’s surface to be the main statement and are comfortable keeping detailed measurement notes while several panel textures are involved. Textured sections may not all behave identically, so comparing actual dimensions matters more than assuming equal stitch counts will create equal widths. The front closure should be considered early because strong cable panels, ribbing, and buttons all compete for visual space at the center of the garment.
Different Panel Textures Need a Shared Measurement
A cable section and a ribbed section can contract or stretch differently even when worked with the same yarn. For made-to-measure construction, judge each panel by the dimensions required for the garment rather than by copying the same stitch count across textures. Lay neighboring panels together periodically to see whether their lengths remain compatible before joining.
Cables Add Visual and Physical Weight
Raised cable texture makes the cardigan look more substantial and can also use more yarn within a given area than flatter fabric. Keep that in mind when deciding where texture belongs. If every panel is highly dimensional, the finished sweater may feel heavier or denser than expected. Follow the creator’s arrangement before making major texture substitutions.
Give the Button Line Space Beside the Texture
Strong cable motifs already create vertical focal points. The closure should sit beside them without crowding or visually cutting through a panel unexpectedly. Before attaching buttons, close the fronts and view the cable layout as one complete surface. Check that the ribbed finishing creates a clear boundary between the textured body and the hardware.
Original Tutorial and Creator Credit
Creator: Katie Joslin
21. Crochet Unisex Striped Button Cardigan

Ascarcrochets’ striped cardigan uses a straightforward buttoned front and is presented as a unisex design. That makes the main planning question less about a gendered size label and more about the actual wearer’s shoulder width, chest measurement, desired ease, sleeve length, and preferred body length. Stripes create a bold surface without the modular joins of granny squares, while the buttoned front makes left-to-right color alignment visible when closed. This is a practical direction when you want a cardigan whose styling can change primarily through measurements and color choices rather than decorative shaping. The creator lists medium-weight yarn and buttons among the materials, but any fit adaptation should still be based on the actual tutorial and your crocheted fabric.
A Straightforward Shape Supports Flexible Styling
“Unisex” should not be read as a single universal fit. Measure the intended wearer or compare against a cardigan that already fits them well. Shoulder width and preferred ease are especially useful because changing only body circumference may leave the sleeves starting at an awkward point. Build the dimensions around the wearer rather than around a clothing-category label.
Button Choice Changes the Front More Than the Stripe Plan
Striped fabric already contains repeated contrast, so buttons can either blend into a dominant shade or introduce another accent. Place a sample button on several stripes before deciding. More importantly, keep the button size compatible with the tutorial’s closure. A visually perfect button is not useful if it stretches the opening every time the cardigan is fastened.
Compare Shoulder Width Before Adding Sleeve Length
Sleeve length should be evaluated only after the body and shoulder placement make sense. If the shoulder extends farther down the arm, a sleeve copied from another fit may become too long. This becomes more obvious on striped garments because horizontal bands can emphasize where the sleeve begins. Confirm upper-body proportions before making sleeve-length adjustments.
Original Tutorial and Creator Credit
Creator: Ascarcrochets
22. Crochet Two Tone V Neck Button Top Cardigan
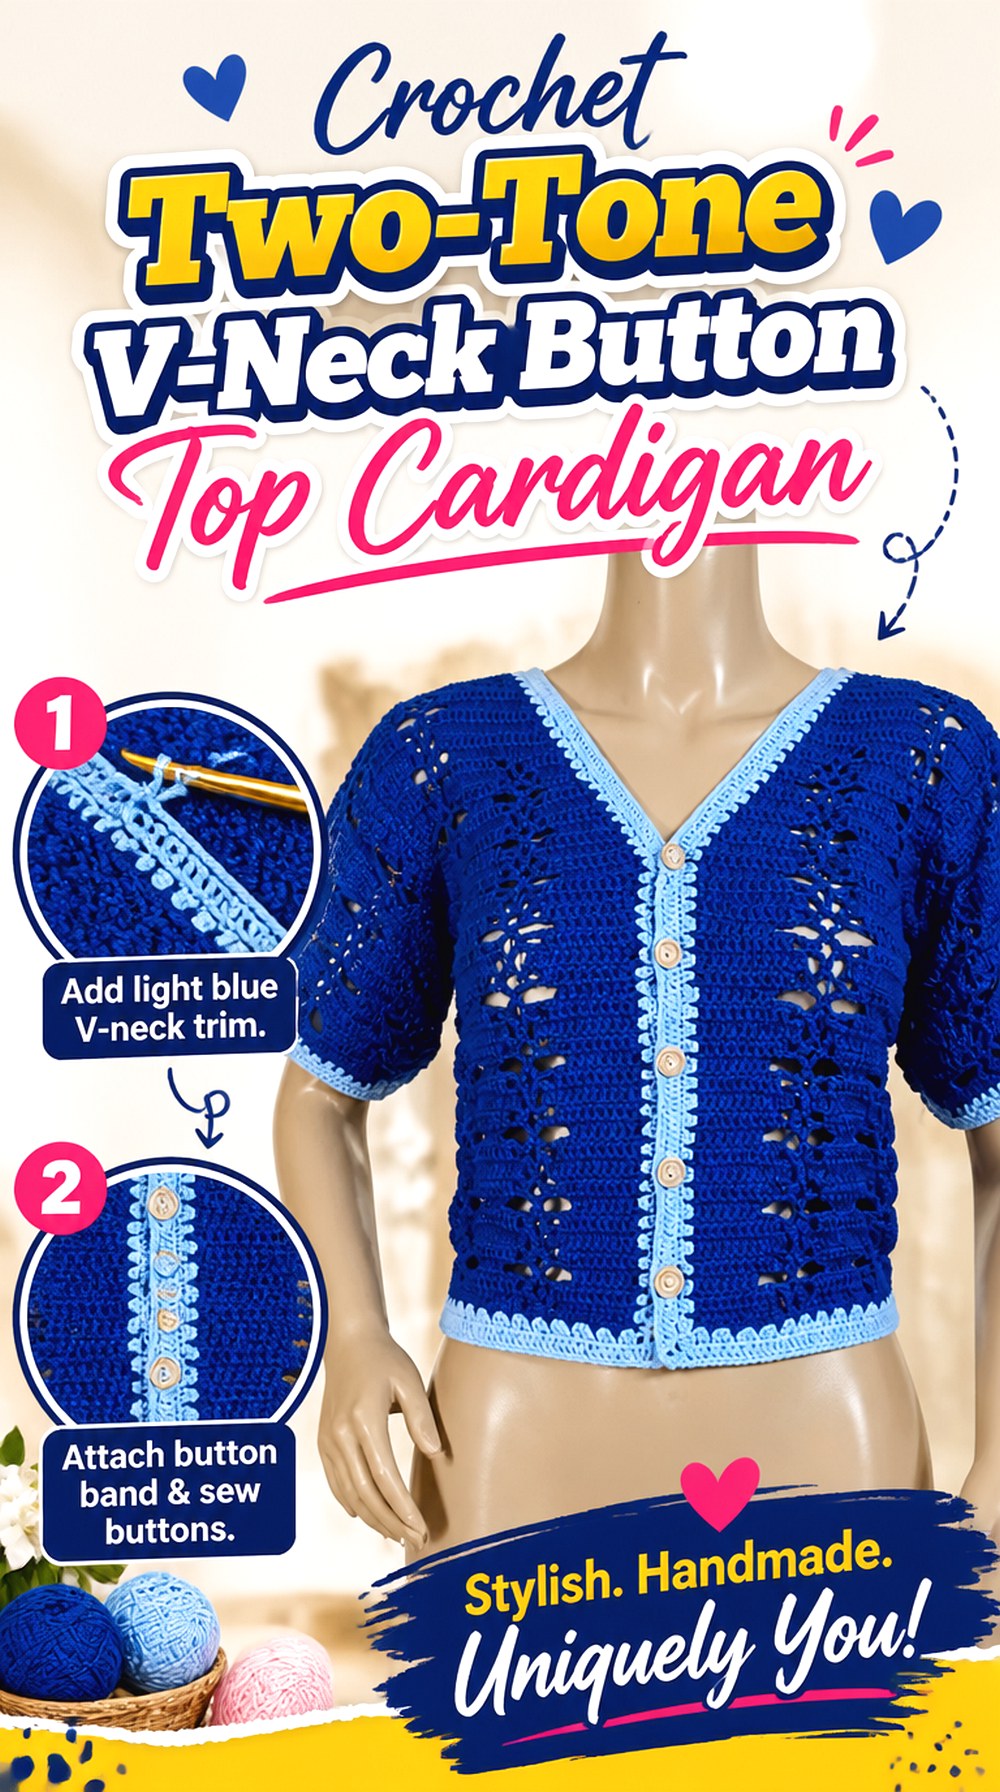
Ler Crochet’s tutorial offers a more compact two-tone V-neck button cardigan that sits closer to the boundary between a traditional cardigan and a button-front top. The design uses front and back panels, buttons, and a neat border, giving it a simpler, lighter-looking shape than the oversized, cabled, or balloon-sleeve projects above. This can work well if you want a garment that may be worn more like a top when fully fastened rather than primarily as an outer layer. That distinction matters for fit: a cardigan-top usually needs more careful attention to how the front sits directly over the torso. The two-tone palette also makes neckline and border placement part of the finished visual structure.
A Cardigan-Top Needs a Different Ease Decision
If you plan to wear the piece fully buttoned as a top, compare its intended ease with what you would choose for a loose layering cardigan. Extra room may look deliberately relaxed, while too little can make the buttons strain. Decide how the garment will actually be worn most often and evaluate the panel dimensions in that context.
Two Colors Can Define the Border Clearly
Using a contrasting shade around the opening can visually sharpen the V-neck and emphasize the button line. Before committing to a high-contrast border, place the colors together and consider which feature you want to dominate. A strong border makes small irregularities more noticeable, so even tension along the neckline becomes particularly important.
Check the V Point Before Attaching Hardware
The lower point of a V neckline should look centered when the two fronts meet. Lay the completed body flat, align the bottom edges, and inspect the V before buttons are sewn on. If the two sides reach the center differently, investigate the panel or border tension rather than shifting the hardware to disguise the imbalance.
Which Crochet Button-Front Cardigan Shape Fits Your Plan?
| If your priority is… | Consider these directions | Main detail to verify |
|---|---|---|
| Minimal assembly | Rounded-yoke, raglan, or seamless top-down styles | Yoke depth, neckline, and sleeve separation before extending the body |
| A cropped wardrobe layer | Wide V-neck, chunky knit-look, or cropped grandpa styles | Exact hem position with the clothes you actually wear |
| Warm-weather use | Relaxed summer cotton or compact V-neck cardigan-top | Fabric drape, coverage, and front-edge stability |
| Strong texture | Suzette, Alpine stitch, ribbing, or cable-panel designs | Gauge, garment weight, and whether the button band remains flexible |
| Color as the main feature | Two-tone, striped, or granny-square cardigans | Front alignment, motif or stripe placement, and button contrast |
| More functional storage | Ribbed pocket or inner-pocket cardigan | Pocket position, extra fabric weight, and effect on the center front |
| More personal sizing control | Made-to-measure classic, striped, or cable-panel designs | Recorded body and panel measurements rather than remembered stitch totals |
| A traditional sweater look | Structured button-band or grandpa-style cardigan | Cuff length, button-band symmetry, and how the cardigan fits when closed |
Conclusion
The most useful way to choose among these crochet button-front cardigan ideas is to start with the finished wearing experience. For light layering, look toward the summer cotton or compact V-neck options. For more presence, compare balloon sleeves, chunky ribbing, cables, pockets, or granny-square construction. If standard sizing is your biggest concern, the made-to-measure and adaptable top-down designs give you different ways to approach fit.
Whatever style you choose, judge the front while it is actually aligned for buttoning. A well-planned closure should support the garment rather than force two mismatched edges together. Use the original tutorials near each project for the creators’ exact construction, sizing, buttonhole, and finishing details.
Frequently Asked Questions
How can I tell whether a crochet button-front cardigan will gape when closed?
Before permanently attaching the buttons, align the two fronts in their intended position and temporarily secure them at several planned closure points with removable markers or clips. Look for pulling between those points, horizontal strain across the torso, or edges that separate even though the hem aligns. If the tutorial provides finished measurements or intended ease, compare them with your measurements. Moving buttons cannot reliably compensate for a cardigan body that is fundamentally too narrow.
Should I block a crochet cardigan before sewing on the buttons?
It depends on the yarn, construction, and creator’s finishing sequence, so follow the individual tutorial first. Blocking can allow some fabrics and edges to settle into their finished dimensions, which may make final button placement easier to judge. If blocking is appropriate for the yarn, mark tentative button positions before and after to see whether anything changes. Avoid assuming every fiber should be blocked with the same method or amount of heat.
Can I use larger buttons than the tutorial shows?
Possibly, but first check the actual buttonhole or edge opening. A larger button may require a different opening and can add more weight to the front band. Test one candidate button before completing every buttonhole. If the cardigan uses existing crochet spaces instead of purpose-made holes, the available opening may limit your options even more. Changing button size can therefore become a construction change, not merely a decorative substitution.
Why does a crochet cardigan button band ripple or pucker?
A common reason is a tension or length mismatch between the front edge and the added band. A band that receives too much length can ripple, while one worked too tightly can pull the cardigan edge inward. Uneven attachment spacing can create similar problems. Compare both fronts flat before adding buttons and follow the tutorial’s edging method. If one side is already distorted, correct that issue rather than relying on the closure to pull it straight.
Can I turn any open-front crochet cardigan into a button-front cardigan?
Not automatically. A functional button front needs enough garment width or overlap, a stable edge, compatible buttonholes or loops, and buttons that the fabric can support. Some open cardigans are deliberately designed to fall apart at the center and may become too tight if forced closed. If buttoning is important to you, choosing a tutorial that already incorporates the closure is usually a more predictable starting point than modifying an unrelated open-front design.
What yarn qualities matter most for a crochet button-front cardigan?
Pay attention to gauge, drape, garment weight, elasticity or recovery, stitch definition, and the yarn’s care requirements. A soft drapey yarn can produce a fluid cardigan but may need a carefully controlled front edge. A dense or chunky yarn can give more structure while also making the garment heavier. Rather than choosing fiber by appearance alone, compare a swatch with the fabric shown in the tutorial and see how it behaves when hung vertically.
How should I plan button placement if I change the cardigan length?
Reassess the whole front instead of automatically copying the original spacing. First establish your final hem and neckline, then position the buttons temporarily and look at their distribution across the new length. The upper and lower buttons often have a stronger visual relationship to the neckline and hem than the middle ones do. Follow any construction restrictions in the creator’s tutorial, especially when buttonholes are incorporated while crocheting the band rather than added afterward.